The engine control module (ECM) processes the various input information. The ECM sends the necessary electrical responses to control fuel delivery.
The input information has an interrelation to more than one output. One failed input can affect more than one systems operation.
Engine Control Module (ECM) Description
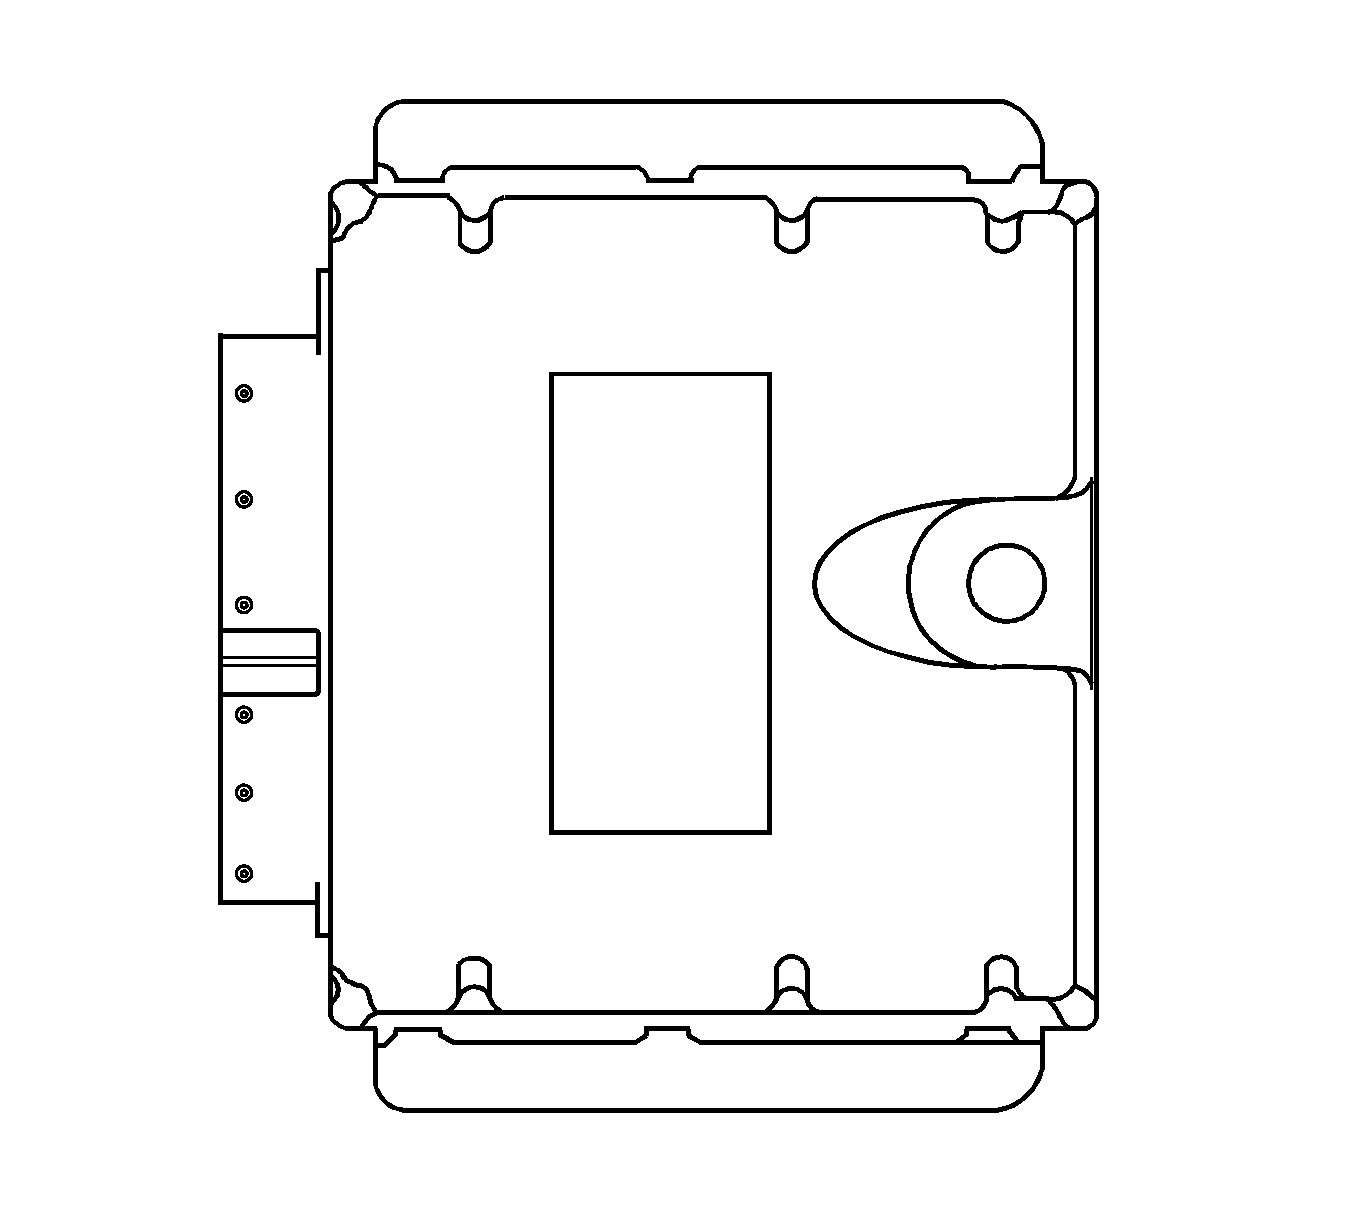
The engine control module (ECM) is located in the inner part of the engine left side cover. The ECM controls the following:
| • | The fuel supply control |
| • | The fuel injection timing control |
| • | The exhaust gas recirculation (EGR) control |
| • | The turbocharger control |
| • | The preheating control (glow control) |
| • | The on-board diagnostics for engine control |
The ECM constantly observes the information from various sensors. The ECM controls the systems that affect vehicle performance. The ECM performs the diagnostic function of the system. The ECM can recognize operational problems, alert the driver through the malfunction indicator lamp (MIL), and store diagnostic trouble codes (DTCs). DTCs identify the system faults to aid the technician in making repairs.
ECM Function
The engine control module (ECM) supplies 5-12 volts to power various sensors or switches. In some cases, the power is supplied through resistances in the engine control module (ECM) are high enough in value that a test lamp will not illuminate when connected to the circuit. In some cases, even an ordinary shop voltmeter will not give an accurate reading because the voltmeter resistance is too low. Therefore, a DMM with at least 10 mega-ohms input impedance is required to ensure accurate voltage readings.
Engine Control Module (ECM) Service Precautions
The engine control module (ECM) is designed to withstand normal current draws associated with vehicle operation. Avoid overloading any circuit. When testing for opens and shorts, do not ground or apply voltage to any of the ECM circuits unless instructed to do so. In some cases, these circuits should only be tested using a DMM. The ECM should remain connected to the ECM harness.
Electrostatic Discharge Damage
Important: To prevent possible electrostatic discharge damage, follow these guidelines:
• Do not touch the engine control module (ECM) connector pins or soldered components on the ECM circuit board. • Do not open the replacement part package until the part is ready to be installed. • Before removing the part from the package, ground the package to a known good ground on the vehicle. • If the part has been handled while sliding across the seat, while sitting down from a standing position, or while walking a distance, touch a known good ground before installing the part. • Charge by induction occurs when a person with well insulated shoes stands near a highly charged object and momentarily touches ground. Charges of the same polarity are drained off leaving the person highly charged with opposite polarity.
Electronic components used in the engine control module (ECM) are often designed to carry very low voltage. Electronic components are susceptible to damage caused by electrostatic discharge. By comparison, as much as 4,000 volts may be needed for a person to feel even the zap of a static discharge. There are several ways for a person to become statically charged. The most common methods of charging are by friction and induction.
An example of charging by friction is a person sliding across a vehicle seat.
Malfunction Indicator Lamp (MIL) Operation
The malfunction indicator lamp (MIL) is located in the instrument panel cluster. The MIL will display as either SERVICE ENGINE SOON or one of the following symbols when commanded ON:
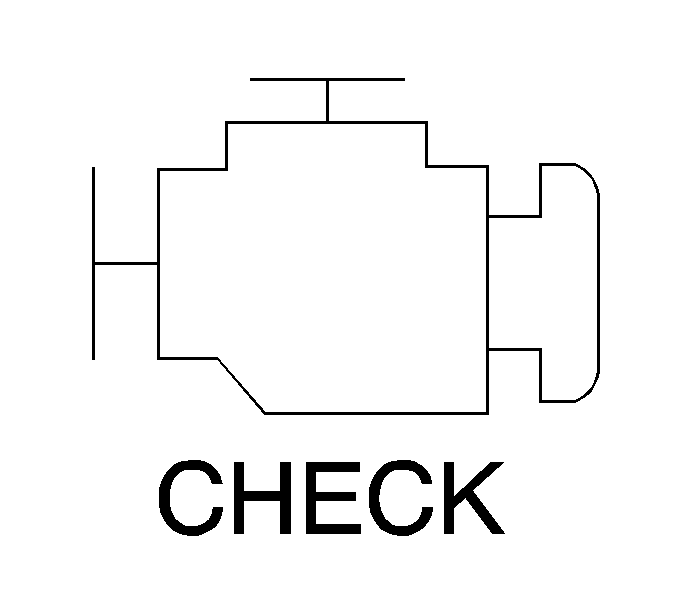
The MIL indicates that an emissions related fault has occurred and vehicle service is required.
The following is a list of the modes of operation for the MIL:
| • | The MIL illuminates when the ignition is turned ON, with the engine OFF. This is a bulb test to ensure the MIL is able to illuminate. |
| • | The MIL turns OFF after the engine is started if a diagnostic fault is not present. |
| • | The MIL remains illuminated after the engine is started if the control module detects a fault. A diagnostic trouble code (DTC) is stored any time the control module illuminates the MIL due to an emissions related fault. The MIL turns OFF after three consecutive ignition cycles in which a Test Passed has been reported for the diagnostic test that originally caused the MIL to illuminate. |
| • | When the MIL is illuminated and the engine stalls, the MIL will remain illuminated as long as the ignition is ON. |
| • | When the MIL is not illuminated and the engine stalls, the MIL will not illuminate until the ignition is cycled OFF and then ON. |
Aftermarket (Add-On) Electrical And Vacuum Equipment
Any equipment installed on a vehicle after leaving the factory that connects to the electrical or vacuum systems of the vehicle defines aftermarket (Add-On) electrical and vacuum equipment. The vehicle design makes no allowances for this type of equipment.
Notice: Do not attach add-on vacuum operated equipment to this vehicle. The use of add-on vacuum equipment may result in damage to vehicle components or systems.
Notice: Connect any add-on electrically operated equipment to the vehicle's electrical system at the battery (power and ground) in order to prevent damage to the vehicle.
The add-on electrical equipment, even when installed to these strict guidelines, may still cause the powertrain system to malfunction. This may also include any equipment which is not connected to the electrical system of the vehicle such as portable telephones and radios. Therefore, the first step in diagnosing any powertrain condition is to eliminate all of the aftermarket electrical equipment from the vehicle. After this is done, if the condition still exists, diagnose the condition in the normal manner.
Engine Controls Information
The driveability and emissions information describes the function and operation of the control module. The emphasis is placed on the diagnosis and repair of conditions related to the system.
Engine Components, Wiring Diagrams, and DTC tables:
| • | The component locations |
| • | The wiring diagrams |
| • | The control module terminal end view and terminal definitions |
| • | The Diagnostic System Check - Engine Controls |
| • | The DTC tables |
The Component System includes the following items:
| • | The component and circuit description |
| • | The on-vehicle service for each subsystem |
| • | The functional checks with the diagnostic tables |
| • | How to use electrical systems diagnostic information |
The DTCs also contain the diagnostic support information containing the circuit or the system information, and helpful diagnostic information.
Wiring Harness Service
The control module harness electrically connects the control module to the various solenoids, switches, and sensors in the vehicle engine compartment and passenger compartment.
Replace the wire harnesses with the proper part number replacement. When splicing signal wires into a harness, use the wiring that has high temperature insulation.
Consider the low amperage and voltage levels utilized in the powertrain control systems. Make the best possible bond at all splices. Use rosin-core solder in these areas.
Molded-on connectors require complete replacement of the connector. Splice a new connector into the harness.
For wiring repair, refer to Wiring Repairs .
Connectors and Terminals
In order to prevent shorting between opposite terminals, use care when probing a connector and when replacing terminals. Damage to the components could result.
Always use jumper wires between connectors for circuit inspecting.
Never probe through the Weather-Pack seals.
The J 35616 Connector Test Adapter Kit , or the equivalent, contains an assortment of flexible connectors used to probe the terminals during the diagnosis. The fuse remover and the BT-8616 Test Tool, or the equivalent, is used for removing a fuse and to adapt the fuse holder to a meter for diagnosis.
Open circuits are often difficult to locate by sight because oxidation or terminal misalignment are hidden by the connectors. Merely wiggling a connector on a sensor or in the wiring harness may temporarily correct the open circuit. Oxidized or loose connections may cause intermittent conditions.
Be certain the type of connector and terminal before making any connector or terminal repair. Weather-Pack and Com-Pack III terminals look similar, but are serviced differently.
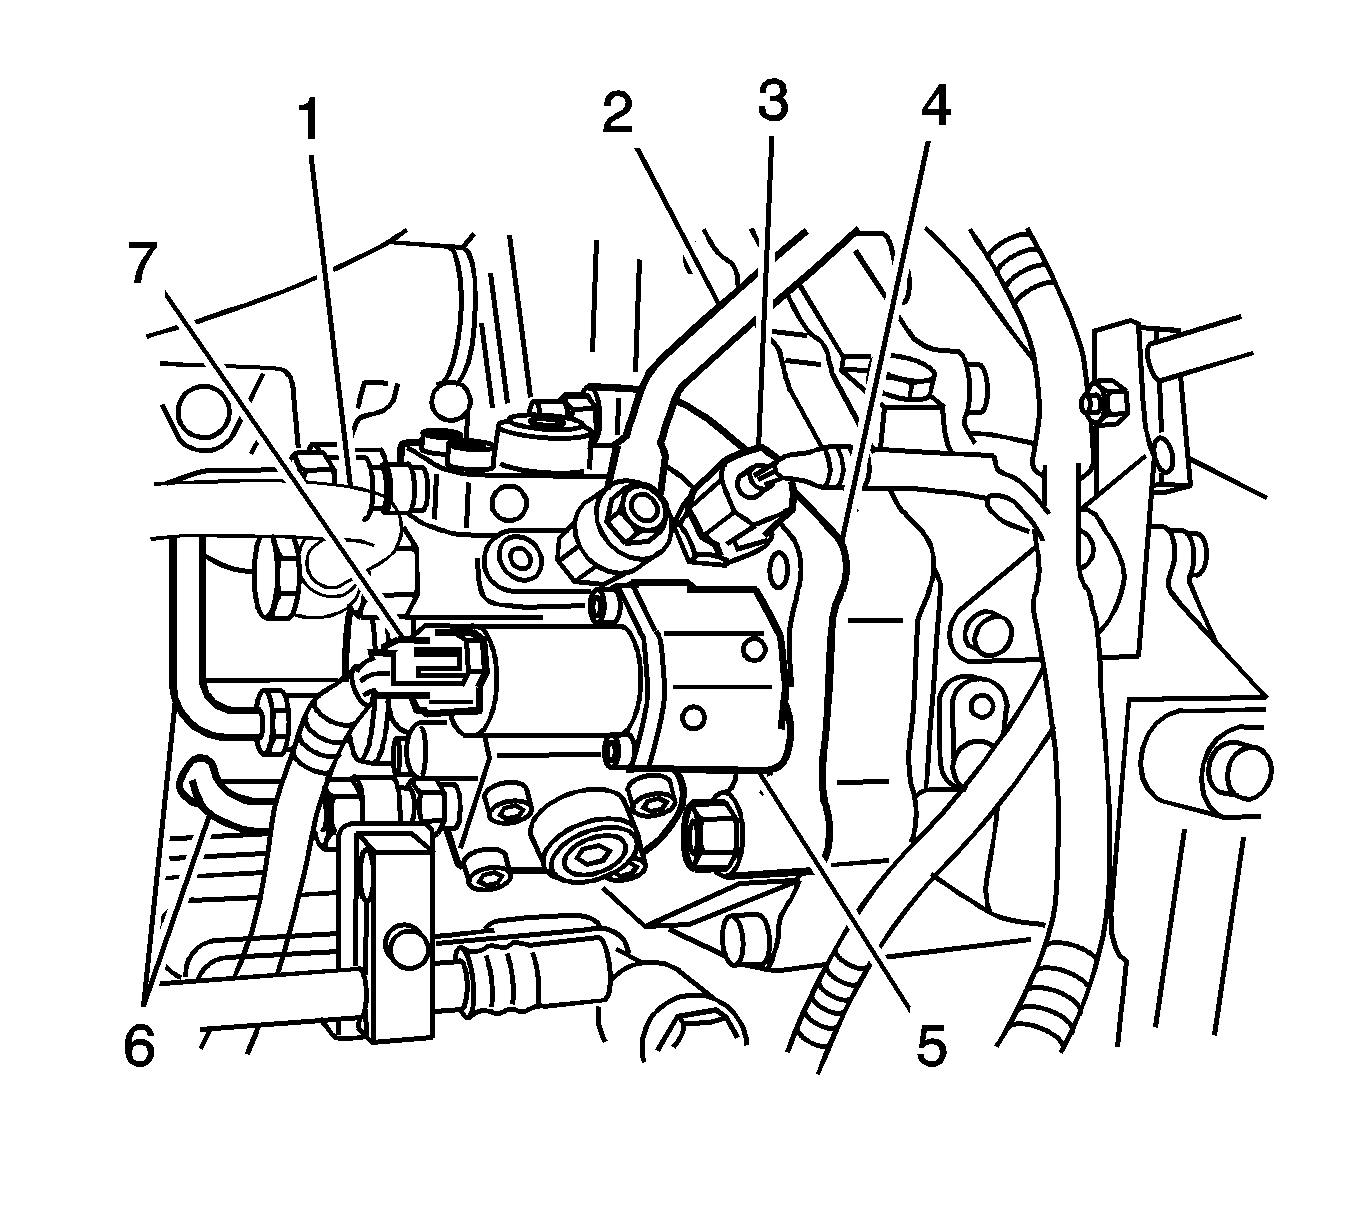
Accelerated Pedal Position (APP) Sensor

The accelerator pedal position (APP) sensor is mounted on the accelerator pedal control assembly. The sensor is made up of 3 individual sensors within one housing. The engine control module (ECM) uses the APP sensor to determine the amount of acceleration or deceleration desired by the person driving the vehicle via the fuel injector control.
Boost Pressure Sensor
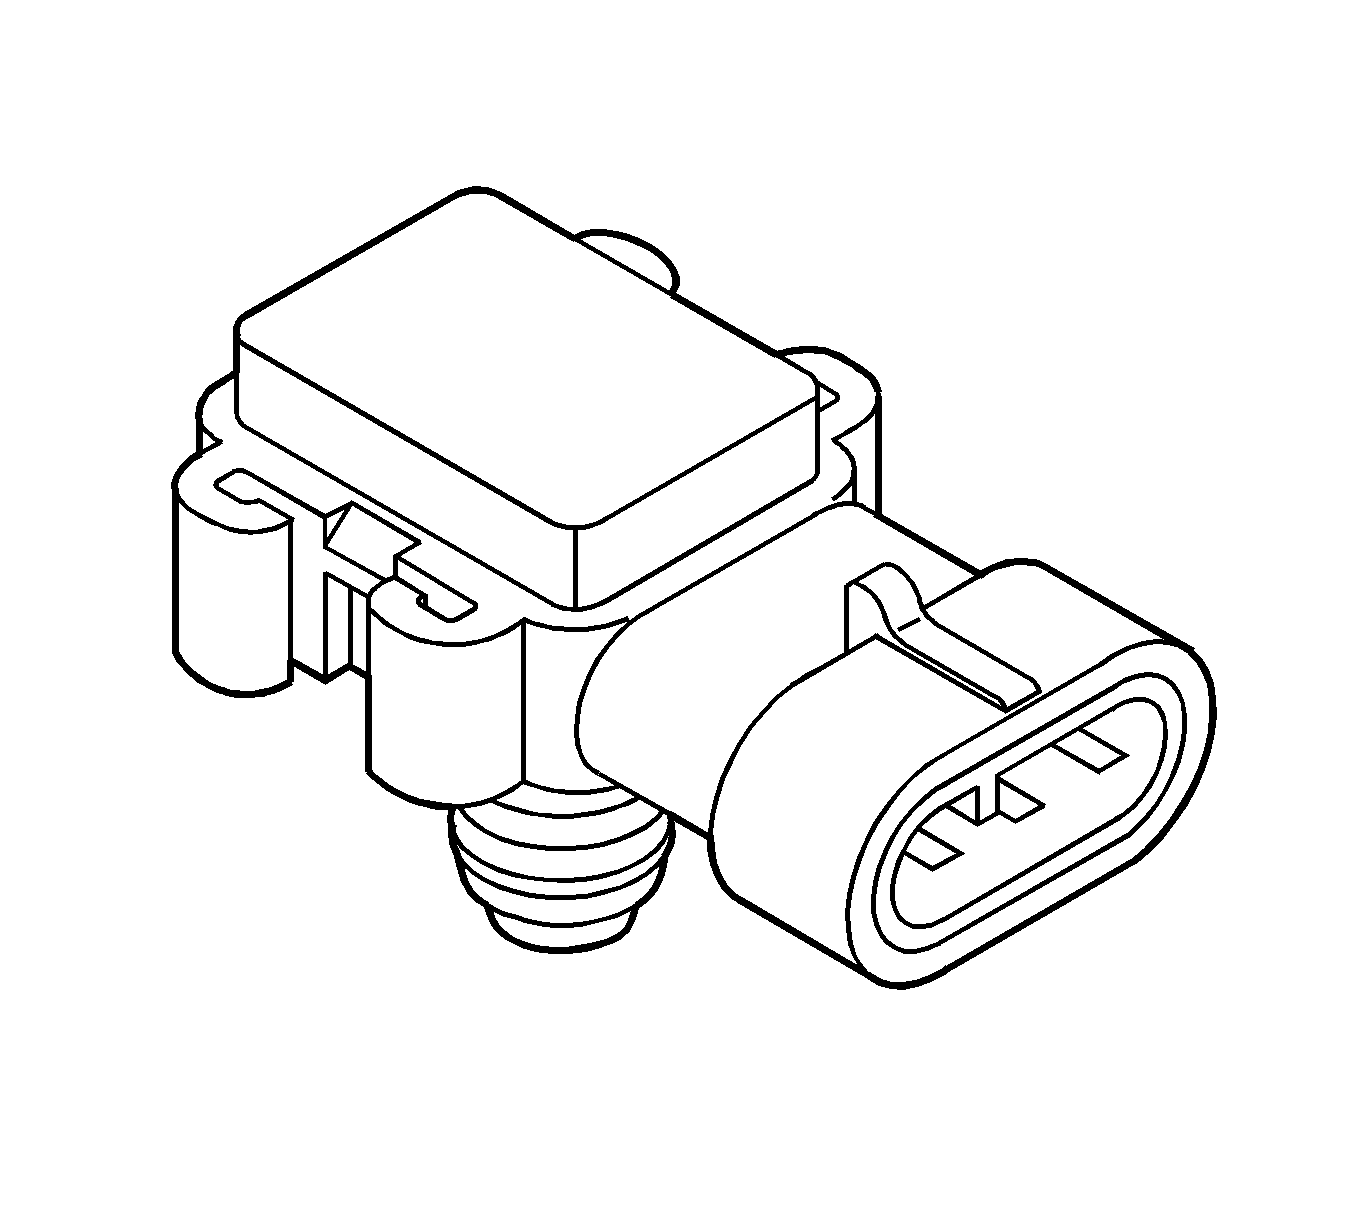
The boost pressure sensor is located on the intake manifold. The sensor generates voltage according to boost pressure in the intake manifold. The generated voltage is sent to the engine control module (ECM) for the boost pressure sensor signal. The ECM detects high signal voltage from the sensor at a high boost pressure.
Camshaft Position (CMP) Sensor
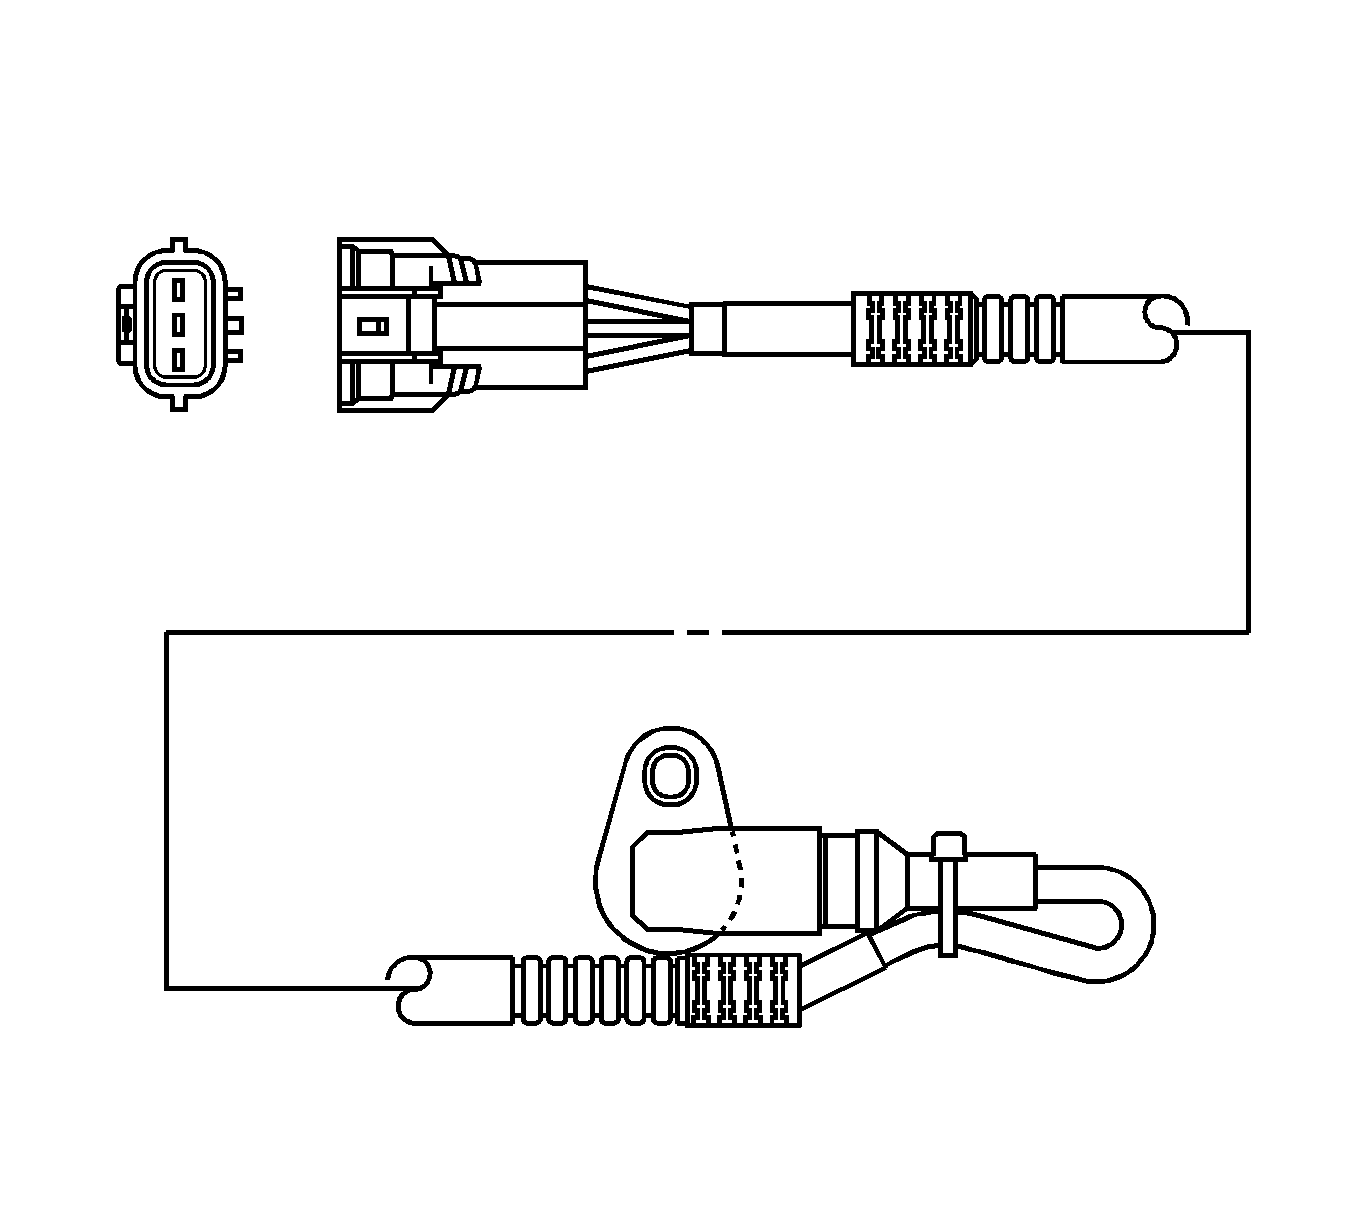
The camshaft position (CMP) sensor is installed on the cylinder head at the rear of the camshaft gear. The CMP sensor detects a total of 7 gaps (6 gaps arranged equally every 60 degrees and one reference gap on the camshaft gear flange surface) and sends signals to the engine control module (ECM). Receiving these signals, the ECM determines cylinder number 1 compression top dead center (TDC). If the CMP sensor fails, the crankshaft position (CKP) sensor signals will substitute for the CMP sensor signals back up.
Crankshaft Position (CKP) Sensor
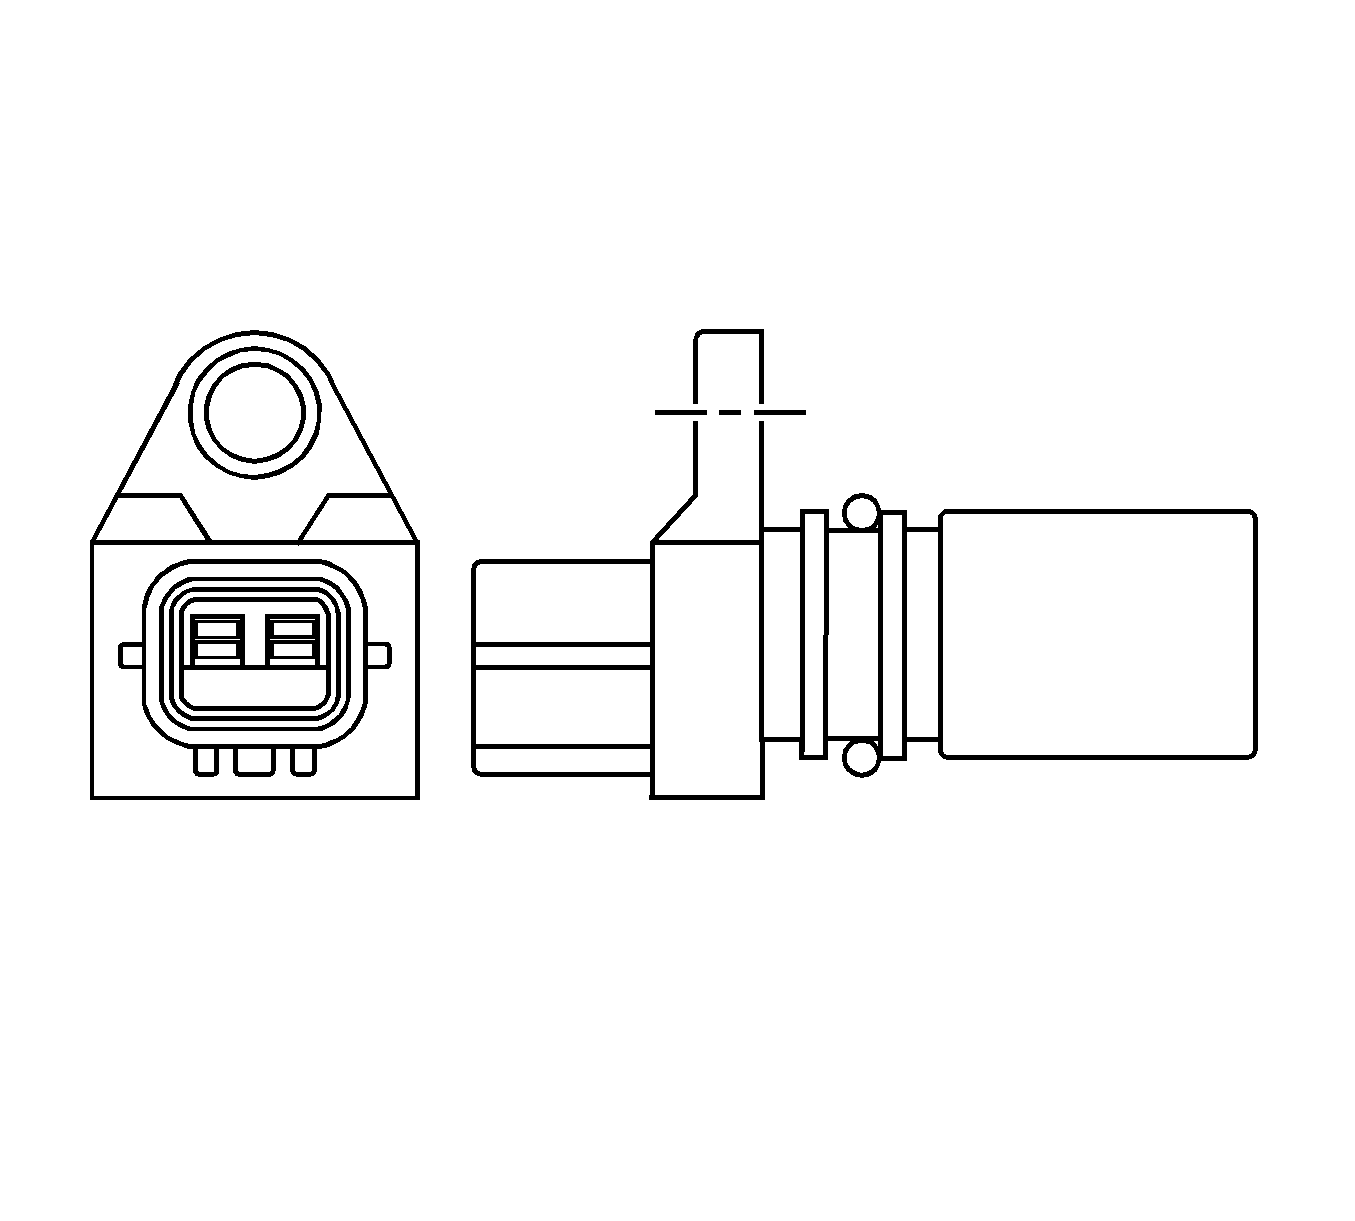
The crankshaft position (CKP) sensor is located on top of the flywheel housing (A/T) or under fuel supply pump (M/T). There are 45 notches spaced 7.5 degrees apart and a 22.5 degree section that is uncut. This uncut portion allows for the defection of top dead center (TDC). The CKP sensor is a magnet coil type sensor, which generates an AC signal voltage based on the crankshaft rotational speed. If the CKP sensor fails, the camshaft position (CMP) sensor signals will substitute for the CKP sensor signals back up.
ECT Sensor
The engine coolant temperature (ECT) sensor is on the thermostat housing and the thermistor in the sensor changes resistance in response to coolant temperature changes. The resistance is decreased when the coolant temperature is high. The resistance is increased when the coolant temperature is low. The engine control module (ECM) supplies a 5-volt reference to the ECT sensor and calculates the engine coolant temperature from the change in voltage, using this in fuel injection control, exhaust gas recirculation (EGR) control, and other control tasks. This voltage is decreased when the resistance is large, temperature is high, while increased when the resistance is large, temperature is low.
Exhaust Gas Recirculation (EGR) Valve and EGR Valve Position Sensor

The exhaust gas recirculation (EGR) valve is controlled by an EGR motor. The EGR motor is driven by duty signal from the engine control module (ECM). The ECM calculates the target EGR valve lift based on the engine speed and the target fuel injection quantity.
The EGR valve position sensor provides pulse signals to the ECM. The ECM detects the EGR valve lift by counting the number of pulses from the sensor.
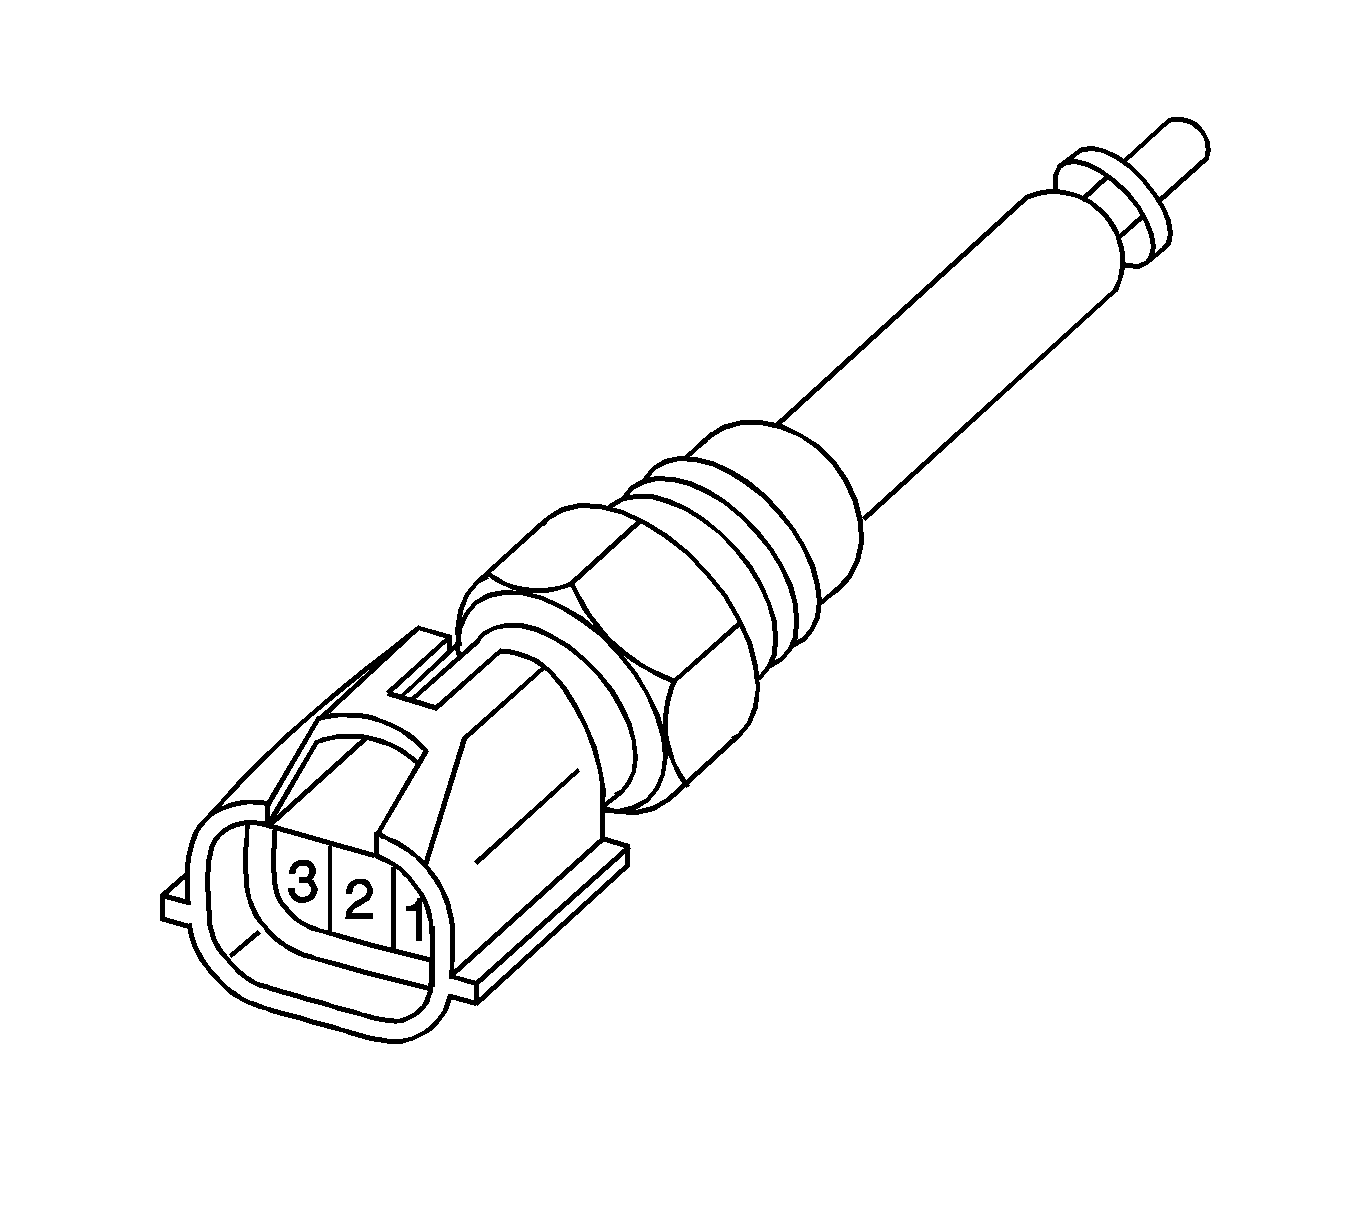
Fuel Rail Pressure Sensor
The fuel rail pressure sensor is in the supply pump. It detects the fuel pressure in the fuel rail, converts the pressure into a voltage signal, and sends the signal to the engine control module (ECM). Higher fuel rail pressure provides higher voltage, while lower pressure provides lower voltage. The ECM calculates actual fuel rail pressure, from the voltage signal and uses the result in fuel injection control and other control tasks.
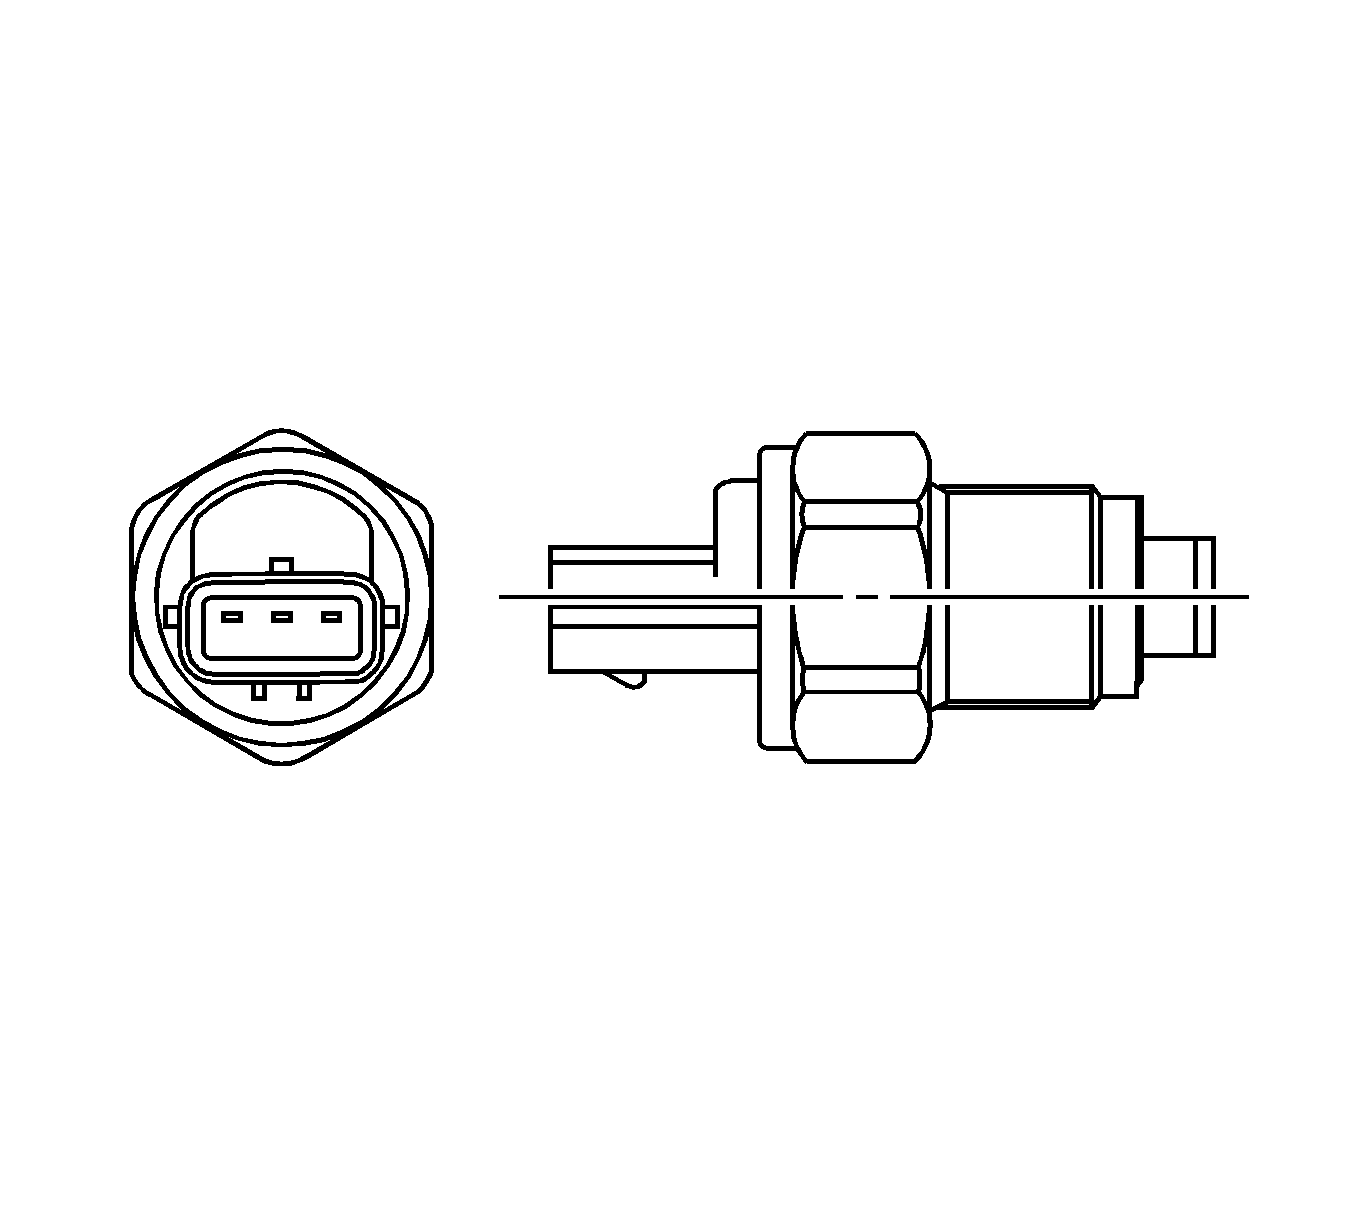
Fuel Temperature Sensor
The fuel temperature sensor (3) is on the supply pump and the thermistor in the sensor changes resistance in response to fuel temperature changes. The resistance is decreased when the fuel temperature is high, and increased when the fuel temperature is low. The engine control module (ECM) supplies a 5-volt reference to the fuel temperature sensor and calculates the fuel temperature from the change in voltage. It is used in supply pump control and other control tasks. This voltage is decreased when the resistance is small, temperature high, while increased when the resistance is large, temperature low.
Mass Air Flow (MAF)/Intake Air Temperature (IAT) Sensor
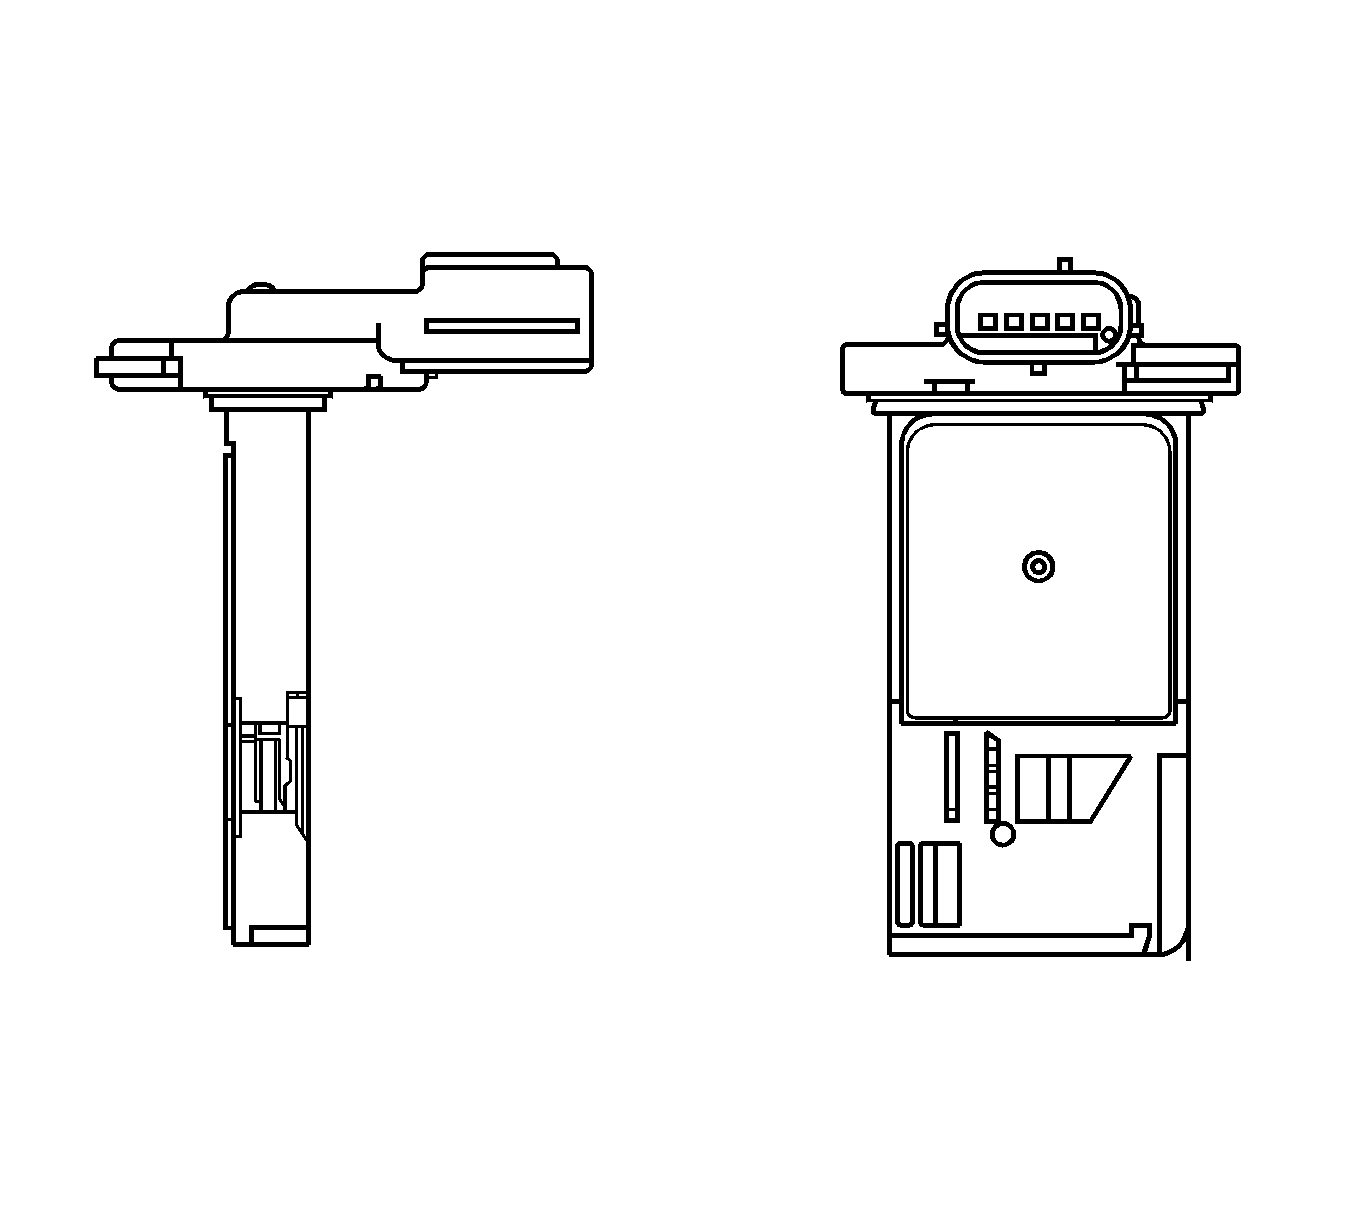
The mass airflow (MAF)/intake air temperature (IAT) sensor is fitted between the air cleaner and the turbocharger. The IAT sensor is a thermistor type sensor. The IAT sensor generates a voltage signal according to intake air temperature. The generated voltage is sent to the engine control module (ECM) for the IAT sensor signal. When the IAT sensor is cold, the sensor resistance is high. When the air temperature increases, the sensor resistance decreases. With high sensor resistance, the ECM detects a high voltage on the IAT signal circuit.
The MAF sensor is an airflow meter that measures the amount of air that enters the engine. The MAF sensor generates a voltage signal according to the amount of airflow and generates voltage input to the ECM for the MAF sensor signal. A small quantity of air that enters the engine indicates deceleration or idle. A large quantity of air that enters the engine indicates acceleration or a high load condition.
Suction Control Valve (SCV)
The suction control valve (SCV) (7) is on the supply pump (5). The SCV controls the suction fuel quantity. The SCV is fully open in its normal state and a larger drive voltage decreases the opening. Based on the data acquired from the sensors, the engine control module (ECM) calculates the desired common rail pressure and pump flow rate and compares the calculated desired common rail pressure to the actual value to determine the SCV opening. When the actual pressure is lower than the desired value, the SCV is opened to increase the pump flow rate. When the actual pressure is higher than the desired value, the SCV is closed to decrease the flow rate.
