Fuel Injector Replacement With CTF
Tools Required
EN 46720 Injector Remover
Removal Procedure
- Remove the engine cover. Refer to Engine Cover Replacement .
- Remove the air cleaner layer. Refer to Air Cleaner Replacement .
- Disconnect the negative battery cable. Refer to Battery Negative Cable Disconnection and Connection .
- Disconnect the 2-way valve (TWV) harness connectors at the outside of the lower case, under the valve rocker arm cover.
- Remove the injection pipes between the injector and the supply pump.
- If required, remove the exhaust gas recirculation (EGR) cooler pipe. Refer to Exhaust Gas Recirculation Pipe Replacement .
- Remove the valve rocker arm cover. Refer to Valve Rocker Arm Cover Replacement .
- Disconnect the TWV harness connector from inside the lower case joint connector.
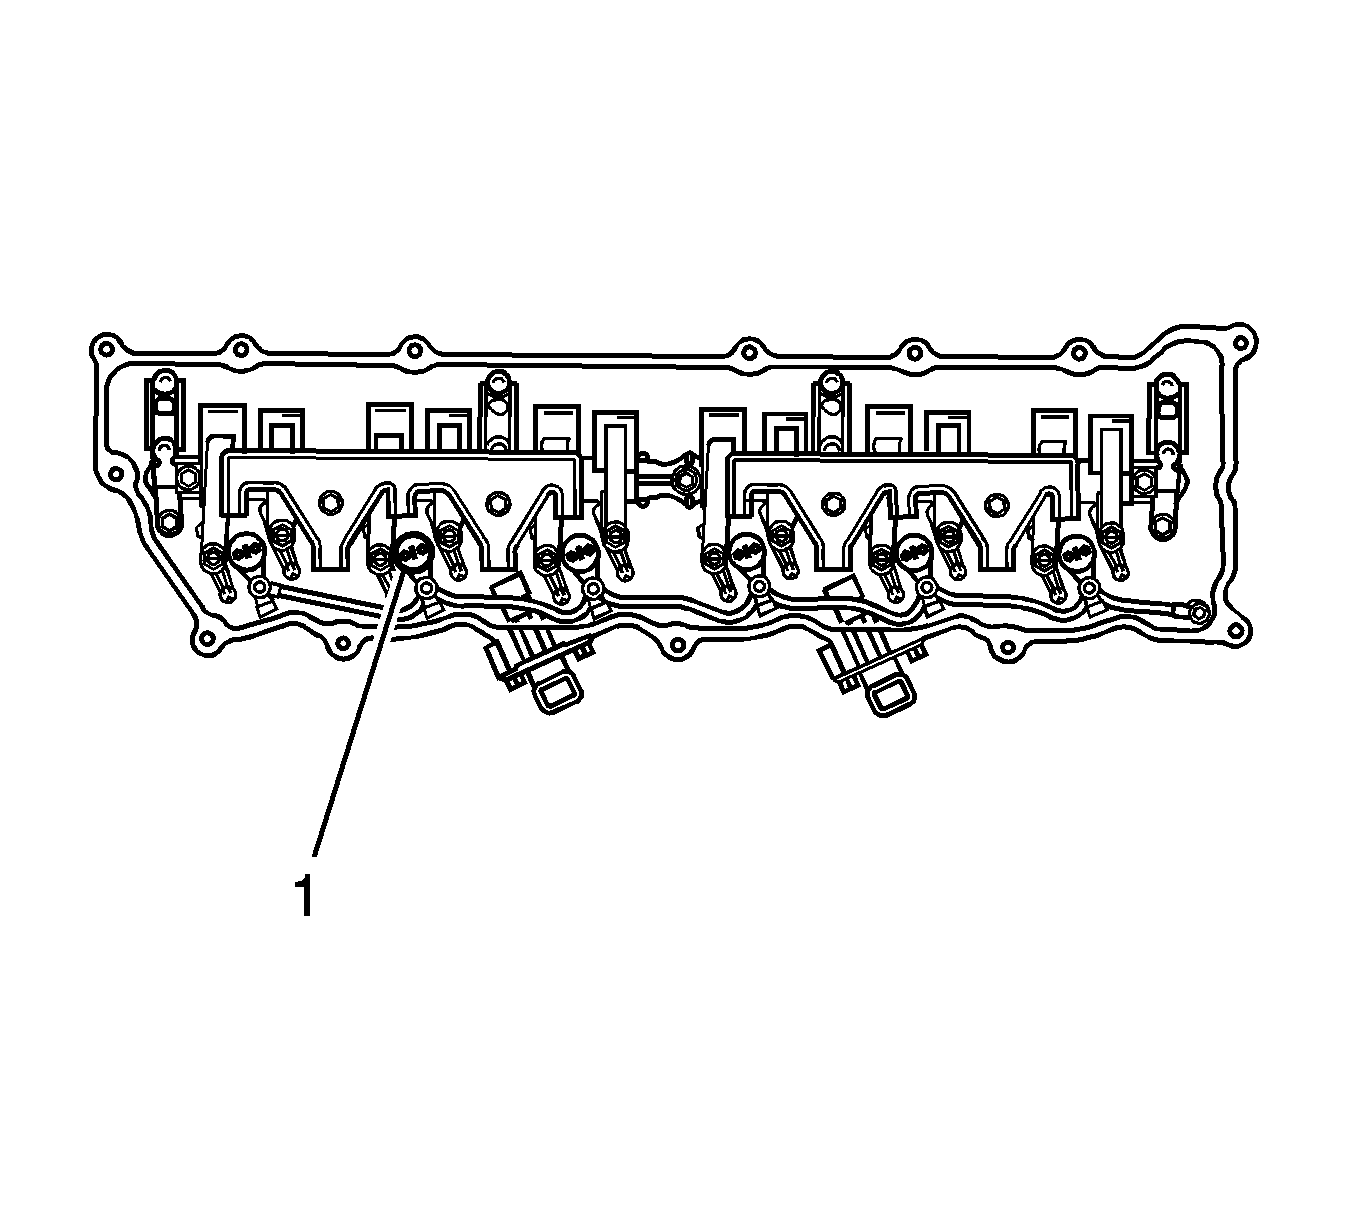
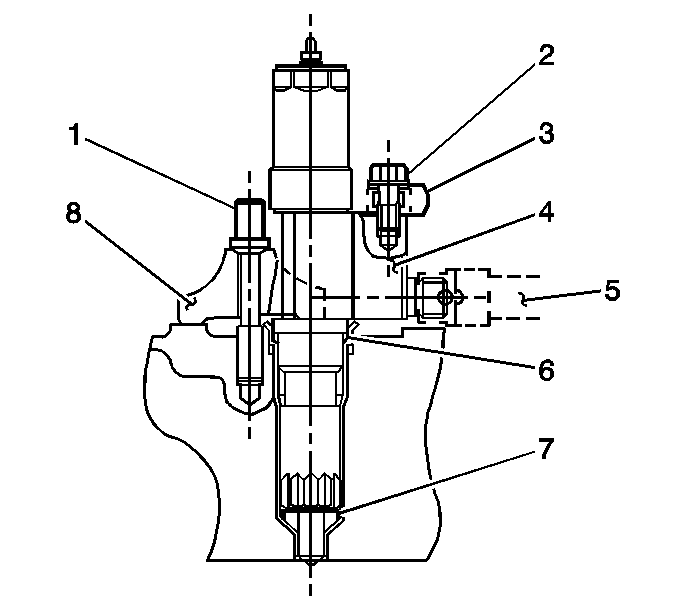
- Loosen the terminal nuts (1) for the TWV harness on the top of the injector and remove the TWV harness.
- Remove the TWV harness assembly bracket from the top of the rocker arm assembly.
- Remove the return pipe eye bolt (2) and the return pipe (3) from the injector (4).
- Remove the injector clamp bolt (1).
- If required, use the EN 46720 to remove the injector assembly (2) and clamp (8) from the cylinder head.
Notice: Do not forcefully pull the injector pipe free. Doing so will loosen the nozzle sleeve and water leakage may result in damage to the engine.
Installation Procedure
- Temporarily install the injector assembly (4) together with the clamp (8) into the injector sleeve hole (6).
- Temporarily tighten the injection pipe (5) to the injector (4).
- Apply molybdenum disulfide grease to the clamp bolt (1).
- Tighten the injection pipe (5).
- Install the fuel return pipe (3) on the injector (4) with the return pipe eye bolt (2).
- Install the TWV harness assembly bracket.
- Install the TWV harness to the TWV terminals (1). Tighten the nut by hand until the nut reaches the harness terminals.
- Reconnect the TWV harness to the lower case joint connector.
- Inspect and record the ID code from the injector.
- Install the valve rocker arm cover. Refer to Valve Rocker Arm Cover Replacement .
- Reconnect the 2 TWV harness connectors at the outside of the lower case.
- If required, install the exhaust gas recirculation (EGR) cooler pipe. Refer to Exhaust Gas Recirculation Pipe Replacement .
- Connect the negative battery cable. Refer to Battery Negative Cable Disconnection and Connection .
- Install the air cleaner layer. Refer to Air Cleaner Replacement .
- Install the engine cover. Refer to Engine Cover Replacement .
- Program the ID code. Refer to Fuel Injector Flow Rate Programming .
Notice: Refer to Fastener Notice in the Preface section.
Tighten
Tighten the injector clamp bolt (1) to 31 N·m (22 lb ft).
Tighten
Tighten the injector pipe to 44 N·m (33 lb ft).
Important:
• Ensure the injection pipe and return pipe eye bolts are tightened. This will prevent the dilution of the engine oil. • Ensure the gasket for the return pipe does not ride on the injector body when tightening the eye bolt.
Tighten
Tighten the fuel return pipe eye bolt (2) to 14 N·m (124 lb in).
Tighten
Tighten the TWV harness bracket bolt to 22 N·m (16 lb ft).
Tighten
Tighten the TWV terminal nut to 2 N·m (18 lb in).