For 1990-2009 cars only
Removal Procedure
- Remove the air cleaner. Refer to Air Cleaner Replacement .
- Unclip the wiring harness clip behind the A/C compressor and reposition the wiring harness.
- Remove the wiring harness clamp nut at the air intake pipe and reposition the wiring harness.
- Remove the nut, bolt, and the 2 wiring harness brackets and reposition the wiring harness.
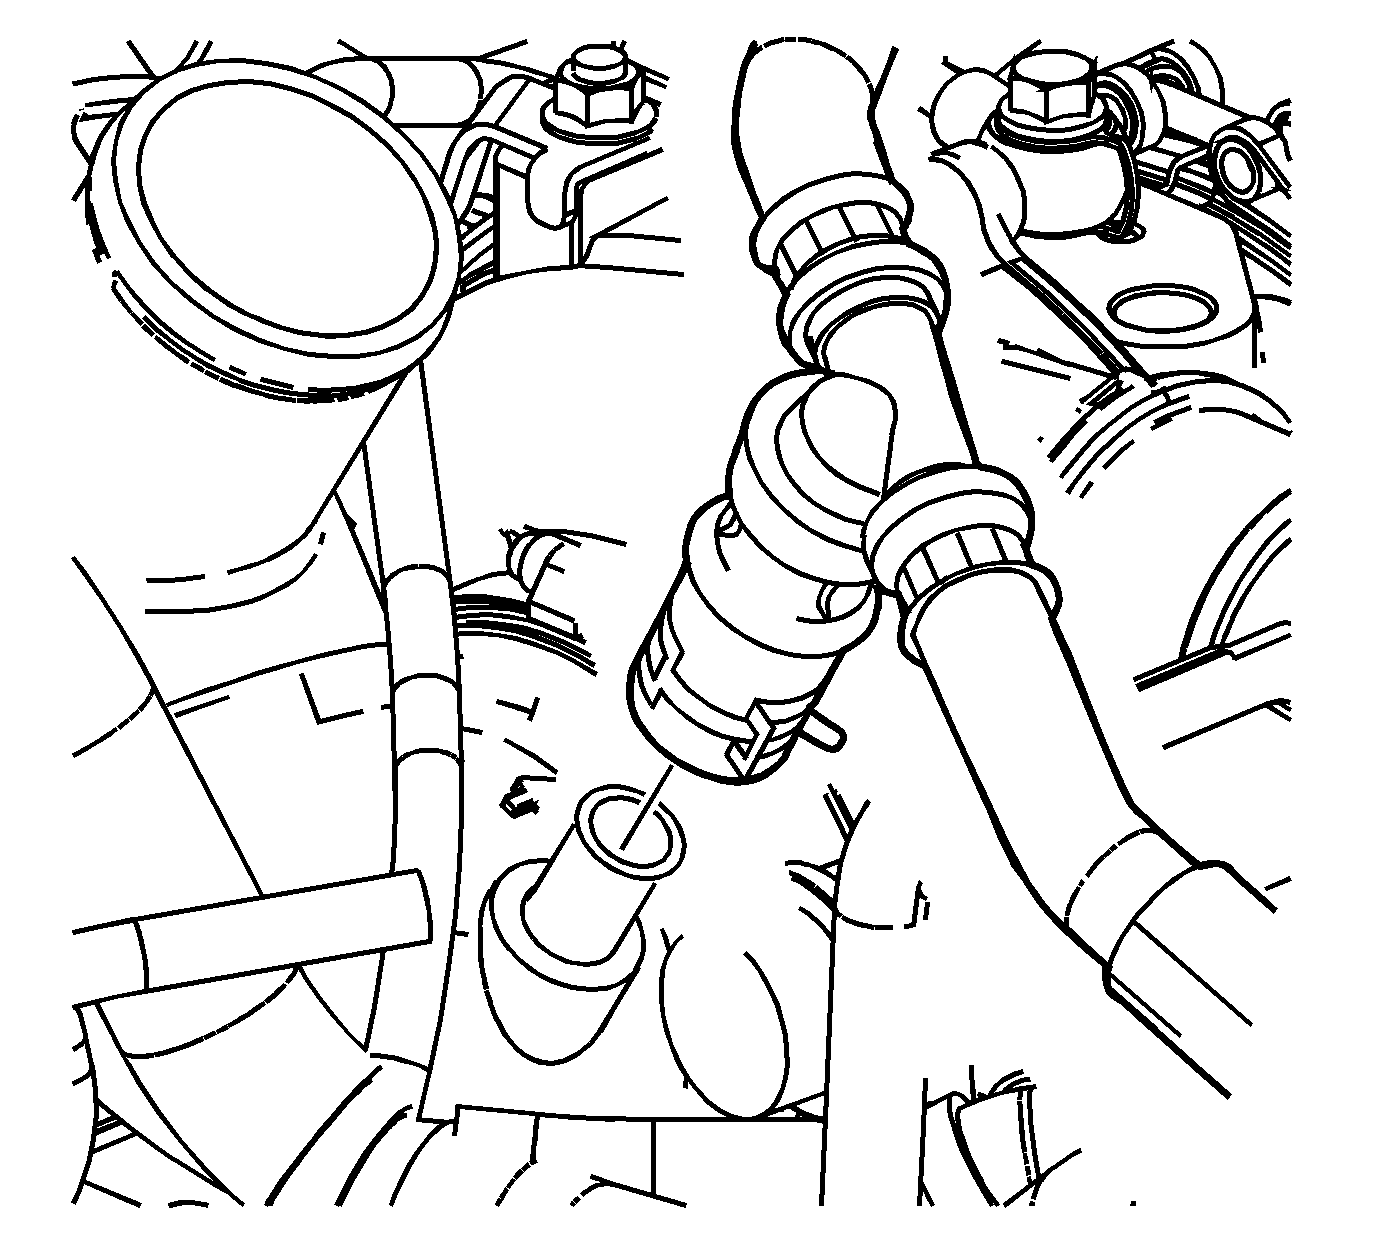
- Disconnect the fuel rail pressure sensor electrical connector.
- Remove the bolt and wiring harness bracket from the turbocharger. Reposition the wiring harness.
- Reposition the positive crankcase ventilation (PCV) hose clamp at the resonator tee.
- Remove the PCV hose from the tee.
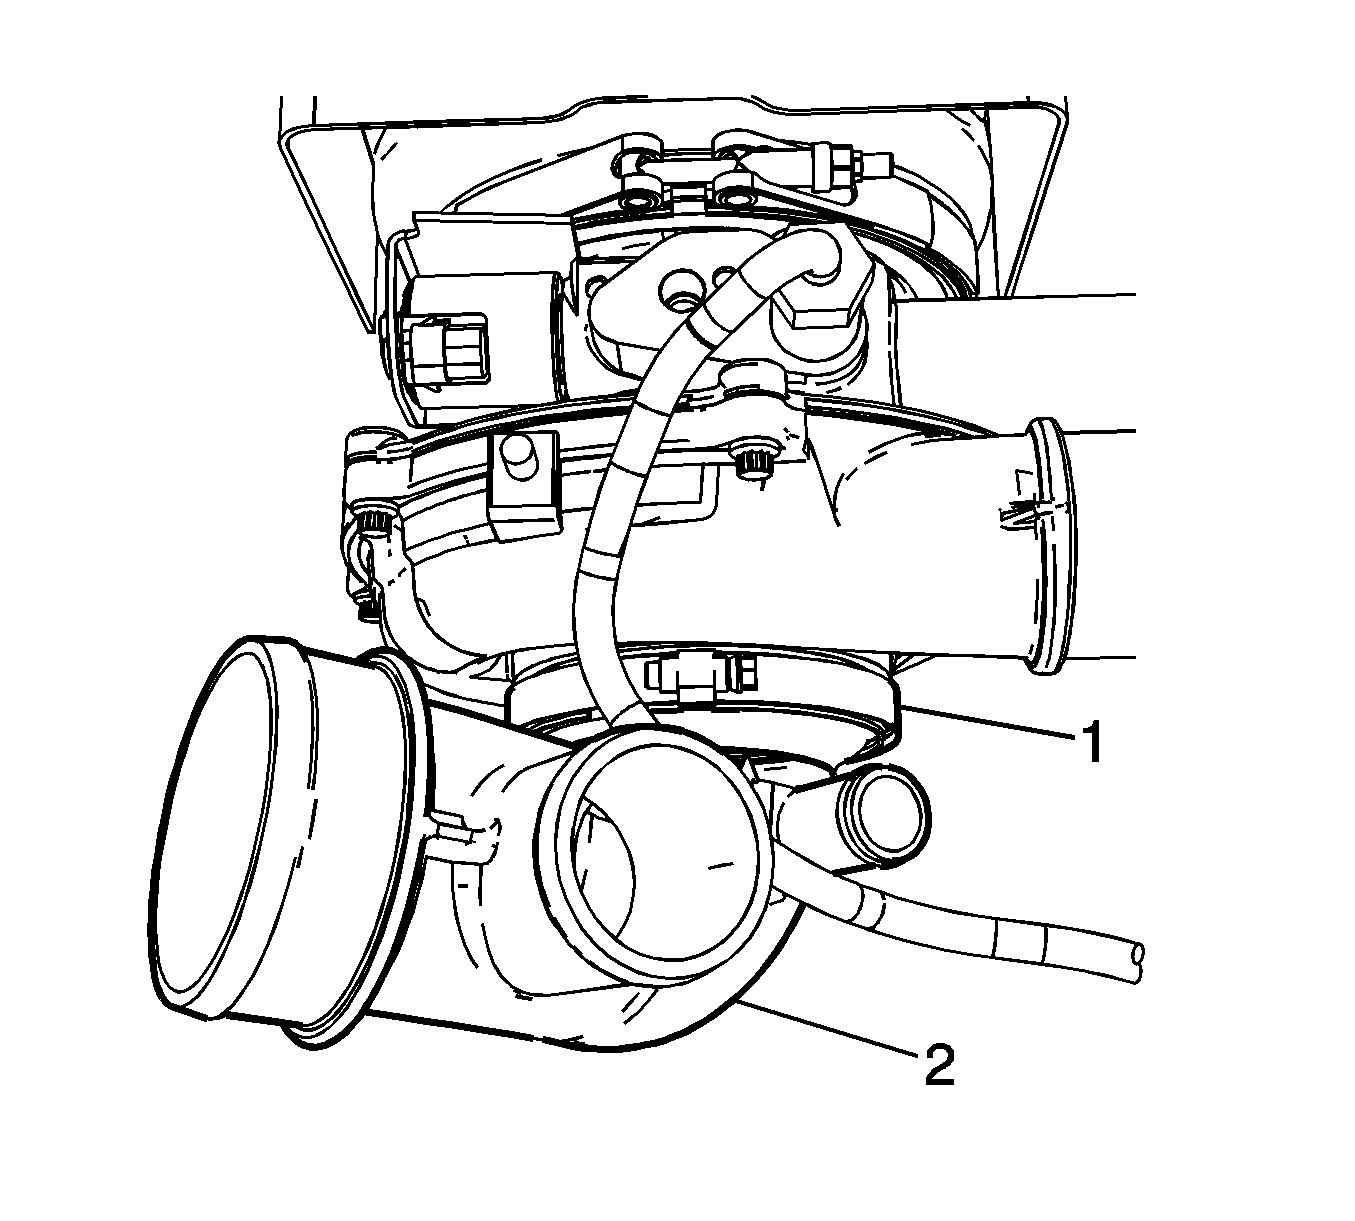
- Loosen the air intake pipe to turbocharger clamp (1).
- Remove the air intake pipe (2) from the turbocharger.
Installation Procedure
- Clean the mating surfaces on the air intake pipe and the turbocharger.
- Align the air intake pipe (2) to the turbocharger.
- Tighten the air intake pipe to turbocharger clamp (1).
- Install the PCV hose to the tee.
- Position the PCV hose clamp at the resonator tee.
- Connect the fuel rail pressure sensor electrical connector.
- Reposition the engine harness to the original position.
- Clip the harness into the harness retainer.
- Install the engine harness clamp nut to the turbocharger.
- Install the engine wiring harness clamps to the thermostat housing with nut and bolt.
- Install the air cleaner. Refer to Air Cleaner Replacement .
Notice: Refer to Fastener Notice in the Preface section.
Tighten
Tighten the clamp to 4.6 N·m (41 lb in).
Tighten
Tighten the nut to 10 N·m (89 lb in).
Tighten
Tighten the nut and bolt to 25 N·m (18 lb ft).
