For 1990-2009 cars only
Removal Procedure
- Disconnect the negative battery cable from the battery. Refer to Battery Negative Cable Disconnection and Connection .
- Remove the fuel filter and bracket. Refer to Fuel Filter Replacement .
- Disconnect the exhaust gas recirculation (EGR) valve sensor connector.
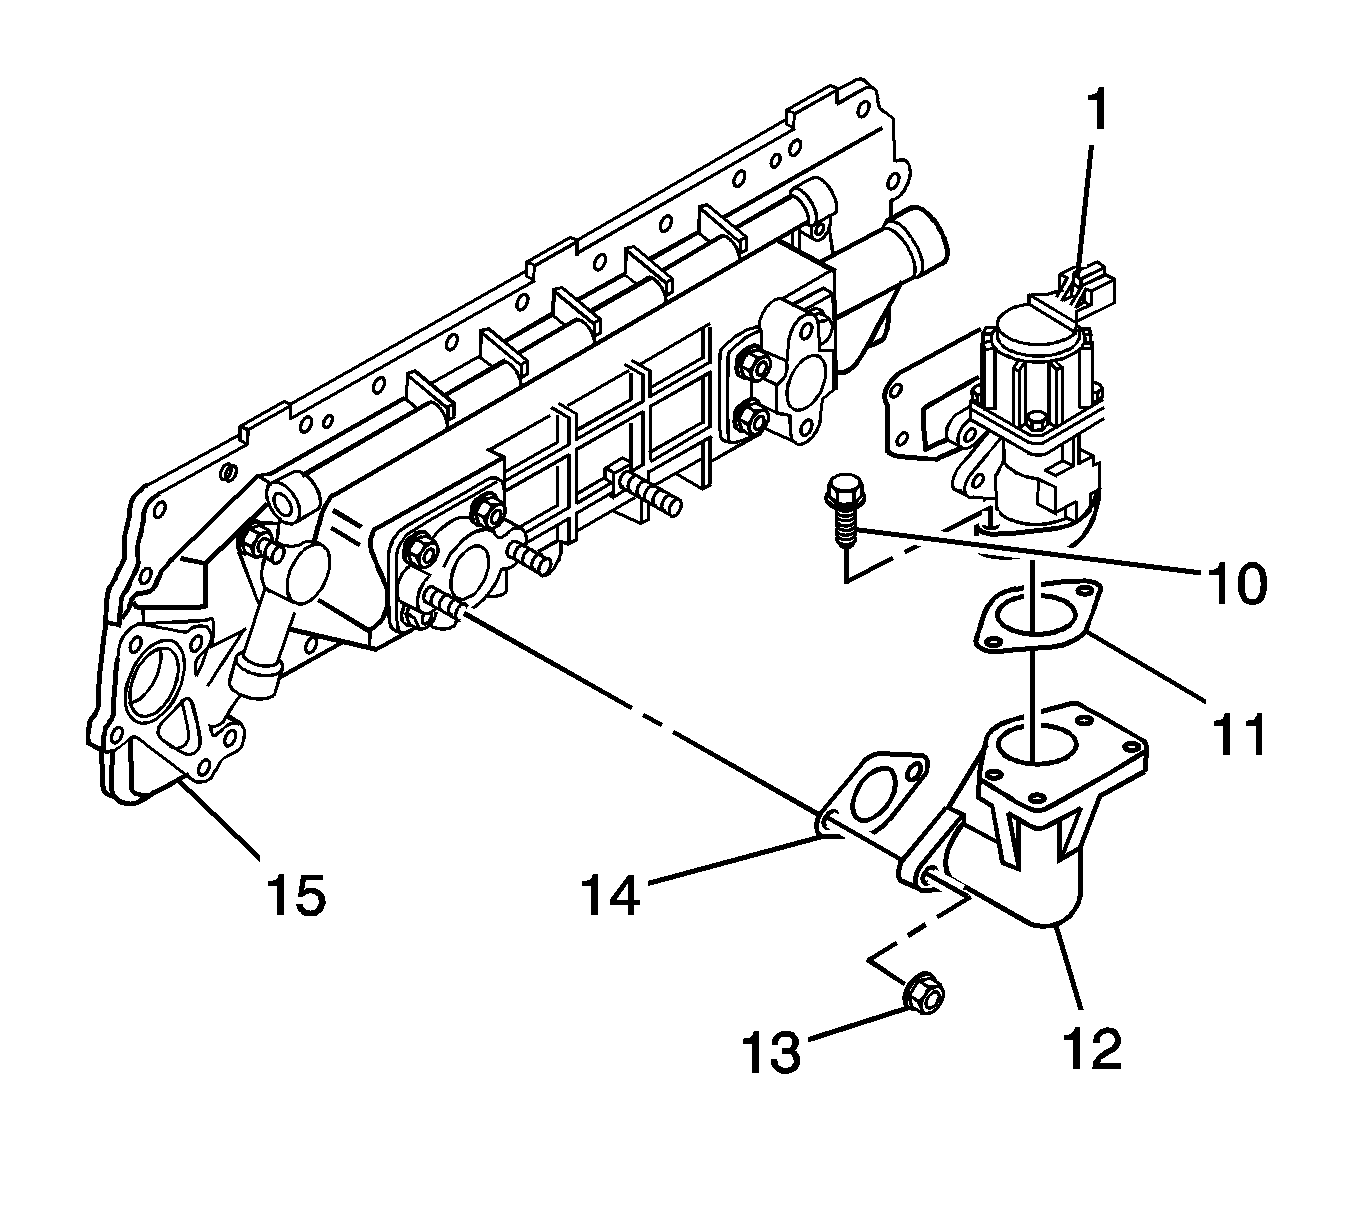
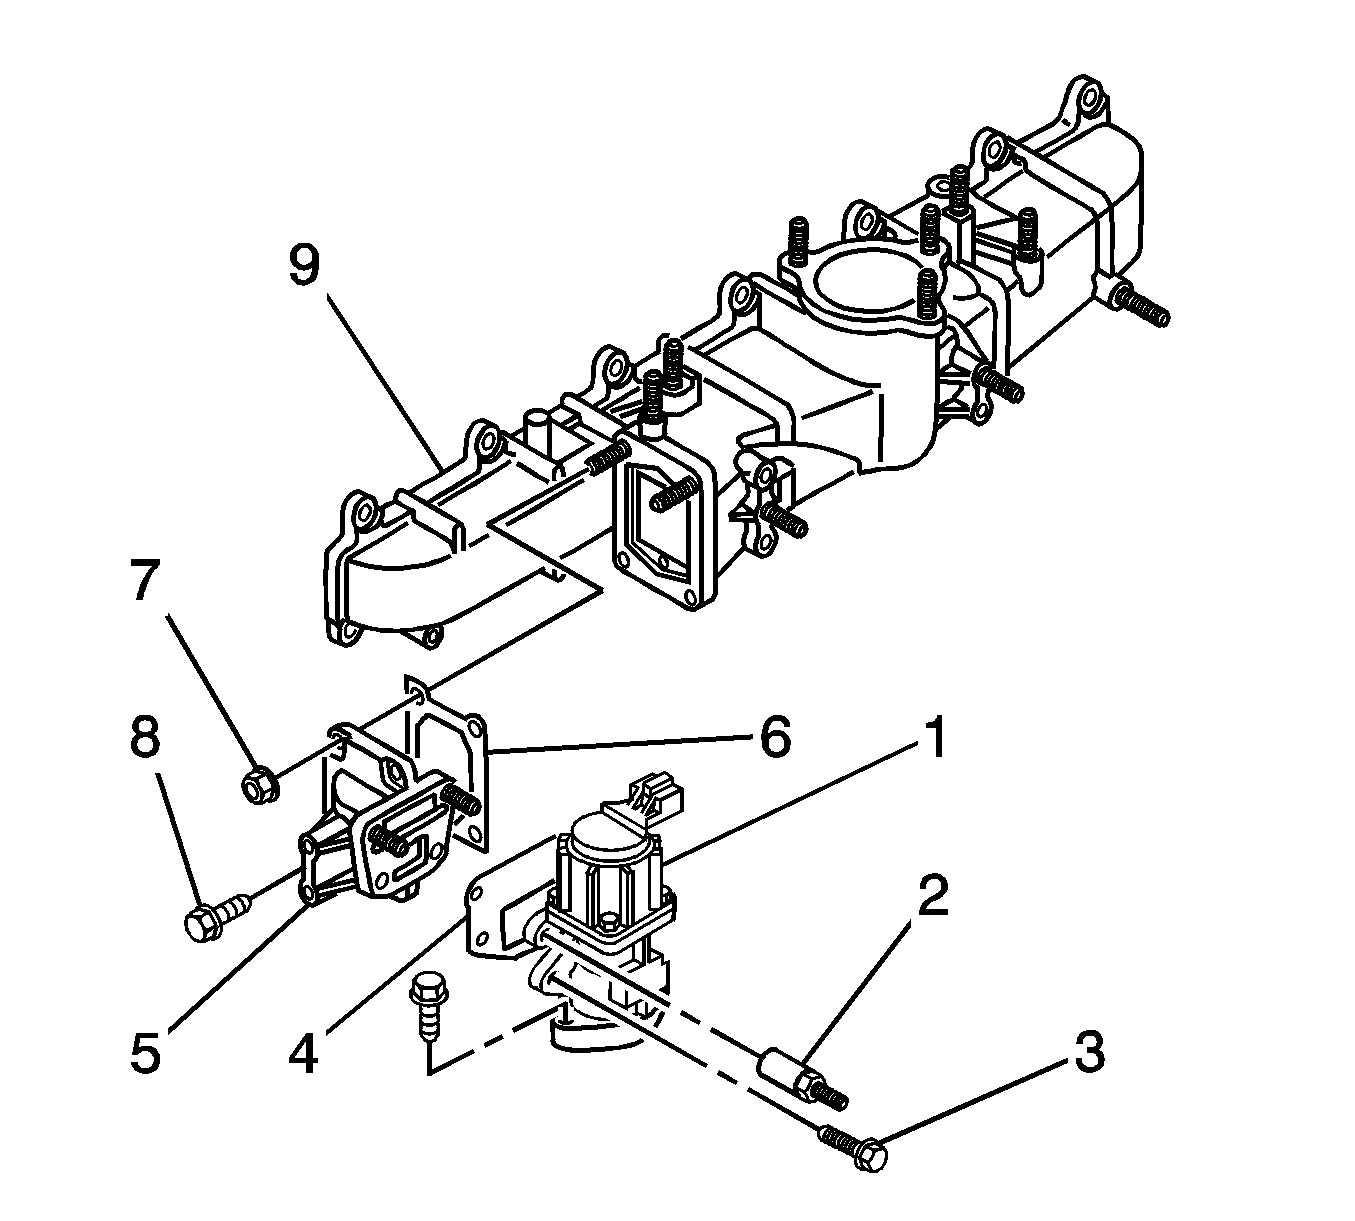
- Remove the EGR valve and bolts (10).
- Remove the EGR valve studs (2), the EGR valve bolts (3), and the EGR valve (1) and gasket (4) from the adapter (5) and the EGR duct.
- Remove the EGR gasket (11) from the EGR duct (12) and the EGR valve (1).
Installation Procedure
- Install the EGR valve (1) to the duct (12) with new gasket (11) and bolts (10).
- Install the EGR valve (1) to the EGR adapter (5) with the gasket (4), bolts (3) and studs (2).
- Tighten EGR valve bolts (3) and studs (2).
- Tighten the EGR bolts (10).
- Install the fuel filter and bracket. Refer to Fuel Filter Replacement .
- Connect the EGR sensor connector.
- Connect the negative battery cable to the battery. Refer to Battery Negative Cable Disconnection and Connection .
Important: Before beginning the installation procedure, carefully inspect the gasket mating surfaces of the EGR valve for cracks and other damage.
The EGR cooler is built into the oiler cooler and is installed with it. It is very important that the EGR nuts and bolts be tightened to the specified torque in the order shown.
Notice: Refer to Fastener Notice in the Preface section.
Tighten
Tighten the EGR valve bolts and studs to 21 N·m (15 lb ft).
Tighten
Tighten the EGR valve bolts to 21 N·m (15 lb ft).
