Battery Positive Cable Replacement 7.2L (CAT)
Important: When replacing battery cables, use a replacement cable that is the same type, diameter, and length. Additional feed wires may be attached to the positive cables. Additional ground leads may be attached to the negative cables. Always route a replacement battery cable the same as the original cable routing.
Removal Procedure
- Disconnect the negative battery cable. Refer to Battery Negative Cable Disconnection and Connection .
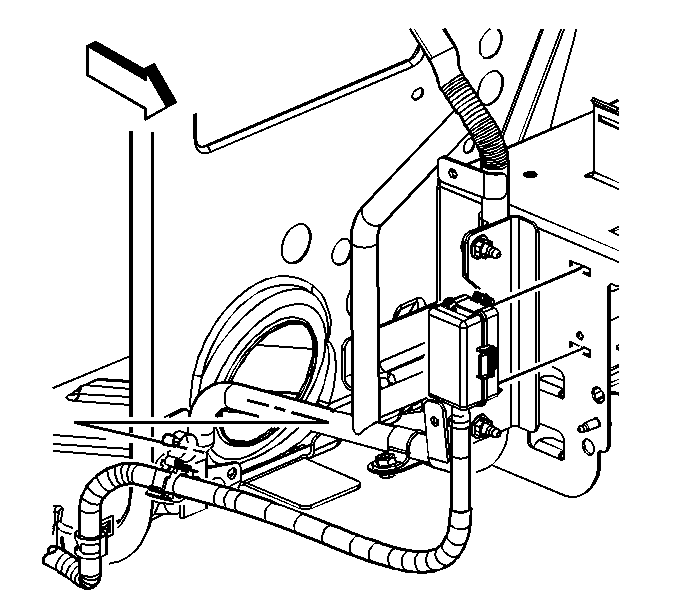
- Remove the positive cable from the starter solenoid.
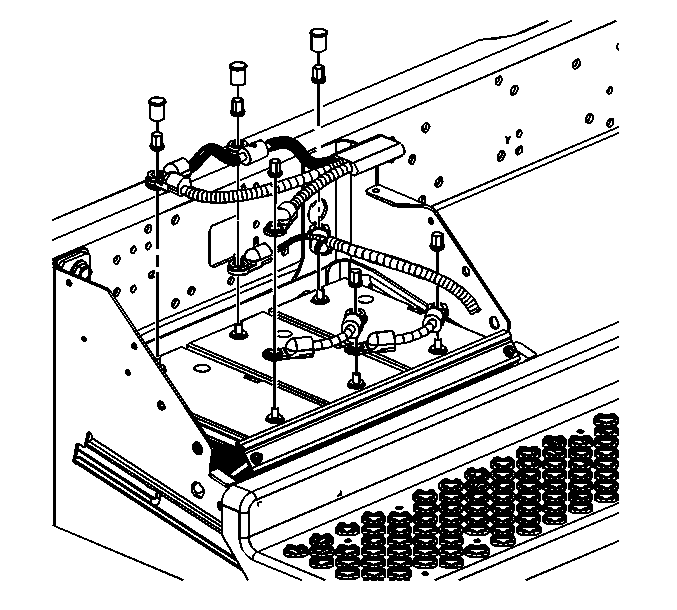
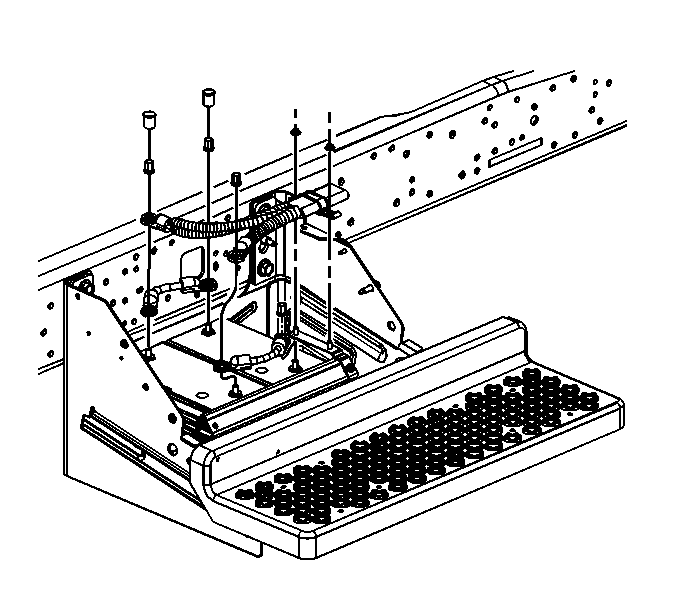
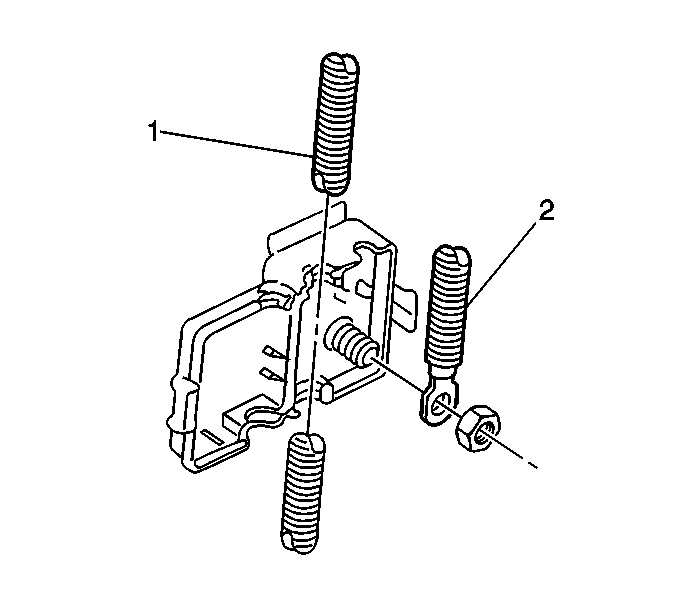
- Remove the positive cable junction block .
- Remove the positive cable clamps and tie downs.
- Remove the positive cable.
Caution: Unless directed otherwise, the ignition and start switch must be in the OFF or LOCK position, and all electrical loads must be OFF before servicing any electrical component. Disconnect the negative battery cable to prevent an electrical spark should a tool or equipment come in contact with an exposed electrical terminal. Failure to follow these precautions may result in personal injury and/or damage to the vehicle or its components.

Installation Procedure
- Install the positive cable to the original routing.
- Install the positive cable clamps and the tie downs.
- Install the positive cable and the nut to the junction block .
- Install the harness leads and the nuts to the starter solenoid.
- Connect the negative battery cable.
Notice: Refer to Fastener Notice in the Preface section.
Tighten
Tighten the positive cable to the Maxi-Fuse® block bolt to 11 N·m (97 lb in).
Tighten
| • | Tighten the positive cable starter nut to 10 N·m (89 lb in). |
| • | Tighten the positive cable starter nut to 30 N·m (22 lb ft). |
Tighten
| • | Tighten the side post terminal bolt to 15 N·m (11 lb ft). |
| • | Tighten the top post terminal nut to 17 N·m (13 lb ft). |
Battery Positive Cable Replacement 6.6L (LLY)
Removal Procedure
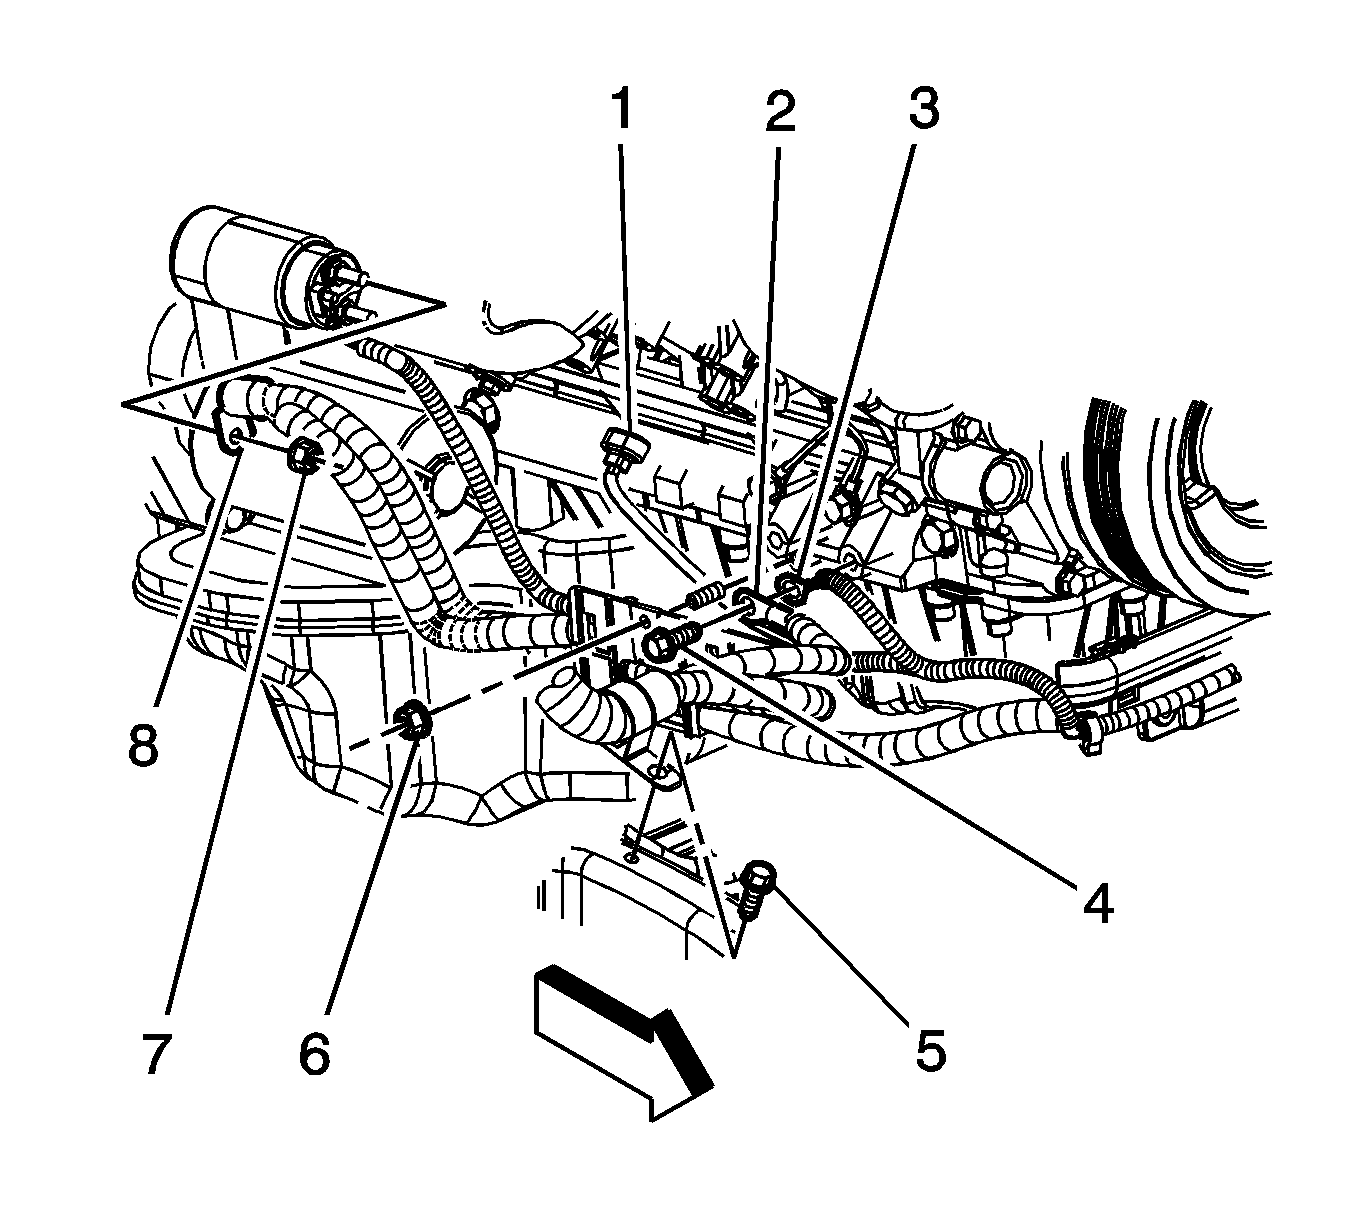
- Disconnect the negative battery cable. Refer to Battery Negative Cable Disconnection and Connection .
- Unsnap the positive battery cable cap.
- Disconnect the positive battery cable.
- Unsnap the junction block cover.
- Remove the positive cable (2) from the junction block.
- Remove the clip attaching the positive cable to the negative cable.
- Remove the battery cable channel bolts.
- Remove the battery cable from the channel.
- Remove the battery cable retainer nut (6) and the retainer.
- Remove the battery positive cable from the retainer.
- Remove the positive battery cable nut (7).
- Remove the positive battery cable lead (8) from the starter.
- Remove the positive battery cable.
Caution: Unless directed otherwise, the ignition and start switch must be in the OFF or LOCK position, and all electrical loads must be OFF before servicing any electrical component. Disconnect the negative battery cable to prevent an electrical spark should a tool or equipment come in contact with an exposed electrical terminal. Failure to follow these precautions may result in personal injury and/or damage to the vehicle or its components.
Installation Procedure
- Install the positive battery cable.
- Install the positive battery cable lead (8) to the starter.
- Install the positive battery cable nut (7).
- Install the battery positive cable to the retainer.
- Install the battery cable retainer nut (6) and the retainer.
- Install the battery cable to the channel.
- Install the battery cable channel bolts.
- Install the clip attaching the positive cable to the negative cable.
- Install the positive cable (2) to the junction block.
- Snap the junction block cover closed.
- Tighten the positive cable nut.
- Snap the positive battery cable cap closed.
- Connect the negative battery cable. Refer to Battery Negative Cable Disconnection and Connection .
Notice: Refer to Fastener Notice in the Preface section.
Tighten
Tighten the nut to 9 N·m (80 lb in).
Tighten
Tighten the nut to 12 N·m (106 lb in).
Tighten
Tighten the bolts to 8 N·m (71 lb in).
Tighten
Tighten the positive cable nut to the Maxi-Fuse junction block bolt to 11 N·m
(97 lb in).
