For 1990-2009 cars only
Starter Solenoid Switch Replacement 6.6L (LLY)
Removal Procedure
- Remove the starter motor. Refer to Starter Motor Replacement .
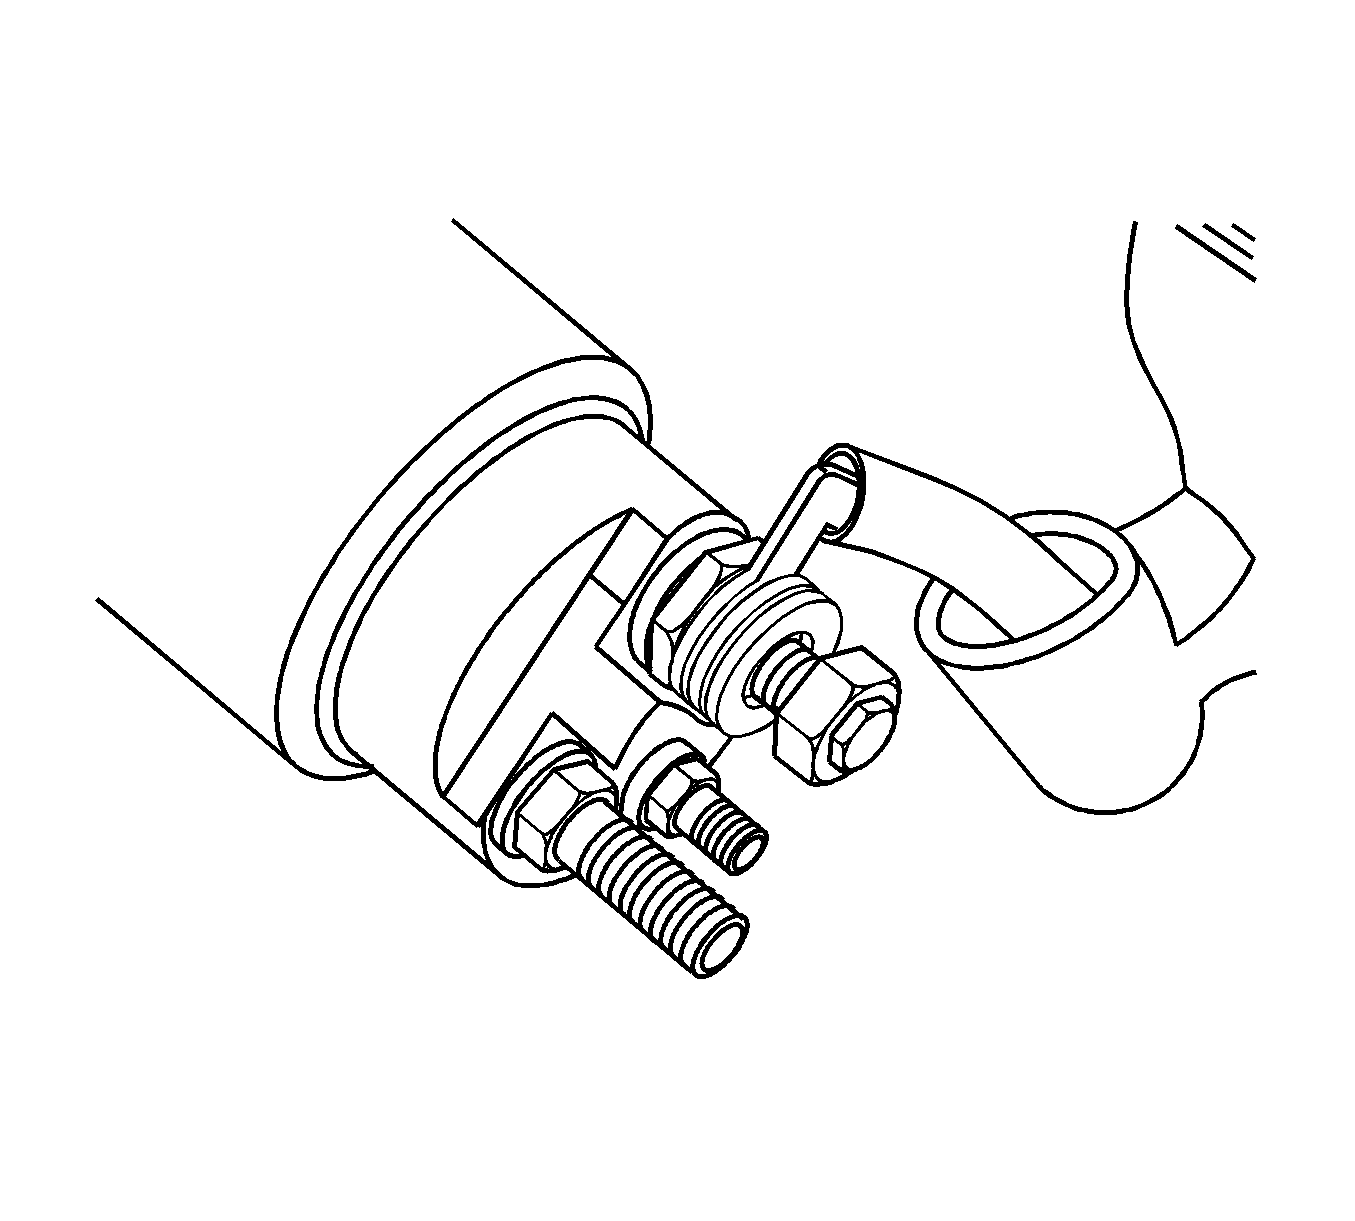
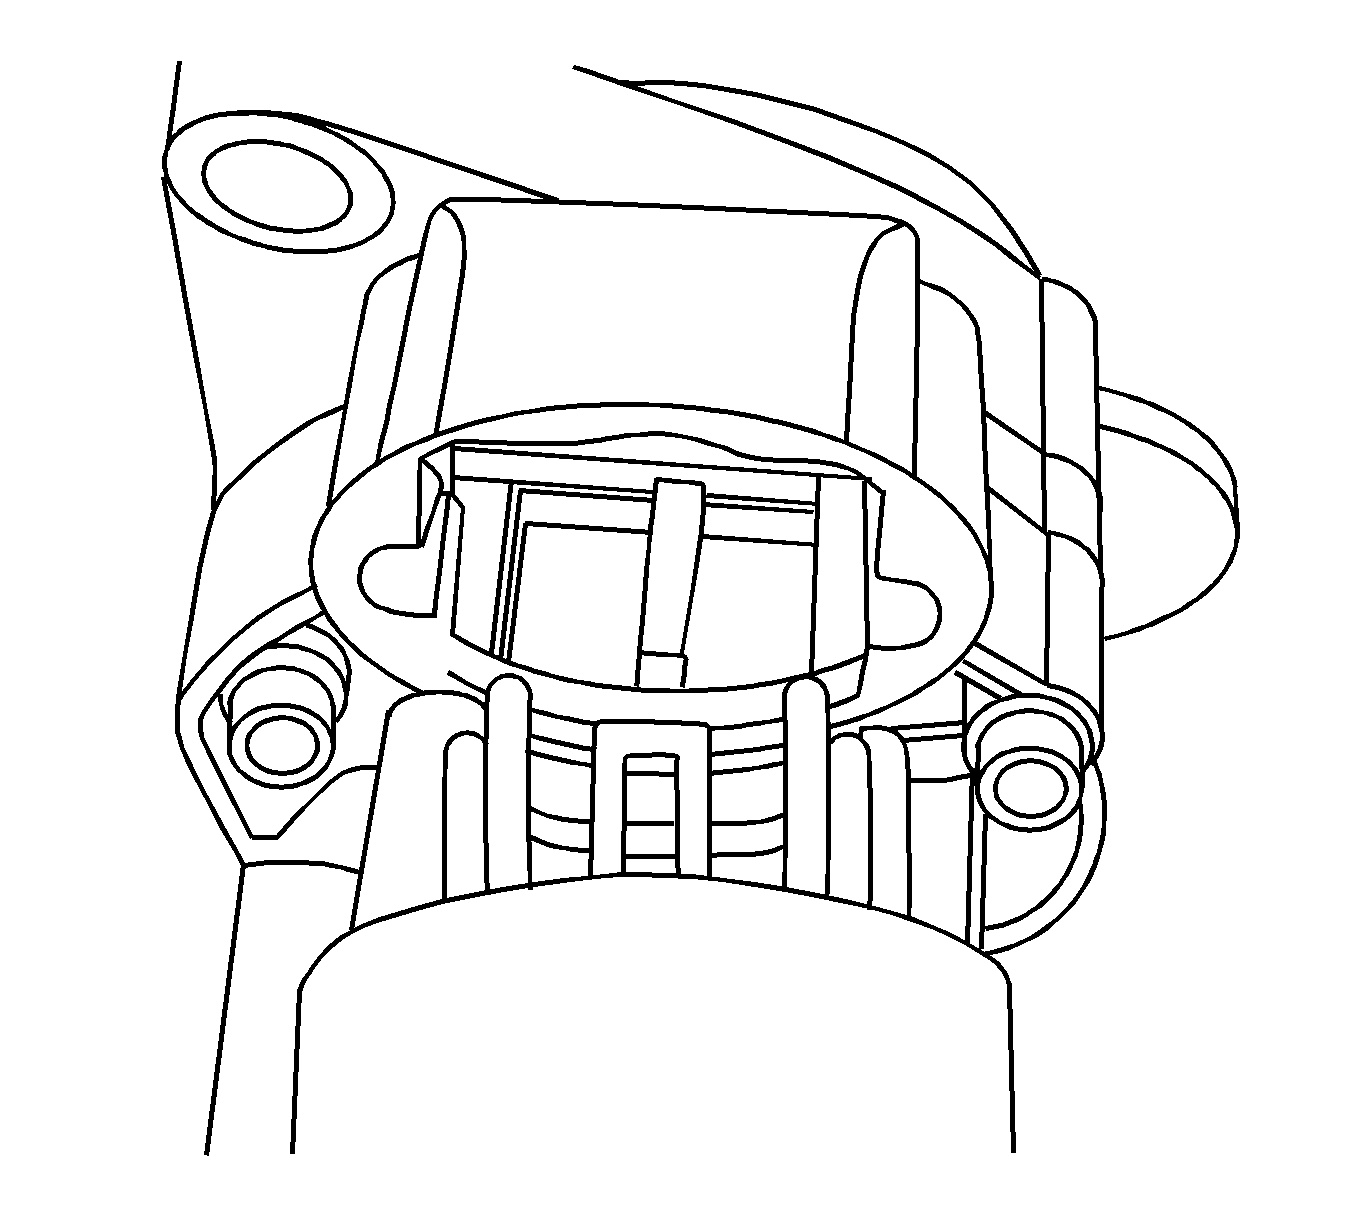
- Reposition the M-terminal stud weather cover (1).
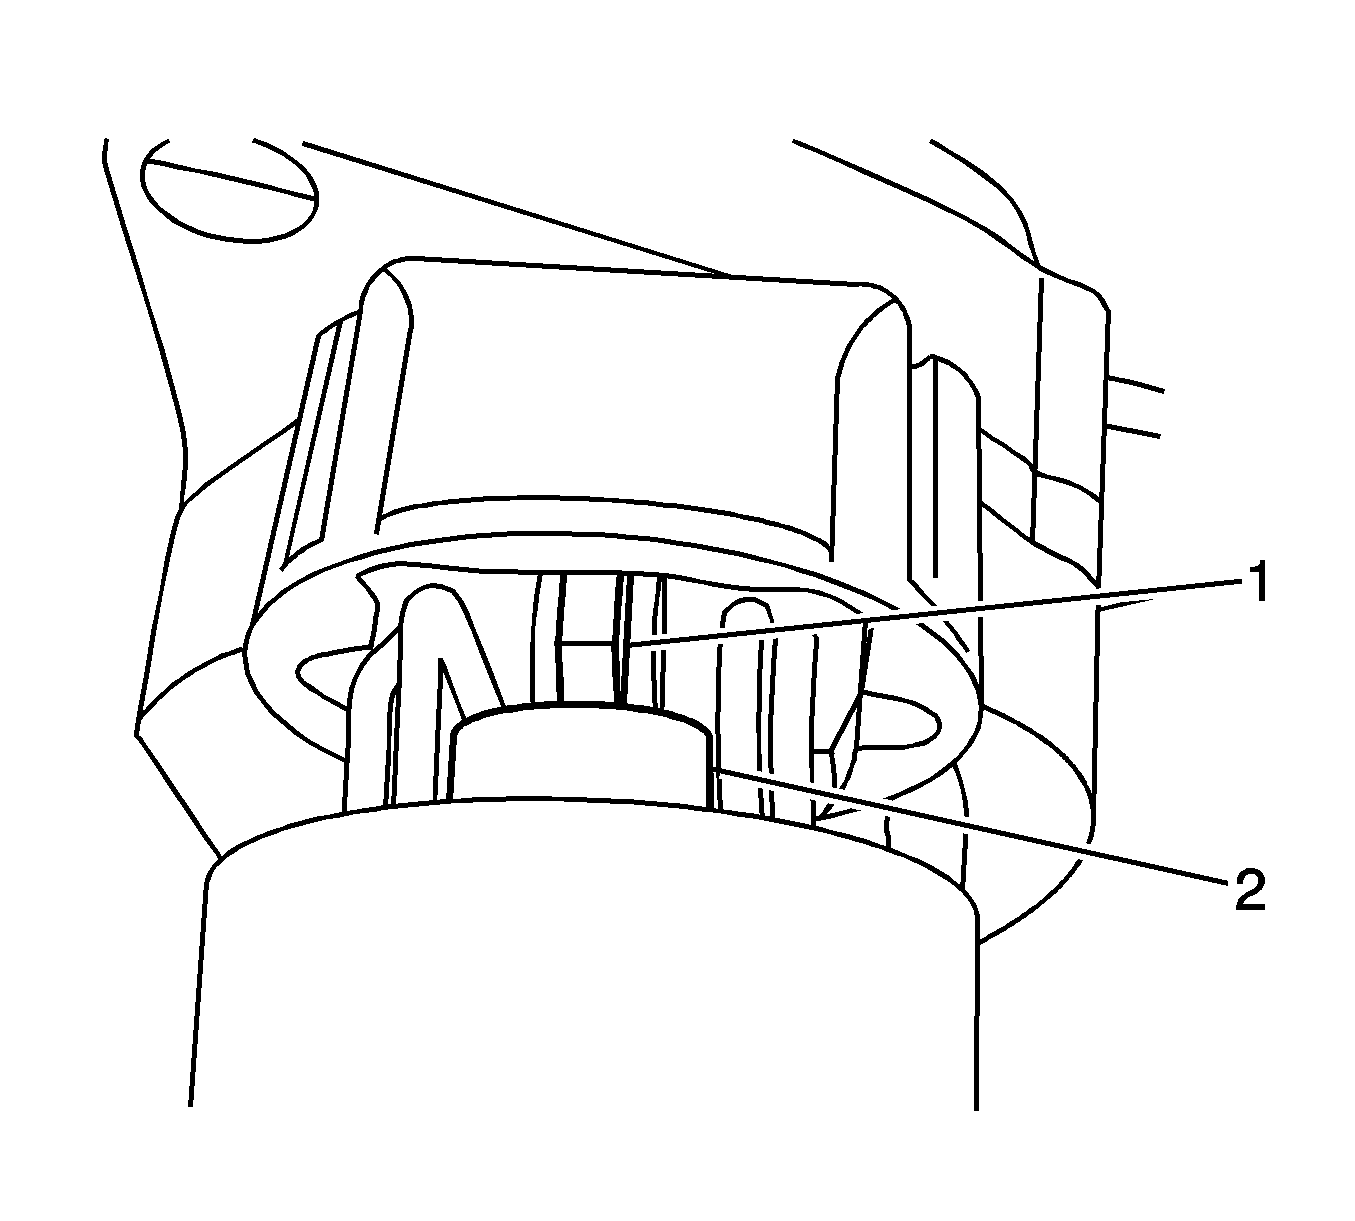
- Clean the epoxy coating (2) from the M-terminal stud.
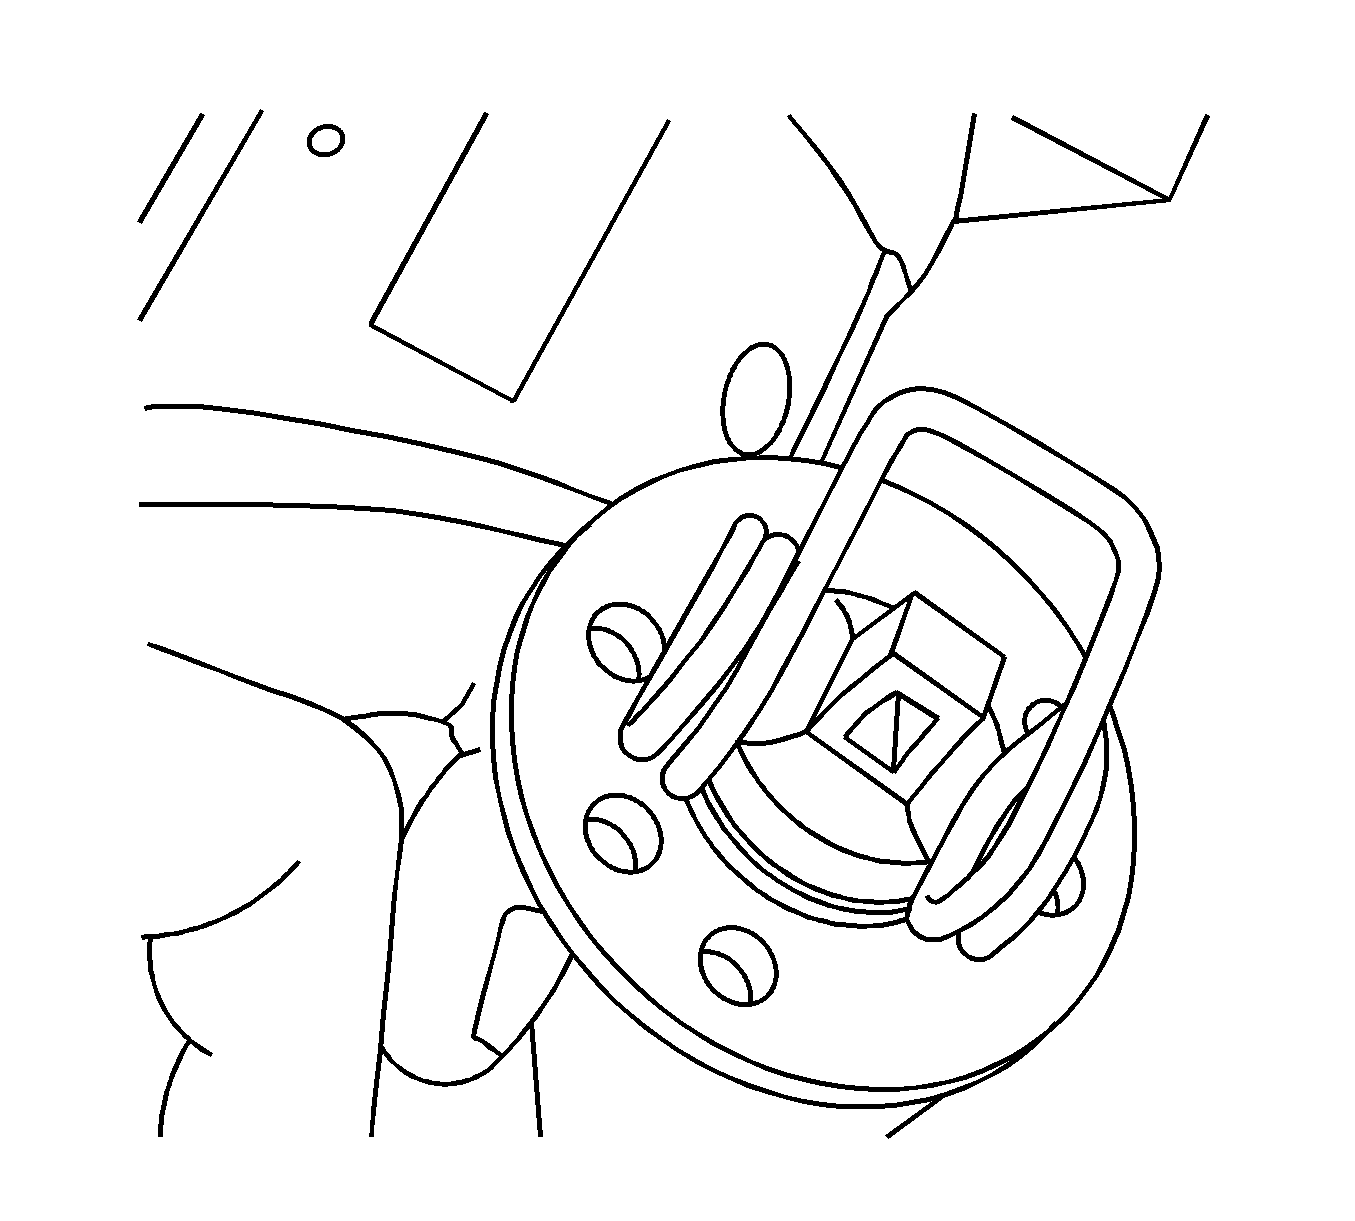
- Loosen the M-terminal stud nut.
- Remove the cable from the M-terminal stud.
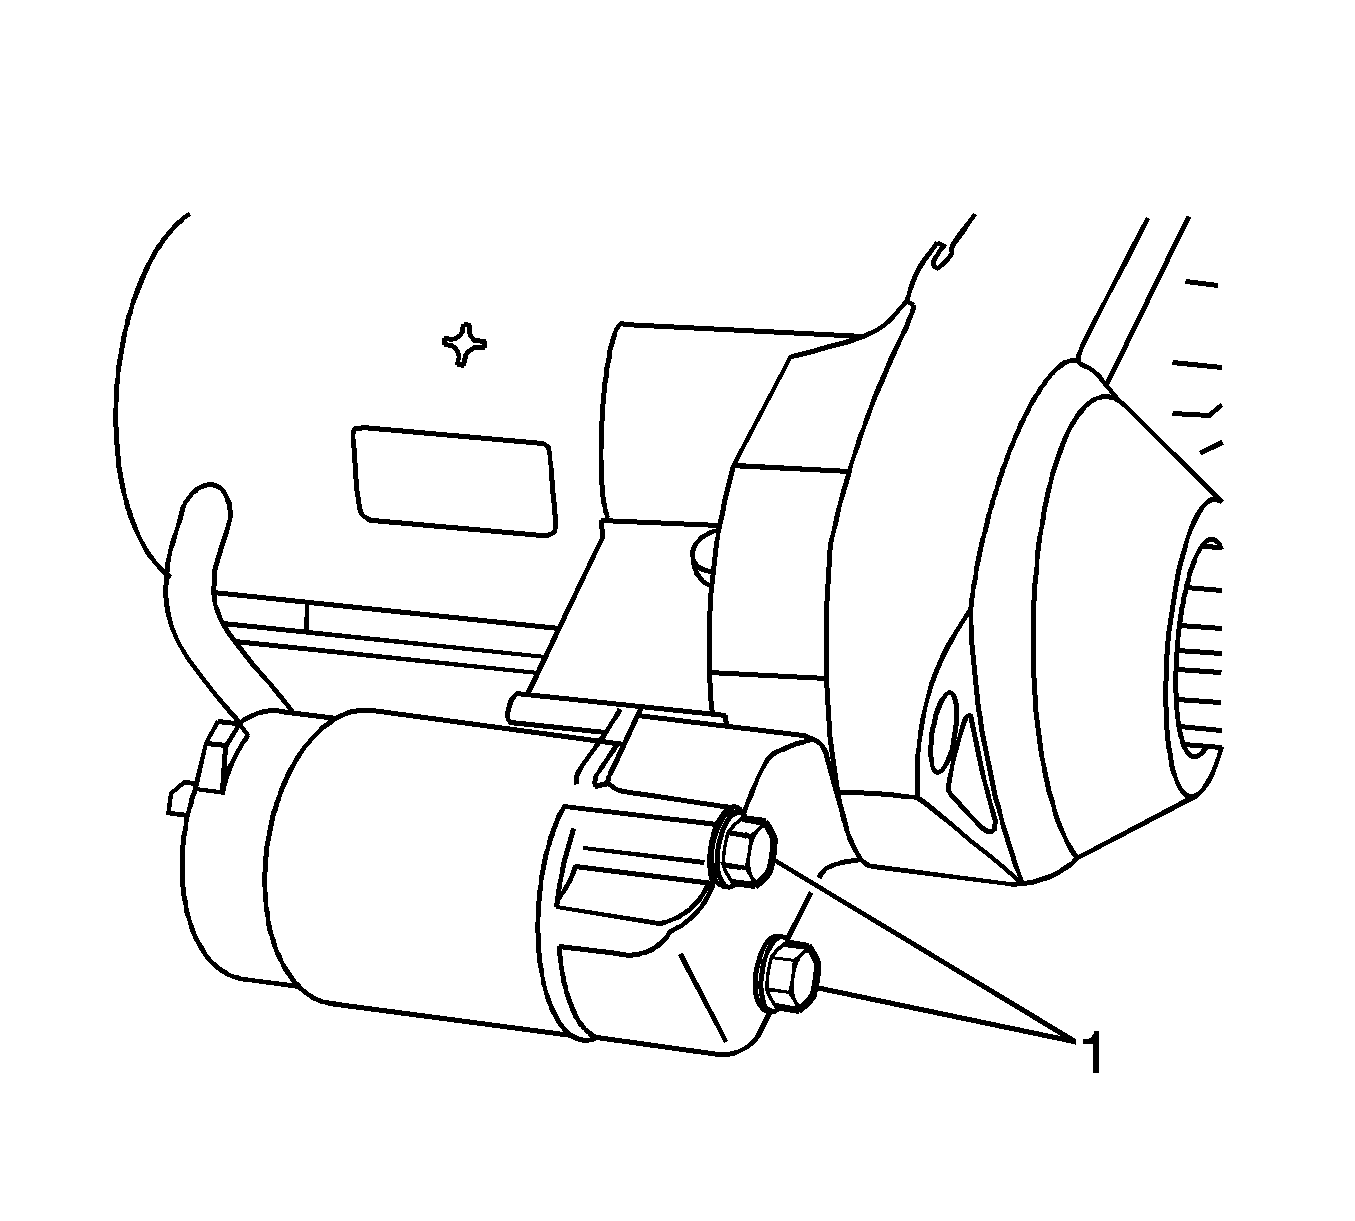
- Remove the solenoid bolts.
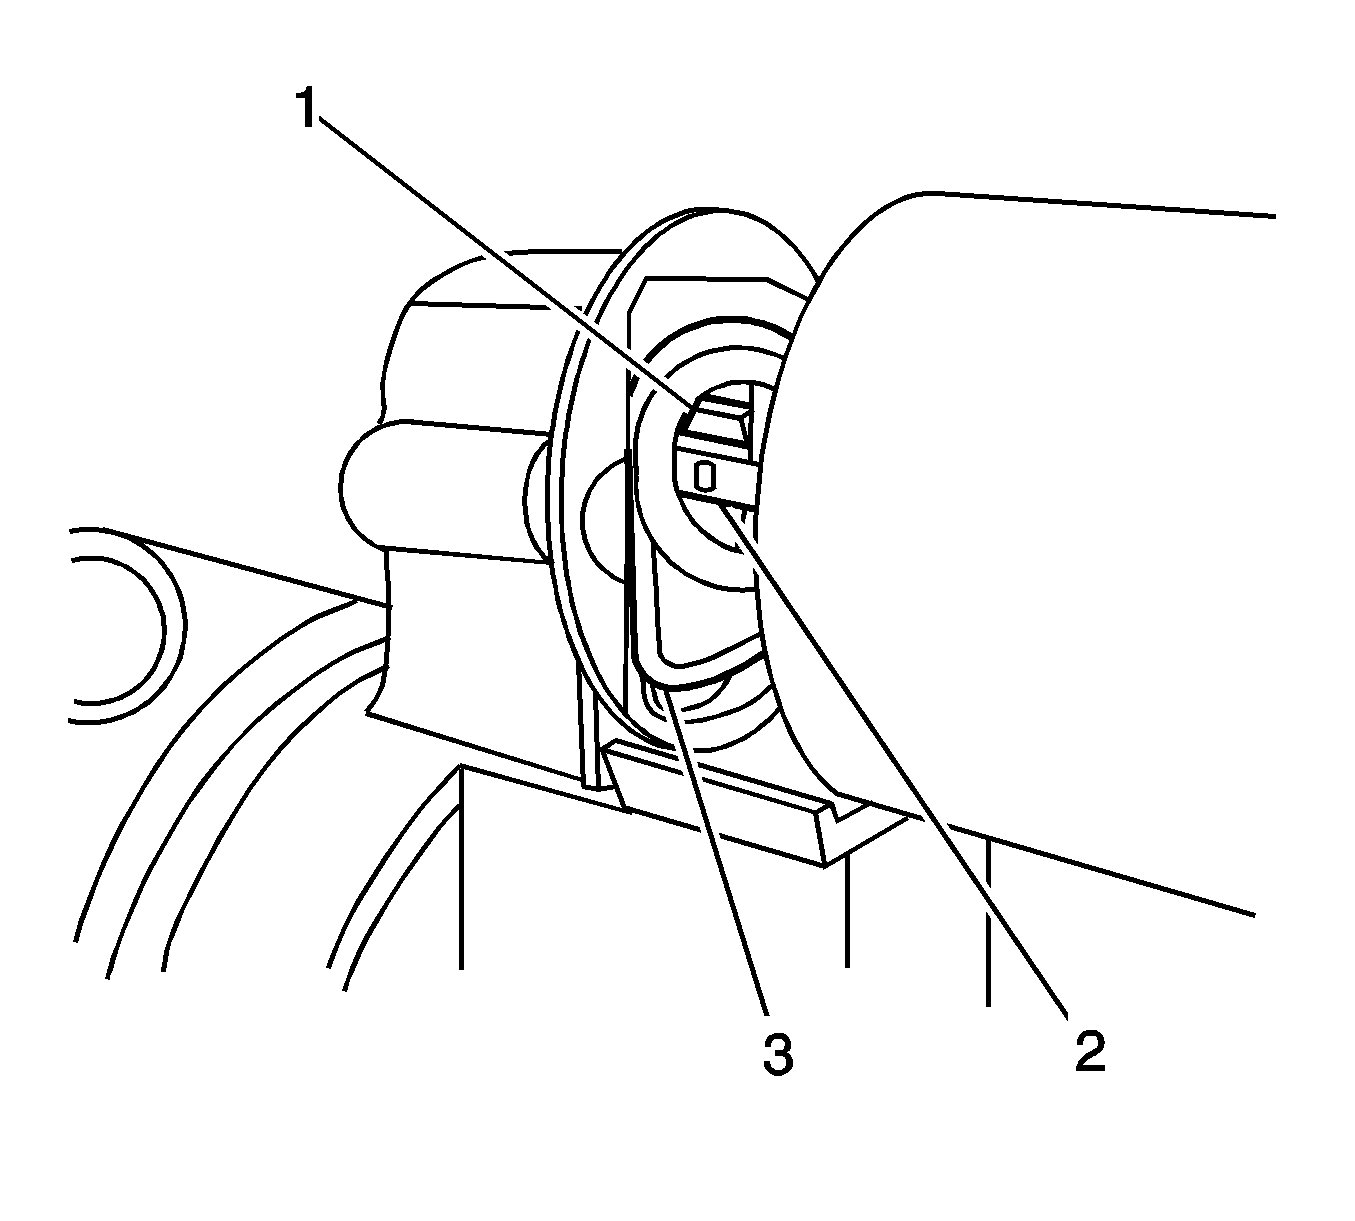
- Separate the solenoid from the housing and unhook the solenoid plunger (2) from the drive gear lever (1).
- Note that the spring (3) is positioned against the drive gear lever (1) and the drive gear lever is placed inside the solenoid plunger loop (2).
- Remove the solenoid housing.
- If necessary, remove the solenoid plunger and spring.

Installation Procedure
- If necessary, install the solenoid plunger and spring.
- Using Three Bond silicone 1207B, GM P/N 97720043, seal the starter solenoid attachment area.
- Install the solenoid, making sure to insert the drive gear lever (1) into the solenoid plunger (2) loop, perform the following:
- Install the solenoid bolts (1).
- Wipe the excess silicone pressed out during the solenoid installation from around the base of the solenoid to make a weather proof seal.
- Install the cable to the M-terminal stud between the washers and terminal nut.
- Tighten the M-terminal stud nut.
- Using Three Bond silicone 1207B, GM P/N 97720043, seal the M-terminal stud connection (2).
- Reposition the M-terminal stud weather cover (1).
- Bench test the starter in a free-run condition prior to installation.
- Install the starter motor. Refer to Starter Motor Replacement .
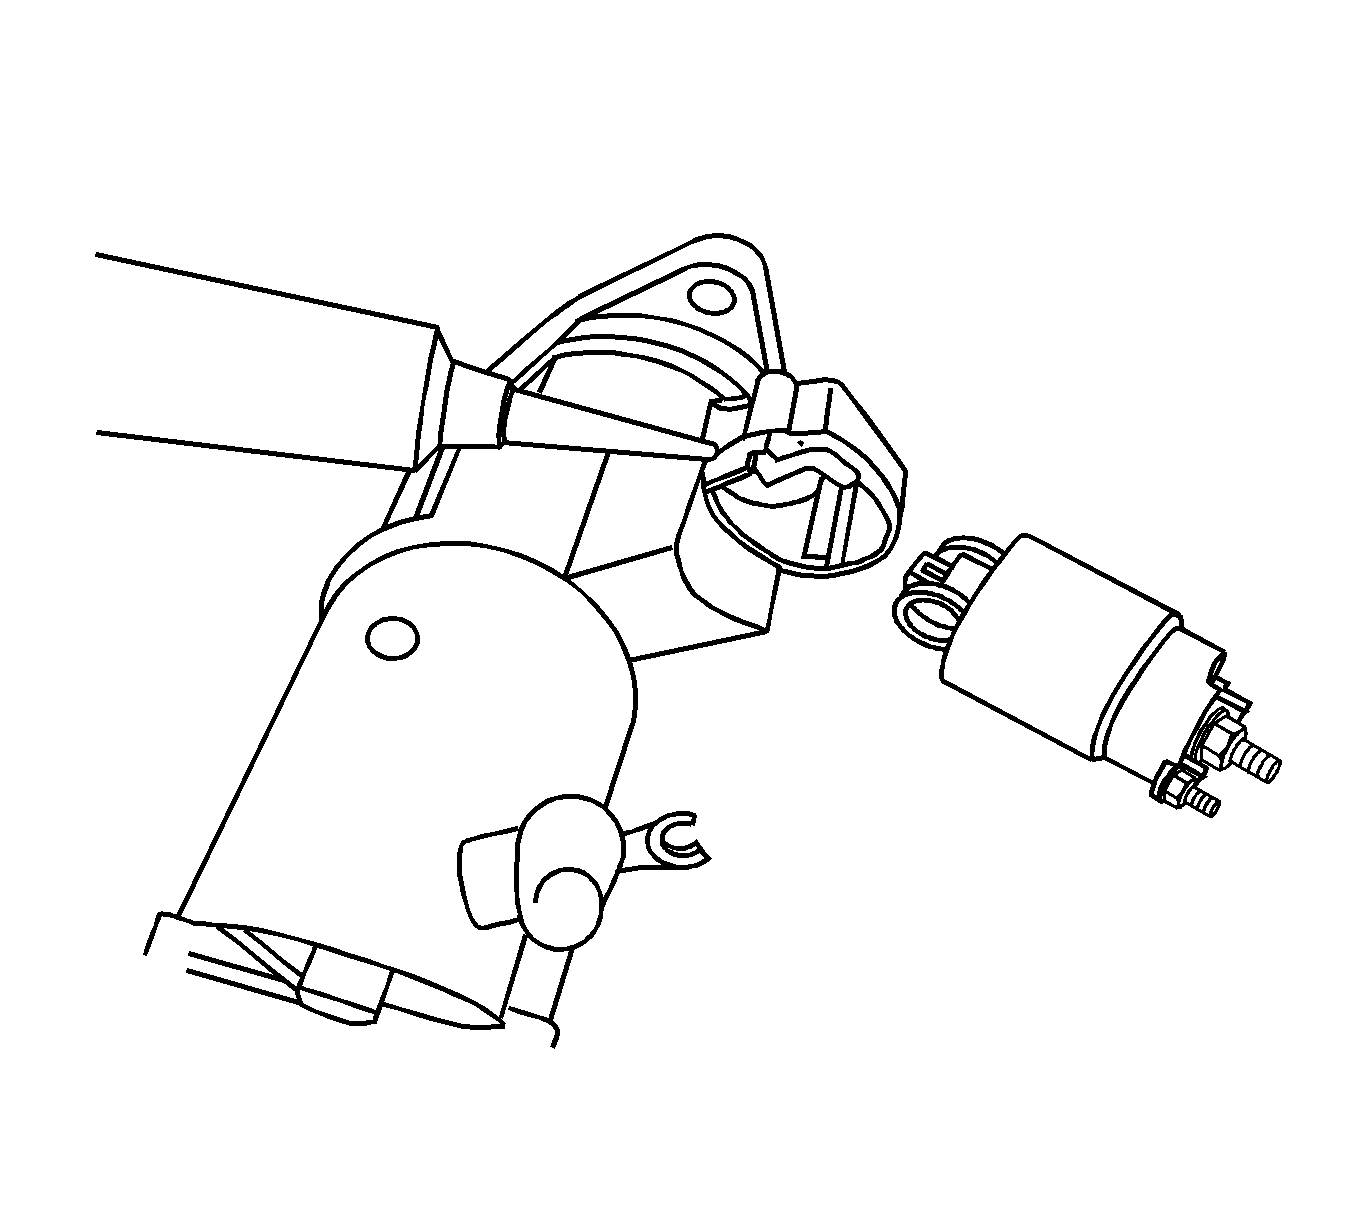
Important: Ensure that the drive gear lever (1) is properly installed into the solenoid plunger (2) loop. Improper installation of the drive gear lever will cause an abnormal or no operation condition of the starter.
| 3.1. | Pull the gear lever (1) out away from the starter housing and pull the plunger (2) out away from the solenoid. |
| 3.2. | Tip the solenoid and insert the lever into the loop, push the solenoid against the housing. |
Notice: Refer to Fastener Notice in the Preface section.
Tighten
Tighten the bolts to 10 N·m (89 lb in).
Tighten
Tighten the nut to 8 N·m (71 lb in).
