Fuel Hose/Pipes Assembly Replacement Fuel Pipe Repair
Steel fuel lines--These are welded steel tubes, meeting GM specifications 124-M, or the equivalent. The fuel feed line is 9.5 mm (3/8 inches) diameter and the fuel return line is 8 mm (5/16 inches) diameter. Do not use copper or aluminum tubing to replace steel tubing. Those materials do not have satisfactory durability to withstand normal vehicle vibration.
Coupled hose--Do not repair the hoses. Replace them only as an assembly.
Uncoupled hose--Use only reinforced fuel resistant hose, made of Fluoroelastomer material. Do not use a hose within 100 mm (4 in) of any part of the exhaust system, or within 2154 mm (10 in) of the catalytic converter. The hoses inside diameter must match the outside diameter of the steel tubing.
Clamps--These are stainless steel, screw bank-type clamps, #2494772, or equivalent.
Steel Fuel Line Repair
- Cut a piece of fuel hose 100 mm (4 in) longer than the section of line to be removed. If you remove more than 152 mm (6 in), use a combination of steel pipe and hose. The hose length should not be more than 2154 mm (10 in) total.
- With a tube cutter, cut a section of the pipe to replace. Use the first step on the reamer to form a bead on the ends of the pipe and, also, on the new section of pipe, if used.
- Slide the hose clamps onto the pipe and push the hose 51 mm (2 in) onto each portion of the fuel pipe. Tighten a clamp on each side of the repair.
- Secure fuel line to the frame.
- Check for leaks.
Fuel Hose/Pipes Assembly Replacement Rear
Removal Procedure
- Disconnect the negative battery cable.
- Relieve the fuel system pressure. Refer to Fuel Pressure Relief .
- Drain the fuel tank. Refer to Fuel Tank Draining .
- Raise the vehicle. Refer to Lifting and Jacking the Vehicle in General Information.
- Clean all the fuel pipe connections and the surrounding areas before disconnecting in order to avoid possible contamination of the fuel system.
- Remove the fuel tank. Refer to Fuel Tank Replacement .
- Disconnect the rear fuel feed pipe from the fuel filter inlet.
- Disconnect the rear fuel return pipe from the chassis fuel return pipe (2).
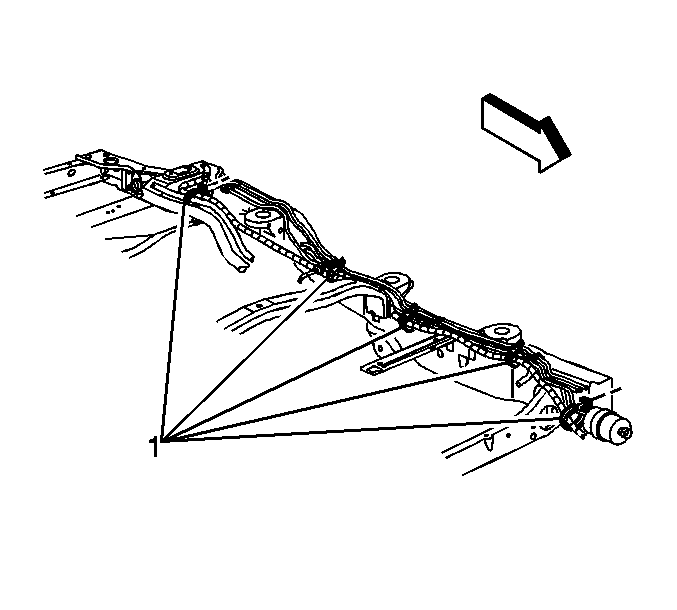
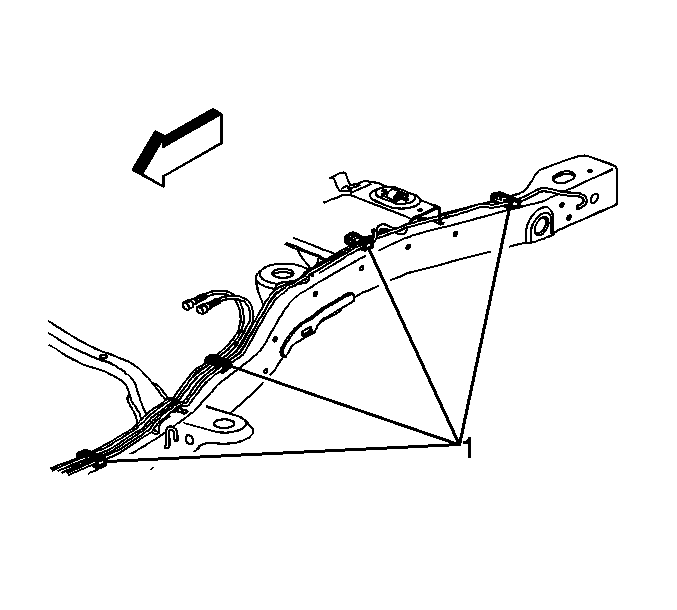
- Remove the fuel feed and return pipes from the retainers.
- Cap the fuel pipes in order to prevent possible fuel system contamination.
Caution: Unless directed otherwise, the ignition and start switch must be in the OFF or LOCK position, and all electrical loads must be OFF before servicing any electrical component. Disconnect the negative battery cable to prevent an electrical spark should a tool or equipment come in contact with an exposed electrical terminal. Failure to follow these precautions may result in personal injury and/or damage to the vehicle or its components.
Installation Procedure
- Remove the caps from the fuel and evaporative emission (EVAP) pipes.
- Connect the rear fuel return pipe to the chassis fuel return pipe (2).
- Connect the rear fuel feed pipe to the fuel filter inlet.
- Install the fuel feed and return pipes into the retainers.
- Install the fuel tank. Refer to Fuel Tank Replacement .
- Lower the vehicle.
- Refill the fuel tank.
- Tighten the fuel filler cap.
- Connect the negative battery cable.
- Inspect for leaks.
| 10.1. | Turn ON the ignition for 2 seconds. |
| 10.2. | Turn OFF the ignition for 10 seconds. |
| 10.3. | Turn ON the ignition. |
| 10.4. | Inspect for fuel leaks. |
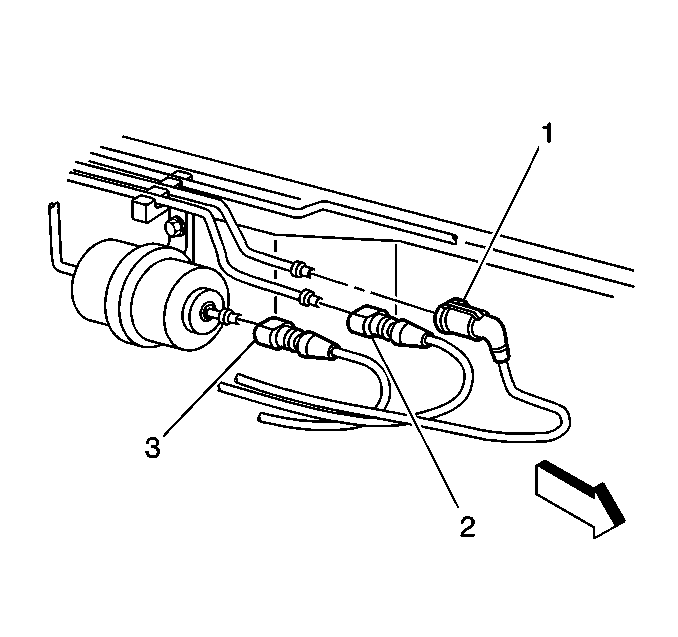
Fuel Hose/Pipes Assembly Replacement 4-Door Utility (Chassis - Tank)
Removal Procedure
- Remove the fuel tank. Refer to Fuel Tank Replacement .
- Clean the fuel pipes and filter area in order to prevent fuel system contamination.
- If replacing the fuel feed pipe, disconnect the fuel feed pipe (3) from the fuel filter inlet. Refer to Plastic Collar Quick Connect Fitting Service .
- If replacing the fuel return pipe, disconnect the fuel return pipe (2) near the fuel filter. Refer to Plastic Collar Quick Connect Fitting Service .
- Cap the fuel pipes in order to prevent contamination of the fuel system.
- If replacing the fuel feed pipe, remove the wiring harness retaining straps (1) from the fuel feed pipe. Note the retaining strap locations for installation.
- Disconnect the fuel pipe(s) from the retaining clips (1) on the chassis.
- Remove the fuel pipe(s).
Installation Procedure
- Position the fuel pipe(s) on the chassis.
- Connect the fuel pipes to the retaining clips (1) on the chassis.
- If replacing the fuel feed pipe, install the new wiring harness retaining straps (1) to the fuel feed pipe as noted during removal.
- Remove the caps from the fuel pipes.
- If replacing the fuel return pipe, connect the fuel return pipe (2) near the fuel filter. Refer to Plastic Collar Quick Connect Fitting Service .
- If replacing the fuel feed pipe, connect the fuel feed pipe (3) to the fuel filter inlet. Refer to Plastic Collar Quick Connect Fitting Service .
- Install the fuel tank. Refer to Fuel Tank Replacement .
Notice: Do not attempt to straighten any kinked nylon fuel lines. Replace any kinked nylon fuel feed or return pipes in order to prevent damage to the vehicle.
