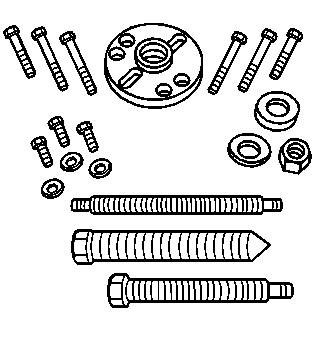
Tools Required
J 23523-F Balancer
Remover and Installer
Removal Procedure
- Disconnect the negative battery cable. Refer to
Battery Negative Cable Disconnection and Connection
in Engine Electrical.
- Remove the fan shroud assembly. Refer to
Fan Shroud Replacement
in Engine Cooling.
- Remove the drive belt. Refer to
Drive Belt Replacement
.
Notice: To prevent damage to the end of the crankshaft when using a crankshaft
balancer removal tool install a bolt in the crankshaft. Use a shorter bolt
with the same threads as the crankshaft balancer bolt. This bolt will allow
a place for the tool to push against. The shorter bolt is to keep from going
past the threads in the crankshaft and damaging the crankshaft threads.
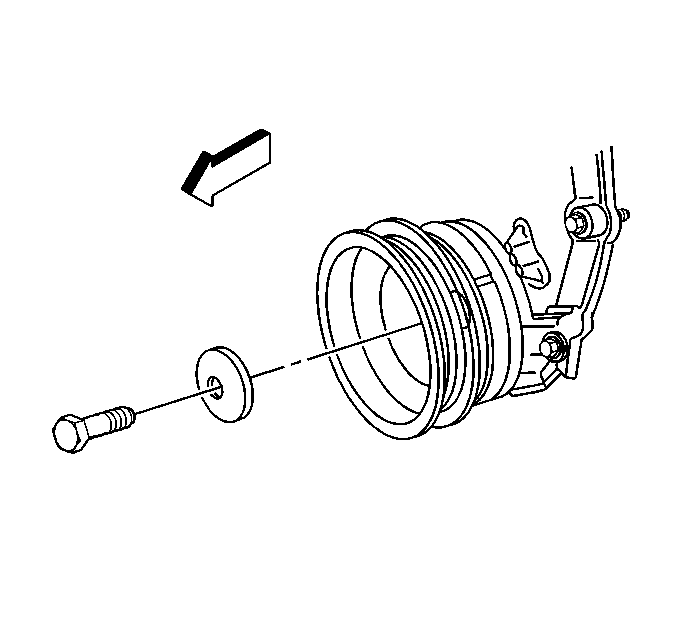
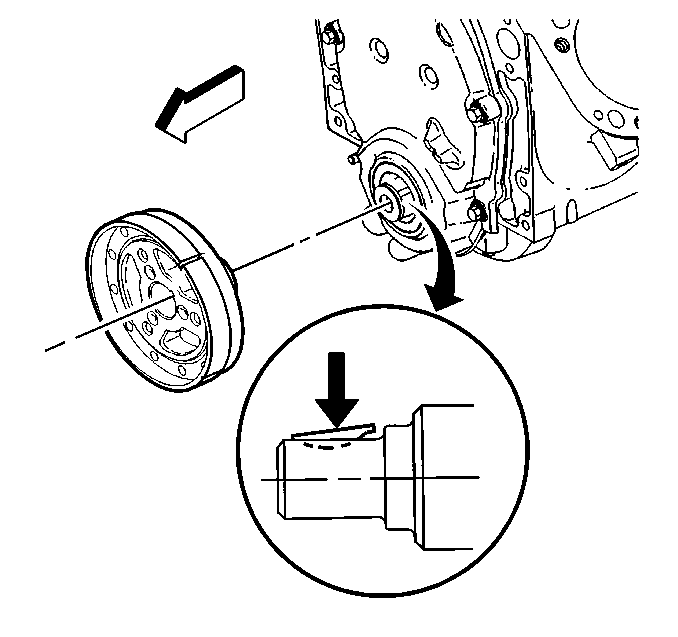
- Remove the crankshaft balancer bolt and washer.
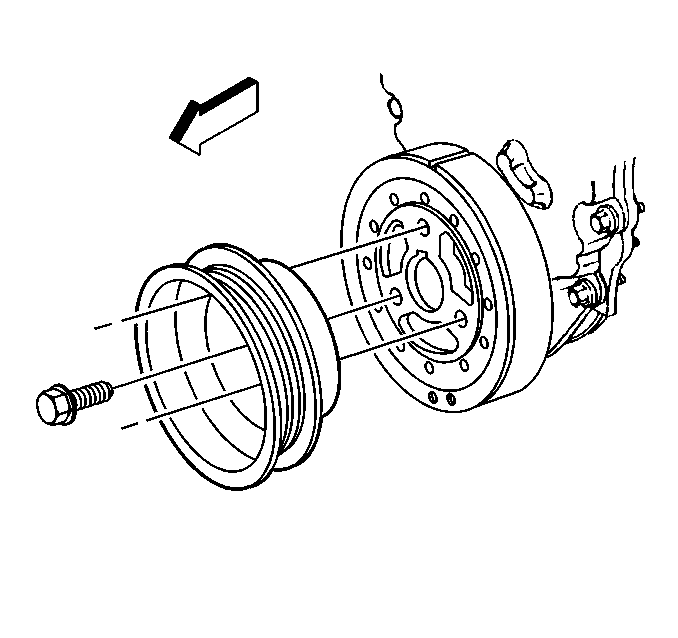
- Remove the bolts and the
crankshaft pulley.
Notice: Use the correct fastener in the correct location. Replacement fasteners
must be the correct part number for that application. Fasteners requiring
replacement or fasteners requiring the use of thread locking compound or sealant
are identified in the service procedure. Do not use paints, lubricants, or
corrosion inhibitors on fasteners or fastener joint surfaces unless specified.
These coatings affect fastener torque and joint clamping force and may damage
the fastener. Use the correct tightening sequence and specifications when
installing fasteners in order to avoid damage to parts and systems.
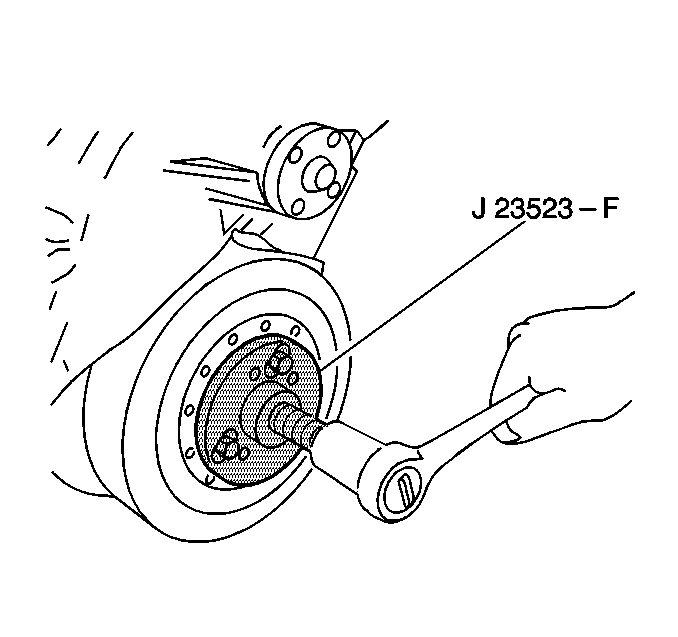
- Use the J 23523-F
in order to remove the crankshaft
balancer.
| 6.1. | Install the J 23523-F
plate and bolts onto the crankshaft balancer. |
Tighten
Tighten the bolts to 25 N·m (18 lb ft).
| 6.2. | Install the J 23523-F
forcing screw into the plate. |
| 6.3. | Rotate the J 23523-F
forcing screw clockwise in order to remove the crankshaft balancer. |
- Remove theJ 23523-F
from the crankshaft balancer.
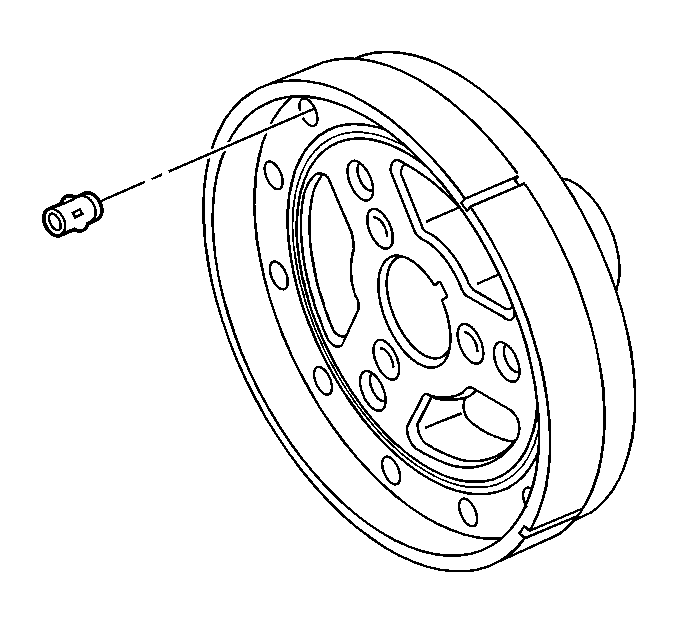
- Note the position and
length of any front groove pins (crankshaft balancer) (if applicable).
- Clean the crankshaft balancer
in cleaning solvent.
- Dry the crankshaft balancer with compressed air.
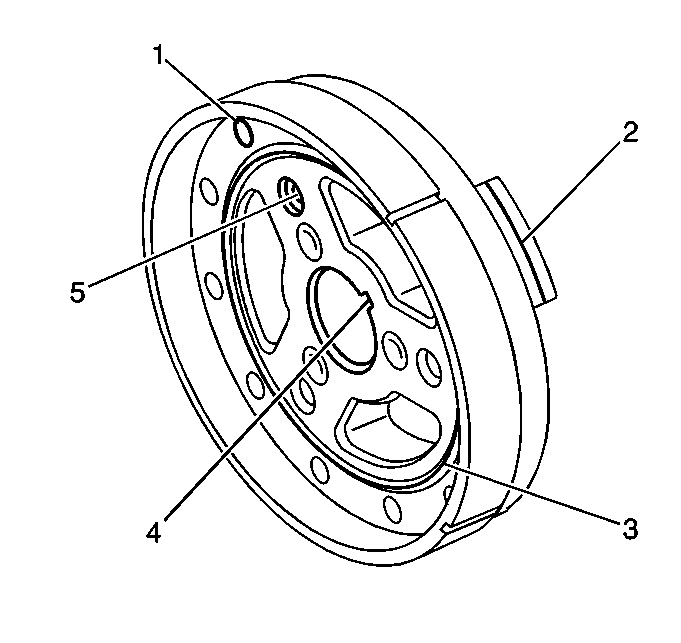
- Inspect the crankshaft balancer for the following:
| • | Loose or improperly installed front groove pin (1) (crankshaft
balancer) |
| • | A properly installed front groove pin should be installed until flush
or below flush with the face of the crankshaft balancer. |
| | Important: A crankshaft front oil sealing surface with excessive scoring, grooves,
rust, or other damage must be replaced.
|
| • | Worn, grooved, or damaged crankshaft front oil sealing surface (2) |
| • | Minor imperfections on the crankshaft balancer crankshaft front oil
seal surface may be removed with a polishing compound or fine grade emery
cloth. |
| • | Worn, chunking, or deteriorated rubber (3) between the hub and
the outer ring |
| • | Worn or damaged keyway (4) |
| • | Worn or damaged bolt hole threads (5) |
Installation Procedure
- Apply a small amount of
grease to the crankshaft front cover oil seal sealing surface if reusing the
seal.
Look to ensure that the front groove pin (crankshaft balancer) is installed
in the proper location (if applicable).
The length and location of the pins must be the same as the original
length and location.
Notice: The inertial weight section of the crankshaft balancer is
assembled to the hub with a rubber type material. The correct installation
procedures (with the proper tool) must be followed or movement of the inertial
weight section of the hub will destroy the tuning of the crankshaft balancer.
- Apply a small amount of adhesive GM P/N 12346141 or equivalent
onto the crankshaft balancer keyway in order to seal the crankshaft balancer
keyway and crankshaft joint.
- Align the keyway of the crankshaft balancer with the crankshaft
balancer key.
- Install the crankshaft balancer onto the end of the crankshaft.
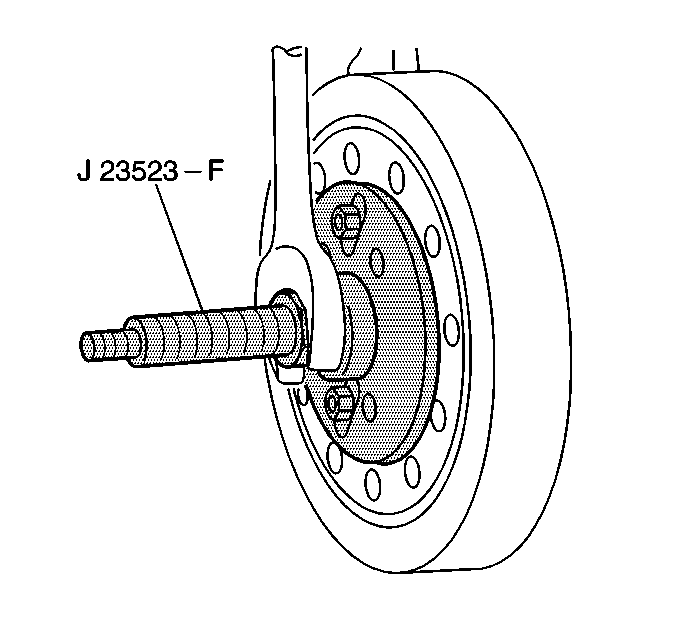
- Use the J 23523-F
in order to press the crankshaft balancer
onto the crankshaft.
| 5.1. | Install theJ 23523-F
plate and bolts onto the front of the crankshaft balancer. |
Tighten
Tighten the J 23523-F
plate
bolts to 25 N·m (18 lb ft).
| 5.2. | Install the J 23523-F
screw into the end for the crankshaft. |
| 5.3. | Install the J 23523-F
bearing, the washer, and the nut onto the screw. |
| 5.4. | Rotate the J 23523-F
nut clockwise until the crankshaft balancer hub is completely seated
against the crankshaft position sensor reluctor ring. |
- Remove the J 23523-F
.
Notice: Use the correct fastener in the correct location. Replacement fasteners
must be the correct part number for that application. Fasteners requiring
replacement or fasteners requiring the use of thread locking compound or sealant
are identified in the service procedure. Do not use paints, lubricants, or
corrosion inhibitors on fasteners or fastener joint surfaces unless specified.
These coatings affect fastener torque and joint clamping force and may damage
the fastener. Use the correct tightening sequence and specifications when
installing fasteners in order to avoid damage to parts and systems.
- Install the crankshaft
pulley and bolts.
Tighten
Tighten the crankshaft pulley bolts to 58 N·m (43 lb ft).
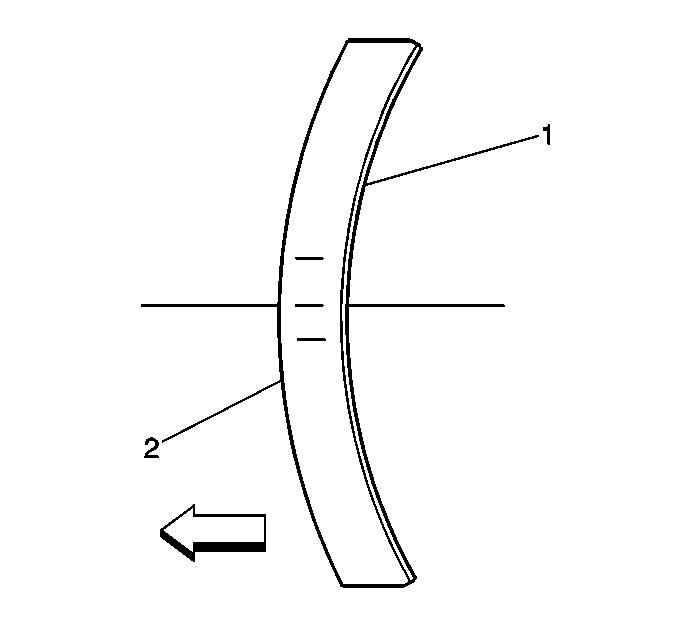
- Ensure that the crown of the crankshaft balancer washer (2) is faced
away from the engine.
- Install the crankshaft
balancer washer and the bolt.
Tighten
Tighten the crankshaft balancer bolt to 95 N·m (70 lb ft).
- Install the drive belt. Refer to
Drive Belt Replacement
.
- Install the fan shroud assembly. Refer to
Fan Shroud Replacement
in Engine Cooling.
- Connect the negative battery cable. Refer to
Battery Negative Cable Disconnection and Connection
in Engine Electrical.
