For 1990-2009 cars only
Cruise Control Cable Replacement 2.2L
Removal Procedure
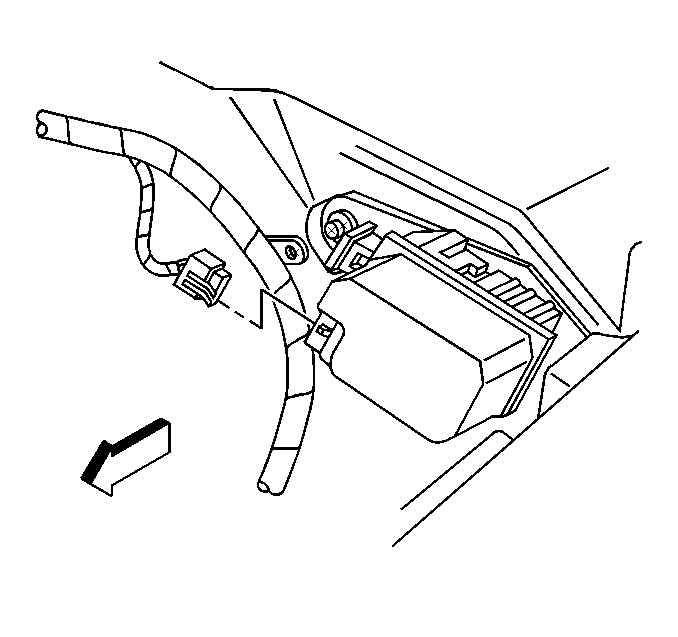
- Disconnect the electrical connector from the cruise control servo module.
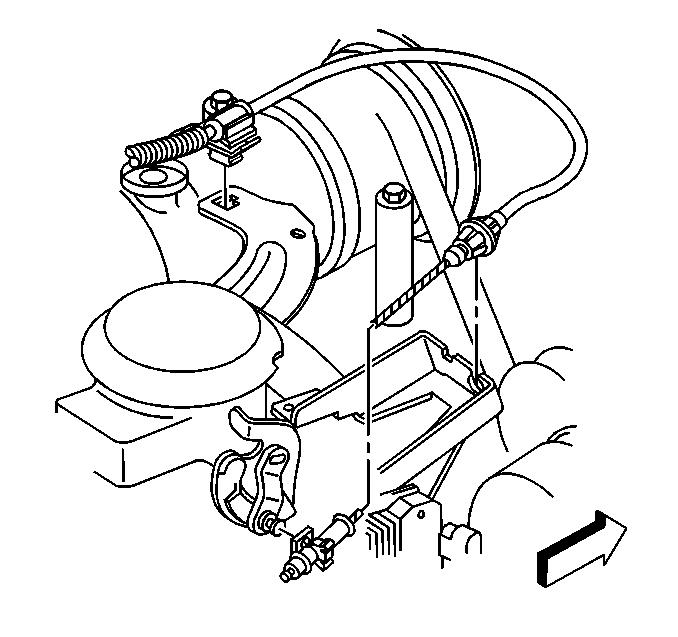
- Disconnect the cruise control cable engine-end fitting (1) from the slot in the engine throttle bracket.
- In order to release the tension on the cruise control adjuster, rotate the cam lever. Disconnect the cruise control cable adjuster (3) from the nail head on the throttle cam lever.
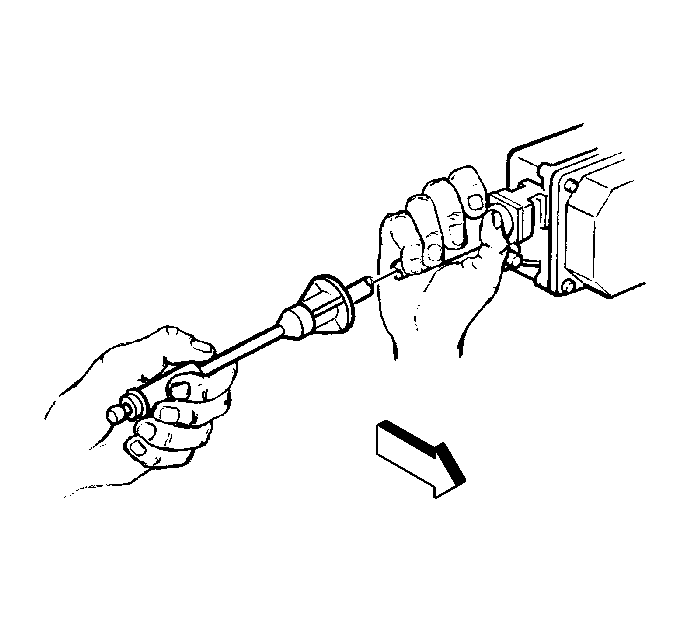
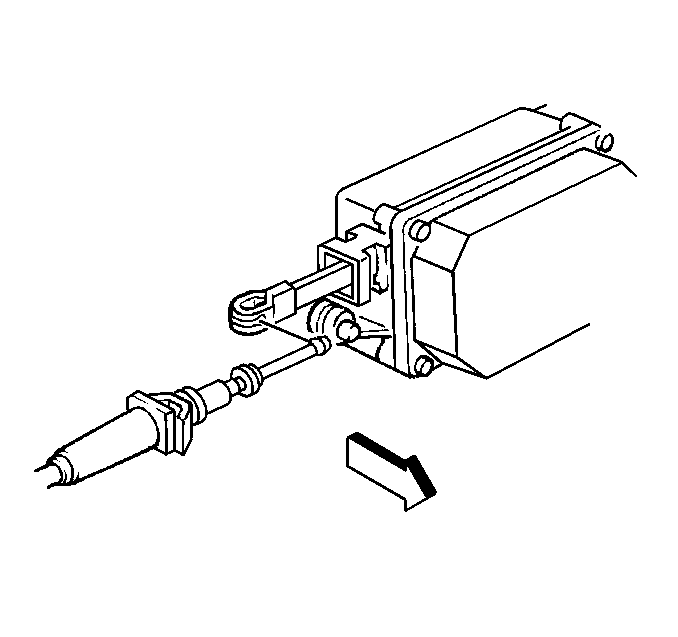
- Disconnect the cruise control cable fitting from the cruise control module by carefully prying out the fitting using a flat-bladed tool.
- Disconnect the cruise control cable bead from the fitting on the cruise control module ribbon.
- Remove the cruise control cable from the vehicle.

Installation Procedure
- Connect the cruise control cable to the vehicle.
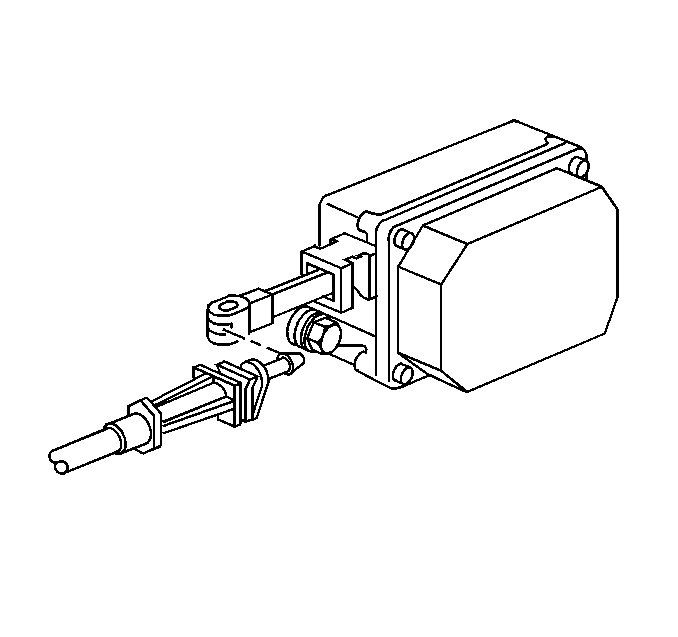
- Connect the cruise control cable bead to the fitting on the cruise control module ribbon.
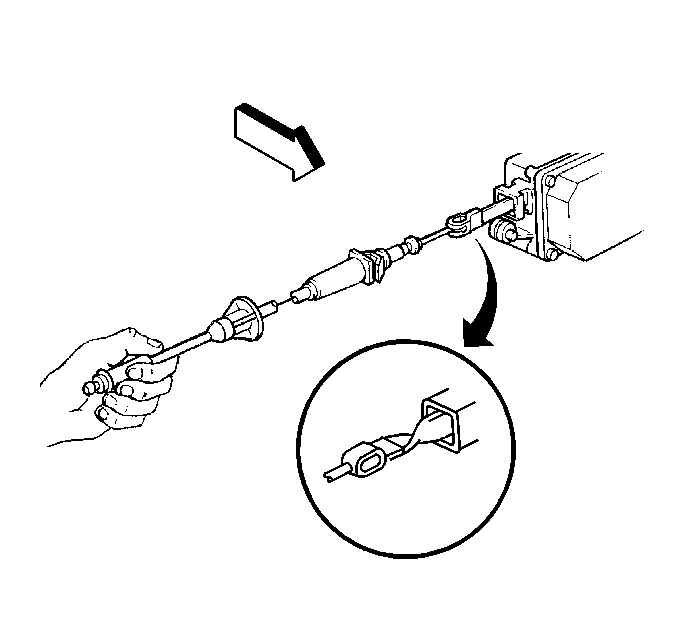
- Pull the cruise control cable until the cable is taut.
- Turn the cruise control cable at the engine-end fitting in order to straighten the cruise control module ribbon, as needed.
- Slide the cruise control cable conduit over the ribbon.
- Install the tangs to the cruise control module housing.
- Ensure the cruise control cable is routed in the original position.
- Rotate the throttle cam lever in order to install the cruise control adjuster (3) onto the nail head on the throttle cam lever.
- Pull the cable conduit toward the right side of the vehicle. Thread the cable through the slot in the round hole of the cable bracket.
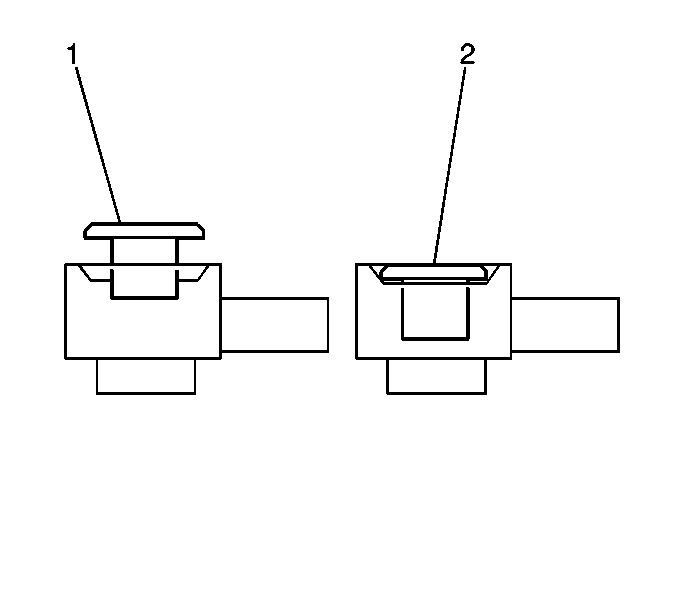
- Push the cable adjuster locking button into the locked position.
- Push the cable adjuster plunger into the locked position (2). Ensure that the white paint area is no longer visible.
- Connect the electrical connector to the cruise control servo module.
The ribbon must be flat and vertical.
Ensure that the tangs snap securely into place.
Discard any cable with kinks or damage to the core wire.
Important: Secure all of the components of the accelerator and the cruise control cables as specified. Ensure that the throttle linkage operates freely without binding between the idle position and the wide open throttle.
| • | The lash should automatically be set at 0.0-1.0 mm (0.0-0.04 in) by the adjuster. |
| • | If an adjustment is required, refer to Cruise Control Cable Adjustment . |
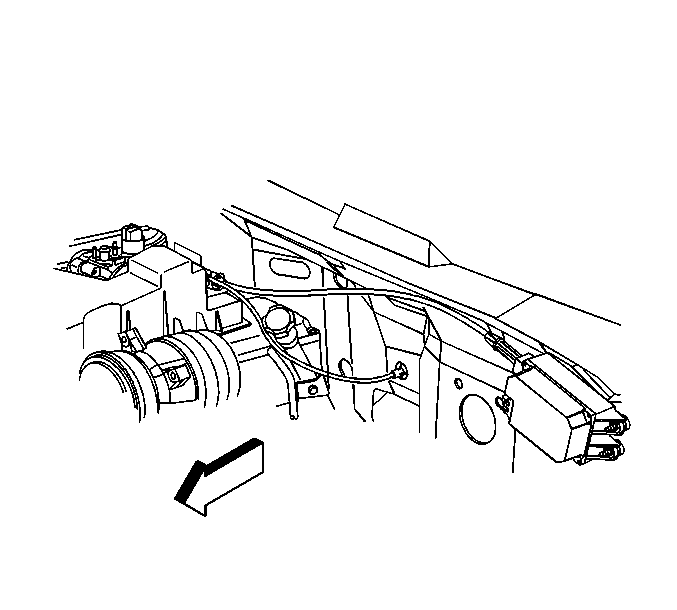
Cruise Control Cable Replacement 4.3L
Removal Procedure
- Disconnect the electrical connector from the cruise control servo module.
- Disconnect the cruise control cable locator clip from the outboard rectangular hole in the routing bracket at the left front corner of the engine.
- Disconnect the cruise control cable conduit fitting from the round hole in the engine cable bracket.
- Disconnect the cruise control cable engine-end fitting from the nail-head stud on the throttle lever.
- Disconnect the cruise control cable fitting from the cruise control module.
- Disconnect the cruise control cable bead from the fitting on the cruise control module ribbon.
- Remove the cruise control cable from the vehicle.
Installation Procedure
- Install the cruise control cable to the vehicle.
- Connect the cruise control cable bead to the fitting on the cruise control module ribbon.
- Pull the cruise control cable until the cable is taut.
- Turn the cruise control cable at the engine-end fitting in order to straighten the cruise control module ribbon, as needed.
- Slide the cruise control cable conduit over the ribbon.
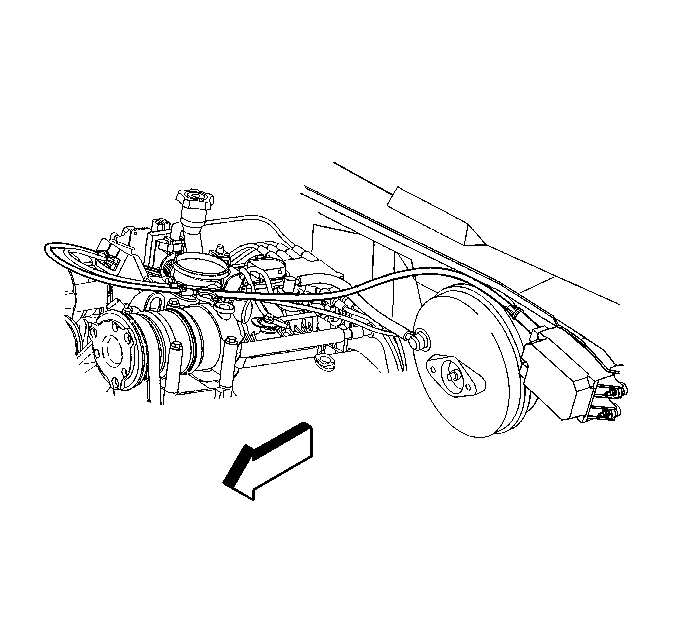
- Route the cable over the brake booster, along the left side rocker cover, under the preplenum air inlet tube, and above the radiator inlet hose.
- Snap the cruise control cable engine-end fitting over the nail head stud on the throttle cam lever.
- Connect the cruise control cable conduit fitting to the round hole in the engine cable bracket.
- Connect the cruise control cable locator clip to the outboard rectangular hole in the routing bracket at the left front corner of the engine.
- Push the cable adjuster plunger into the locked position (2). Ensure that the white paint area is no longer visible.
- Connect the electrical connection to the cruise control servo module.
- Test the systems operation.
Ensure that the ribbon is flat and vertical.
| 5.1. | Install the tangs to the cruise control module housing. |
| 5.2. | Ensure that the tangs snap securely into place. |
Ensure that the tabs snap securely into the hole.
| 9.1. | Route the cruise control cable above the accelerator cable. |
| 9.2. | Ensure that the clip snaps securely into place. |
Important: Secure all of the components of the accelerator and the cruise control cables as specified. Ensure that the throttle linkage operates freely without binding between the idle position and the wide open throttle.
| • | The lash should automatically be set at 0.0-1.0 mm (0.0-0.04 in) by the adjuster. |
| • | If an adjustment is required, refer to Cruise Control Cable Adjustment . |
