Tools Required
J 35621-B Rear Main Seal Installer
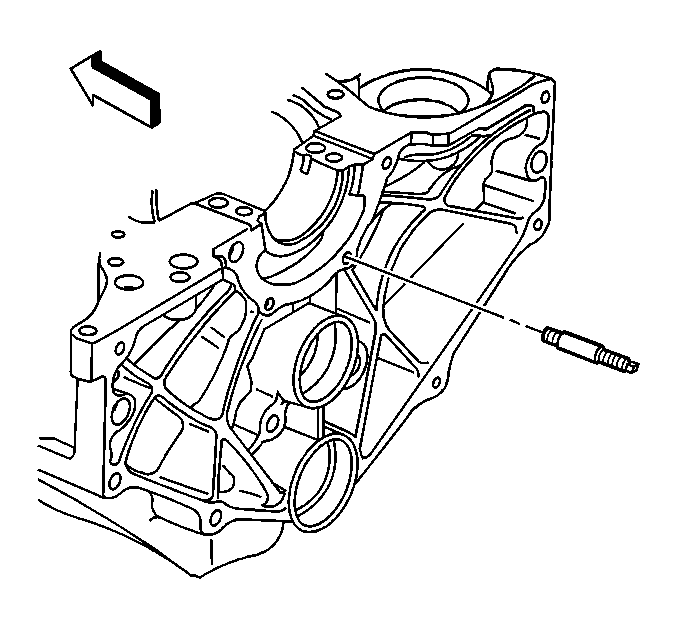
- Install the crankshaft rear oil seal housing retainer stud.
- Install the NEW crankshaft rear oil seal housing gasket.
- Install the crankshaft rear oil housing onto the crankshaft rear oil seal housing retainer stud.
- Install the crankshaft rear oil seal housing nut and bolts.
- Inspect the J 35621-B flange for imperfections that may damage the crankshaft rear oil seal. Minor imperfections may be removed with a fine grade emery cloth.
- Clean the crankshaft sealing surface with a clean, lint free towel. Inspect the lead-in edge of the crankshaft for burrs or sharp edges that could damage the rear main oil seal. Remove the burrs or sharp edges with a fine grade emery cloth before proceeding.
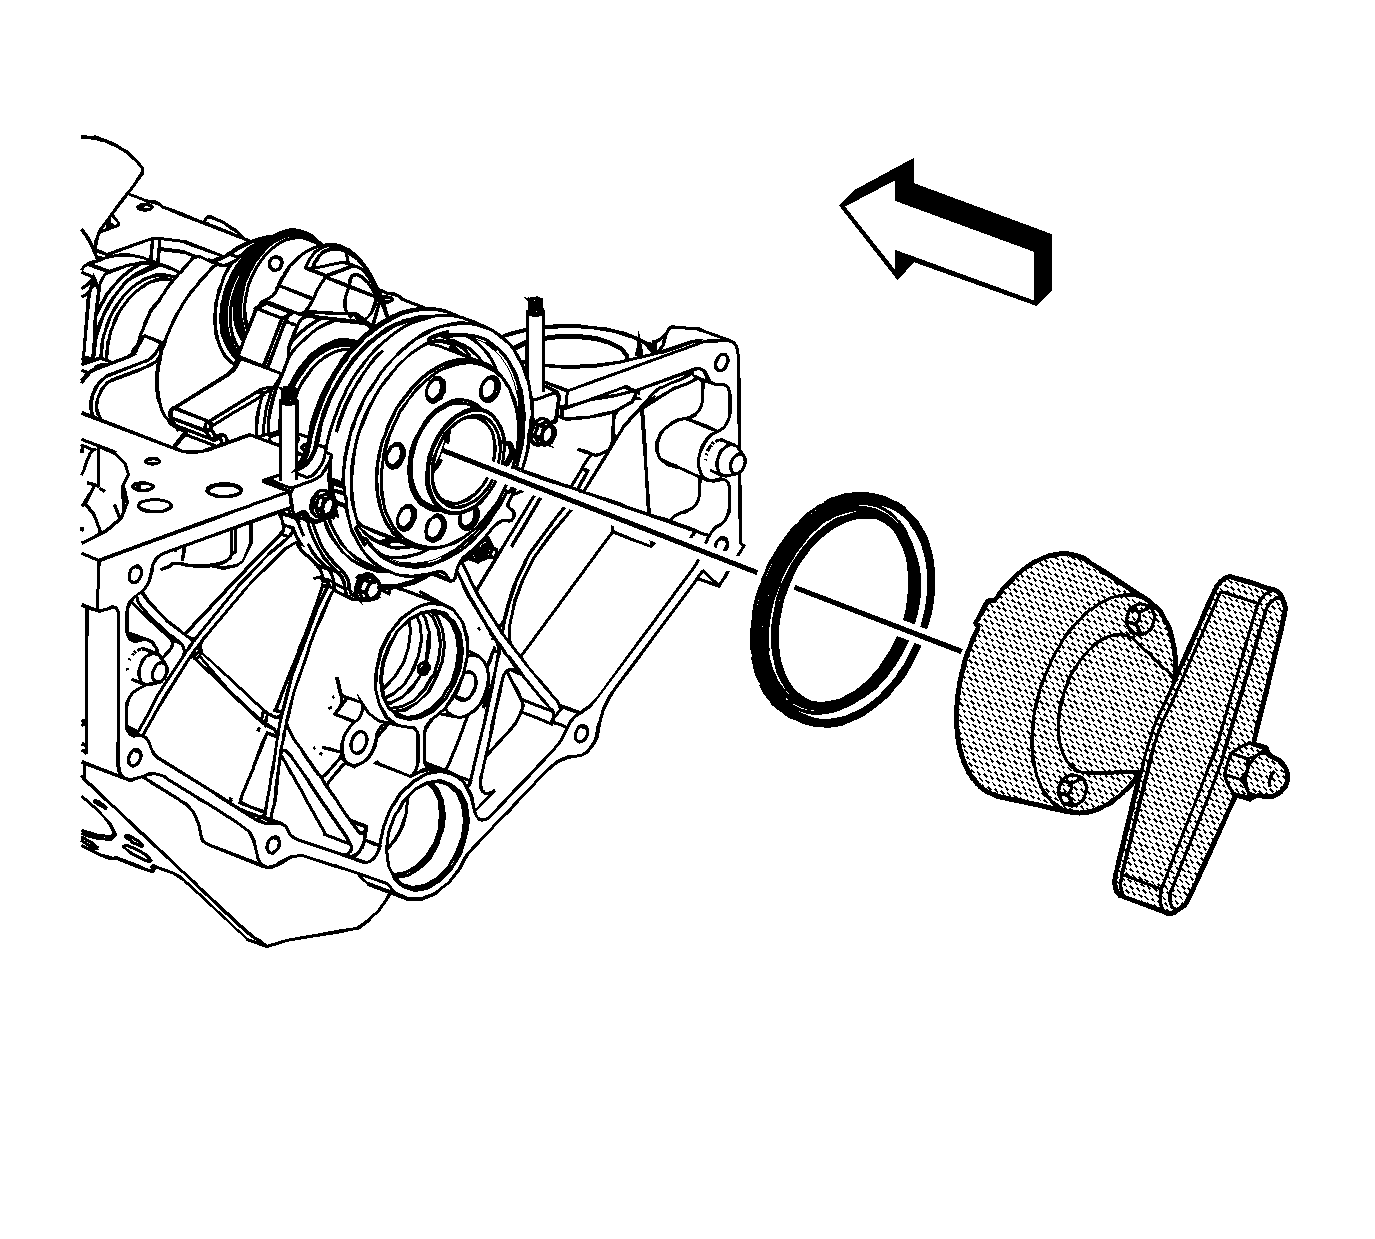
- Carefully remove the protection sleeve from the NEW crankshaft rear oil seal.
- Install the crankshaft rear oil seal onto the J 35621-B .
- Install the J 35621-B onto the rear of the crankshaft and hand tighten the tool bolts until snug.
- Install the crankshaft rear oil seal onto the crankshaft and into the crankshaft rear oil seal housing.
- Remove the J 35621-B from the crankshaft.
- Wipe off any excess engine oil with a clean rag.
Notice: Use the correct fastener in the correct location. Replacement fasteners must be the correct part number for that application. Fasteners requiring replacement or fasteners requiring the use of thread locking compound or sealant are identified in the service procedure. Do not use paints, lubricants, or corrosion inhibitors on fasteners or fastener joint surfaces unless specified. These coatings affect fastener torque and joint clamping force and may damage the fastener. Use the correct tightening sequence and specifications when installing fasteners in order to avoid damage to parts and systems.
Tighten
Tighten the crankshaft rear oil seal housing retainer stud to 6 N·m (53 lb in).
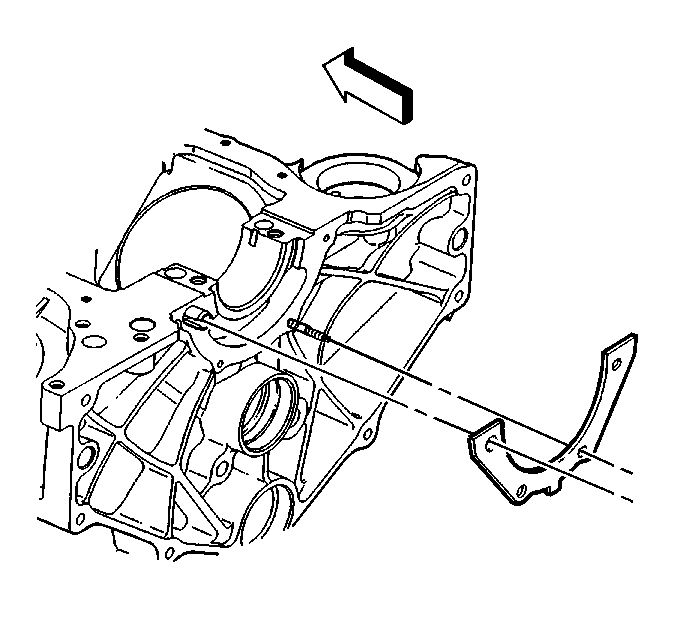
Important: Always use a NEW crankshaft rear oil seal housing gasket when installing the crankshaft rear oil seal housing.

Tighten
Tighten the crankshaft rear oil seal housing nut and bolts to 12 N·m (106 lb in).
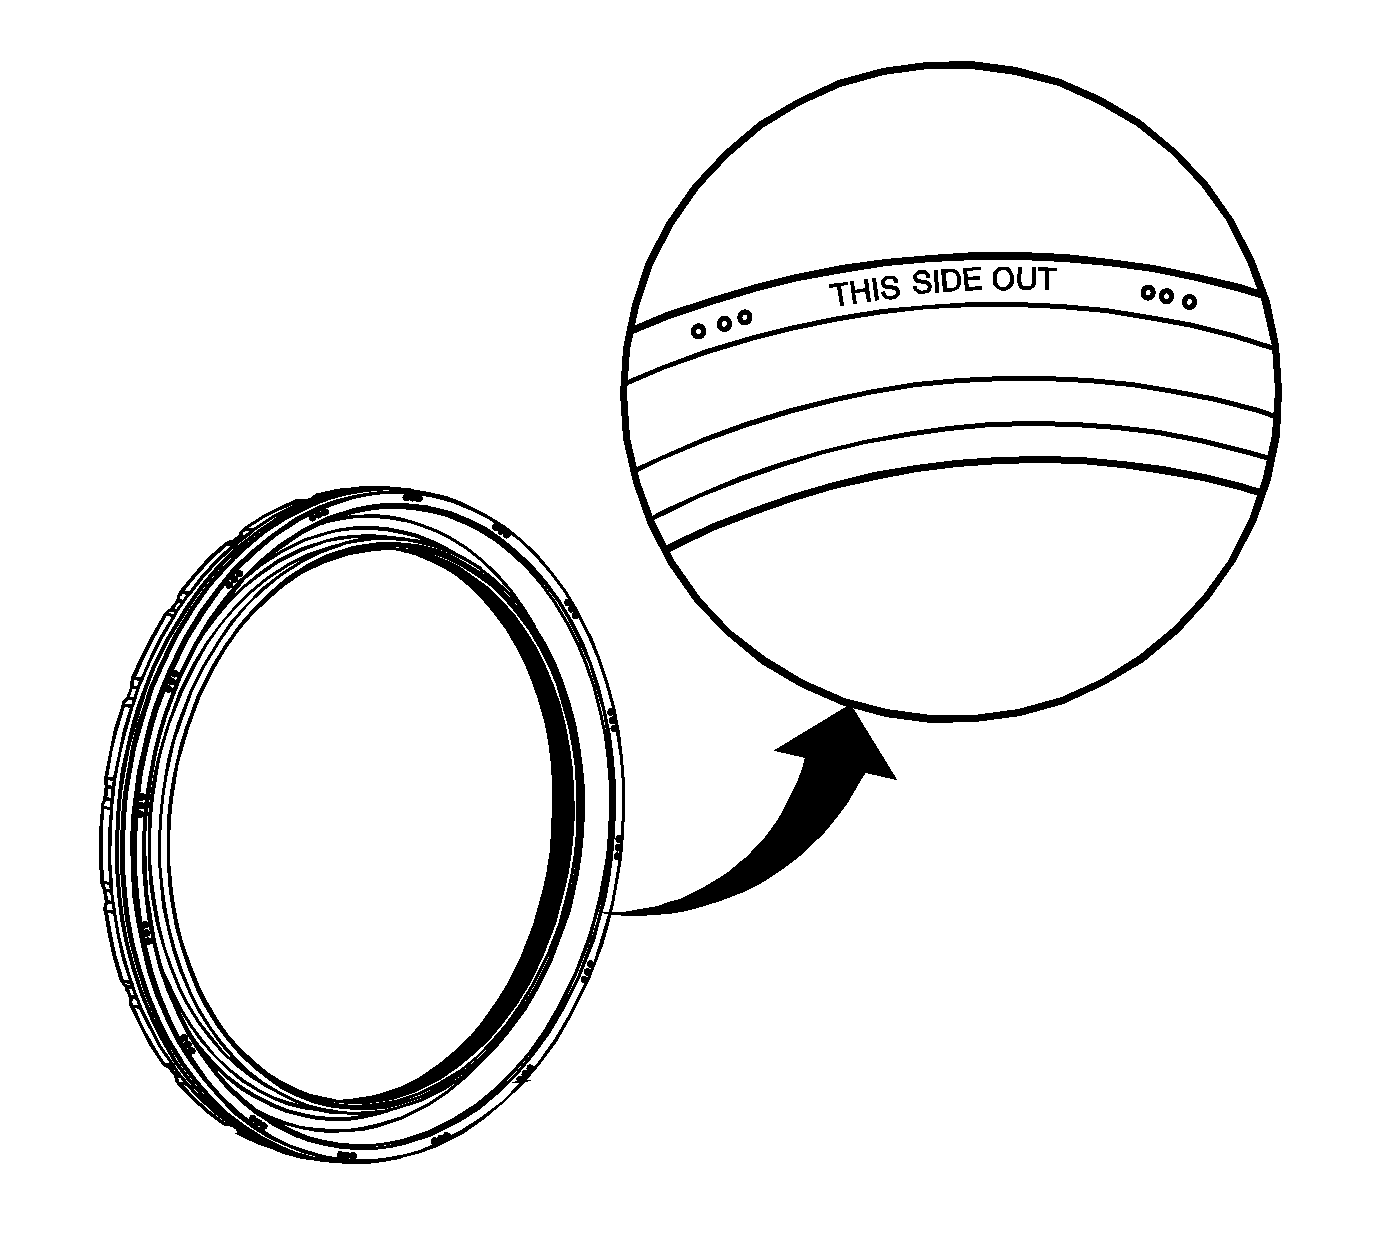
Important: Notice the direction of the rear oil seal. The new design seal is a reverse style as opposed to what has been used in the past. "THIS SIDE OUT" has been stamped into the seal as shown in the graphic.
Important: Do not apply or use any oil lubrication on the crankshaft rear oil seal or seal installer. Do not touch the sealing lip of the oil seal once the protective sleeve is removed.
Notice: Proper alignment of the crankshaft rear oil seal is critical. Install the crankshaft rear oil seal near to flush and square to the crankshaft rear oil seal housing. Failing to do so may cause the crankshaft rear oil seal or the crankshaft rear oil seal installation tool to fail.
| 10.1. | Turn the J 35621-B wing nut clockwise until the crankshaft rear oil seal is installed near to flush and square to the crankshaft rear oil seal housing. Increased resistance will be felt when the crankshaft rear oil seal has reached the bottom of the crankshaft rear oil seal housing bore. |
| 10.2. | Turn the J 35621-B wing nut counterclockwise to release the J 35621-B from the crankshaft rear oil seal. |
