Removal Procedure
Important: The oil pan requires removal in order to remove the engine front cover. For a RWD vehicle remove the engine. Refer to Engine Replacement and start on step six.
- Disconnect the battery negative cable. Refer to Battery Replacement in Engine Electrical.
- Remove the air cleaner assembly. Refer to Air Cleaner Assembly Replacement in Engine Controls.
- Drain the cooling system. Refer to Cooling System Draining and Filling in Engine Cooling.
- Remove the condenser. if equipped. Refer to Condenser Replacement in HVAC Systems with A/C - Manual.
- Remove the radiator. Refer to Radiator Replacement in Engine Cooling.
- Remove the valve rocker arm covers. Refer to Valve Rocker Arm Cover Replacement .
- Remove the intake manifold. Refer to Intake Manifold Replacement .
- Remove the valve lifters and the valve pushrods. Refer to Valve Lifter Replacement .
- Remove the engine front cover. Refer to Engine Front Cover Replacement .
- Remove the crankshaft position sensor reluctor ring. Refer to Crankshaft Position Sensor Reluctor Ring Replacement .
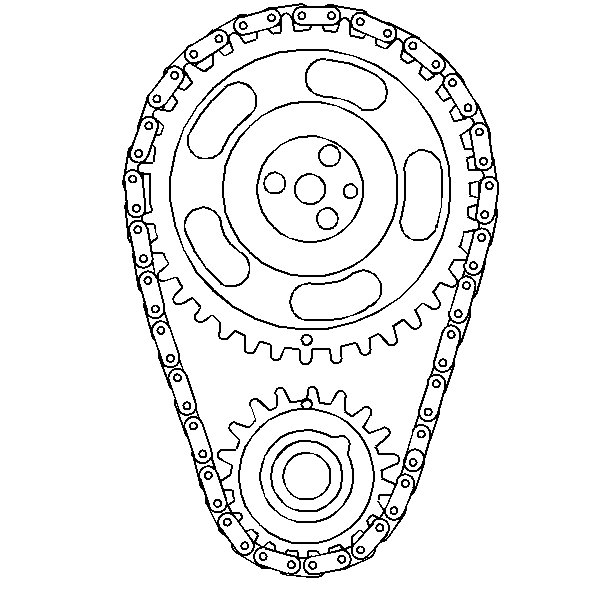
- Remove the camshaft timing chain and the camshaft sprocket. Refer to Timing Chain and Sprocket Replacement .
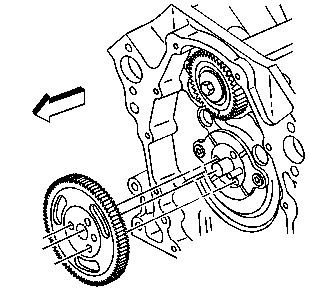
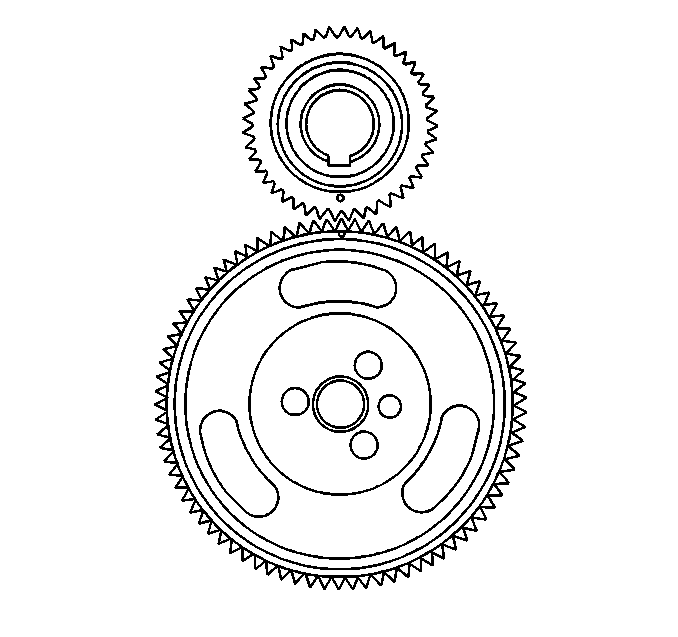
- Remove the balance shaft drive gear.
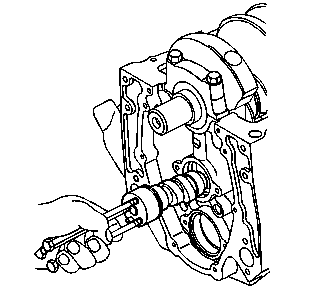
- Remove the camshaft. Refer to Camshaft Removal .
Installation Procedure
- Install the camshaft into the engine block. Refer to Camshaft Installation .
- Position the drive gear onto the camshaft.
- Line up the timing marks on the camshaft sprocket and the crankshaft sprocket dot to dot. When these dots are lined up dot to dot, the number four cylinder is at the top dead center of its compression stroke.
- Install the camshaft timing chain and camshaft sprocket. Refer to Timing Chain and Sprocket Replacement .
- Install the crankshaft position sensor reluctor ring. Refer to Crankshaft Position Sensor Reluctor Ring Replacement .
- Install the valve lifters and the valve pushrods. Refer to Valve Lifter Replacement .
- Install the engine front cover. Refer to Engine Front Cover Replacement .
- Install the intake manifold. Refer to Intake Manifold Replacement .
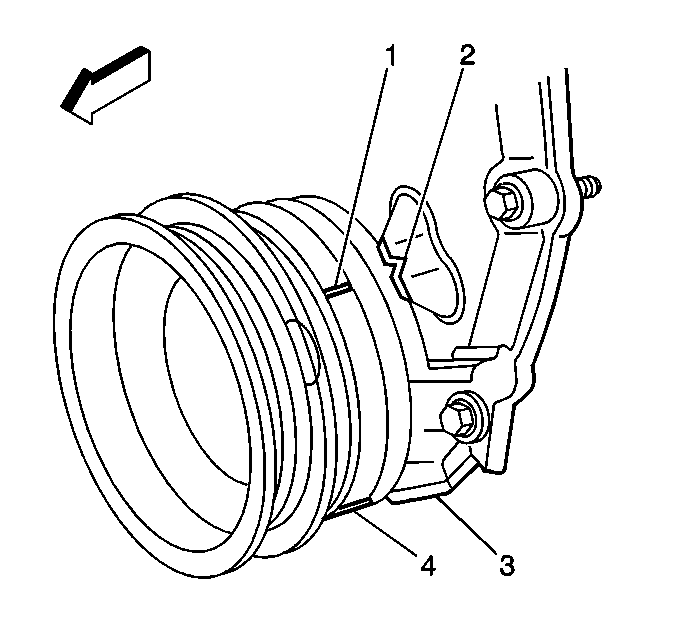
- Rotate the engine to align the crankshaft balancer marks (1) and (4) with the engine front cover marks (2) and (3) for cylinder number one top dead center.
- Install the distributor. Refer to Distributor Replacement in Engine Electrical.
- Install the valve rocker arm covers. Refer to Valve Rocker Arm Cover Replacement .
- Install the condenser, if equipped. Refer to Condenser Replacement in HVAC Systems with A/C - Manual.
- Install the radiator. Refer to Radiator Replacement in Engine Cooling.
- Fill the engine cooling system. Refer to Cooling System Draining and Filling in Engine Cooling.
- Recharge the air conditioning system, if equipped. Refer to Refrigerant Recovery and Recharging in HVAC Systems with A/C - Manual.
- Install the air cleaner assembly. Refer to Air Cleaner Assembly Replacement in Engine Controls.
- Connect the battery negative cable. Refer to Battery Replacement in Engine Electrical.
Important: Whenever a new camshaft is installed, do the following procedures:
• Change the engine oil. • Change the engine oil filter. • Add GM Engine Oil Supplement GM P/N 1052367 or the
equivalent to the engine oil.
| • | Ensure that the timing marks align. |
| • | The number four cylinder will be at the top dead center of its compression stroke. |
Notice: Failure to properly align the crankshaft position sensor reluctor ring may result in component damage and effect OBD II system performance.
Important: Rotate the engine to align the crankshaft balancer marks with the front cover marks for cylinder number one top dead center. When the alignment marks on the camshaft sprocket and the crankshaft sprocket are aligned the engine is at cylinder number four top dead center,
