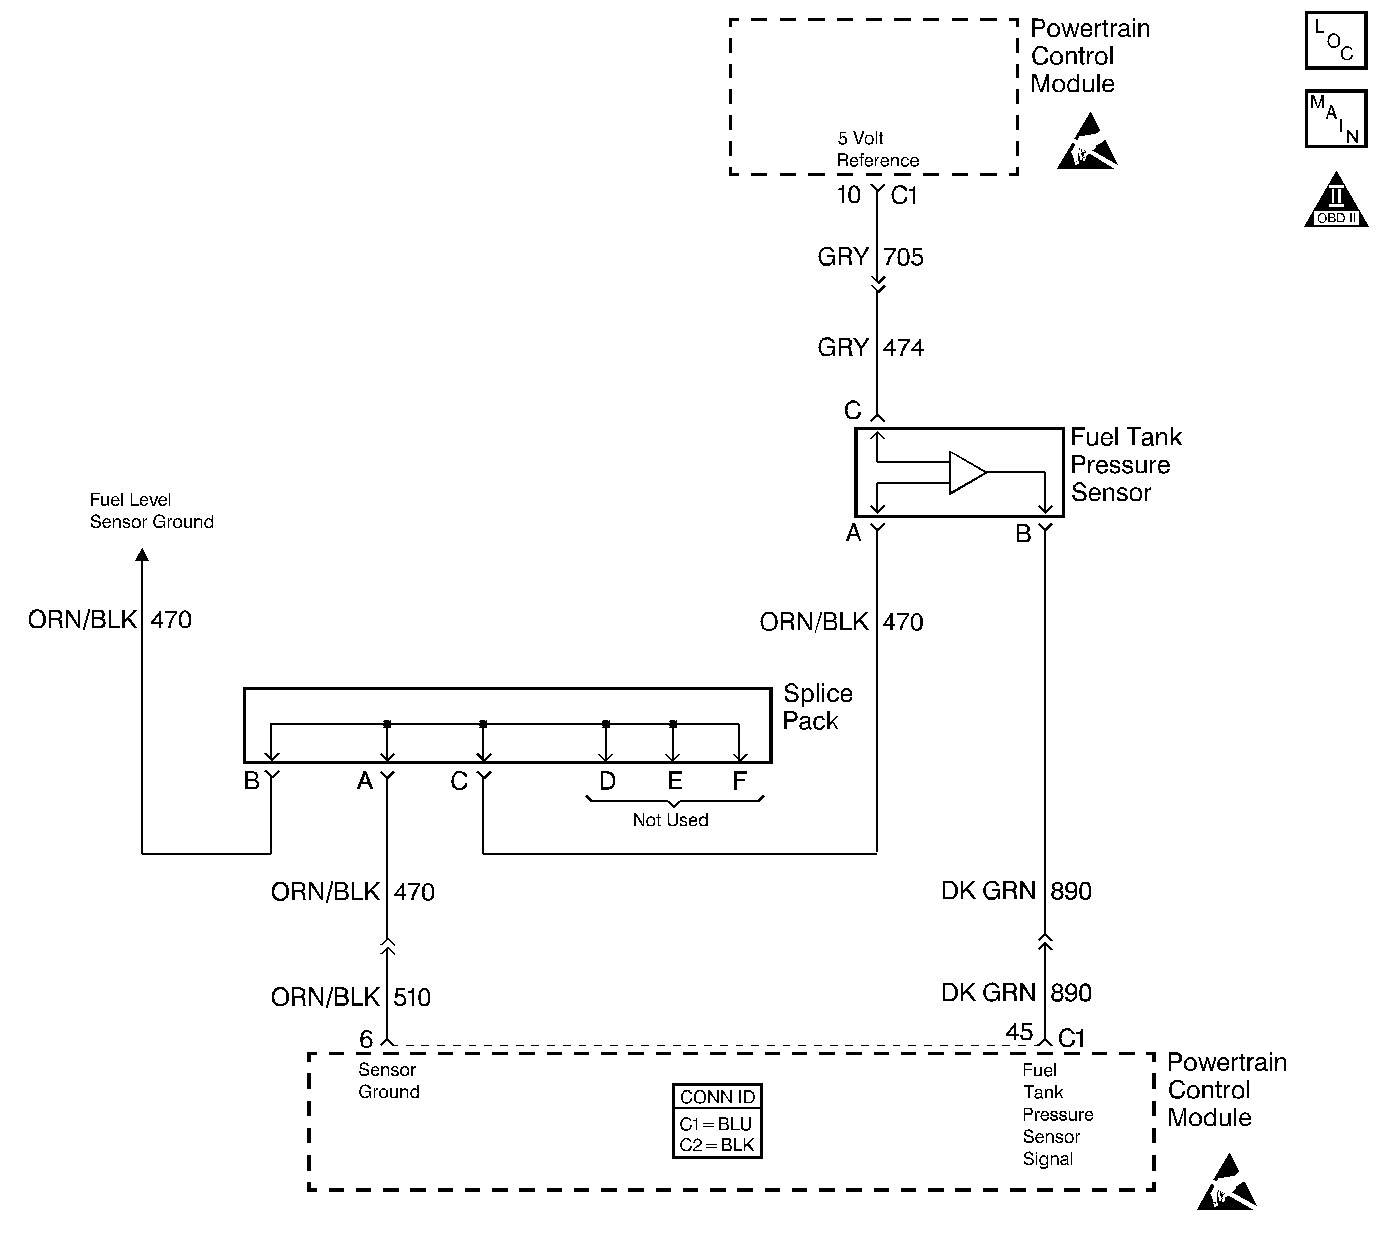
Circuit Description
The fuel tank pressure sensor is used in order to detect a vacuum decay or an excessive vacuum during the EVAP diagnostic routine. The fuel tank pressure sensor responds to the changes in the fuel tank pressure or vacuum. The signal voltage to the Powertrain Control Module (PCM) varies from a minimum of about 0.2 volts with pressure in the fuel tank to above 4.0 volts with a high vacuum in the fuel tank.
The fuel tank pressure display on the scan tool has an auto zero feature which occurs at each ignition cycle and is corrected according to the barometric pressure. Because of this, the fuel tank pressure may not accurately reflect the actual output of the sensor or the conditions within the fuel tank.
Conditions for Running the DTC
The engine is running.
Conditions for Setting the DTC
The fuel tank pressure sensor voltage is lower than 0.1 volt for more than 25 seconds.
Action Taken When the DTC Sets
| • | The malfunction indicator lamp (MIL) will illuminate. |
| • | The PCM will record the operating conditions at the time that the diagnostic fails. The Freeze Frame and Failure Records buffers will store this information. |
| • | A history DTC stores. |
Conditions for Clearing the MIL/DTC
| • | The malfunction indicator lamp (MIL) will turn OFF after 3 consecutive ignition cycles in which the diagnostic runs without a fault. |
| • | A history DTC will clear after 40 consecutive warm up cycles without a fault. |
| • | Use a scan tool to clear the DTCs. |
Diagnostic Aids
Check for the following conditions:
| • | Inspect the Control Module harness connectors for the following conditions: |
| - | Improper mating |
| - | Broken locks |
| - | Improperly formed |
| - | Damaged terminals |
| • | Inspect the wiring harness for damage. If the harness appears to be OK, observe the Fuel Tank Vacuum display on the scan tool while moving the connectors and the wiring harnesses related to the sensor. A change in the display will indicate the location of the fault. |
Refer to Evaporative Emission System Cleaning before starting repairs.
An intermittent may be caused by any of the following conditions:
| • | A poor connection |
| • | Rubbed through wire insulation |
| • | A broken wire inside the insulation |
Thoroughly check any circuitry that is suspected of causing the intermittent complaint. Refer to Intermittents and Poor Connections Diagnosis in Wiring Systems.
If a repair is necessary, refer to Wiring Repairs or Connector Repairs in Wiring Systems.
Test Description
-
The Powertrain OBD System Check prompts the technician to complete some basic checks and store the freeze frame and failure records data on the scan tool if applicable. This creates an electronic copy of the data taken when the malfunction occurred. The information is then stored in the scan tool for later reference.
-
A normal Fuel Tank Pressure sensor voltage output with no pressure or vacuum on the fuel system should be between 1.3 V and 1.7 V.
-
Replacement PCMs must be programmed and the Crankshaft Position System Variation Learn Procedure must be performed. Refer to the latest Techline information for PCM programming.
Step | Action | Value(s) | Yes | No |
|---|---|---|---|---|
Did you perform the Powertrain On-Board Diagnostic (OBD) System Check? | -- | Go to | ||
2 |
Does the scan tool display a fuel tank pressure sensor reading more than the specified value? | 0.2 V | ||
3 |
Is the fuel tank pressure sensor above the specified value? | 0.2 V | Go to Diagnostic Aids | |
4 |
Is the voltage near the specified value? | 5.0 V | ||
5 |
Was a repair necessary? | -- | ||
6 |
Important:: The Powertrain Control Module (PCM) uses a single 5.0 volt power supply to supply power to all the engine control components. If one component shorts its 5.0 volt reference circuit to ground or battery voltage, the other 5.0 volt reference circuits will also have a low or high voltage.
Was a repair necessary? | -- | ||
Is the voltage between the specified values? | 1.3-1.7V | |||
8 |
Was a repair necessary? | -- | ||
9 |
Was a repair necessary? | -- | ||
10 |
Was a repair necessary? | -- | ||
11 | Replace the fuel tank pressure sensor. Refer to Fuel Tank Pressure Sensor Replacement . Is the action complete? | -- | -- | |
|
Important:: The replacement PCM must be programmed. Refer to Powertrain Control Module Replacement/Programming . Replace the PCM. Is the action complete? | -- | -- | ||
13 |
Does the scan tool indicate that this diagnostic ran and passed? | -- | ||
14 | Check if any additional DTCs are set. Are any DTCs displayed that have not been diagnosed? | -- | Go to the applicable DTC table | System OK |
