For 1990-2009 cars only
Removal Procedure
- Remove the air cleaner outlet resonator. Refer to Air Cleaner Outlet Resonator Replacement .
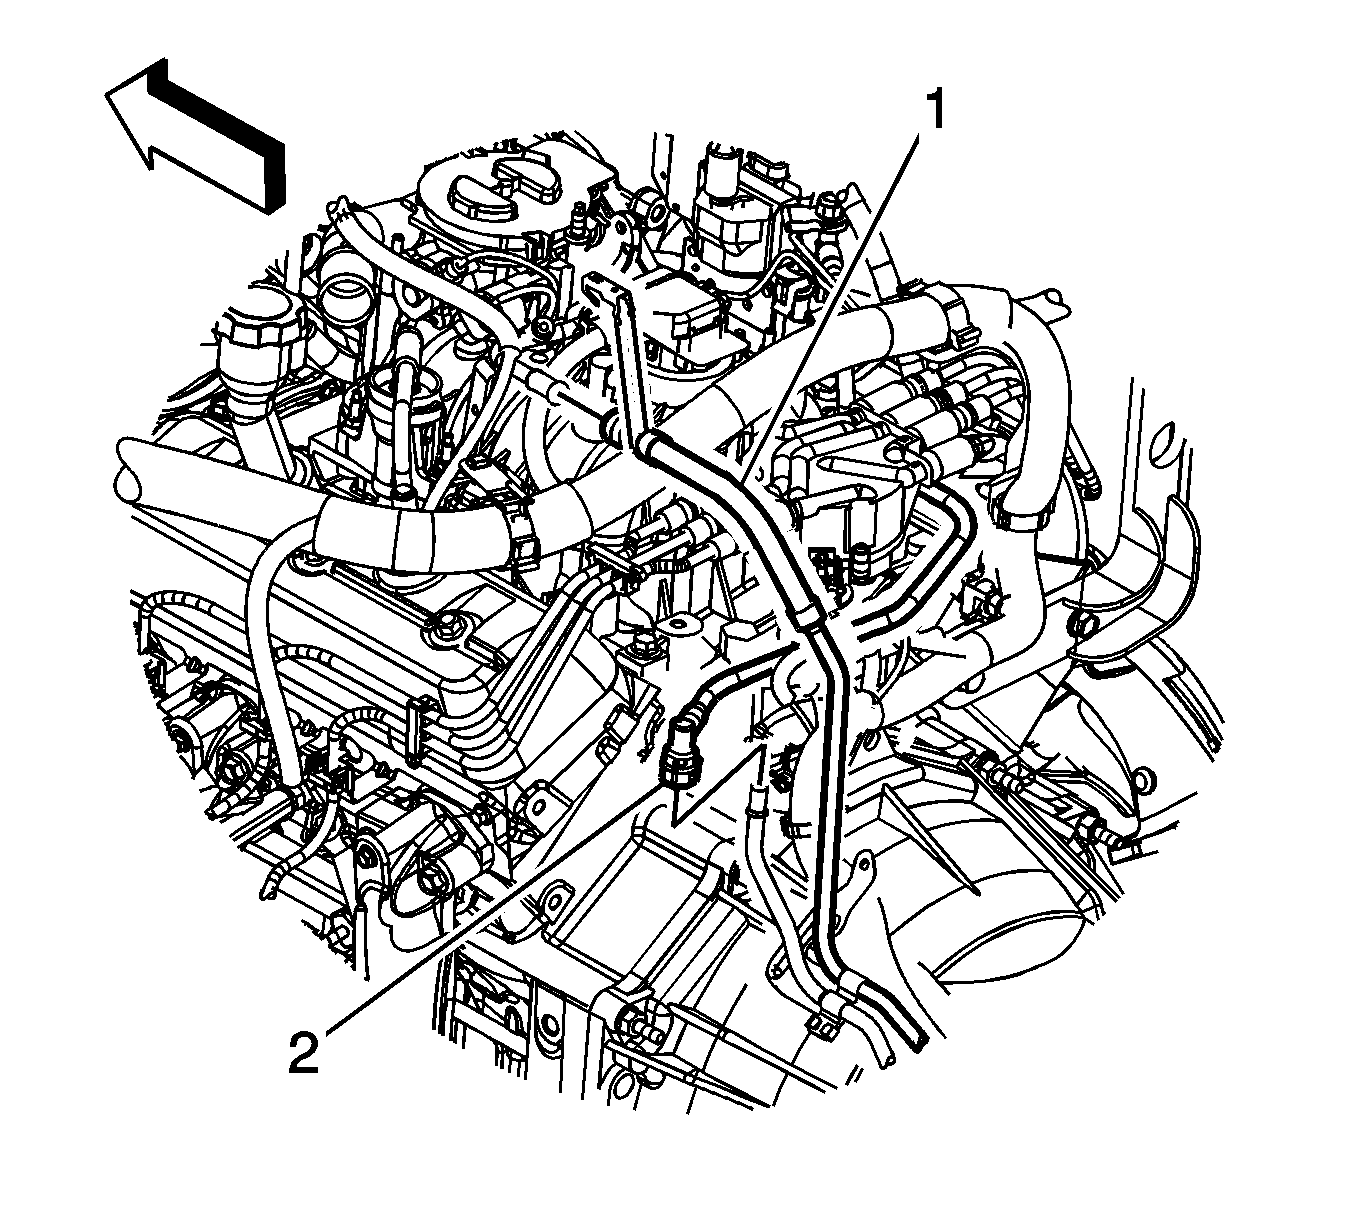
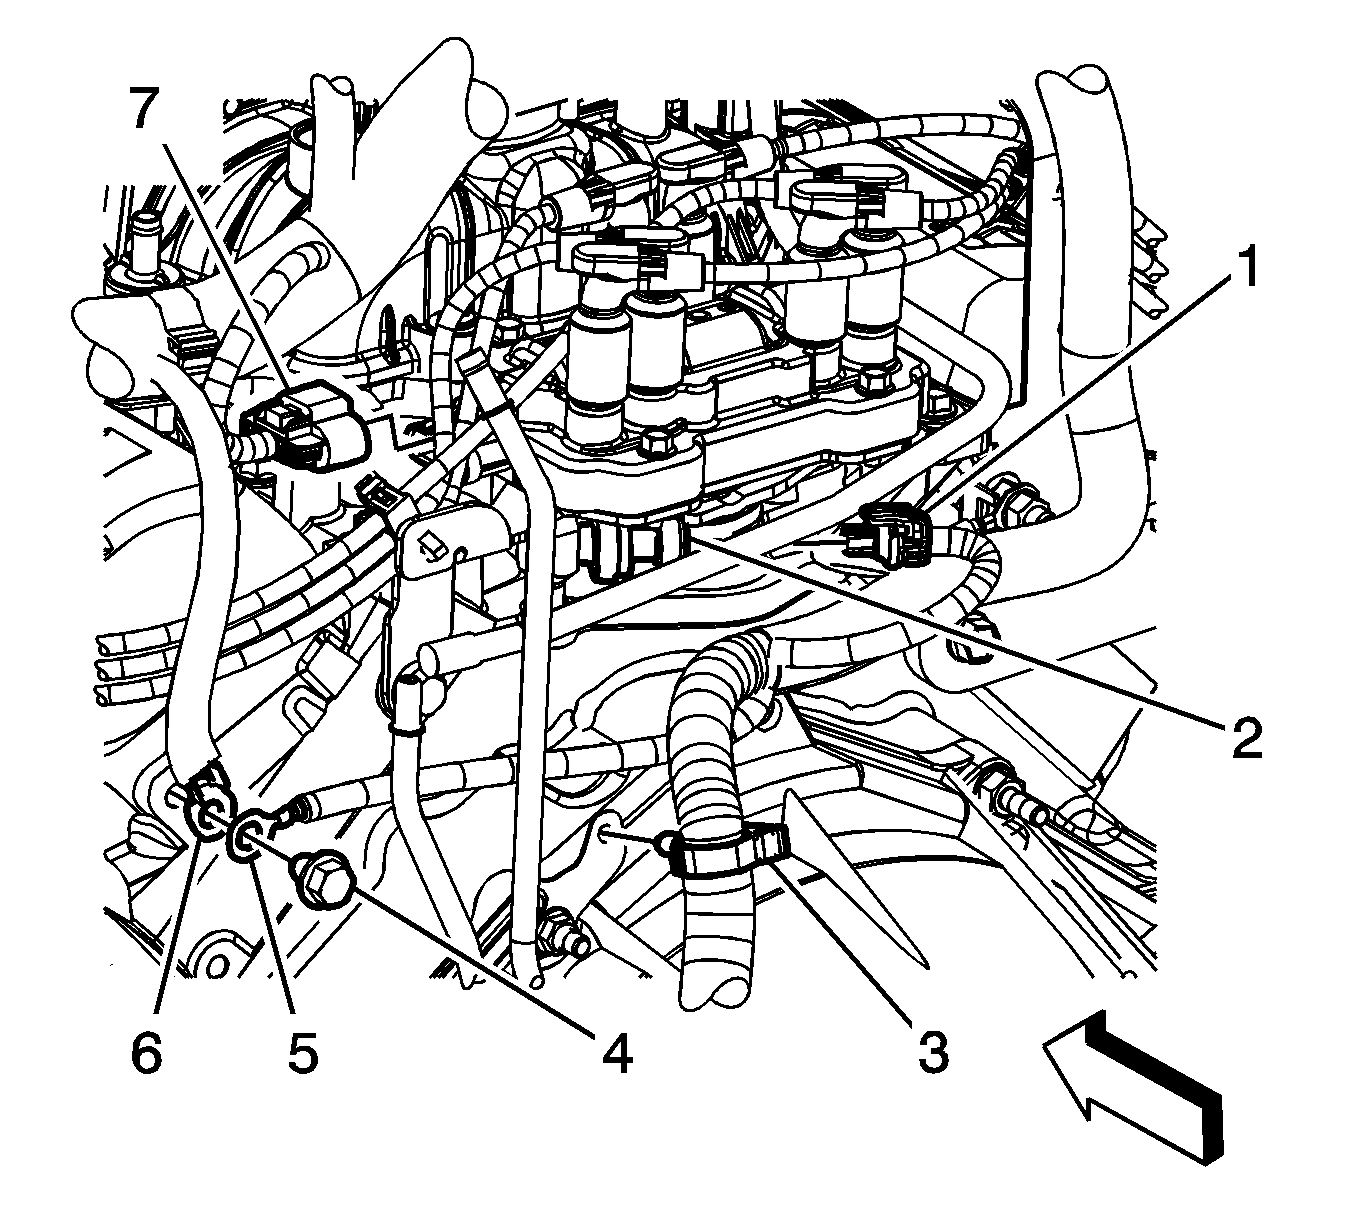
- Disconnect the chassis fuel feed pipe (1) quick connect fitting from the engine fuel feed pipe. Refer to Metal Collar Quick Connect Fitting Service .
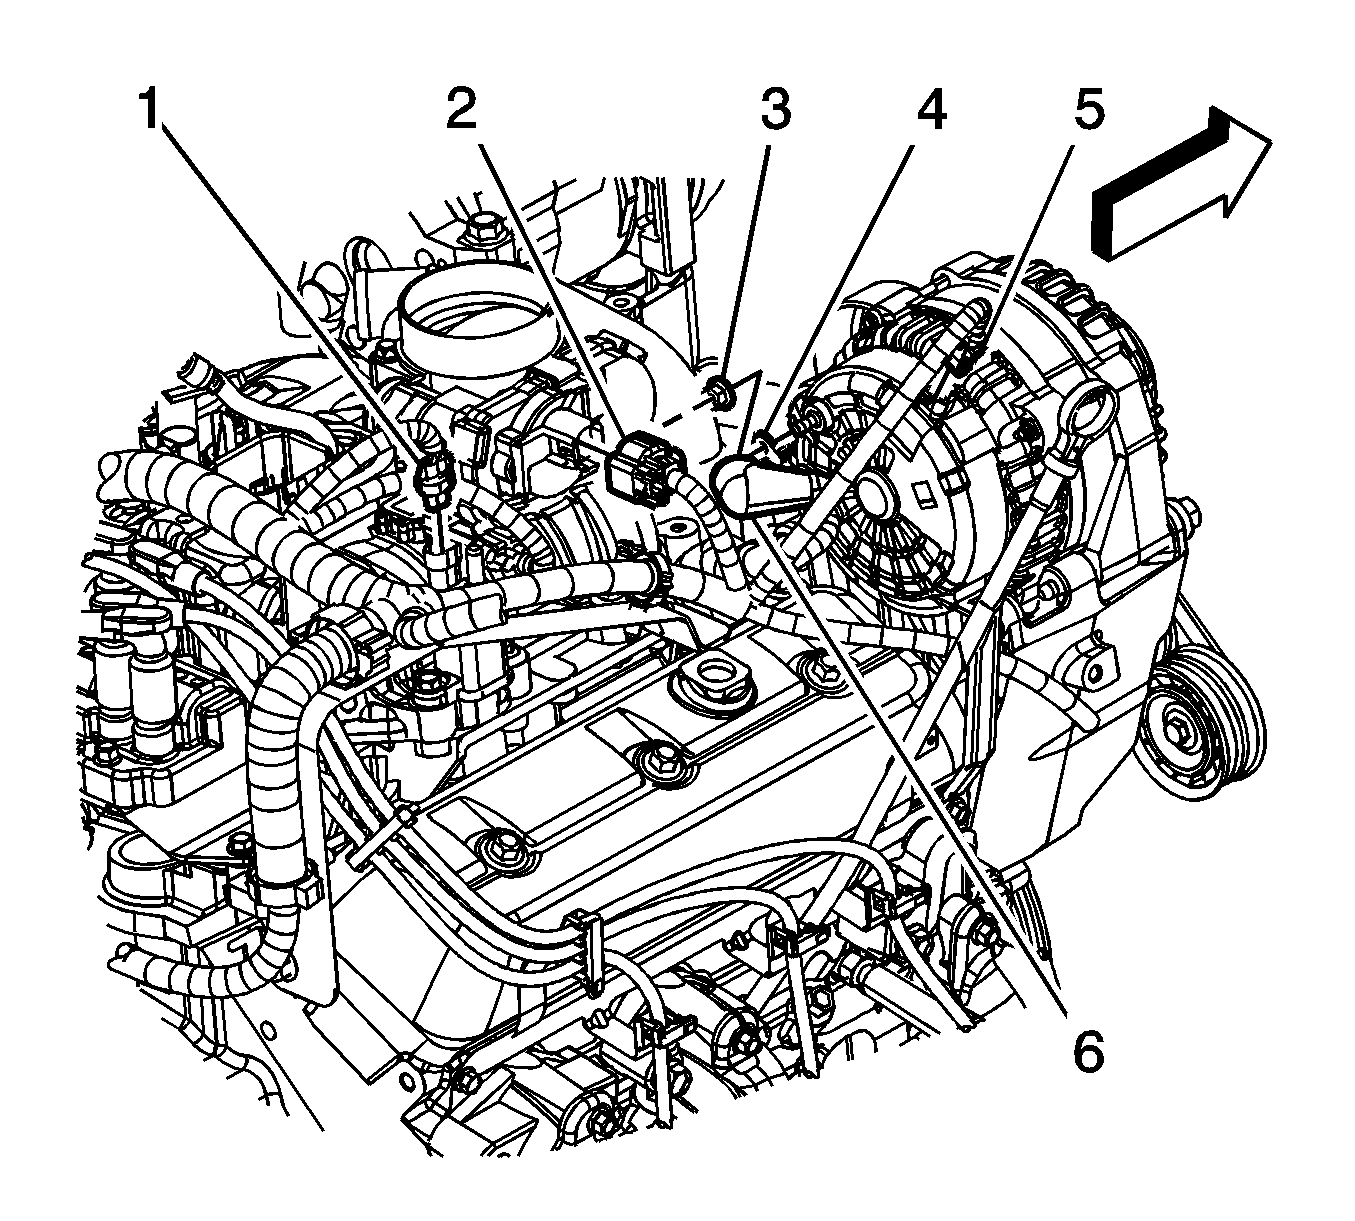
- Disconnect the engine wiring harness electrical connector from the manifold absolute pressure (MAP) sensor.
- Disconnect the engine wiring harness electrical connector (1) from the evaporative emission (EVAP) canister purge solenoid valve.
- Remove the engine wiring harness connector position assurance (CPA) retainer at the fuel meter body.
- Disconnect the engine wiring harness electrical connector (1) from the fuel meter body.
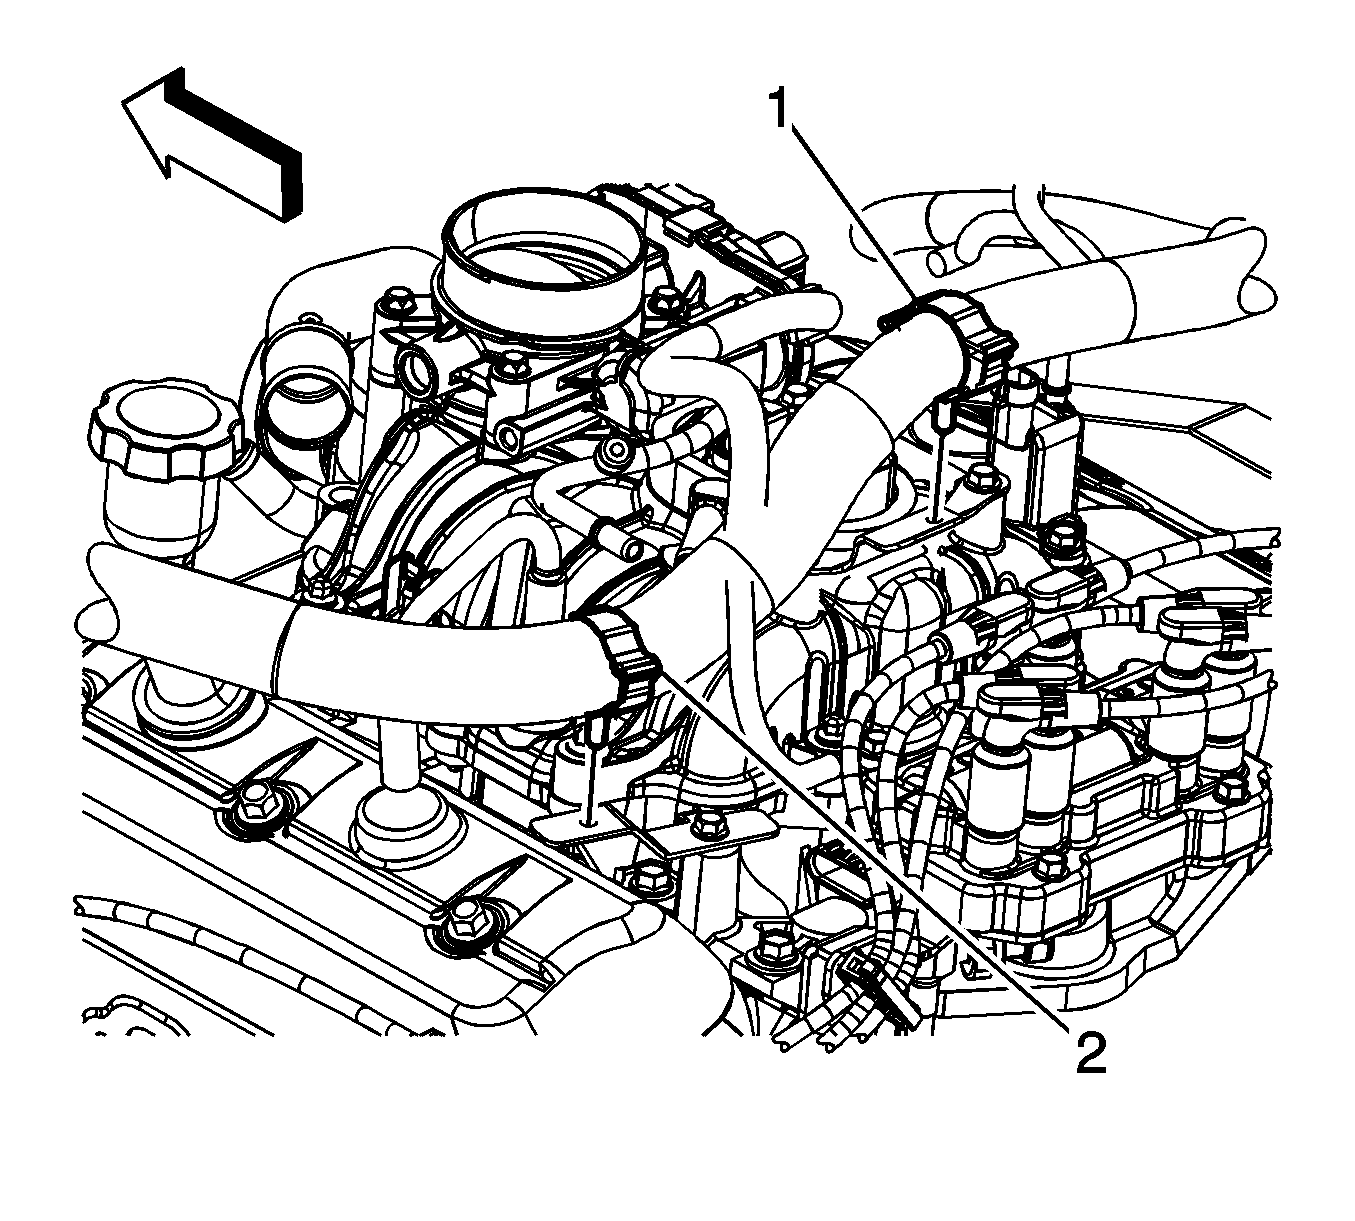
- Remove the engine wiring harness clips (1, 2) from the engine harness brackets.
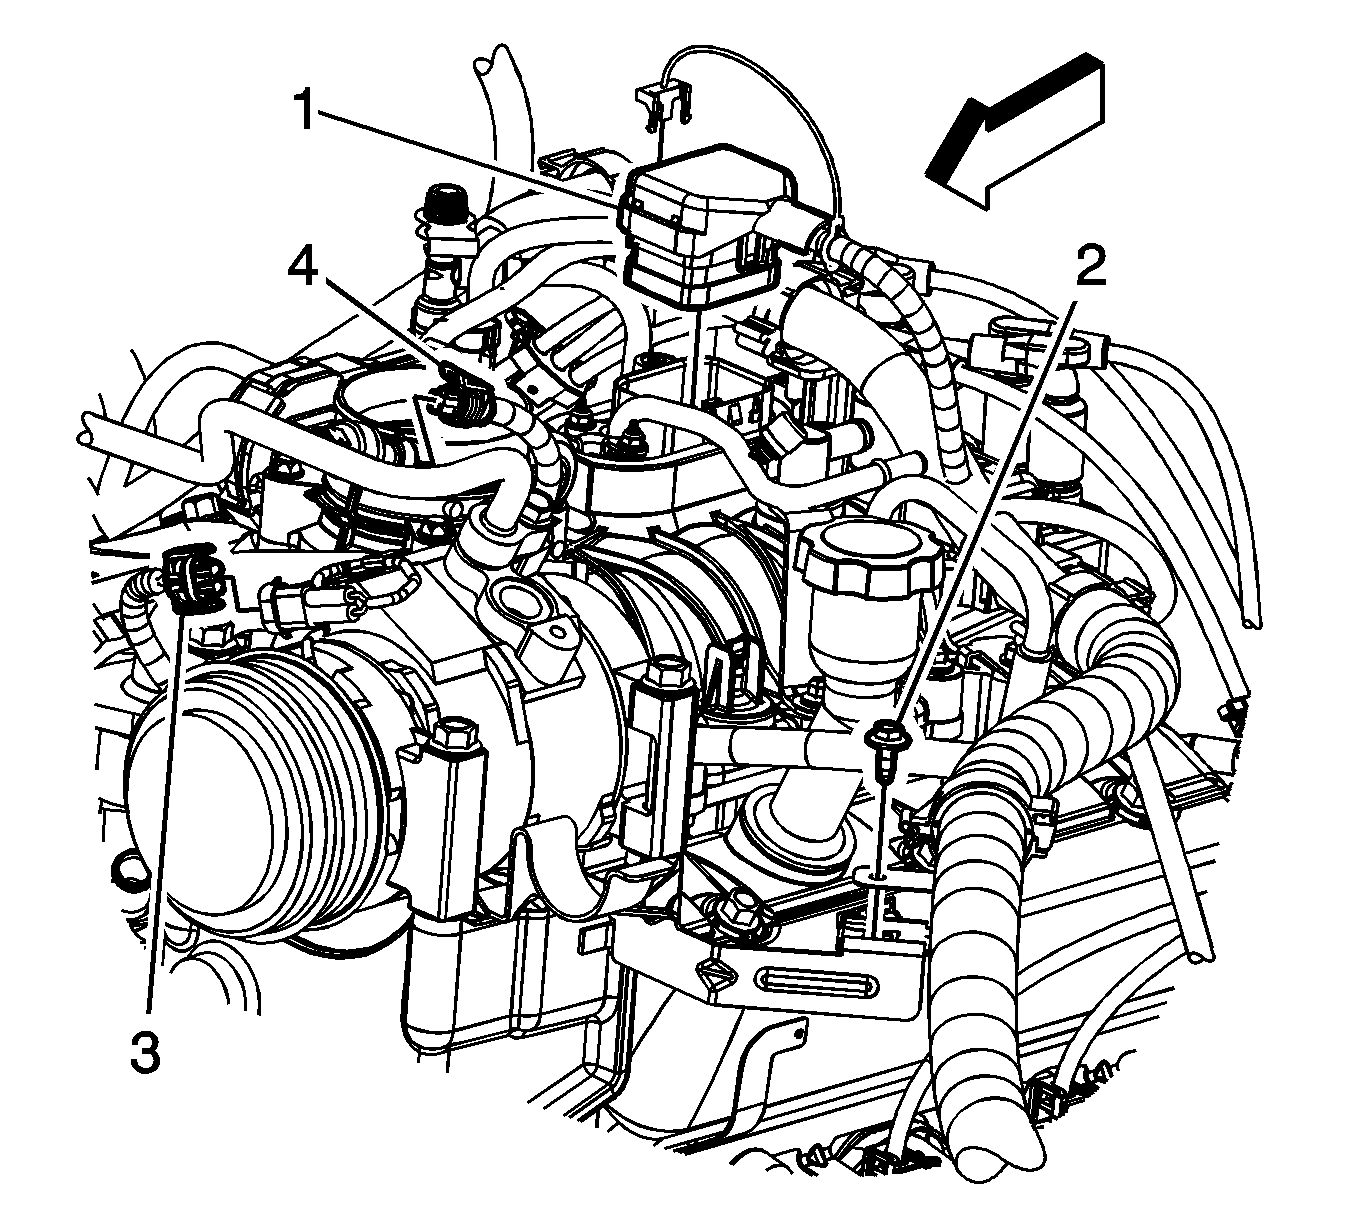
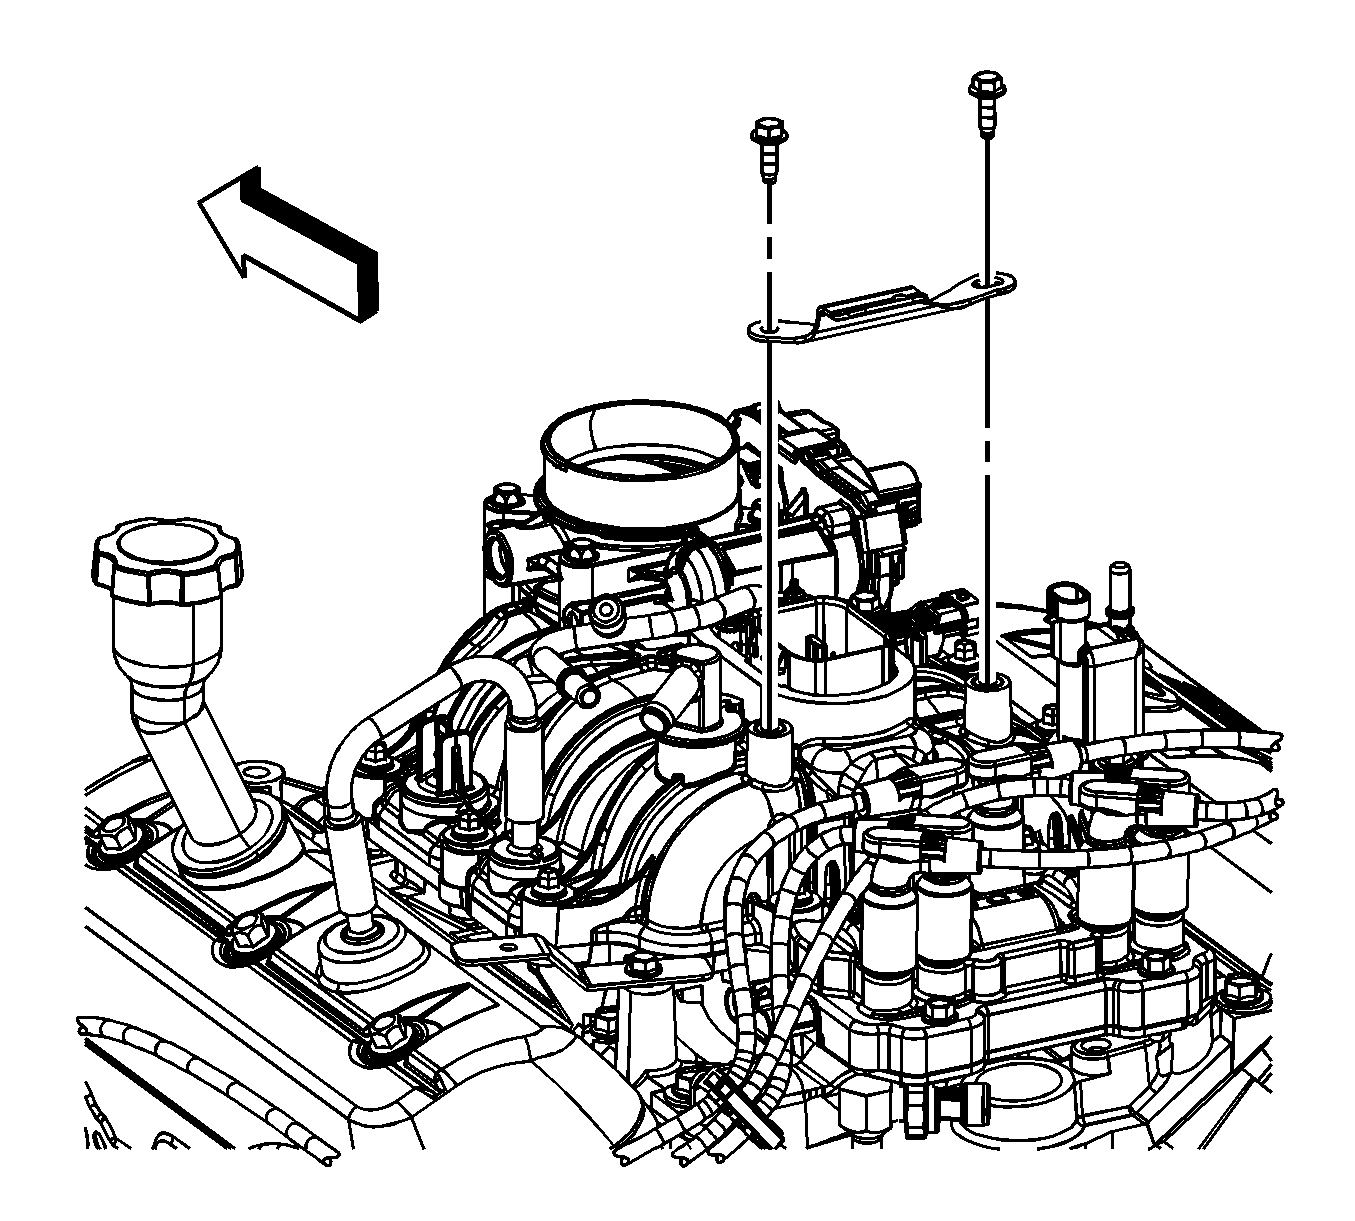
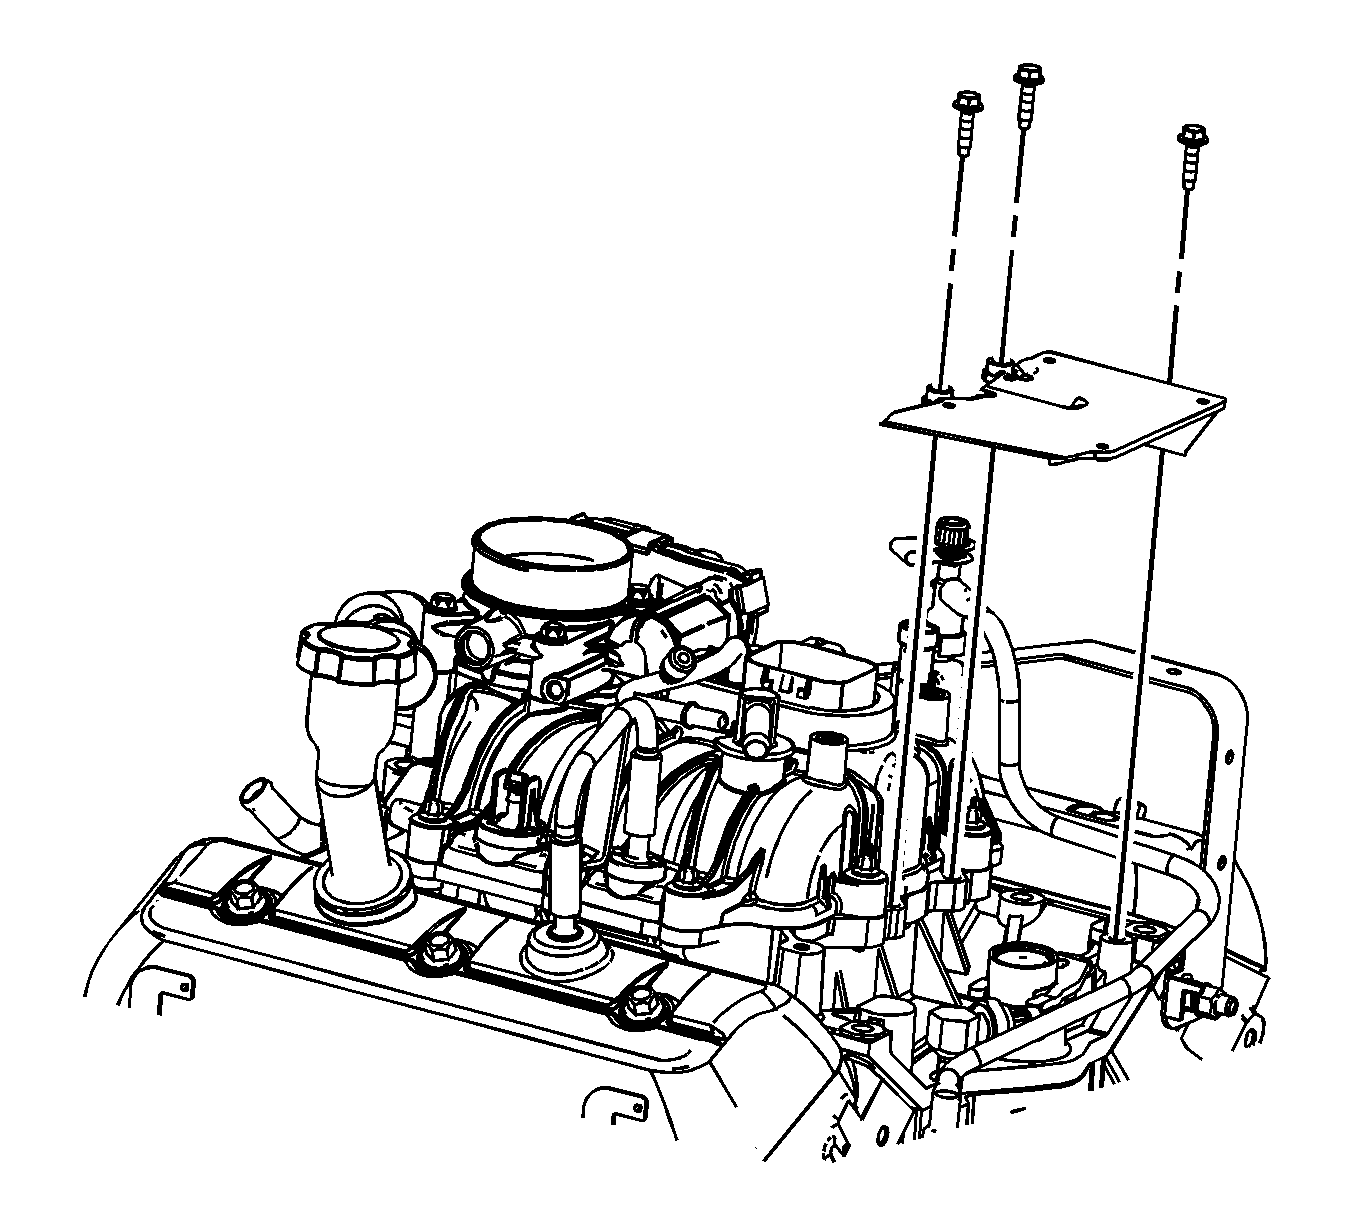
- Remove the engine wiring harness rear bracket bolts and bracket.
- Disconnect the spark plug wires (1, 2) from the ignition coil.
- Reposition the spark plug wires out of the way.
- Disconnect engine wiring harness electrical connector (7) from the ignition coil.
- Reposition the engine wiring harness branches out of the way as required.
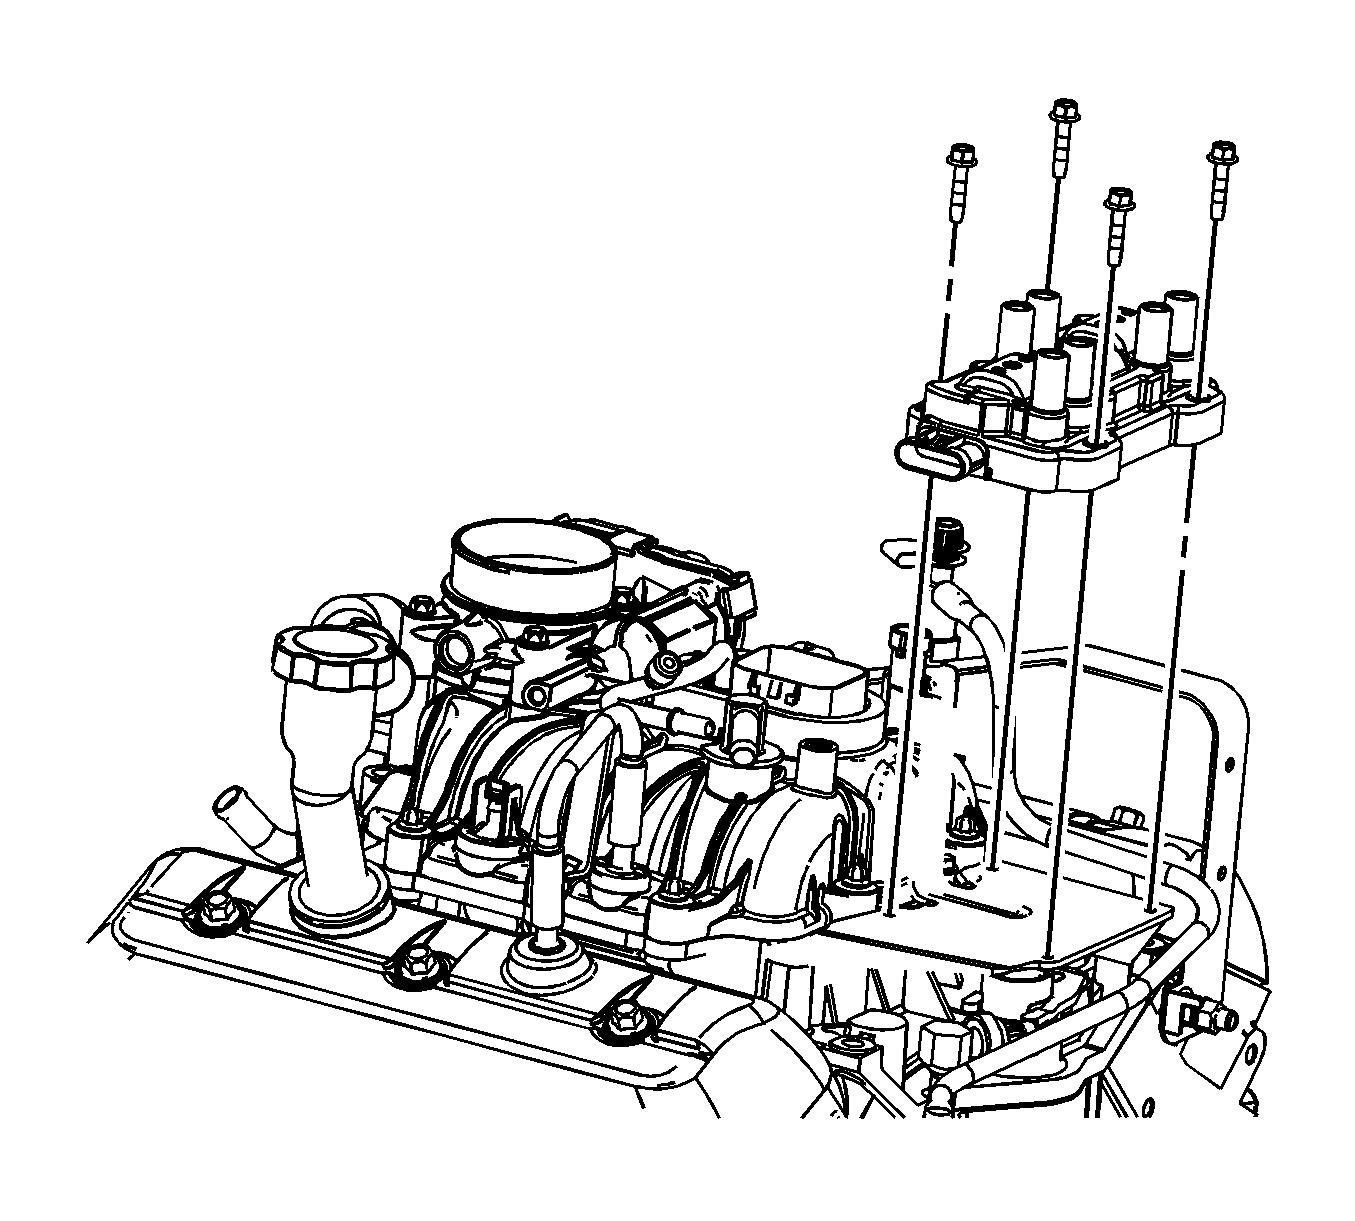
- Remove the ignition coil bolts and coil from the bracket.
- If required, remove the ignition coil bracket bolts and bracket.
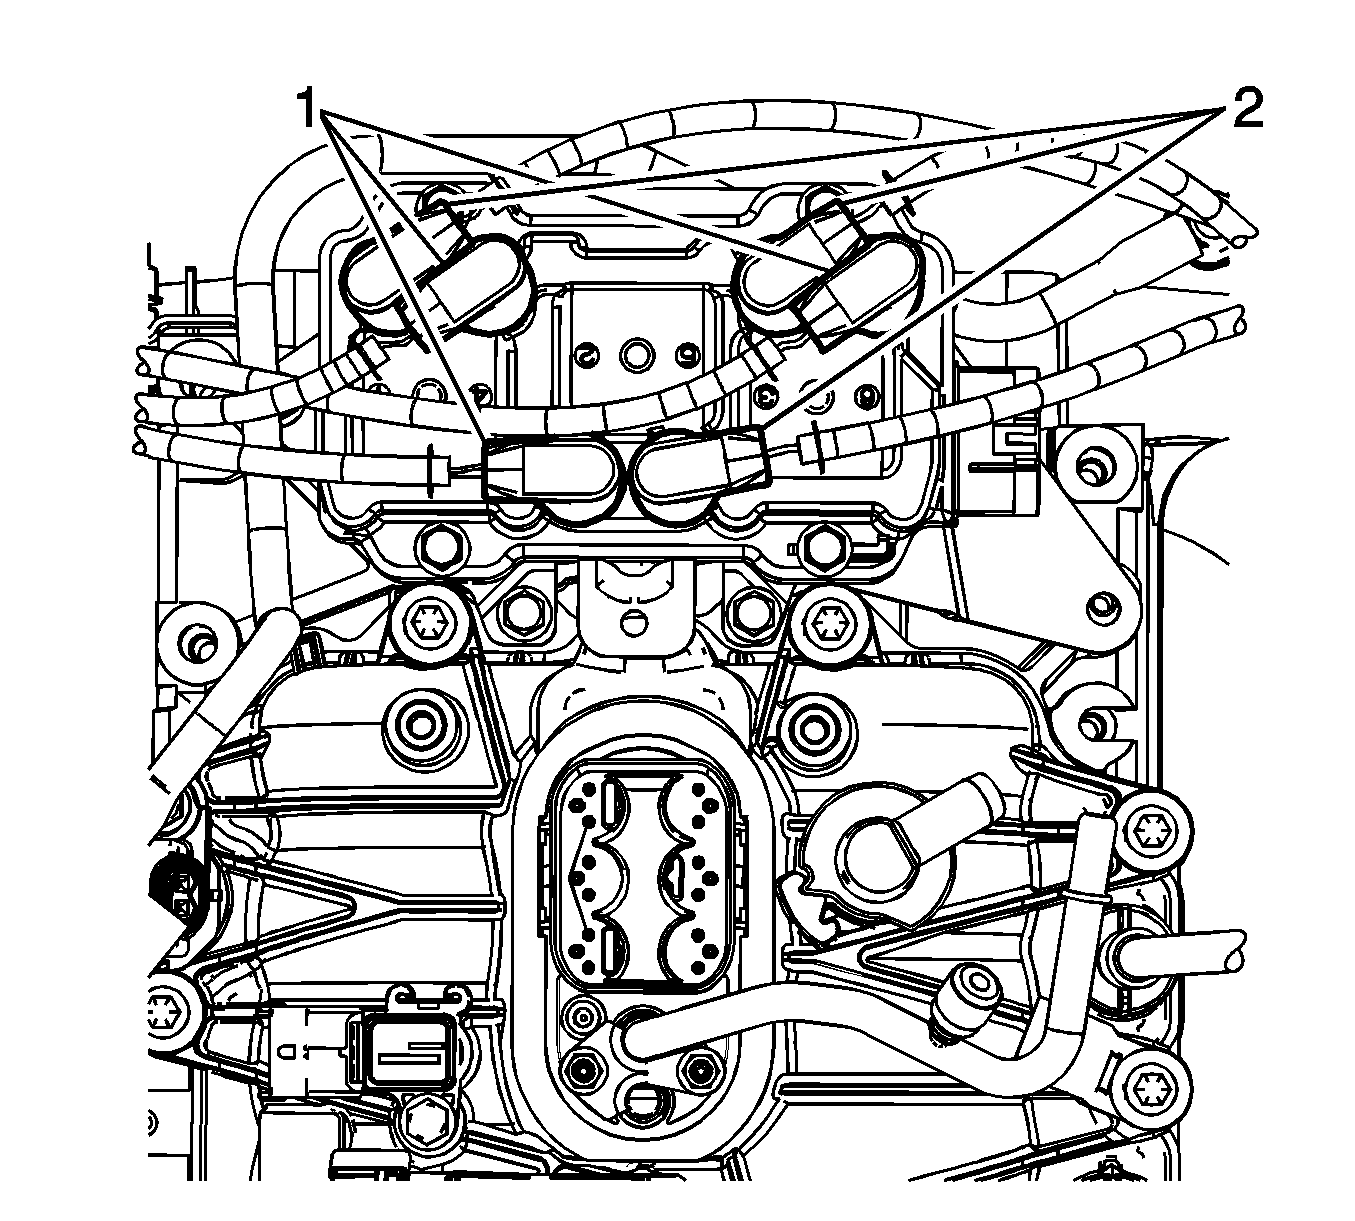
Important: Note the routing of the spark plug wires prior to disconnecting the wires from the ignition coil.
Installation Procedure
- If required, position the ignition coil bracket to the lower intake manifold and install the bolts.
- Place the ignition coil on top of the bracket and install the bolts.
- Position the engine wiring harness branches as required.
- Connect engine wiring harness electrical connector (7) to the ignition coil.
- Position the spark plug wires to the ignition coil.
- Connect the spark plug wires (1, 2) to the ignition coil as noted during removal.
- Place the engine wiring harness rear bracket onto the upper intake manifold and install the bolts.
- Install the engine wiring harness clips (1, 2) to the engine harness brackets.
- Connect the engine wiring harness electrical connector (1) to the fuel meter body.
- Install the engine wiring harness CPA retainer at the fuel meter body.
- Connect the engine wiring harness electrical connector (1) to the EVAP canister purge solenoid valve.
- Connect the engine wiring harness electrical connector to the MAP sensor.
- Connect the chassis fuel feed pipe (1) quick connect fitting to the engine fuel feed pipe. Refer to Metal Collar Quick Connect Fitting Service .
- Install the air cleaner outlet resonator. Refer to Air Cleaner Outlet Resonator Replacement .
Notice: Refer to Fastener Notice in the Preface section.

Tighten
Tighten the bolts to 12 N·m (106 lb in).

Tighten
Tighten the bolts to 12 N·m (106 lb in).


Tighten
Tighten the bolts to 10 N·m (89 lb in).


