For 1990-2009 cars only
Removal Procedure
- Remove the air cleaner outlet resonator. Refer to Air Cleaner Outlet Resonator Replacement .
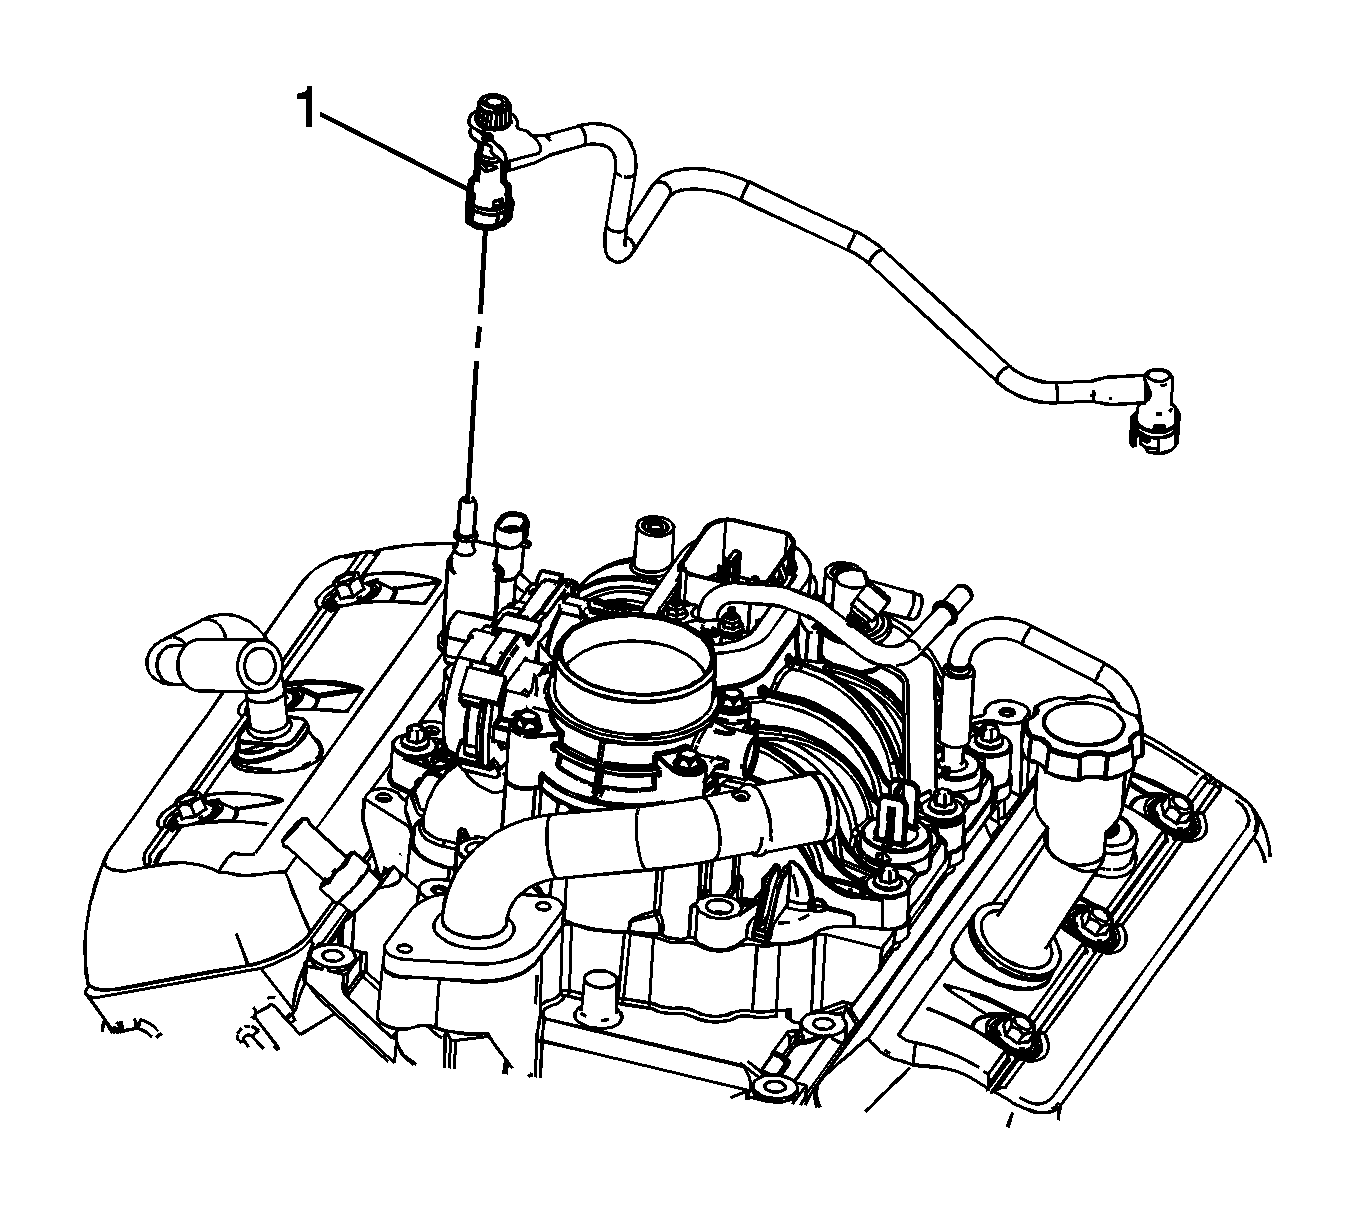
- Disconnect the evaporative emission (EVAP) canister purge solenoid valve tube quick connect fitting (1) from the EVAP purge solenoid valve. Refer to Plastic Collar Quick Connect Fitting Service .
- Reposition the tube out of the way.
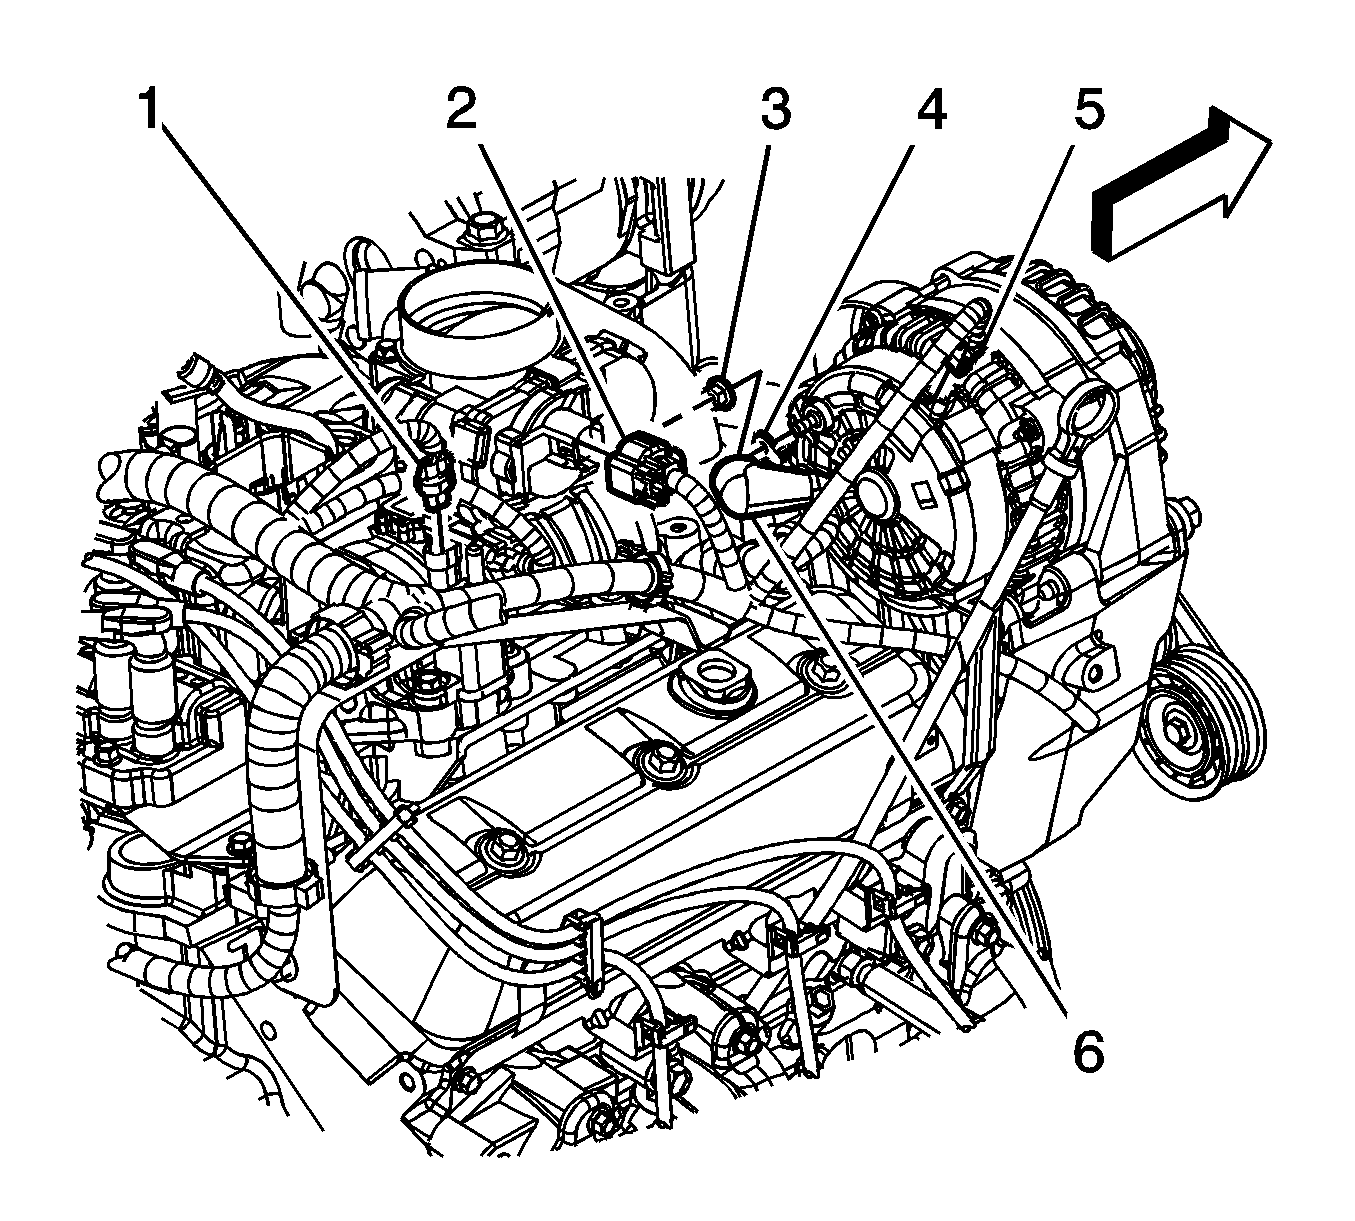
- Disconnect the engine wiring harness electrical connector (1) from the EVAP purge valve solenoid.
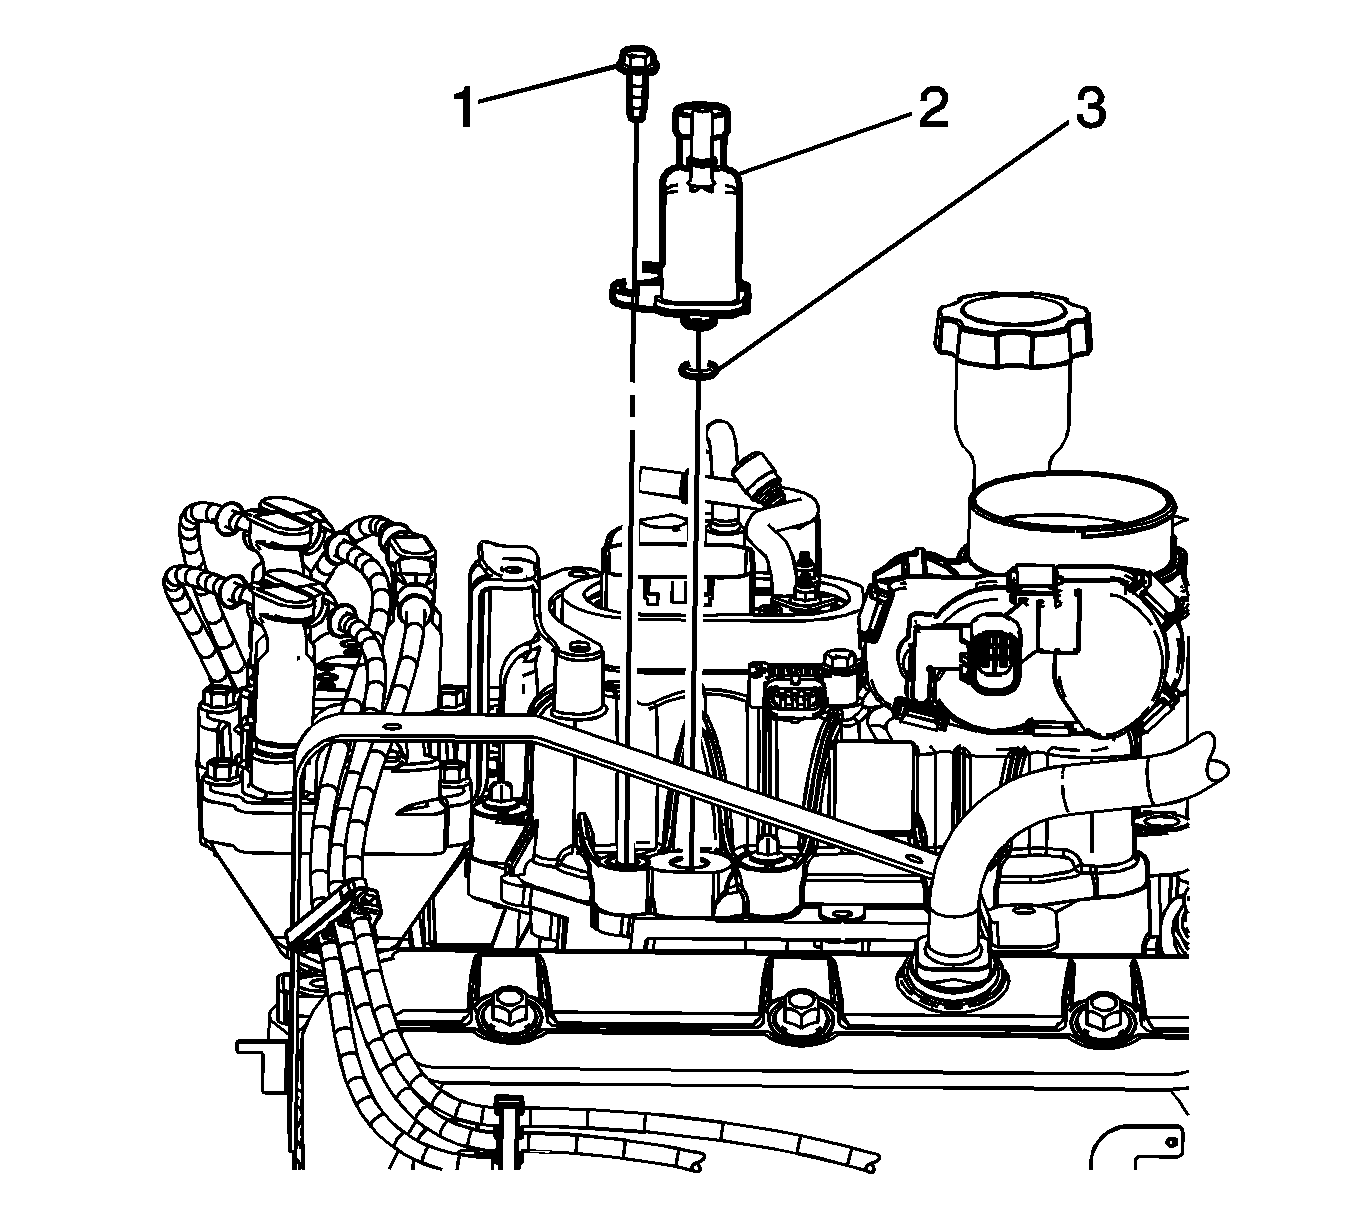
- Remove the EVAP canister purge solenoid valve bolt (1).
- Remove the EVAP canister purge solenoid valve (2) from the upper intake manifold.
- Remove the EVAP canister purge solenoid valve O-ring seal (3) from the upper intake manifold, if necessary.


Installation Procedure
- Lubricate the EVAP canister purge solenoid valve O-ring seal with clean engine oil in order to aid with the installation.
- Install the EVAP canister purge solenoid valve (2) into the upper intake manifold.
- Install the EVAP canister purge solenoid valve bolt (1).
- Connect the engine wiring harness electrical connector (1) to the EVAP purge valve solenoid.
- Position the EVAP canister purge solenoid tube, and connect the tube quick connect fitting (1) to the EVAP purge solenoid valve. Refer to Plastic Collar Quick Connect Fitting Service .
- Install the air cleaner outlet resonator. Refer to Air Cleaner Outlet Resonator Replacement .

Notice: Refer to Fastener Notice in the Preface section.
Tighten
Tightne the bolt to 10 N·m (89 lb in).


