For 1990-2009 cars only
Water Entering/Leak in Accessories Side Storage Tool Box (Install Handle Repair Kit)

| Subject: | Water Entering/Leak in Accessories Side Storage Tool Box (Install Handle Repair Kit) |
| Models: | 2007-2008 Chevrolet Silverado |
| 2007-2008 GMC Sierra |
Condition
Some customers may comment on water leaking into the accessory side storage tool boxes.
Cause
Water may be entering through the toolbox between the lid and handle or at the handle pivot pin.
Correction
Install a handle repair kit. Refer to the procedure below.
Tools Required
| • | 1/8 inch drill bit and drill |
| • | 1/8 inch center punch and hammer |
| • | Utility knife |
| • | Plastic trim stick |
| • | 3 mm hex wrench |
| • | 8 mm open end wrench |
| • | Rivet gun |
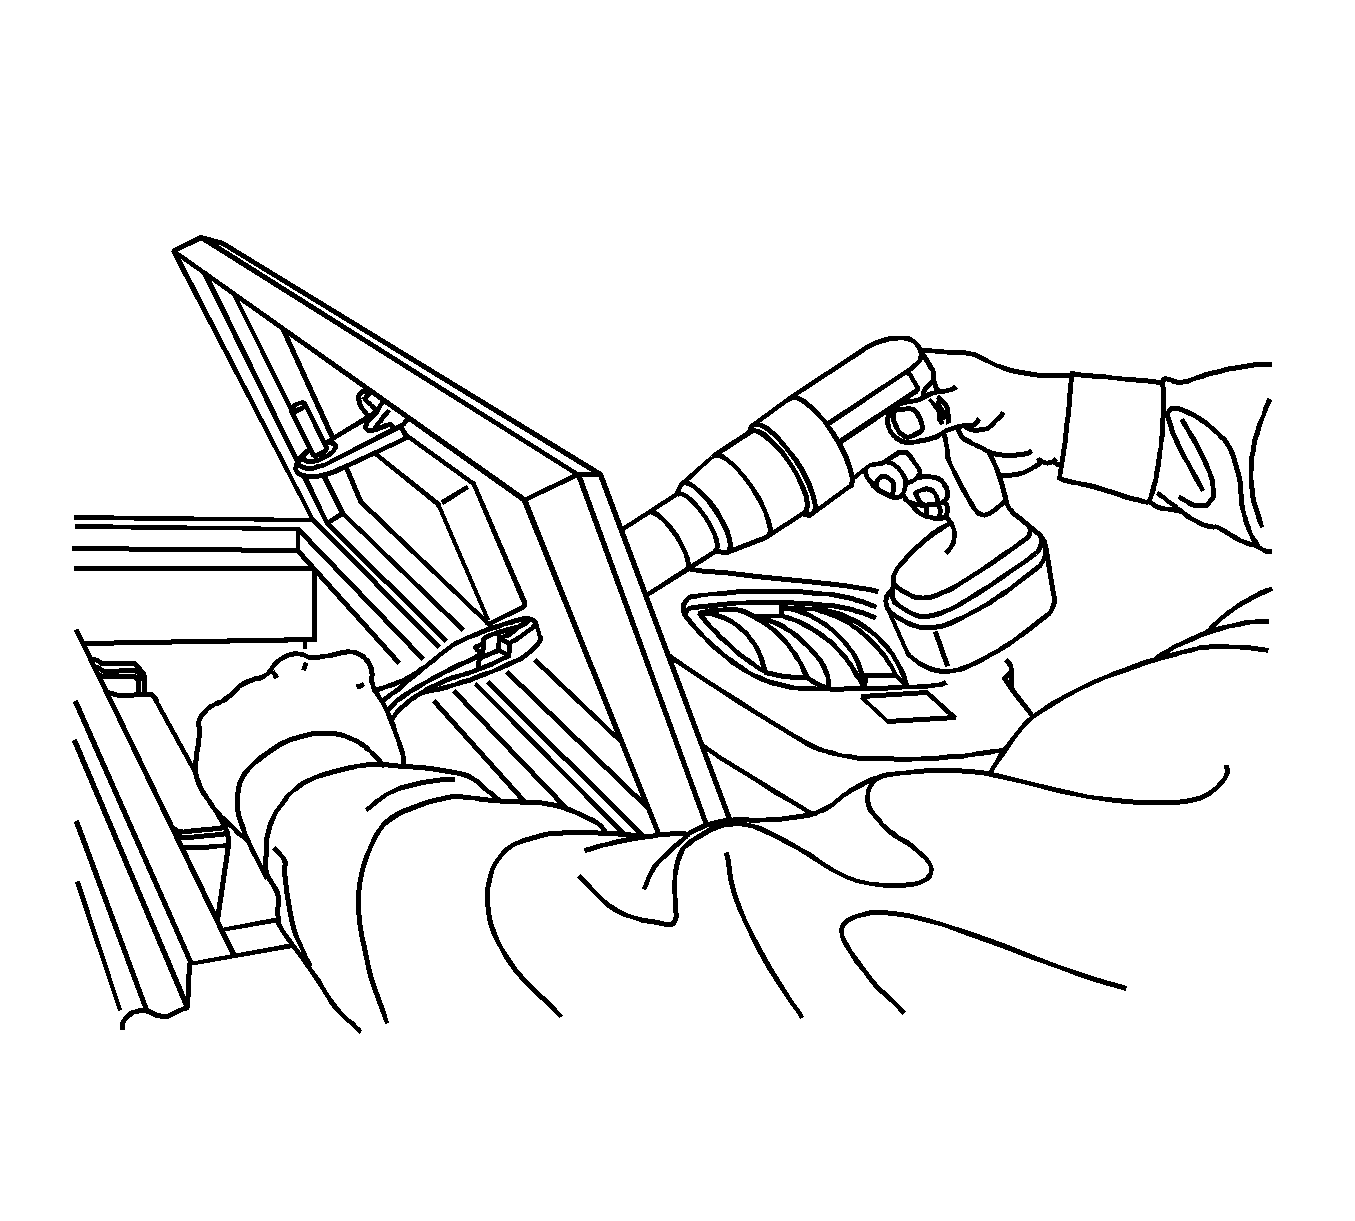
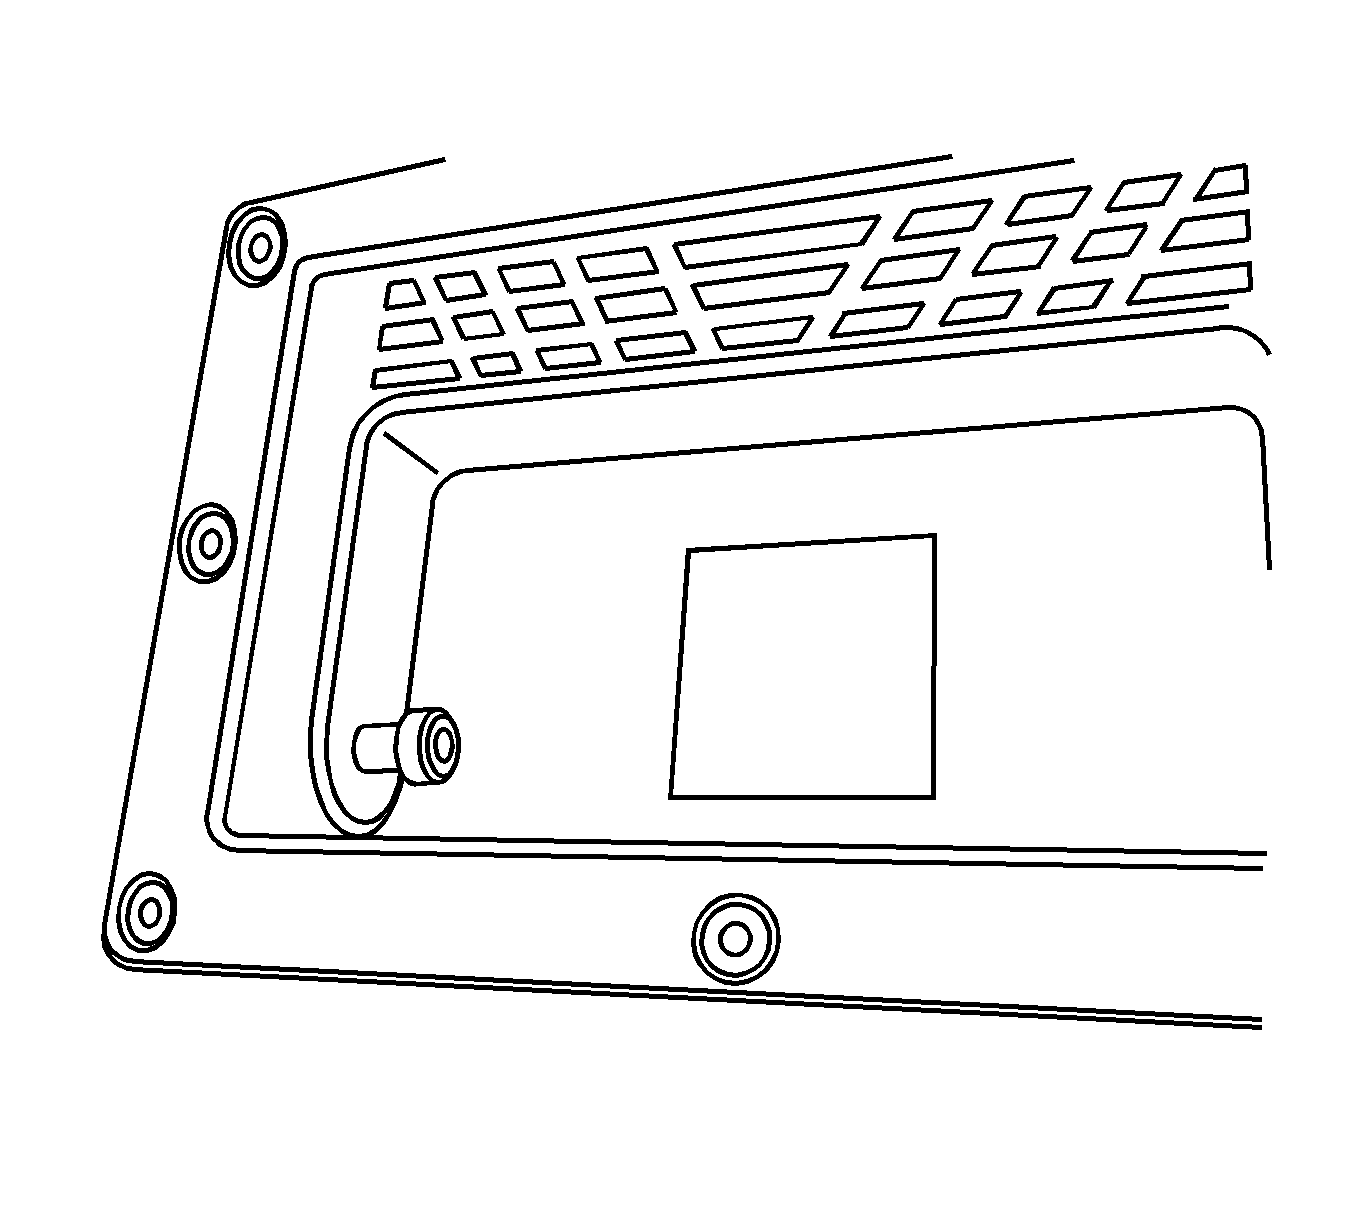
- Drill out the attachment rivets. Use a 1/8 inch drill bit and carefully drill the head of the rivet off. Hold the rivet with a pair of pliers to keep it from spinning while drilling the rivets head off as seen in the illustration above.
- Use a 1/8 inch center punch and hammer to remove the remaining part of the rivet.
- Remove the handle from the tool box. The handle is sealed to the box with silicon and may be difficult to remove. Use a plastic trim stick and carefully pry up on the edges of the handle. Use a utility knife and carefully remove the silicon from the lid of the tool box and the handle.
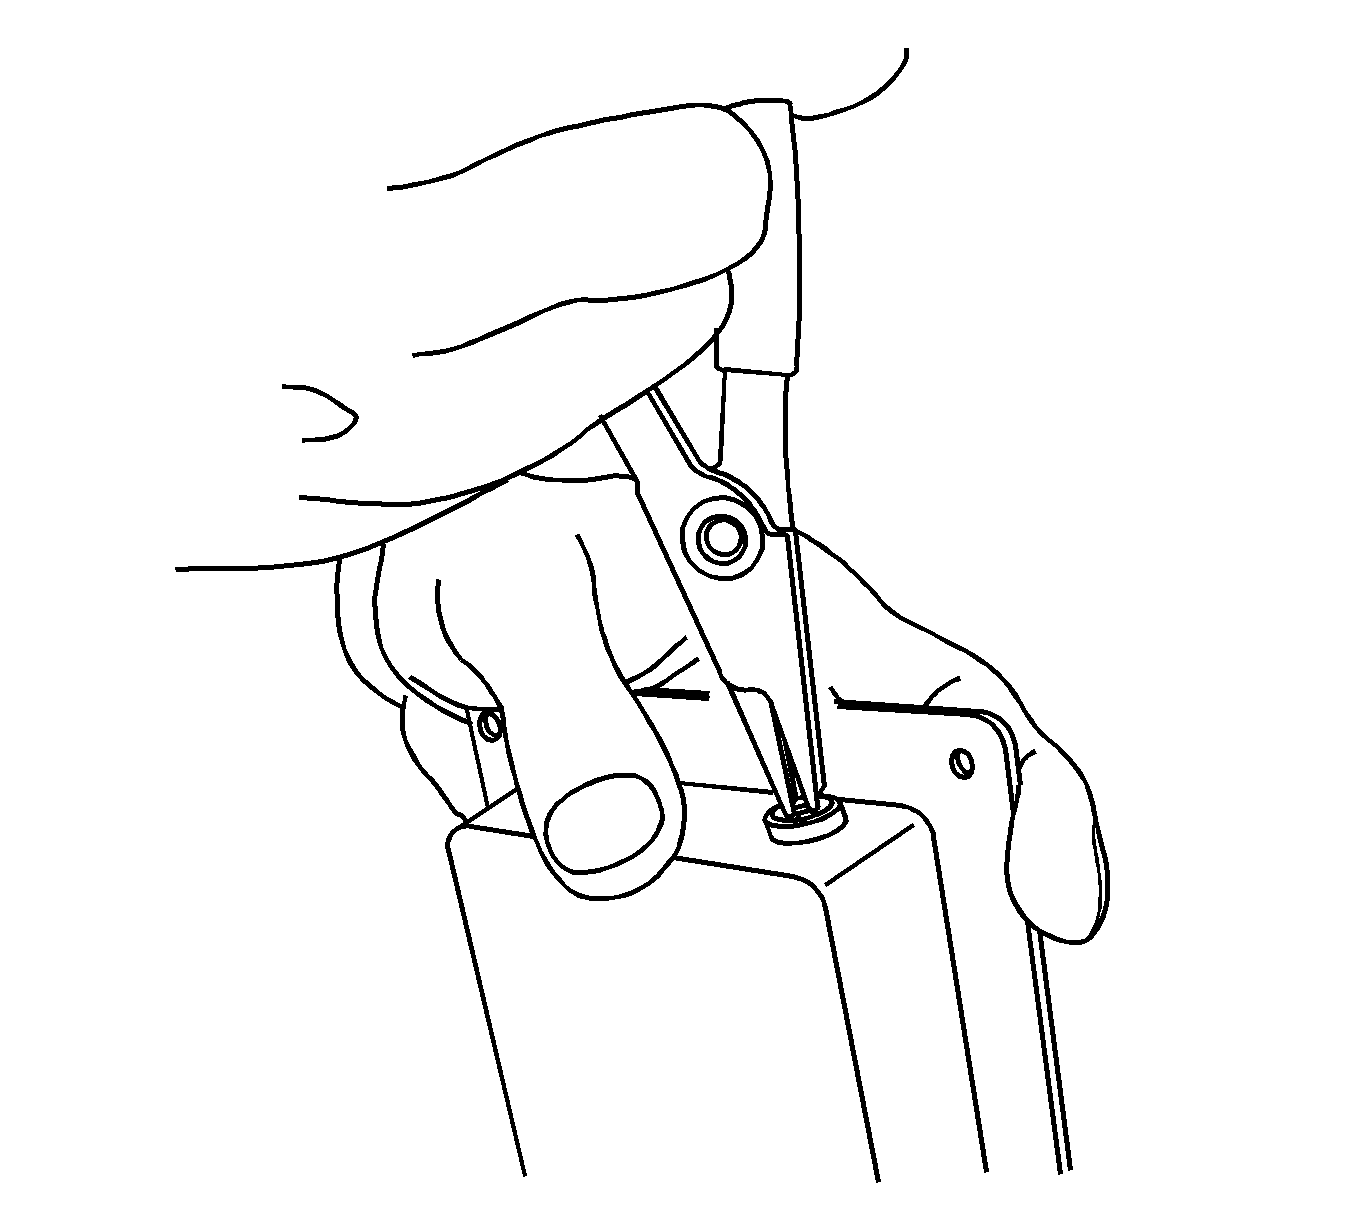
- Remove the handle pivot pins. Using a pair of snap ring pliers, remove the snap ring from both pins.
- Remove both pivot pins from the handle assembly.
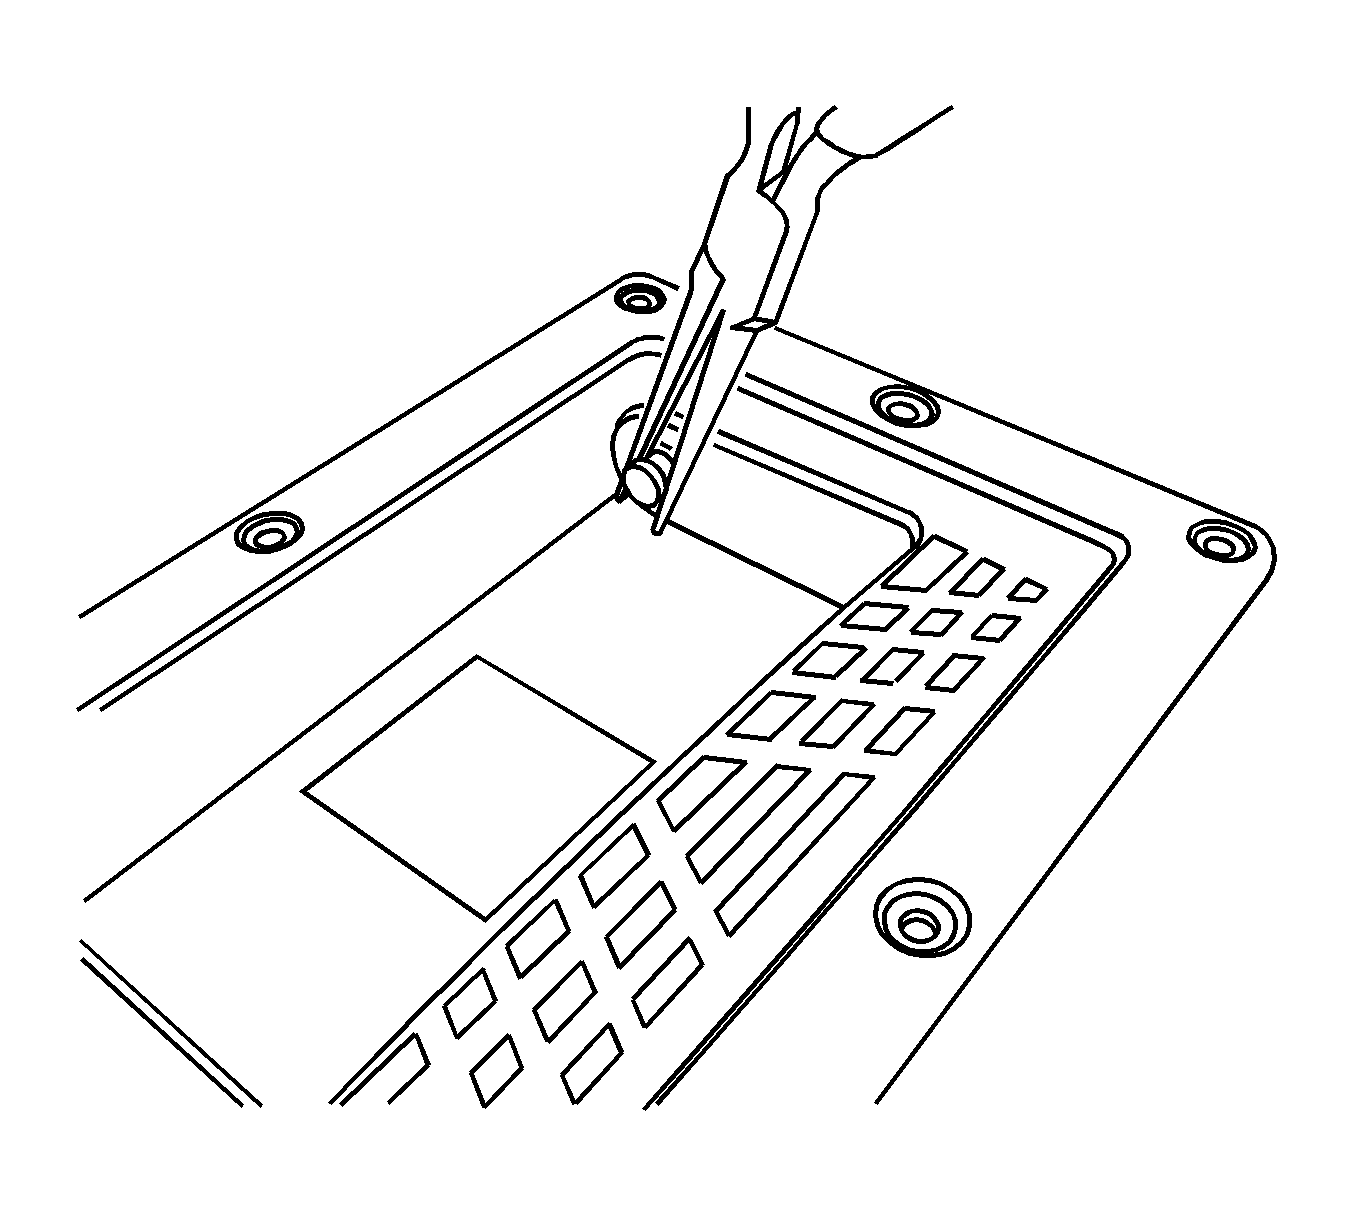
- Install the gasket to the handle assembly. Clean the surface of the handle assembly to remove any dirt or oils. Peel back half of the paper backing on the gasket to expose the adhesive.
- Install the gasket onto the underside of the handle assembly as seen in the illustration above.
- Remove the rest of the paper backing and completely install the gasket as seen in the illustration above.
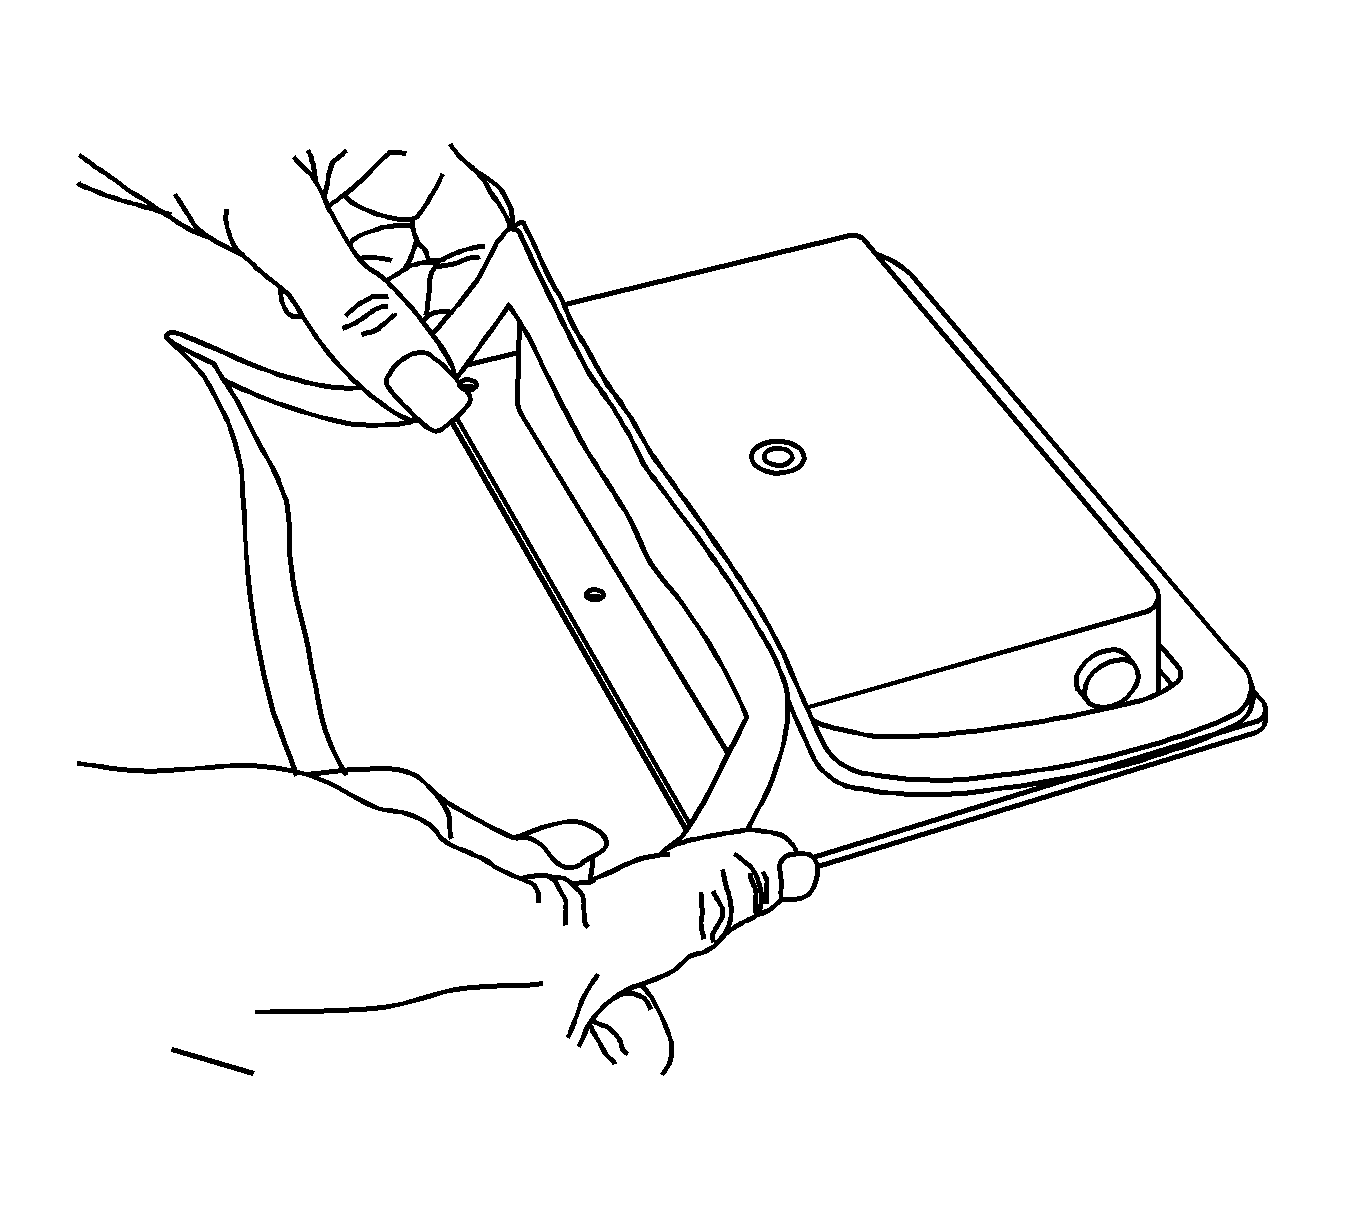
- Install the handle assembly to the tool box lid. Make sure the GM logo is facing the front of the box. Install the rivets in all four corners first.
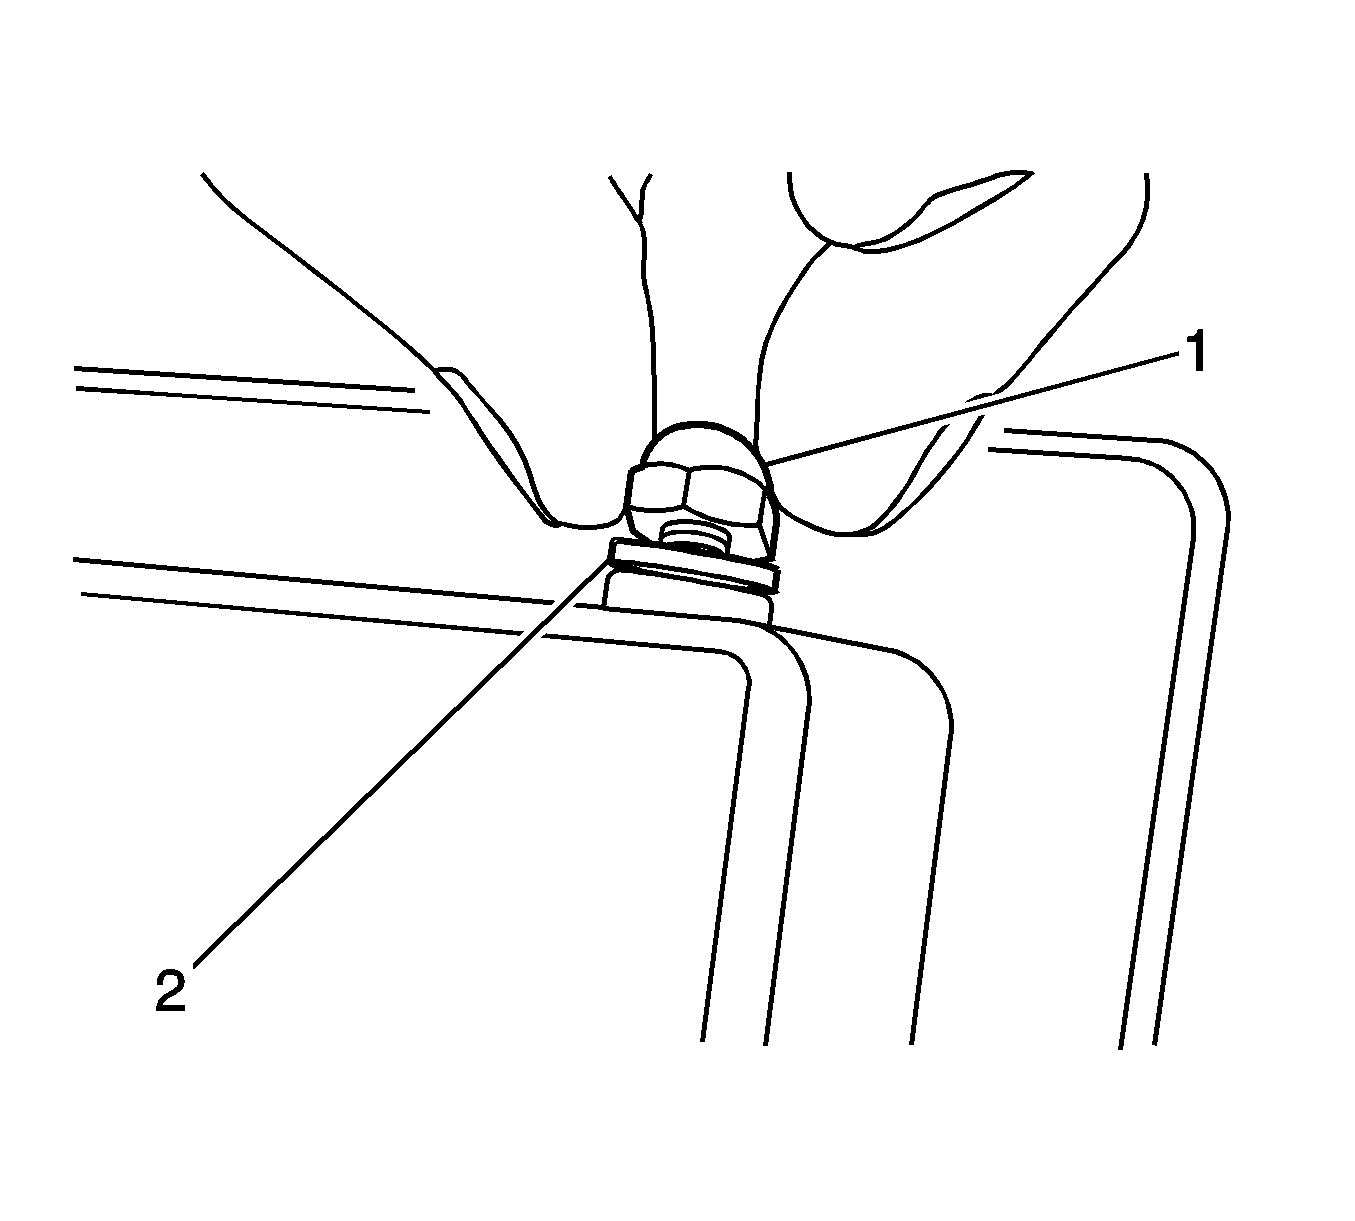
- Install the handle and the shoulder bolts into the handle assembly with the head of the bolt outside the box as seen in the illustration above. The handle assembly was removed for illustration purposes only.
- Install the rubber washer (2) over the bolt and tighten the lock nut (1).
- Cycle the handle up and down to verify that the handle will pivot. If the handle does not pivot, the nut may be too tight. Slightly loosen the nut on the shoulder bolt.
Notice: Take care not to rip the gasket or allow it to fold over on itself.
Parts Information
Part Number | Description |
|---|---|
19172791 | Handle Repair Kit |
Warranty Information
For vehicles repaired under warranty, use;
Labor Operation | Description | Labor Time |
|---|---|---|
R9370 | Truck Bed Extenders/Organizers | 0.5 hr |
