Front Floor Carpet or Rubber Floor Covering Poor Fit, Loose or Bulging (Install Floor Insulator/Deadener)

| Subject: | Front Floor Carpet or Rubber Floor Covering Poor Fit, Loose or Bulging (Install Floor Insulator/Deadener) |
| Models: | 2007 Chevrolet Silverado Regular Cab |
| 2007 GMC Sierra Regular Cab |
| with Carpet (RPO B30) or Rubber (RPO BG9) Floor Covering |
Do This | Don't Do This |
|---|---|
Install floor deadener. | Do not replace the carpet or rubber floor covering. |
Condition
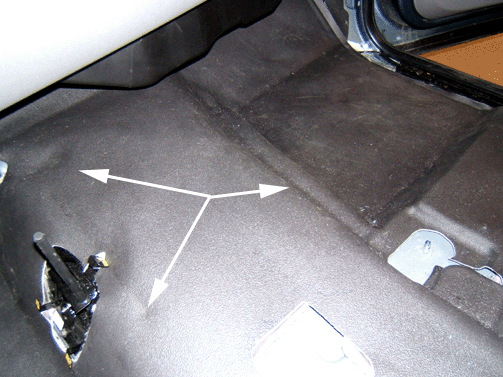
Some customers may comment on the way the front floor carpet or rubber floor covering fits on the floor tunnel as shown in the illustration. Others may comment that the floor covering is loose, bulging or just fits poorly on the passenger side.
Cause
This condition may be caused by a lack of padding under the front floor carpet or rubber floor covering.
Correction
Install floor deadener to the top of the floor tunnel using the steps below.
Important: The deadener or insulator is not currently available from GMSPO. It will be necessary to purchase the material locally from an automotive trim shop, until the insulator becomes available.
- Remove the carpet or rubber floor covering away from the front floor tunnel. Refer to Floor Panel Carpet Replacement (Regular Cab) in SI.
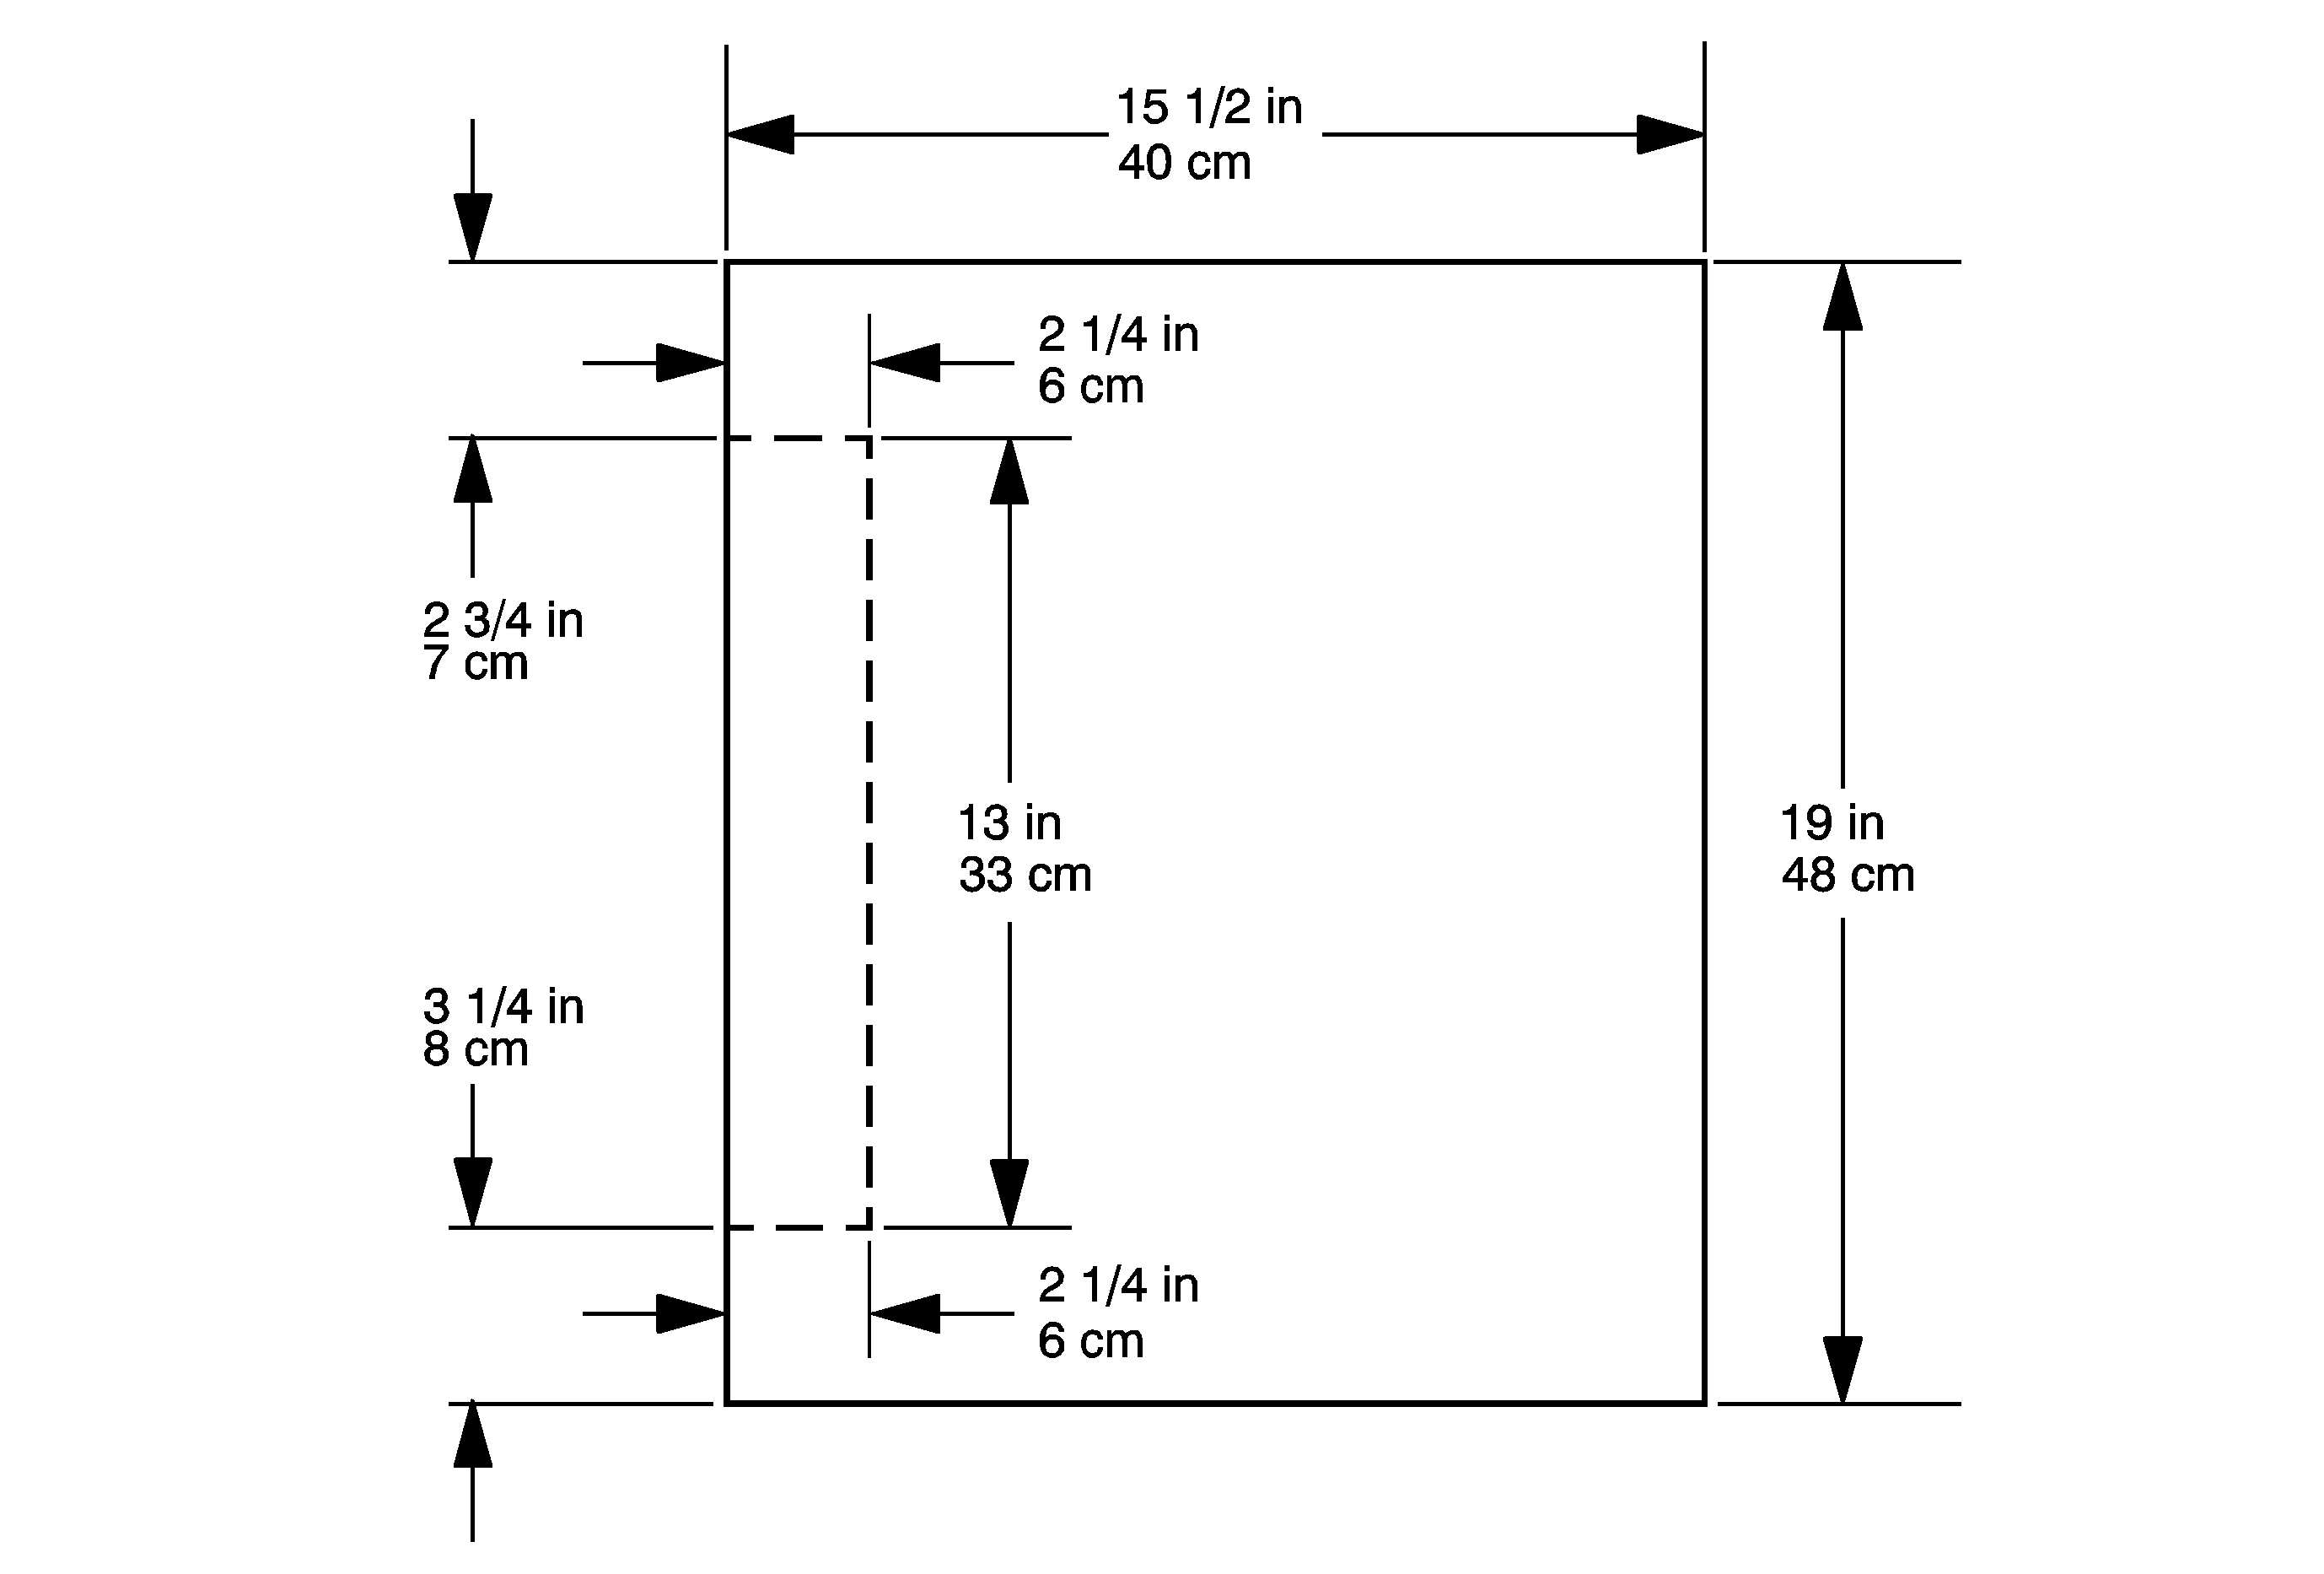
- Use the illustration and the measurements above to create a piece needed for the center floor tunnel. The dotted line should Only be used on vehicles equipped with the manual 4x4 shifter. All other vehicles should use one complete piece.
- For vehicles equipped with a manual 4x4 shifter, it will be necessary to cut out the dotted line area as shown above.
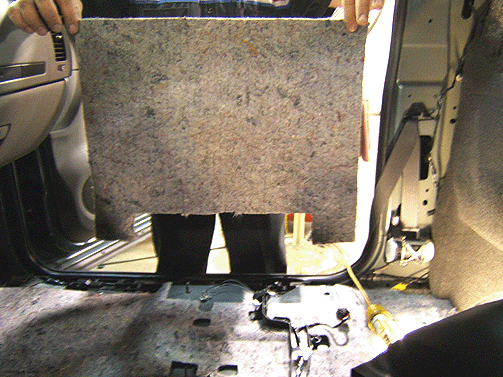
- Use hot glue to attach the deadener to the top of the floor tunnel as shown above.
- Inspect the center tunnel area for a good fit. If the carpet or rubber is still loose, add another piece of deadener by repeating steps 1-3, or you may add some deadener to the specific area needed.
- Reposition the carpet or rubber floor covering back into position.
- Install the body lock pillar trim panels. Refer to Body Lock Pillar Trim Replacement in SI.
- Install the jack and the jack handle kit. Refer to Jack Stowage Cover Replacement in SI.
- Install the IP support bracket, bolts and trim covers.
- Install the center front seat. Refer to Center Seat Replacement in SI.
- Install the front seats. Refer to Front Seat Replacement in SI.
- Install the front seat belts to the seats. Refer to Seat Belt Retractor Pretensioner Replacement in SI.
- Install the front hinge pillar trim panels. Refer to Body Hinge Pillar Trim Panel Replacement in SI.
- Install the front door sill plates. Refer to Front Door Sill Plate Replacement in SI.
Important: For vehicles equipped with a manual 4 x 4 shifter, the shifter knob and trim plate will need to be removed. Refer to Transfer Case Control Lever Replacement in SI.
Tip
The instrument panel (IP) support bracket will need to be removed by prying apart the two trim panels and removing the bolts.
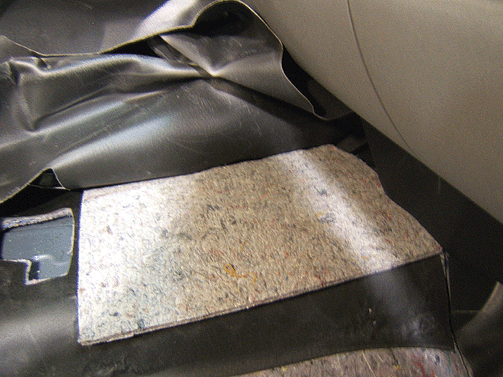
Important: Glue the deadener in place to keep it from moving or coming loose.
Tighten
Tighten the bolts to 22 N·m (16 lb ft).
Parts Information
Part Number | Description | Material Allowance | QTY |
|---|---|---|---|
40 ounce | Deadener* | $17.90 per vehicle $18.88 in (Canada) | 1 |
12377914 (U.S)** | Hot Melt Adhesive Sticks (14 sticks per pkg) | $8.00 per vehicle $8.44 in (Canada) | 1 |
*Purchase the deadener material locally from an automotive trim shop.
**For Canada, dealers should purchase the adhesive sticks locally.
Warranty Information
For vehicles repaired under warranty, use:
Labor Operation | Description | Labor Time |
|---|---|---|
C9746* | Install Deadener Floor Panel | 2.2 hrs |
Add | If equipped with 4X4 Manual Shifter | 0.2 hr |
*This labor operation number is for bulletin use only. This number will not be published in the Labor Time Guide. | ||
