For 1990-2009 cars only
175 Amp Mega Fuse Replacement w/Single Battery
Removal Procedure
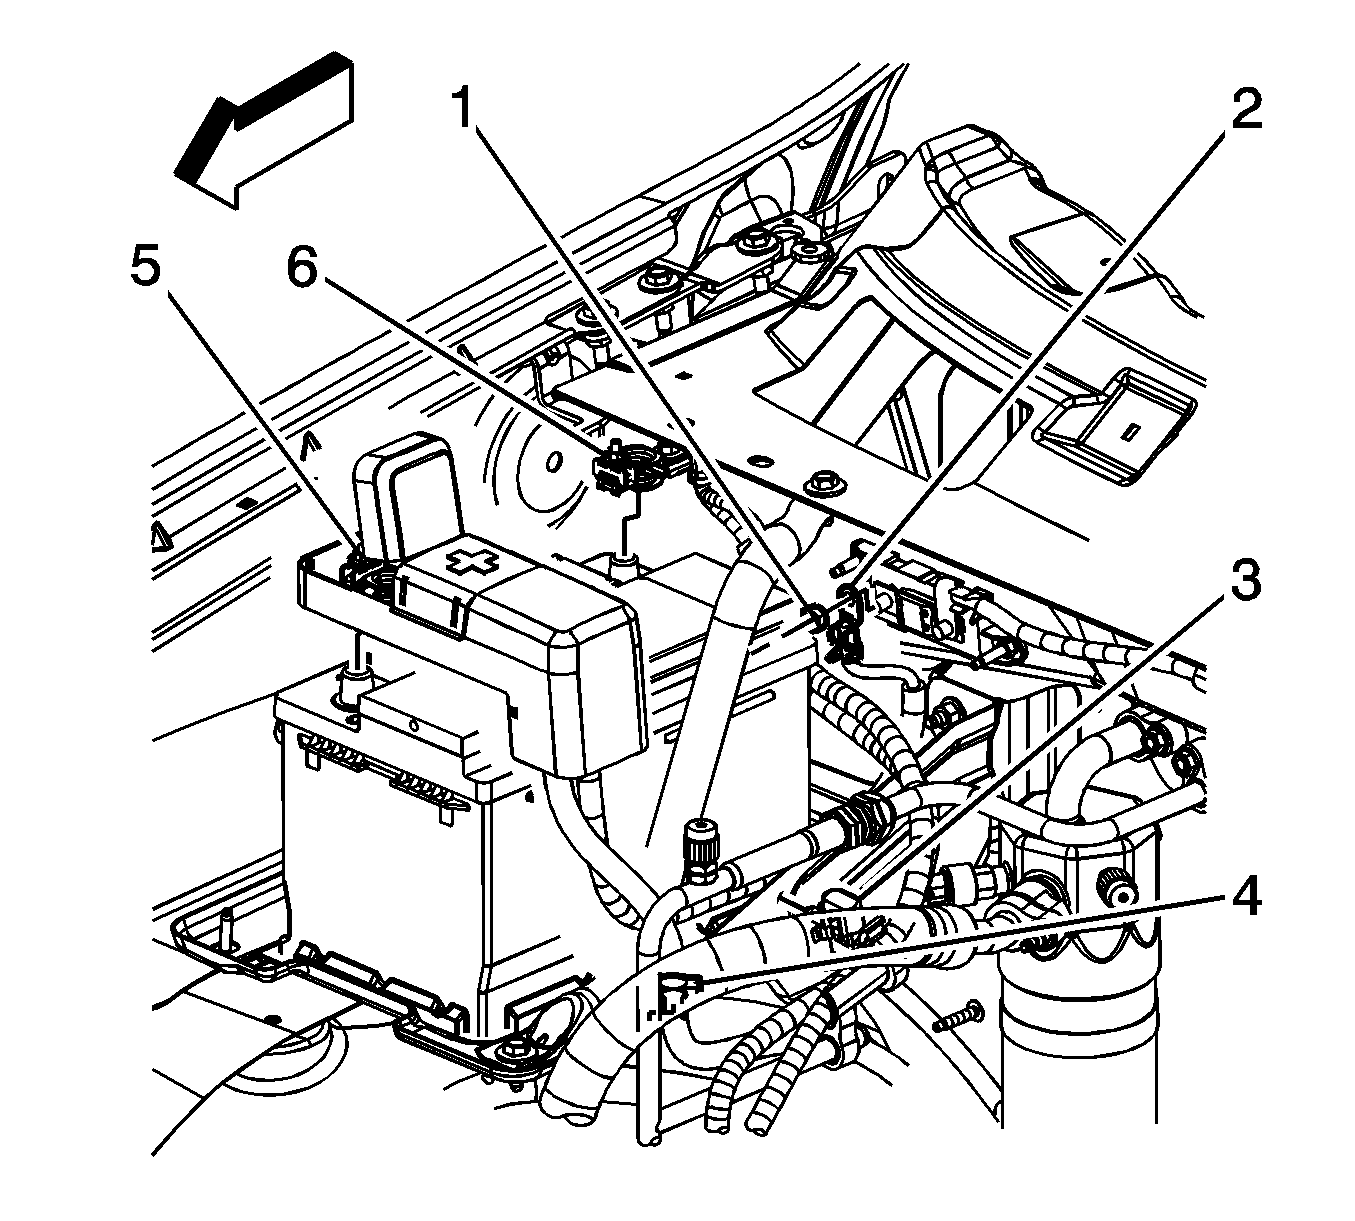
- Disconnect the negative battery cable. Refer to Battery Negative Cable Disconnection and Connection.
- Remove the fuse cover.
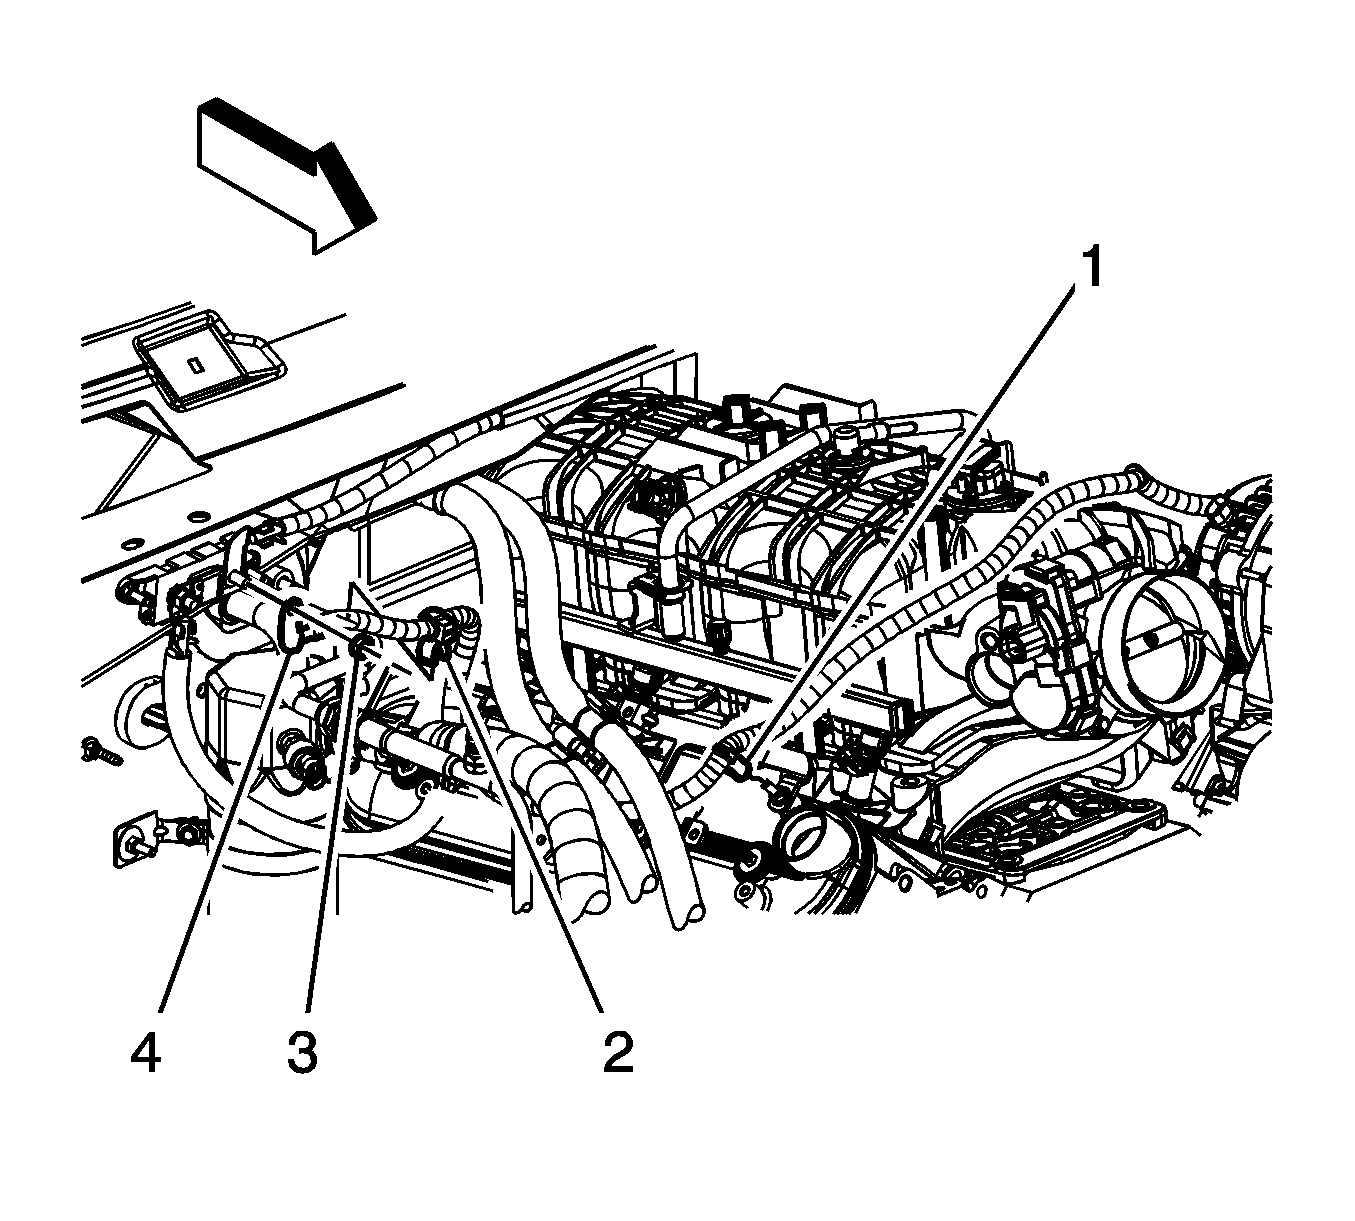
- Remove the starter solenoid cable nut (1) from the fuse stud.
- Remove the starter solenoid cable terminal (2) from the fuse stud.
- Remove the generator battery jumper cable to fuse nut (3).
- Remove the generator battery jumper cable terminal (4) from the fuse stud.
- Remove the positive battery cable terminal from the fuse stud.
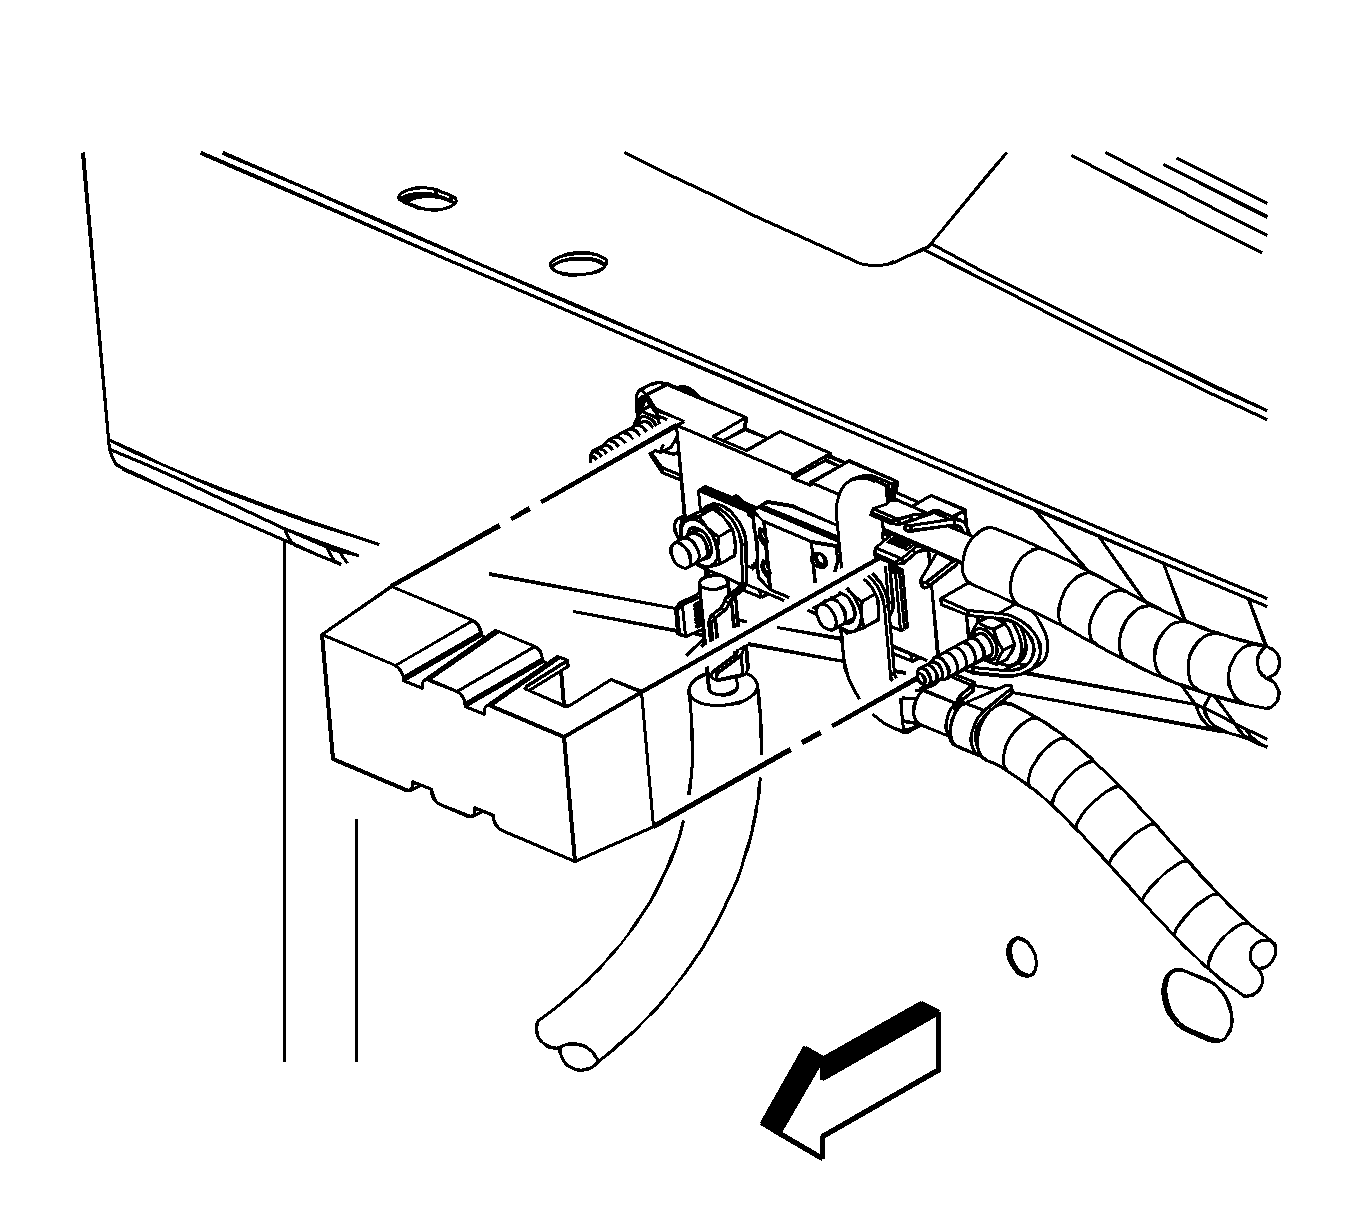
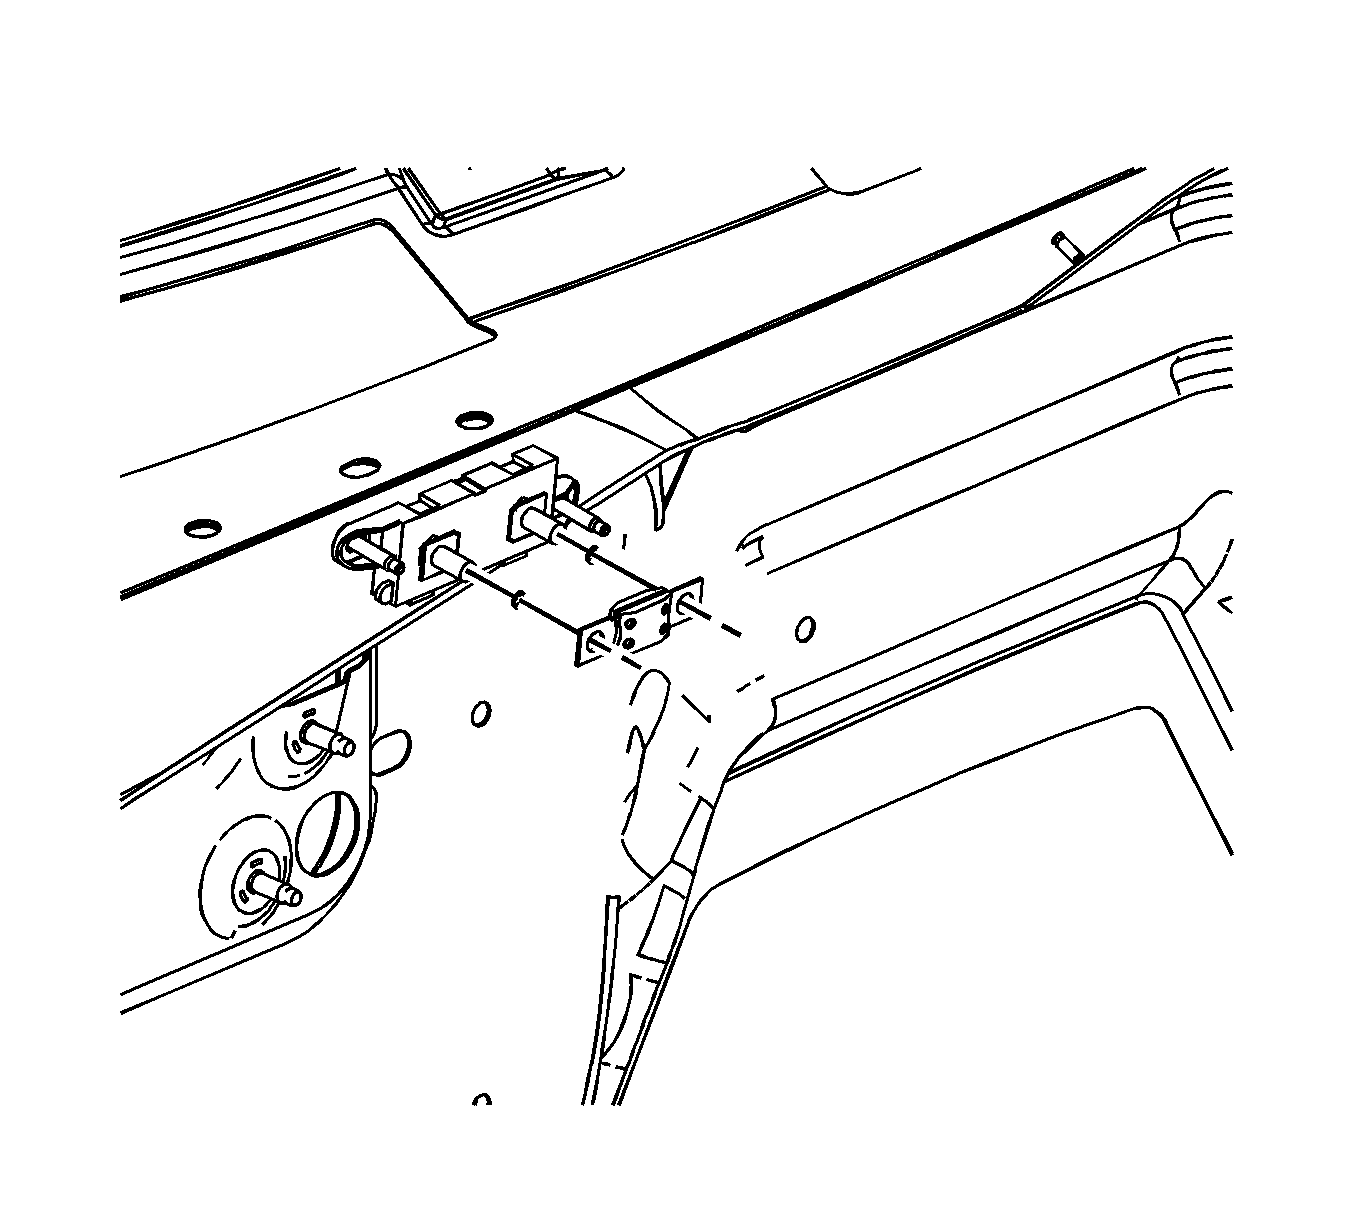
- Remove the fuse from the holder.
Installation Procedure
- Install the fuse to the holder.
- Install the positive battery cable terminal to the fuse stud.
- Install the generator battery jumper cable terminal (4) to the fuse stud.
- Install the generator battery jumper cable to fuse nut (3).
- Install the starter solenoid cable terminal (2) to the fuse stud.
- Install the starter solenoid cable nut (1) to the fuse stud.
- Install the fuse cover.
- Connect the negative battery cable. Refer to Battery Negative Cable Disconnection and Connection.


Notice: Refer to Fastener Notice in the Preface section.
Tighten
Tighten the nut to 15 N·m (11 lb ft).

Tighten
Tighten the nut to 15 N·m (11 lb ft).

175 Amp Mega Fuse Replacement w/Auxiliary Battery
Removal Procedure
- Disconnect the auxiliary battery negative cable. Refer to Battery Negative Cable Disconnection and Connection.
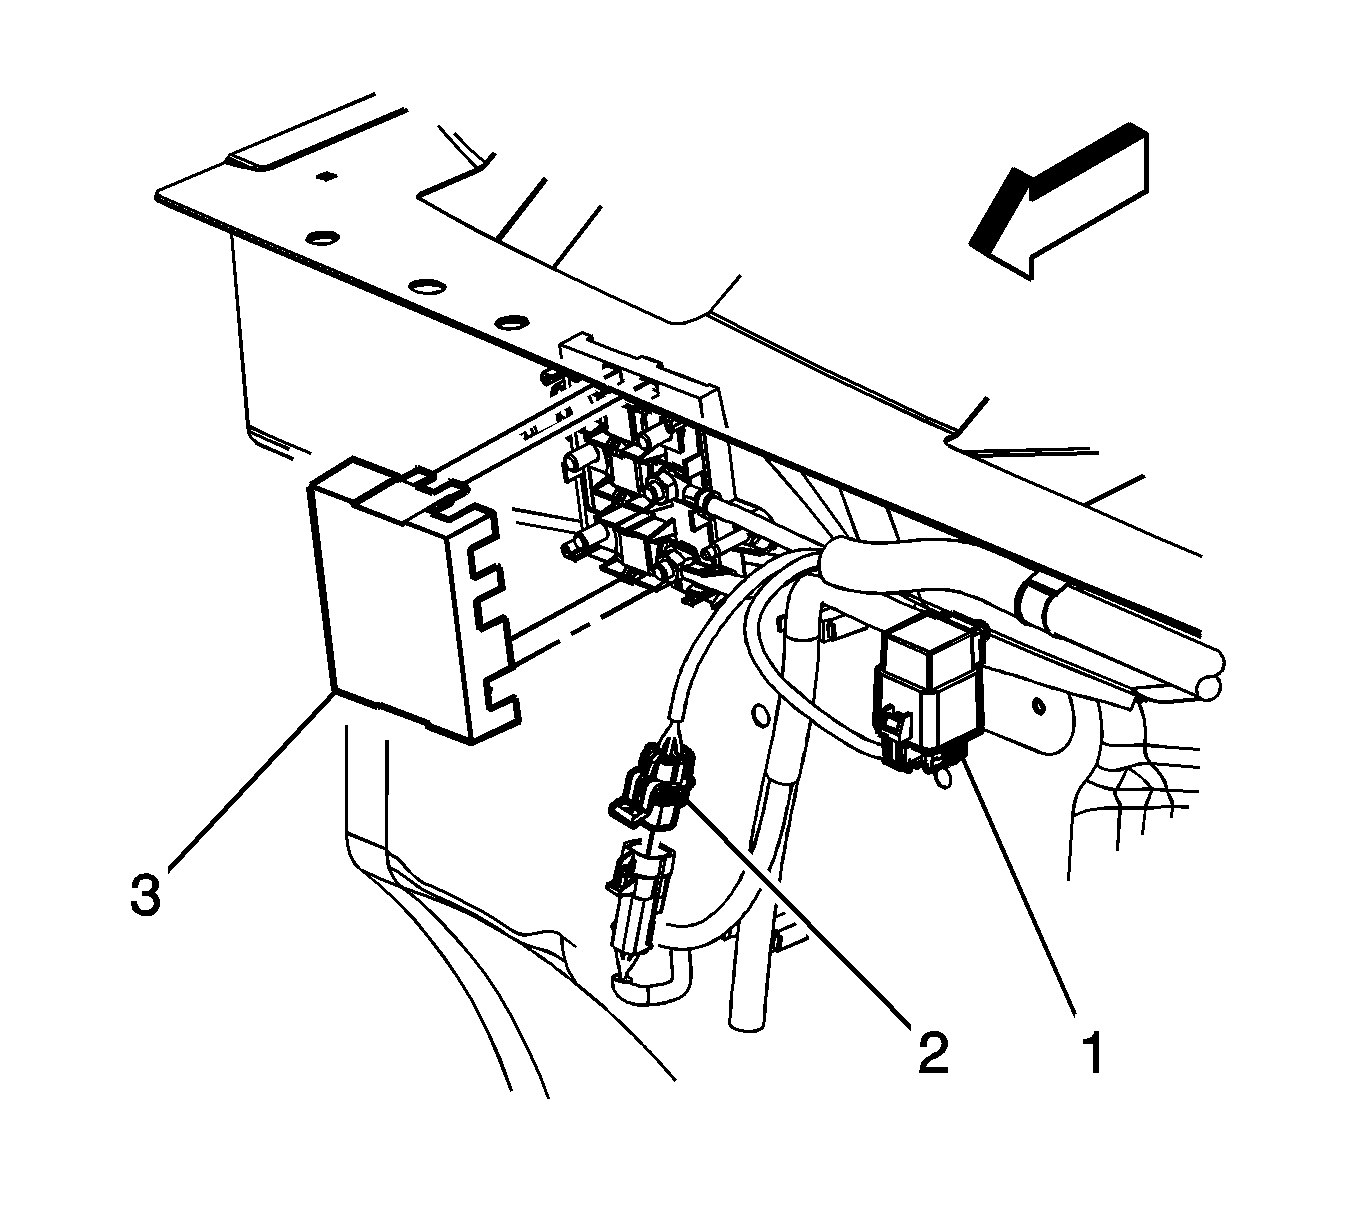
- Remove the mega fuse cover.
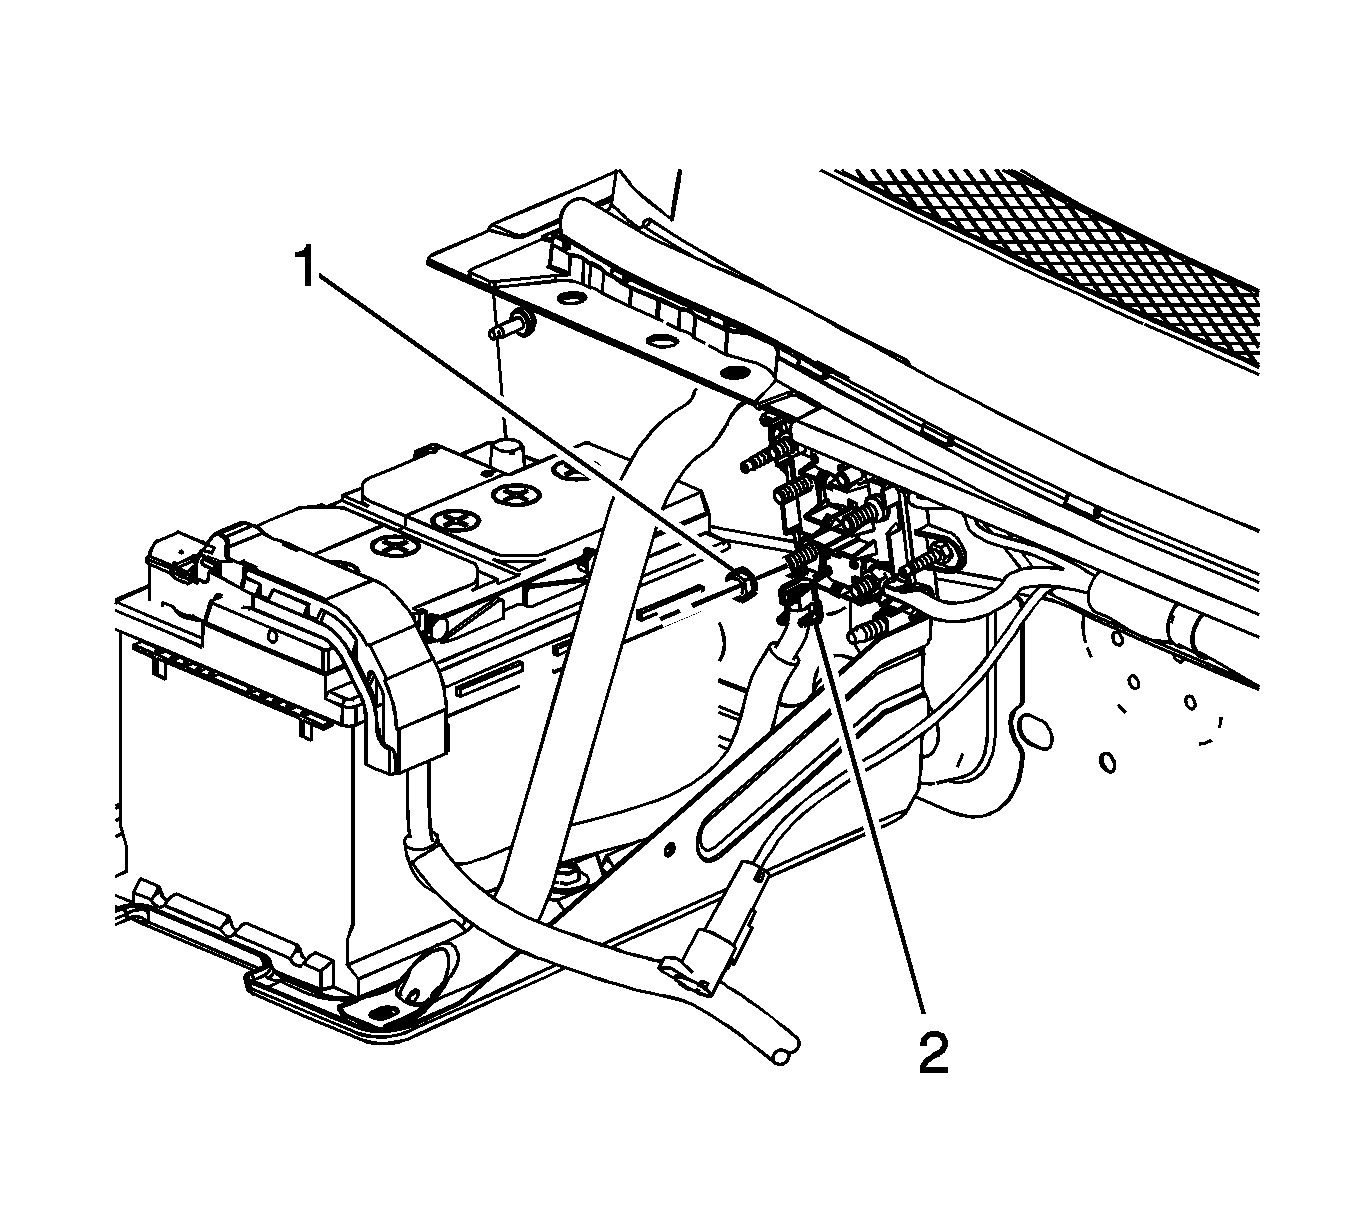
- Remove the starter solenoid cable nut (1) from the fuse stud.
- Remove the starter solenoid cable terminal (2) from the fuse stud.
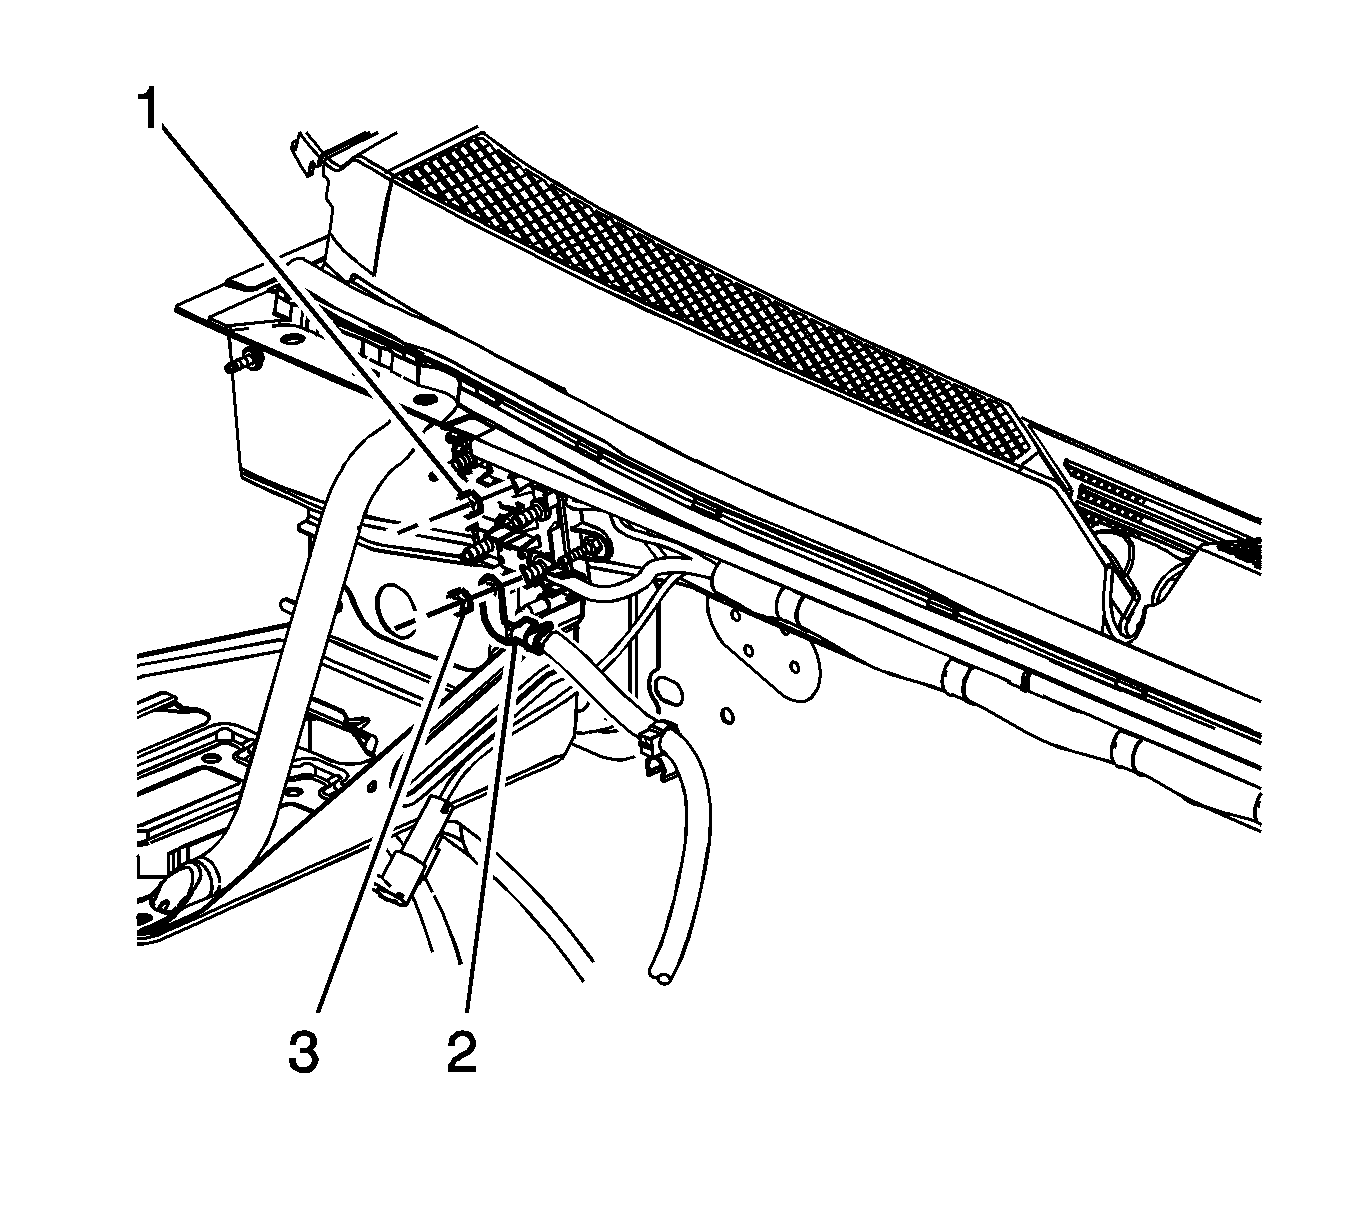
- Remove the auxiliary battery positive cable nut (1) from the mega fuse holder.
- Remove the generator battery jumper cable to fuse nut (3).
- Remove the generator battery jumper cable terminal (2) from the fuse stud.
- Remove the auxiliary battery positive cable from the fuse studs.
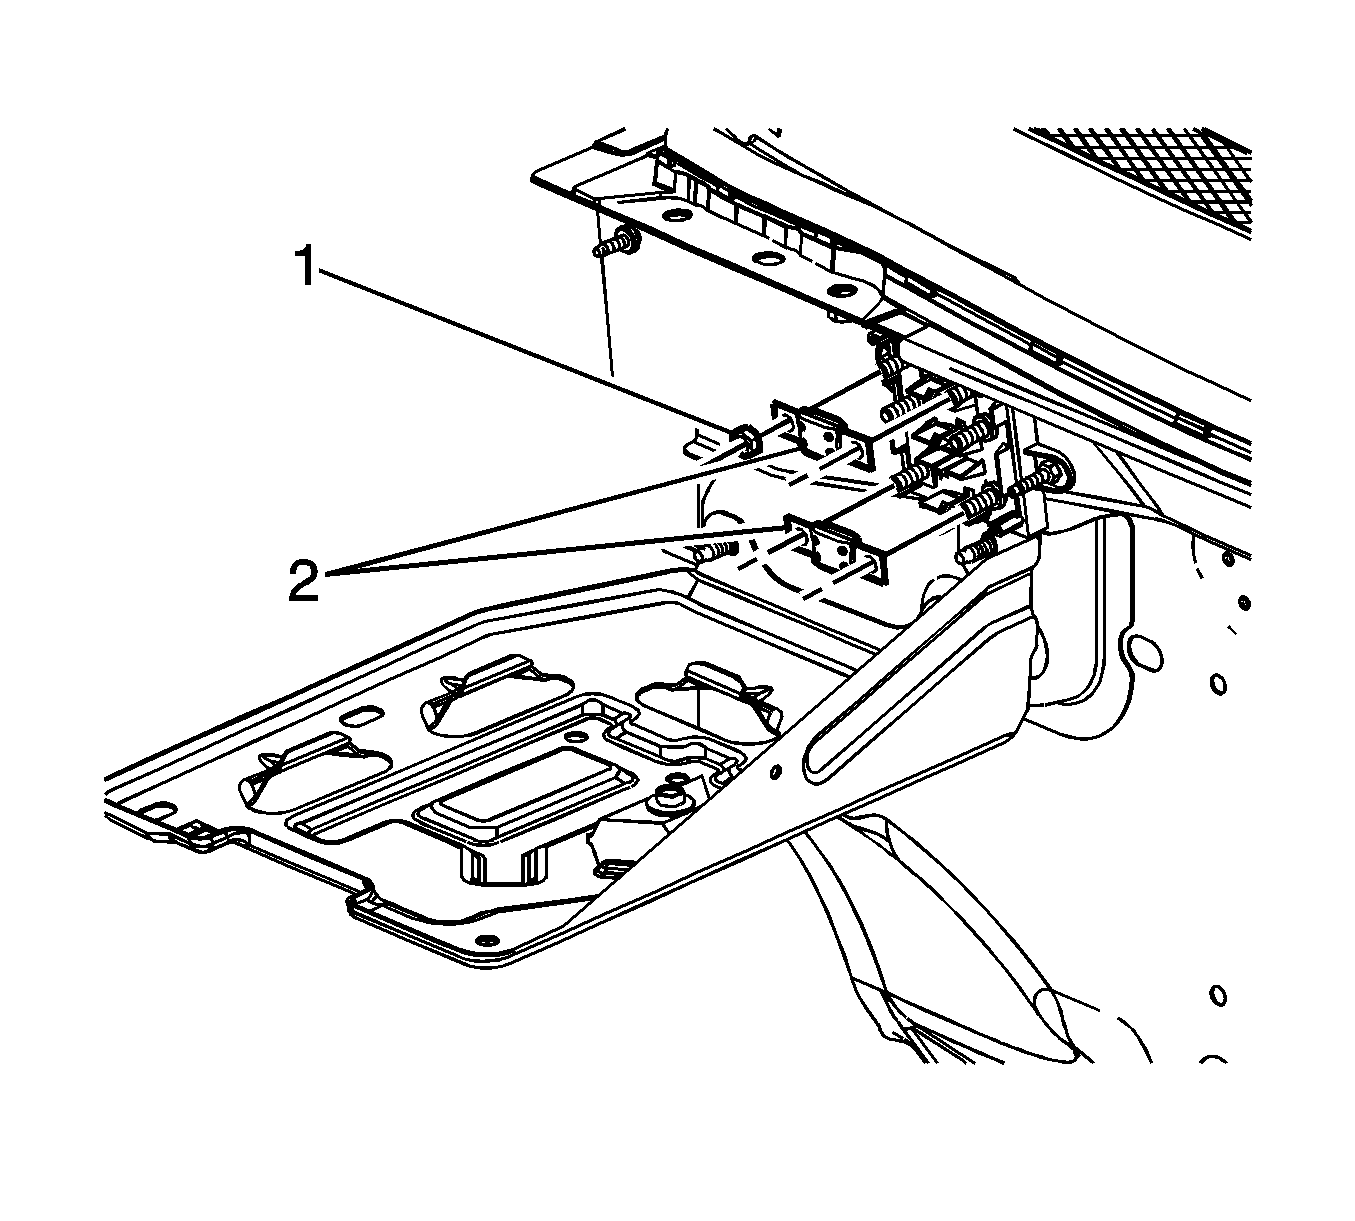
- Remove the upper mega fuse nut (1), if necessary.
- Remove the appropriate mega fuse (2).
Installation Procedure
- Install the appropriate mega fuse (2).
- Install the upper mega fuse nut (1), if necessary.
- Install the auxiliary battery positive cable to the fuse studs.
- Install the generator battery jumper cable terminal (2) to the fuse stud.
- Install the generator battery jumper cable to fuse nut (3).
- Install the auxiliary battery positive cable nut (1) to the mega fuse holder.
- Install the starter solenoid cable terminal (2) to the fuse stud.
- Install the starter solenoid cable nut (1) to the fuse stud.
- Install the mega fuse cover.
- Connect the auxiliary battery negative cable. Refer to Battery Negative Cable Disconnection and Connection.

Notice: Refer to Fastener Notice in the Preface section.
Tighten
Tighten the nut to 15 N·m (11 lb ft).

Tighten
Tighten the nut to 9 N·m (80 lb in).
Tighten
Tighten the nut to 15 N·m (11 lb ft).

Tighten
Tighten the nut to 15 N·m (11 lb ft).

