For 1990-2009 cars only
Special Tools
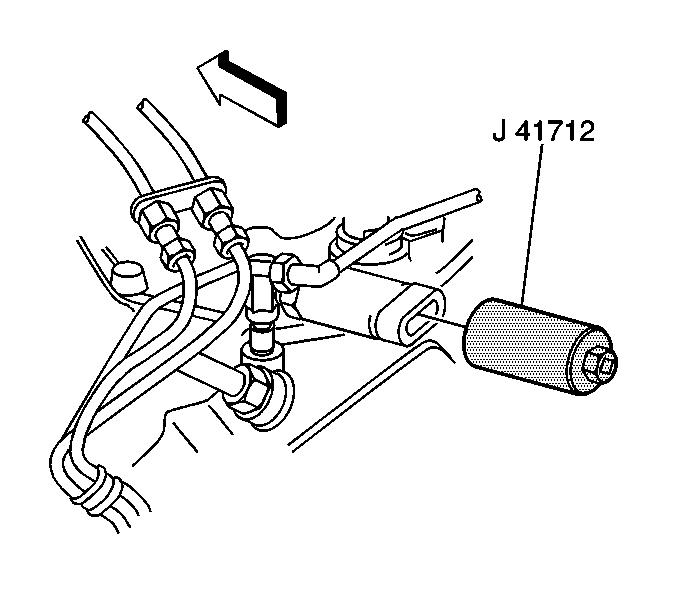
J 41712 Oil Pressure Switch Socket
Removal Procedure
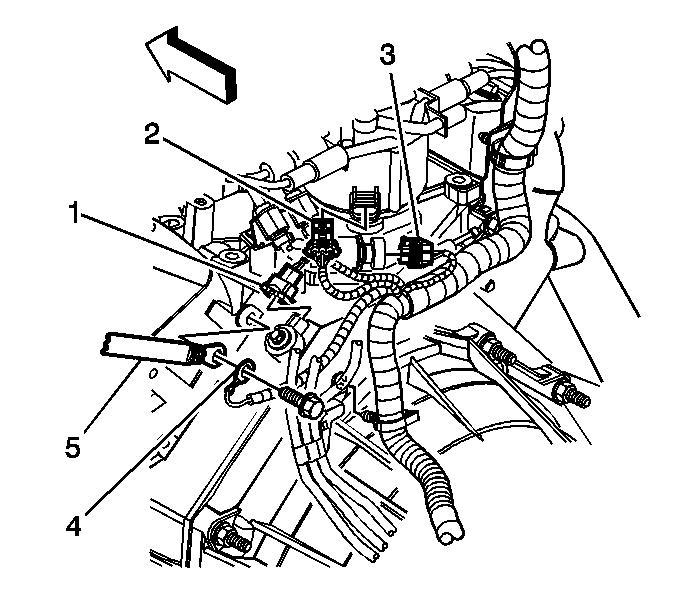
- Disconnect the fuel pump/oil pressure sensor electrical connector (3).
- Using J 41712 , remove the fuel pump/oil pressure sensor.
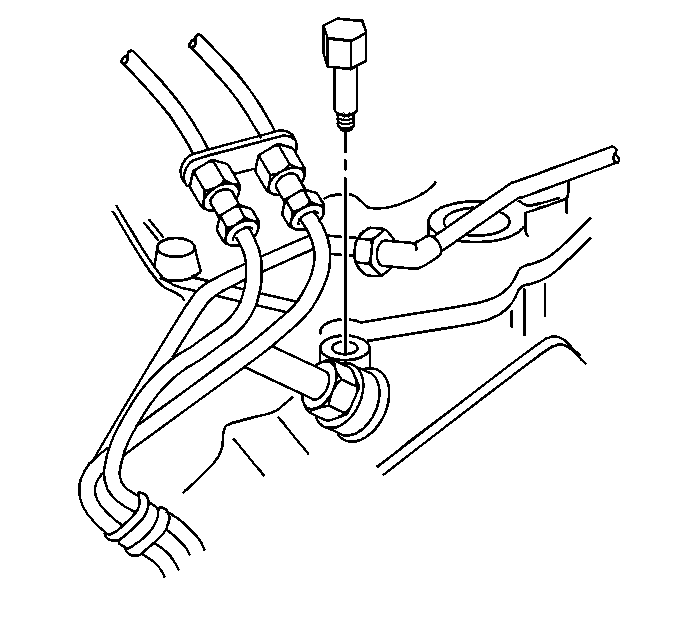
- Remove the fuel pump/oil pressure sensor fitting, if necessary.

Note: Clean the area around the oil pressure sensor. Do not allow debris to enter the engine.


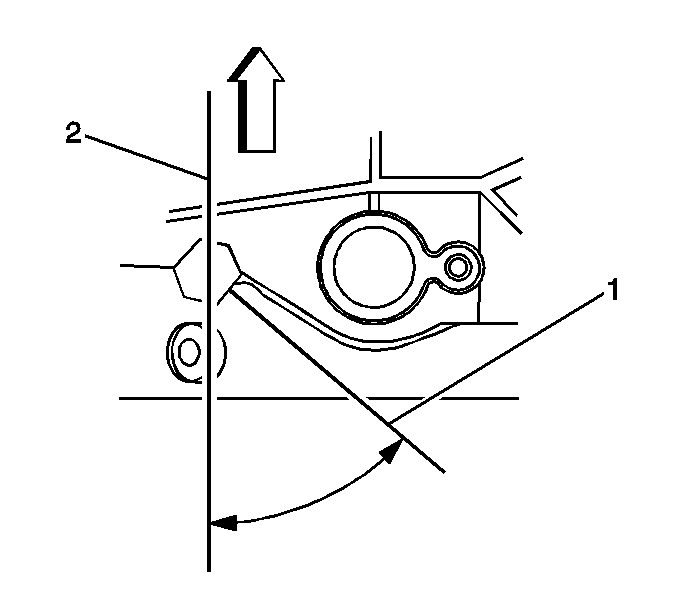
Note: Note the alignment of the engine oil pressure sensor fitting prior to removal.
Installation Procedure
- If installing the old fitting, apply sealant to the threads of the fitting. Refer to Adhesives, Fluids, Lubricants, and Sealers for the correct part number.
- Install the fitting until snug, if necessary.
- Tighten the fuel pump/oil pressure sensor fitting.
- Tighten the fitting to 15 N·m (11 lb ft).
- Increase torque until the centerline of the fitting (1) is 50 degrees from the centerline of the crankshaft (2).
- If installing the old sensor, apply sealant to the threads of the sensor. Refer to Adhesives, Fluids, Lubricants, and Sealers for the correct part number.
- Using J 41712 , install the sensor.
- Connect the fuel pump/oil pressure sensor electrical connector (3).
- Check and adjust the engine oil level, if necessary.

Caution: Refer to Fastener Caution in the Preface section.

Tighten

Tighten
Tighten the sensor to 30 N·m (22 lb ft).

