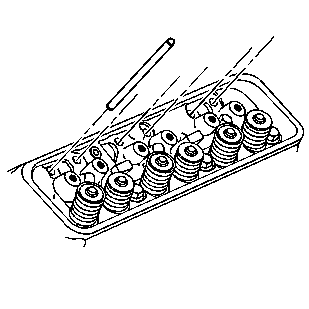
Note: Be sure to keep parts in order. Parts must be reinstalled into the original location and position.
- Install the valve pushrods.
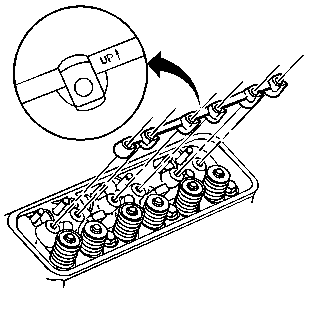
Note: Be sure that the arrow on the valve rocker arm support is in the up position.
- Install the valve rocker arm supports.

- Apply prelube GM P/N 12345501 (Canadian P/N 992704) or equivalent, to the following
valve rocker arm contact surfaces:
| • | Valve pushrod socket (1) |

- Install the valve rocker arm assemblies as follows:
| 4.1. | Finger start the bolt at location (1) |
| 4.2. | Finger start the bolt at location (2) |
| 4.3. | Finger start the bolt at location (3) |
| 4.4. | Finger start the remaining valve rocker arm bolts |
Note: Rotate the number 1 cylinder to top dead center (TDC) of the compression stroke. The engine front cover has 2 alignment tabs and the crankshaft balancer has 2 alignment marks which are spaced 90 degrees
apart that are used for positioning the number 1 piston at TDC.
- Rotate the crankshaft balancer clockwise until the alignment marks on the crankshaft balancer are aligned with the tabs on the engine front cover, 1 with 2 and 3 with 4. At that point the number 1 piston should be at TDC of the compression
stroke.
Caution: Refer to Fastener Caution in the Preface section.
Note: Once the valve rocker arm assemblies are installed and properly torqued, no additional valve lash adjustment is required.
- Tighten the valve rocker arm bolts and tighten to
30 N·m (22 lb ft).
