Exhaust Pressure Differential Sensor Pipe Replacement Pickup
Removal Procedure
Caution: The exhaust temperature sensor and exhaust pressure differential sensor line fittings may be difficult to remove when the engine exhaust system temperature is below 48°C (120°F). Excessive force may damage the threads in the exhaust manifold or exhaust pipe.
- Raise and support the vehicle. Refer to Lifting and Jacking the Vehicle.
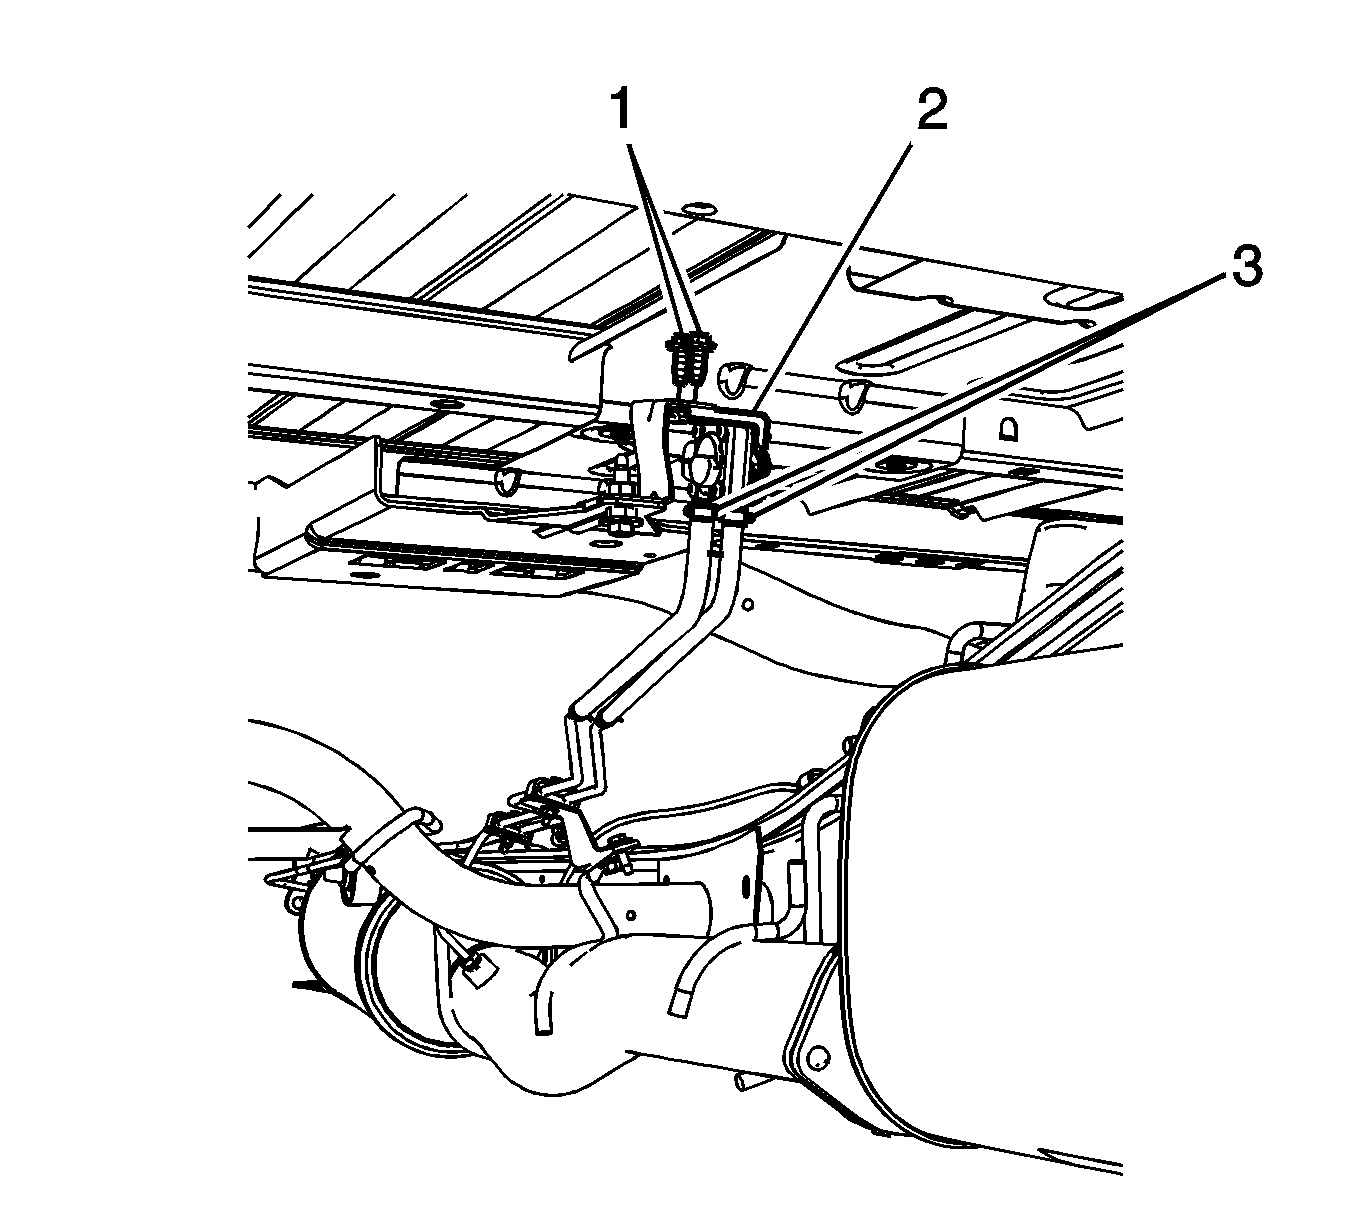
- Reposition the exhaust differential pressure sensor pipe assembly hose clamps (3).
- Remove the exhaust differential pressure sensor pipe assembly hoses from the sensor.
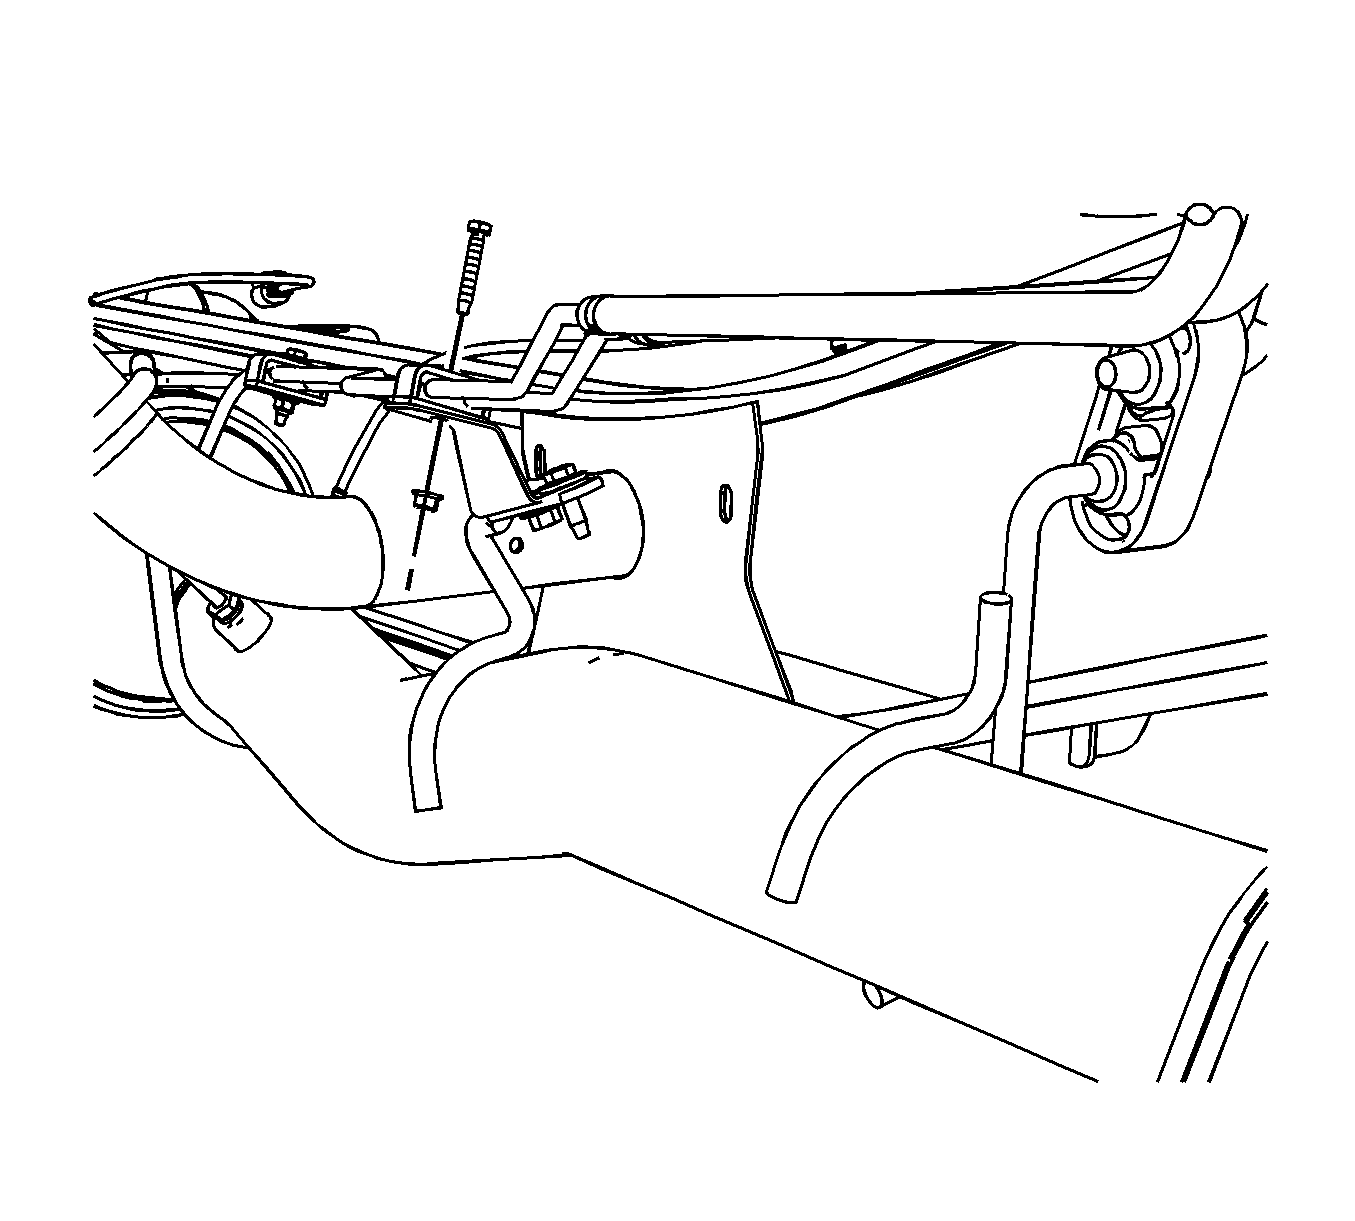
- Remove the exhaust differential pressure sensor pipe bracket bolt and nut.
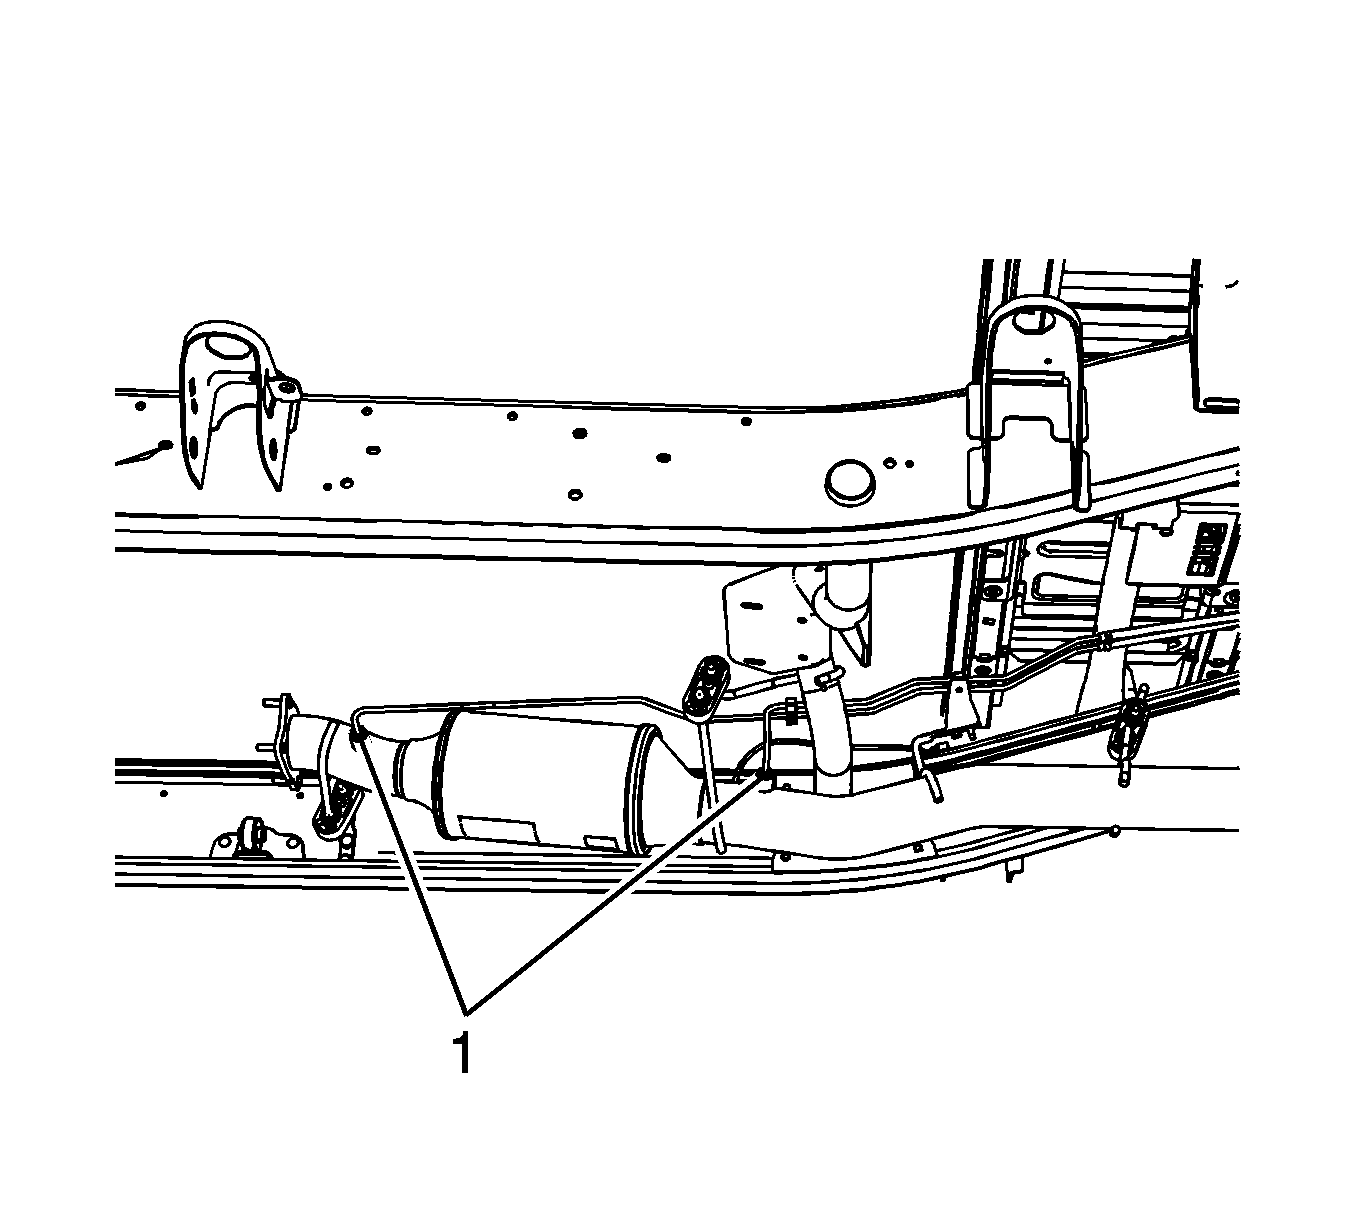
- Loosen the exhaust differential pressure sensor pipe assembly fittings (1).
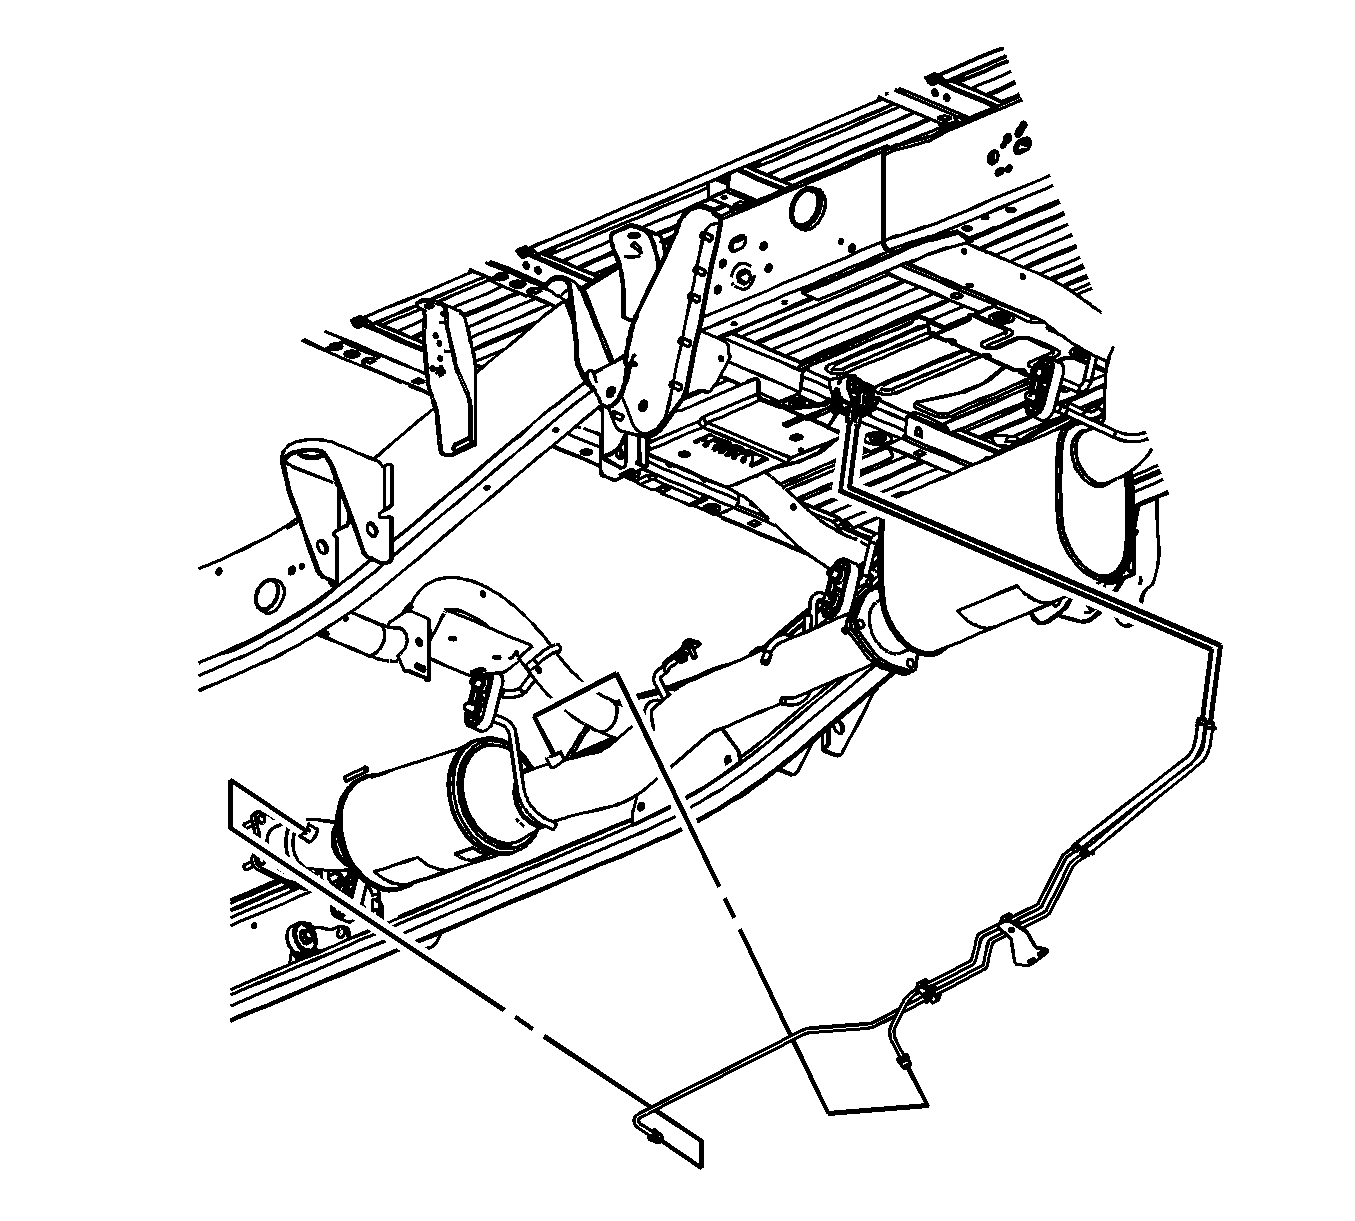
- Remove the exhaust differential pressure sensor pipe assembly.


Installation Procedure
- If reinstalling the old temperature sensor or differential pressor sensor line fittings, coat the threads with anti-seize compound GM P/N 12377953, or equivalent.
- Position and install the exhaust differential pressure sensor pipe assembly to the vehicle.
- Tighten the exhaust differential pressure sensor pipe assembly fittings (1).
- Position the exhaust differential pressure sensor pipe bracket to the exhaust hanger and install the bolt and nut.
- Install the exhaust differential pressure sensor pipe assembly hoses to the sensor.
- Position the exhaust differential pressure sensor pipe assembly hose clamps (3).
- Lower the vehicle.
Note: A special anti-seize compound is used in the sensor or line fittings threads. The compound consists of liquid graphite and glass beads. The graphite tends to burn away, but the glass beads remain, making the sensor or line fitting easier to remove. New, or service replacement sensors or line fittings already have the compound applied to the threads. If the sensor or line fittings are removed from an exhaust component and if for any reason the sensor or line fitting are reinstalled, the threads must have anti-seize compound applied before reinstallation.

Note: Ensure to route the pipe assembly over the frame crossmember.
Caution: Refer to Fastener Caution in the Preface section.

Tighten
Tighten the fittings to 45 N·m (33 lb ft).

Tighten
Tighten the bracket bolt/nut to 9 N·m (80 lb in).

Exhaust Pressure Differential Sensor Pipe Replacement Cab/Chassis
Removal Procedure
Caution: The exhaust temperature sensor and exhaust pressure differential sensor line fittings may be difficult to remove when the engine exhaust system temperature is below 48°C (120°F). Excessive force may damage the threads in the exhaust manifold or exhaust pipe.
- Raise and support the vehicle. Refer to Lifting and Jacking the Vehicle.
- Reposition the exhaust differential pressure sensor pipe assembly hose clamps (3).
- Remove the exhaust differential pressure sensor pipe assembly hoses from the sensor.
- Remove the exhaust differential pressure sensor pipe bracket bolt and nut.
- Loosen the exhaust differential pressure sensor pipe assembly fittings (1).
- Remove the exhaust differential pressure sensor pipe assembly.


Installation Procedure
- If reinstalling the old temperature sensor or differential pressor sensor line fittings, coat the threads with anti-seize compound GM P/N 12377953, or equivalent.
- Position and install the exhaust differential pressure sensor pipe assembly to the vehicle.
- Tighten the exhaust differential pressure sensor pipe assembly fittings (1).
- Position the exhaust differential pressure sensor pipe bracket to the exhaust hanger and install the bolt and nut.
- Install the exhaust differential pressure sensor pipe assembly hoses to the sensor.
- Position the exhaust differential pressure sensor pipe assembly hose clamps (3).
- Lower the vehicle.
Note: A special anti-seize compound is used in the sensor or line fittings threads. The compound consists of liquid graphite and glass beads. The graphite tends to burn away, but the glass beads remain, making the sensor or line fitting easier to remove. New, or service replacement sensors or line fittings already have the compound applied to the threads. If the sensor or line fittings are removed from an exhaust component and if for any reason the sensor or line fitting are reinstalled, the threads must have anti-seize compound applied before reinstallation.

Note: Ensure to route the pipe assembly over the frame crossmember.
Caution: Refer to Fastener Caution in the Preface section.

Tighten
Tighten the fittings to 45 N·m (33 lb ft).

Tighten
Tighten the bracket bolt/nut to 9 N·m (80 lb in).

