Removal Procedure
- Remove the intake manifold cover. Refer to Intake Manifold Cover Replacement.
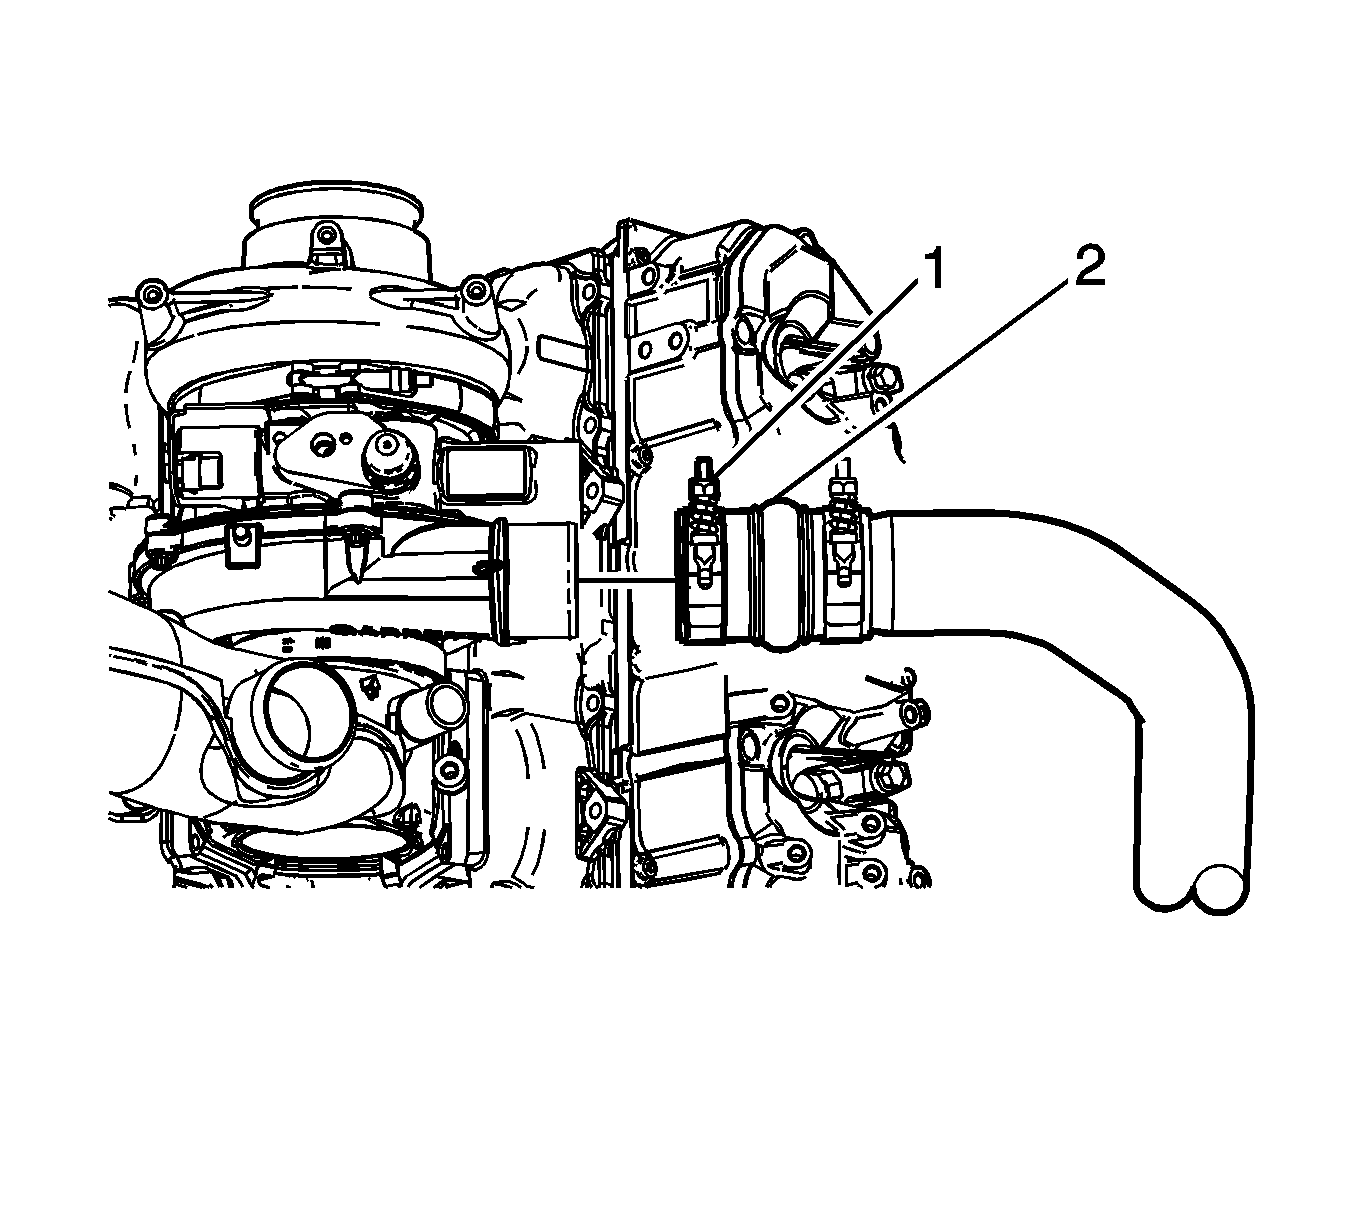
- Loosen the charge air cooler inlet pipe connector clamp (1) at the turbocharger.
- Remove the charge air cooler inlet pipe connector (2) from the turbocharger.
- Cover the turbocharger opening with tape in order to prevent possible entry of foreign objects.
- Remove the wheelhouse panel. Refer to Front Wheelhouse Liner Replacement - Left Side.
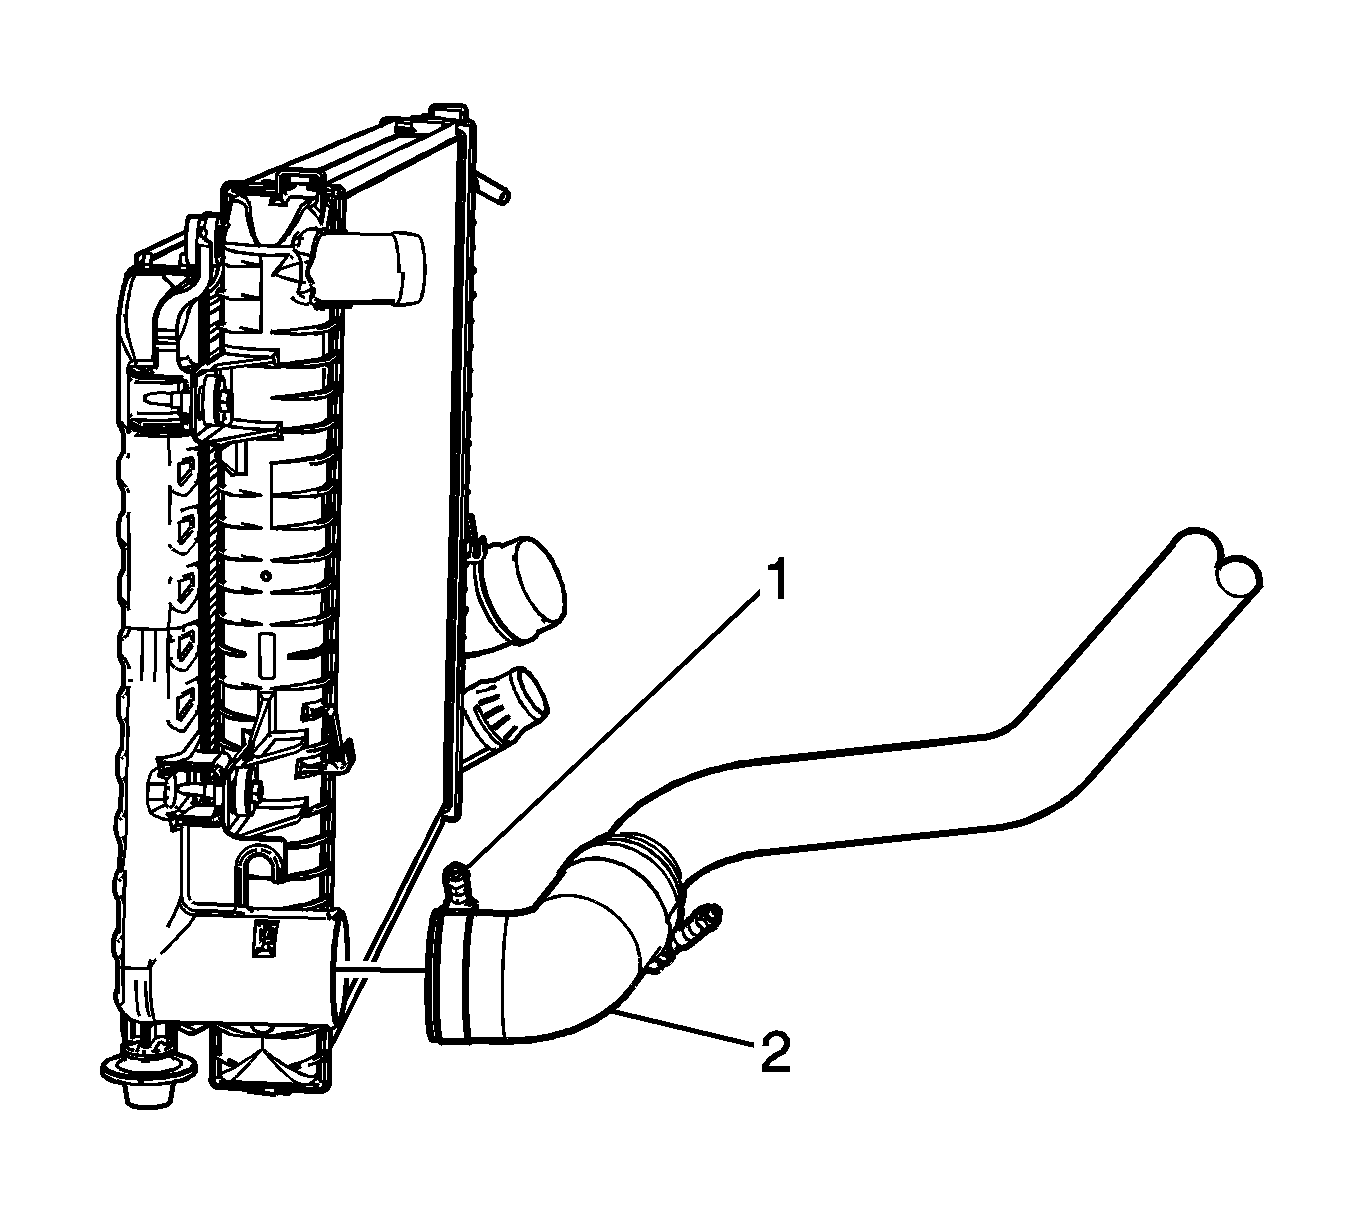
- Working through the wheelhouse, loosen the charge air cooler inlet pipe connector clamp (1) at the charge air cooler.
- Remove the charge air cooler inlet pipe connector (2) from the charge air cooler.
- Lower the vehicle.
- Remove the charge air cooler inlet pipe from the vehicle.

Note: Do not use a screwdriver or other tool to pry the connector loose. The connector can be torn or damaged. Loosen the connector by twisting.

Note: Do not use a screwdriver or other tool to pry the connector loose. The connector can be torn or damaged. Loosen the connector by twisting.
Installation Procedure
- Install the charge air cooler inlet pipe to the vehicle.
- Remove the turbocharger opening cover.
- Install the charge air cooler inlet pipe connector (2) onto the turbocharger.
- Tighten the charge air cooler inlet pipe to turbocharger connector clamp (1).
- Raise and support the vehicle half way. Refer to Lifting and Jacking the Vehicle.
- Working through the wheelhouse, install the charge air cooler inlet pipe connector onto the charge air cooler.
- Tighten the charge air cooler inlet pipe to charge air cooler connector clamp (1).
- Install the wheelhouse panel. Refer to Front Wheelhouse Liner Replacement - Left Side.
- Install the intake manifold cover. Refer to Intake Manifold Cover Replacement.

Note: Do not over tighten the charge air cooler connector clamp. If the clamp is overtightened, the connector may become distorted allowing separation of the connector from the pipe. Make sure the charge air cooler pipe is properly orientated.
Caution: Refer to Fastener Caution in the Preface section.
Tighten
Tighten the clamp to 8 N·m (70 lb in).

Important: Do not over tighten the charged air cooler pipe connector clamp. If the clamp is overtightened, the connector may become distorted allowing separation of the connector from the pipe. Make sure the charge air cooler pipe is properly orientated.
Tighten
Tighten the clamp to 8 N·m (70 lb in).
