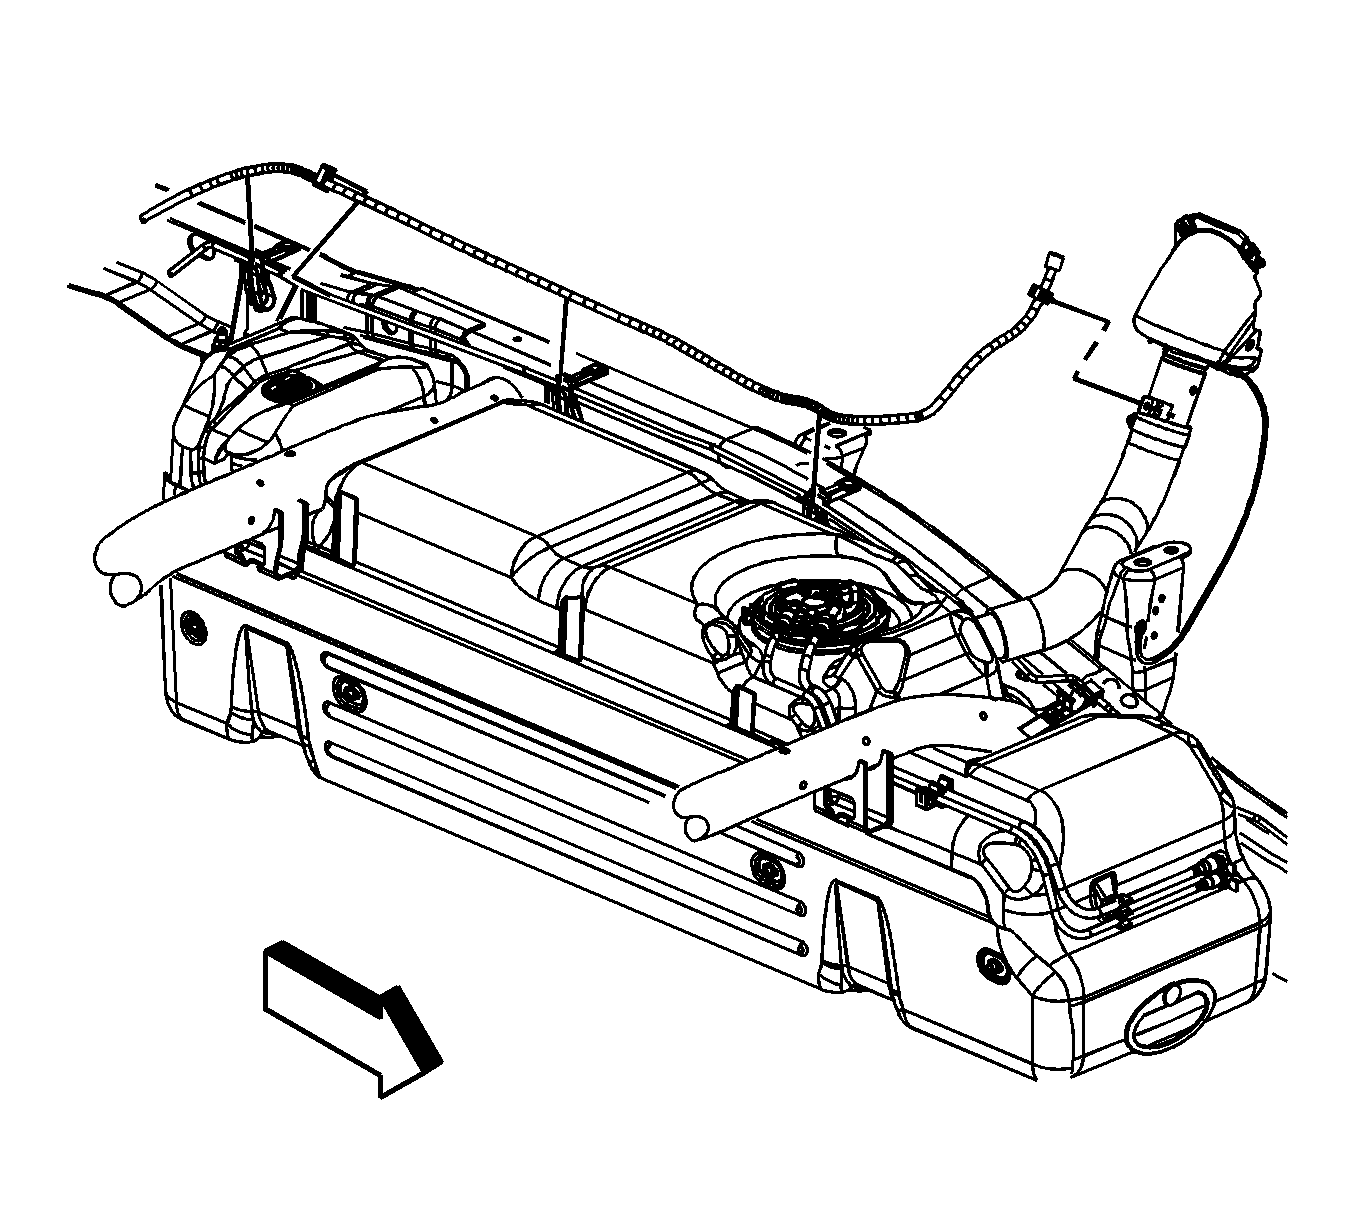
Fuel Tank Replacement Pickup
Removal Procedure
- Drain the fuel tank. Refer to Fuel Tank Draining.
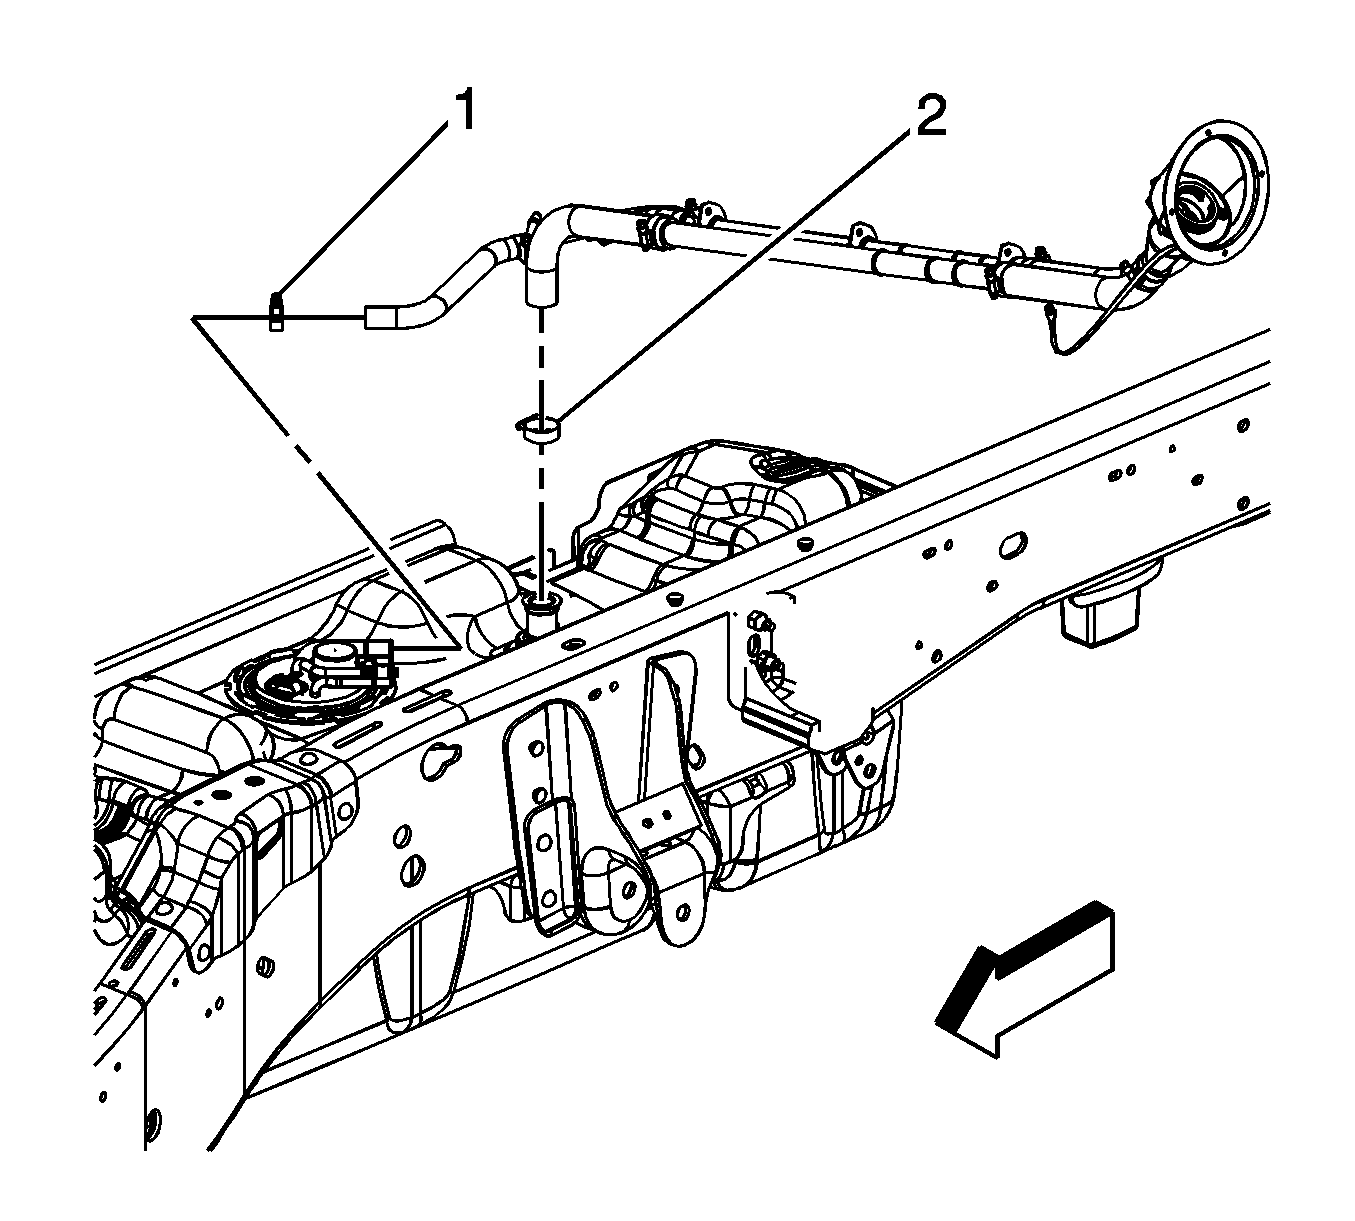
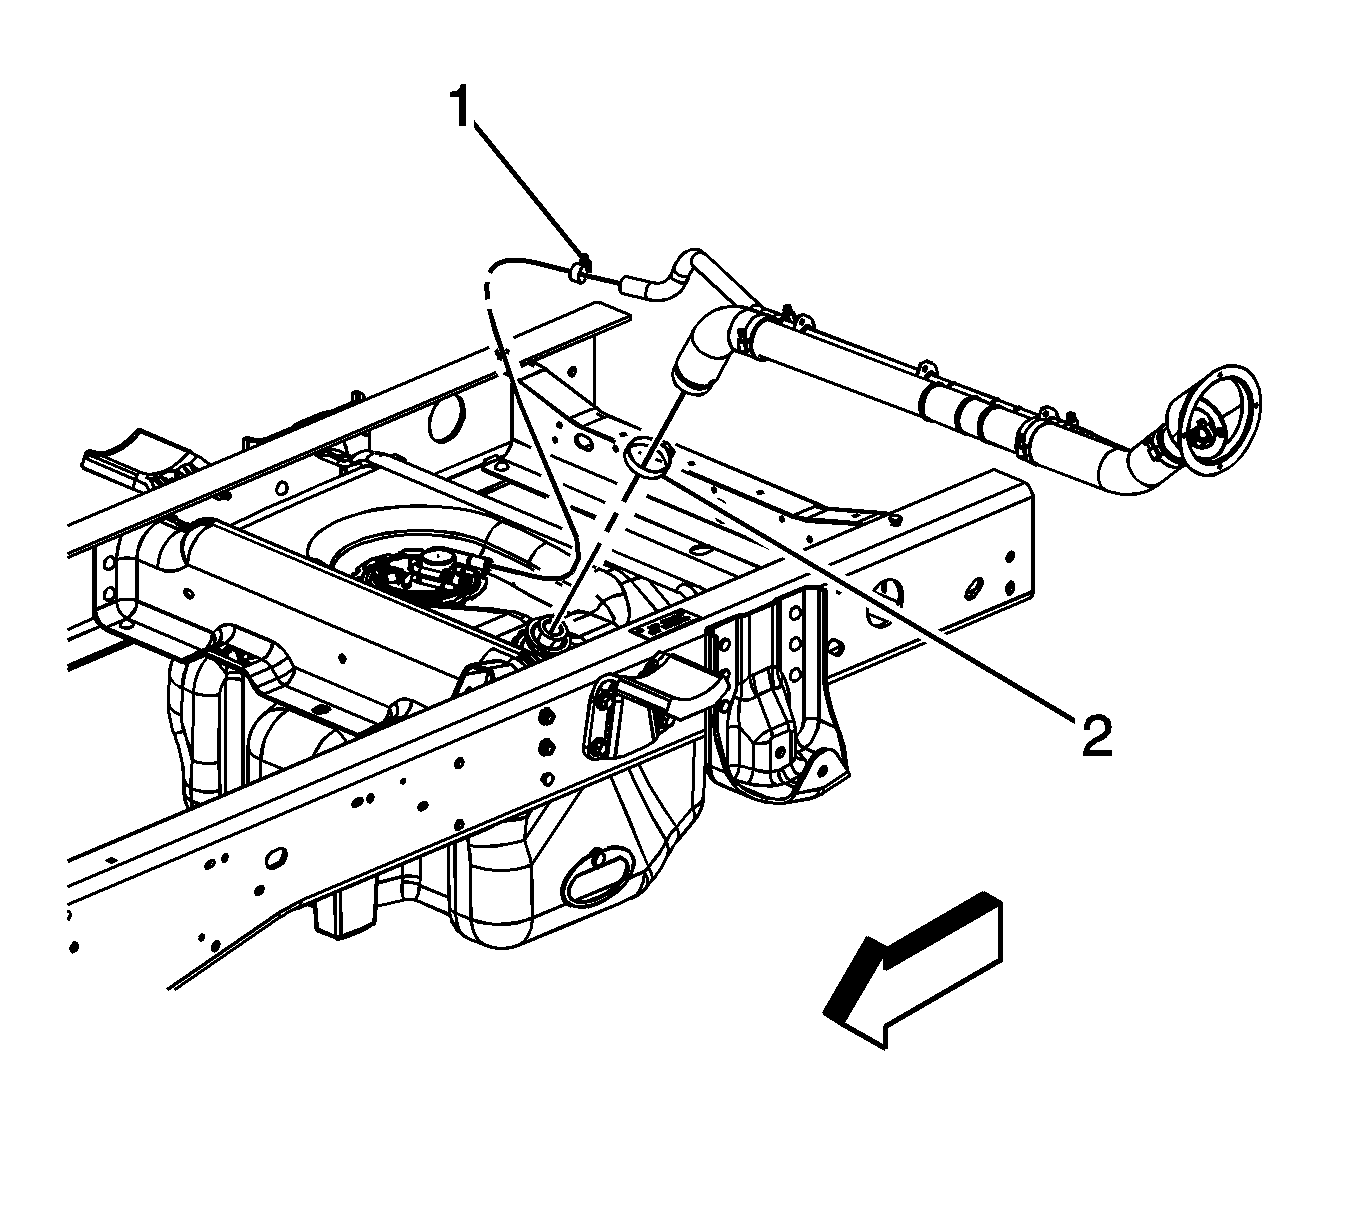
- Remove the fuel tank filler housing to body screws (1), and retainer (2).
- Remove the fuel tank filler housing to fuel tank fill pipe screws.
- Remove the fuel tank filler housing.
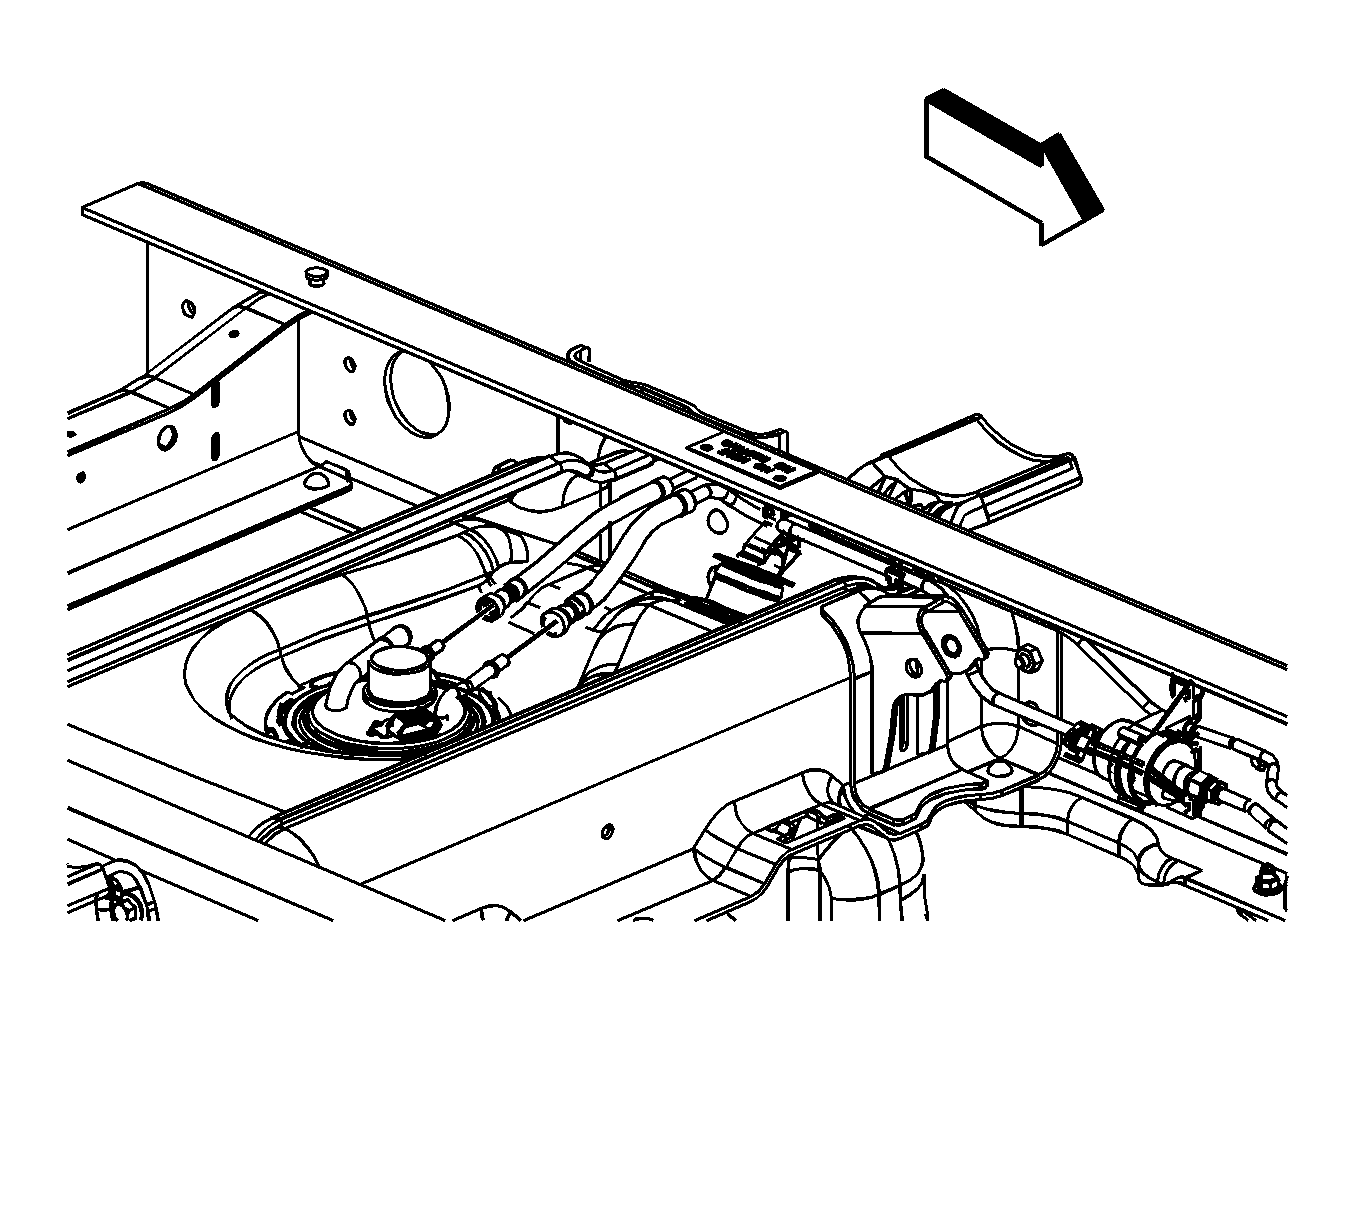
- Remove the rear axle vent hose from the clip on the fuel fill pipe bracket.
- Raise and suitably support the vehicle. Refer to Lifting and Jacking the Vehicle.
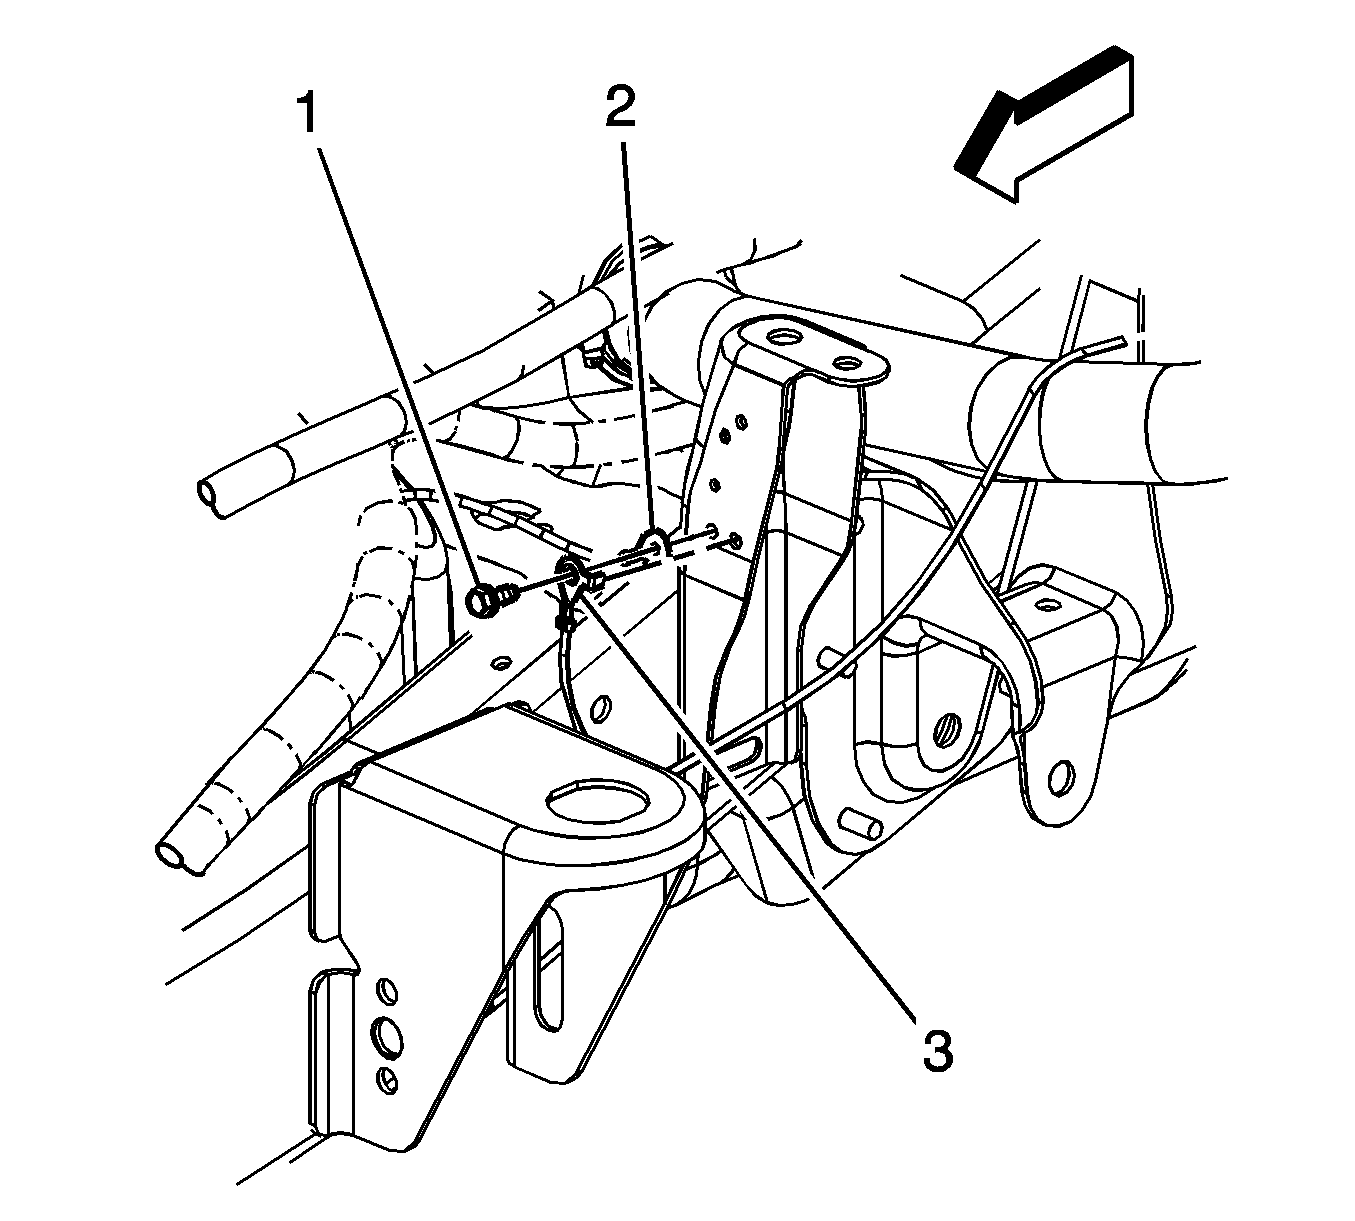
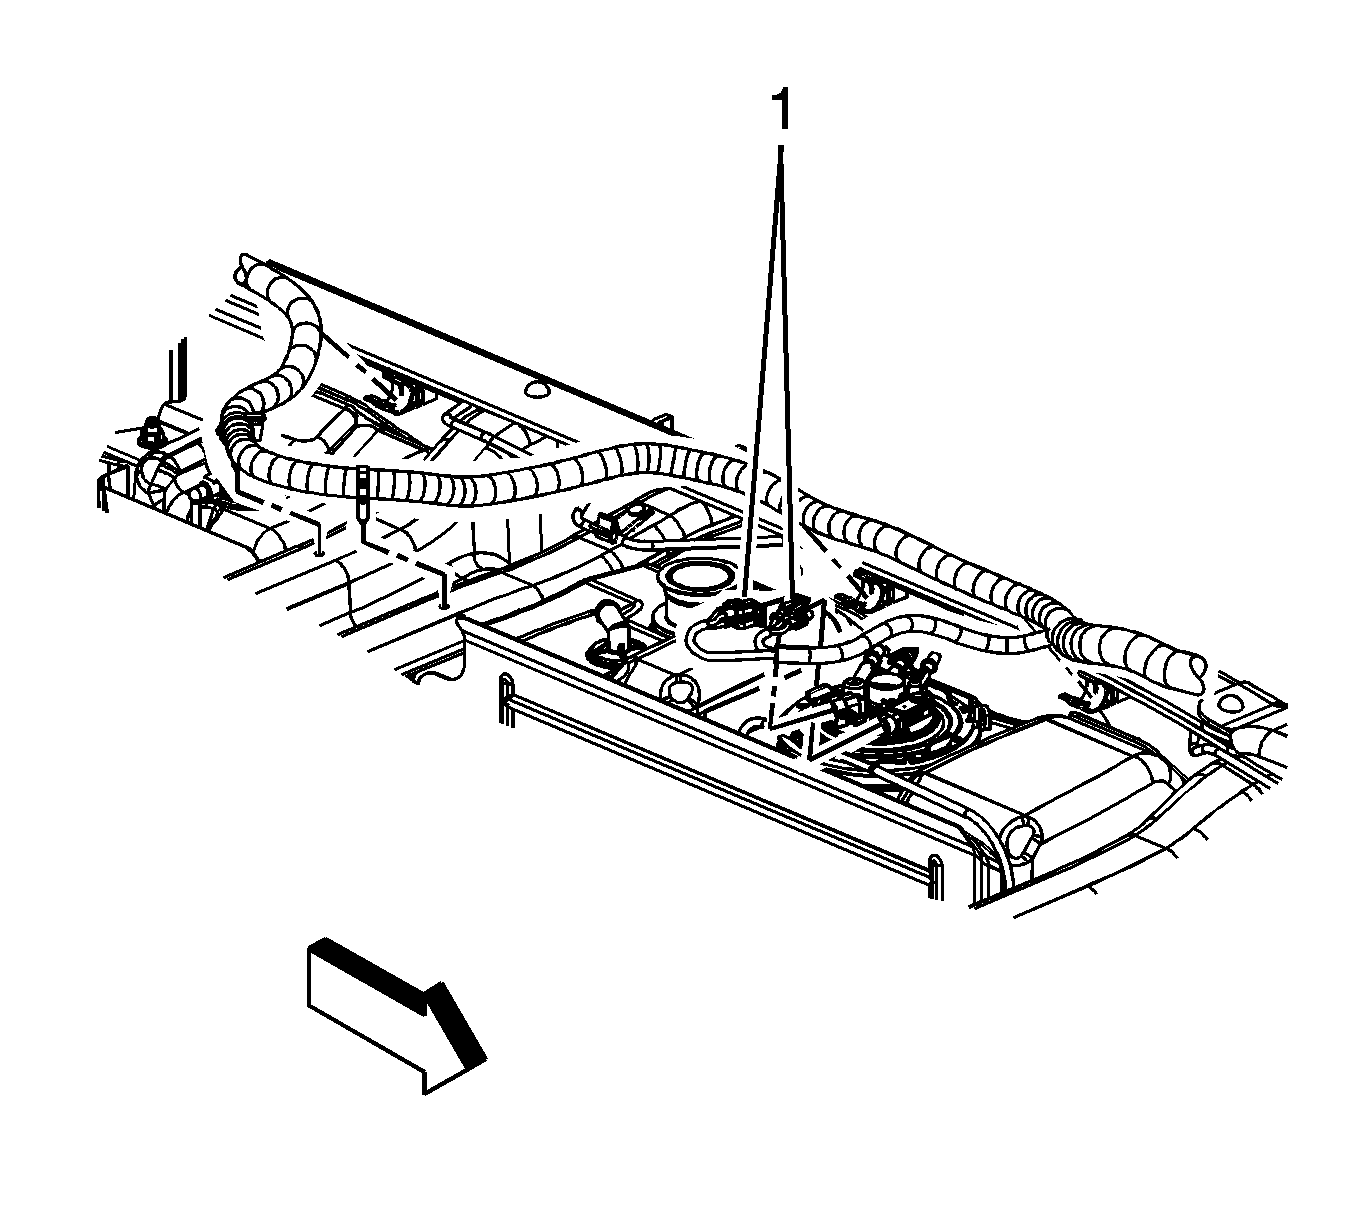
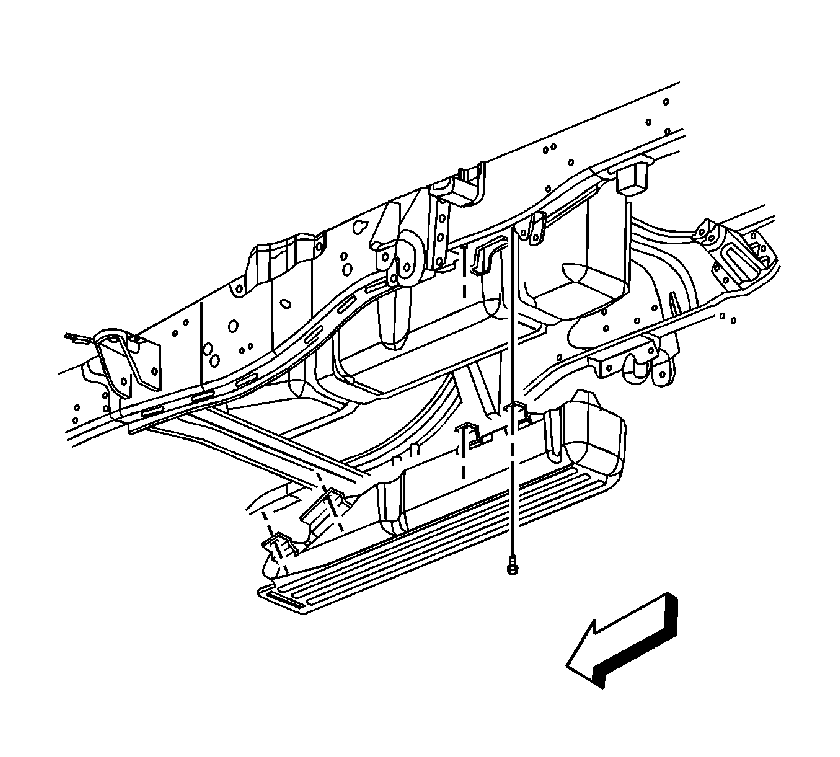
- Remove the fuel tank ground strap bolt (1).
- Reposition the fuel tank ground strap (3).
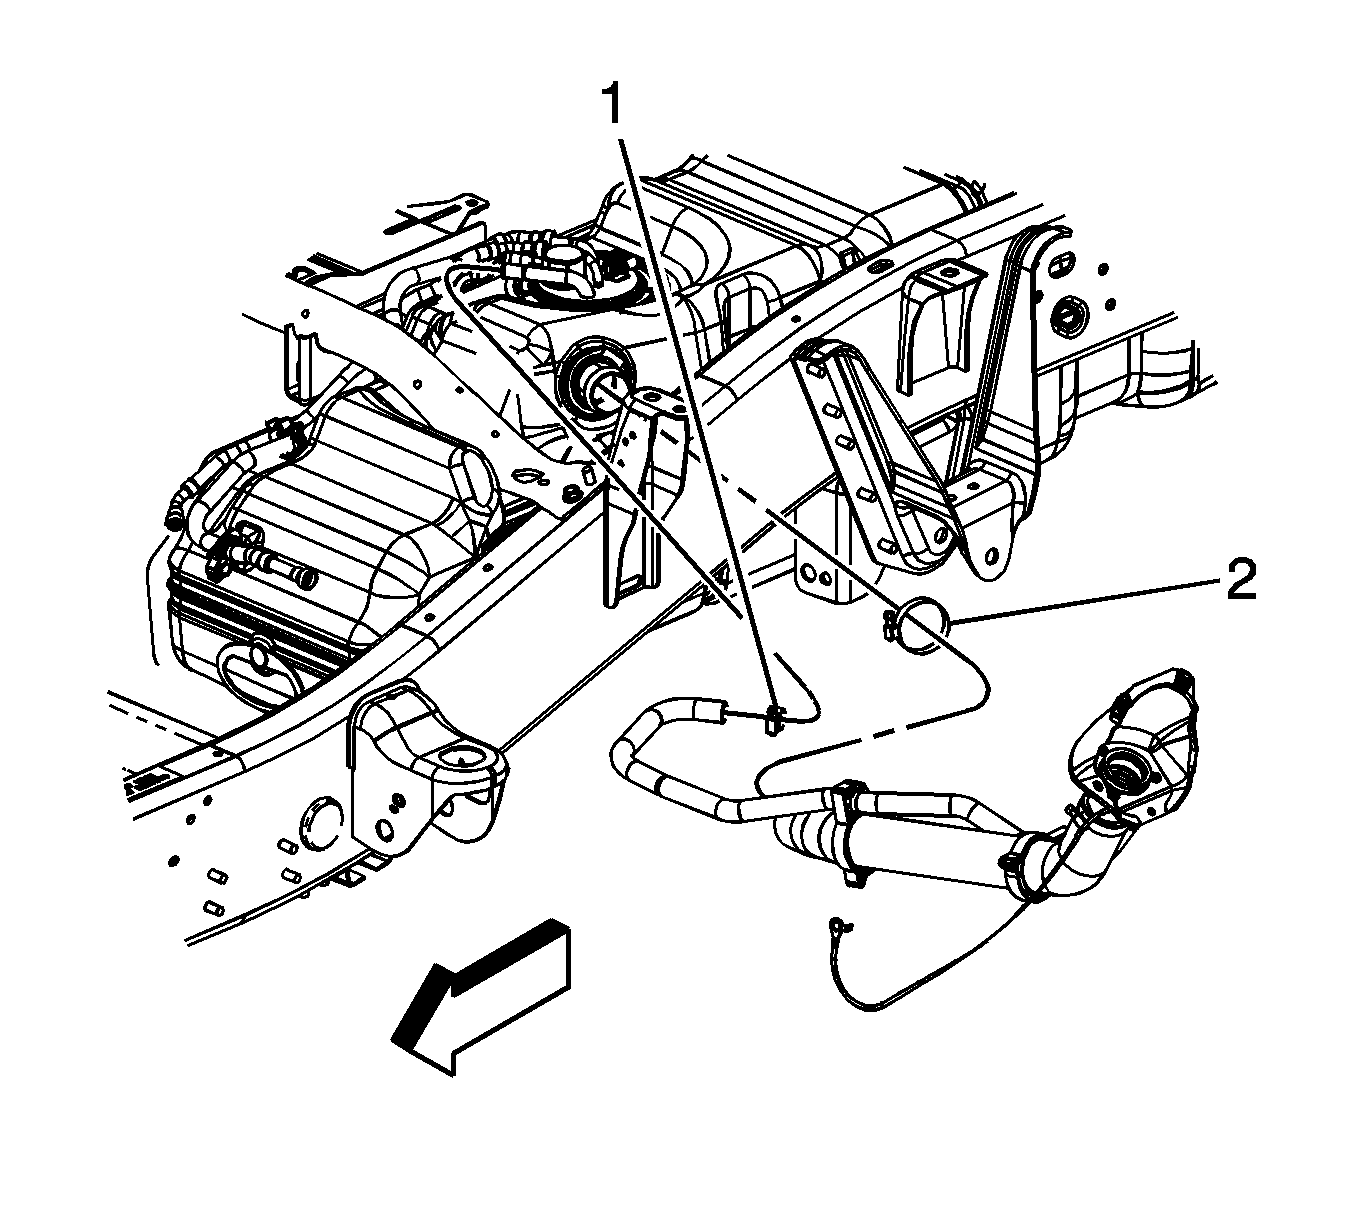
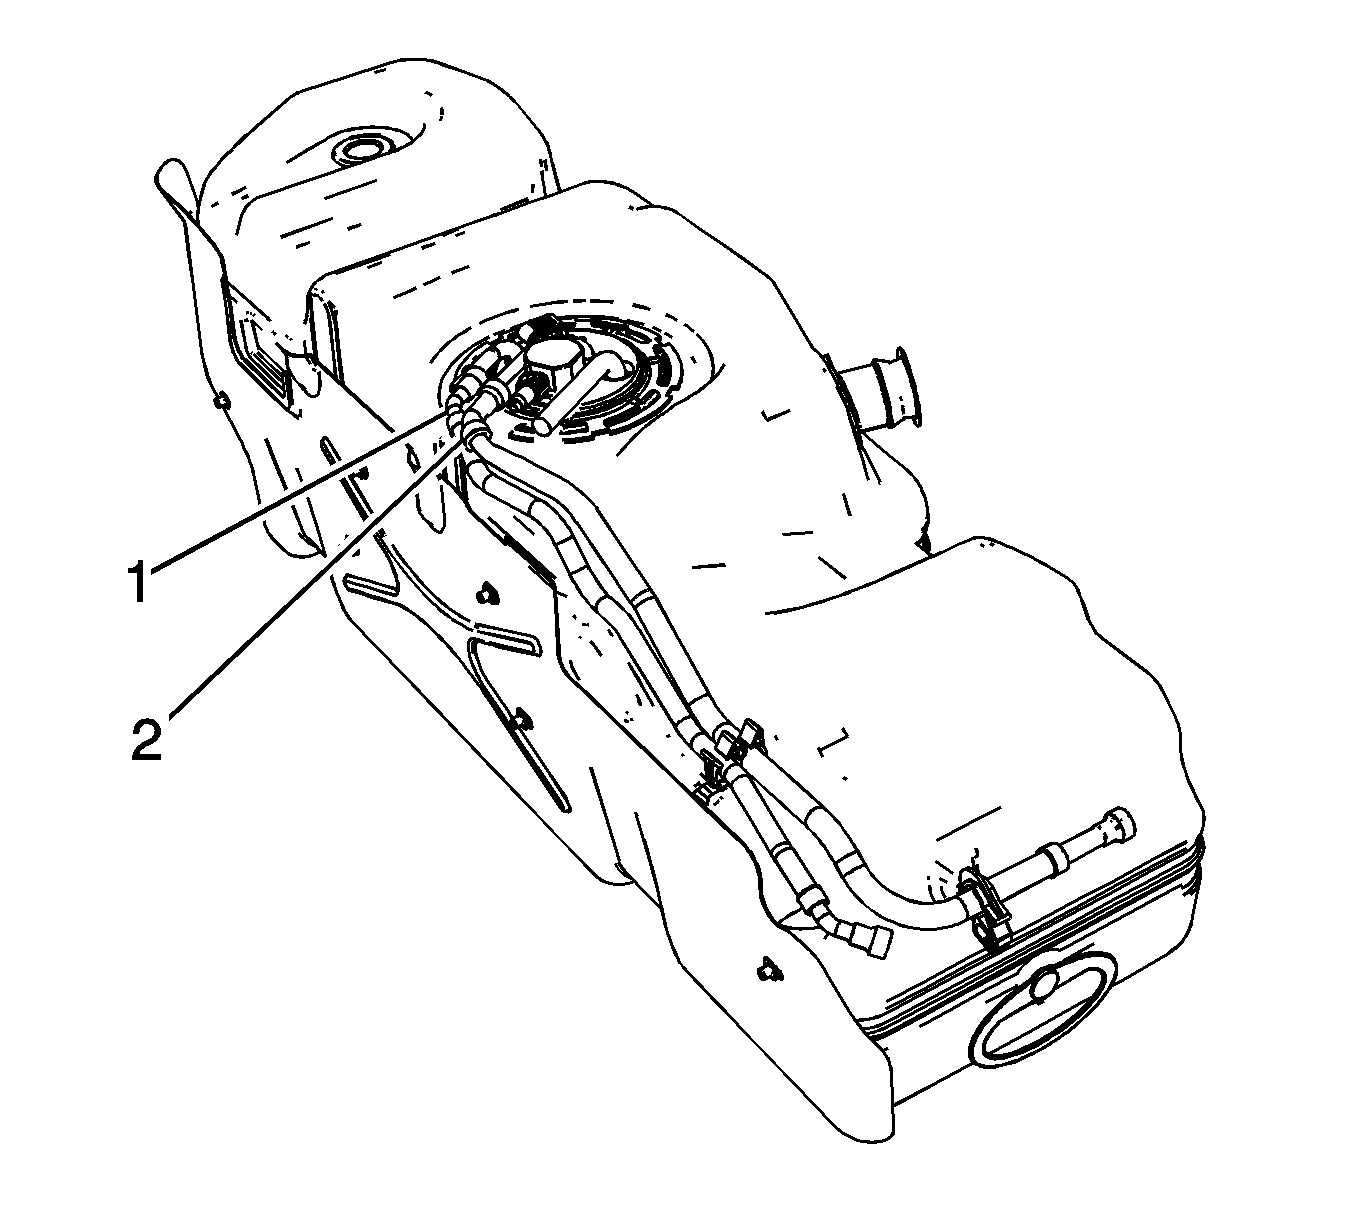
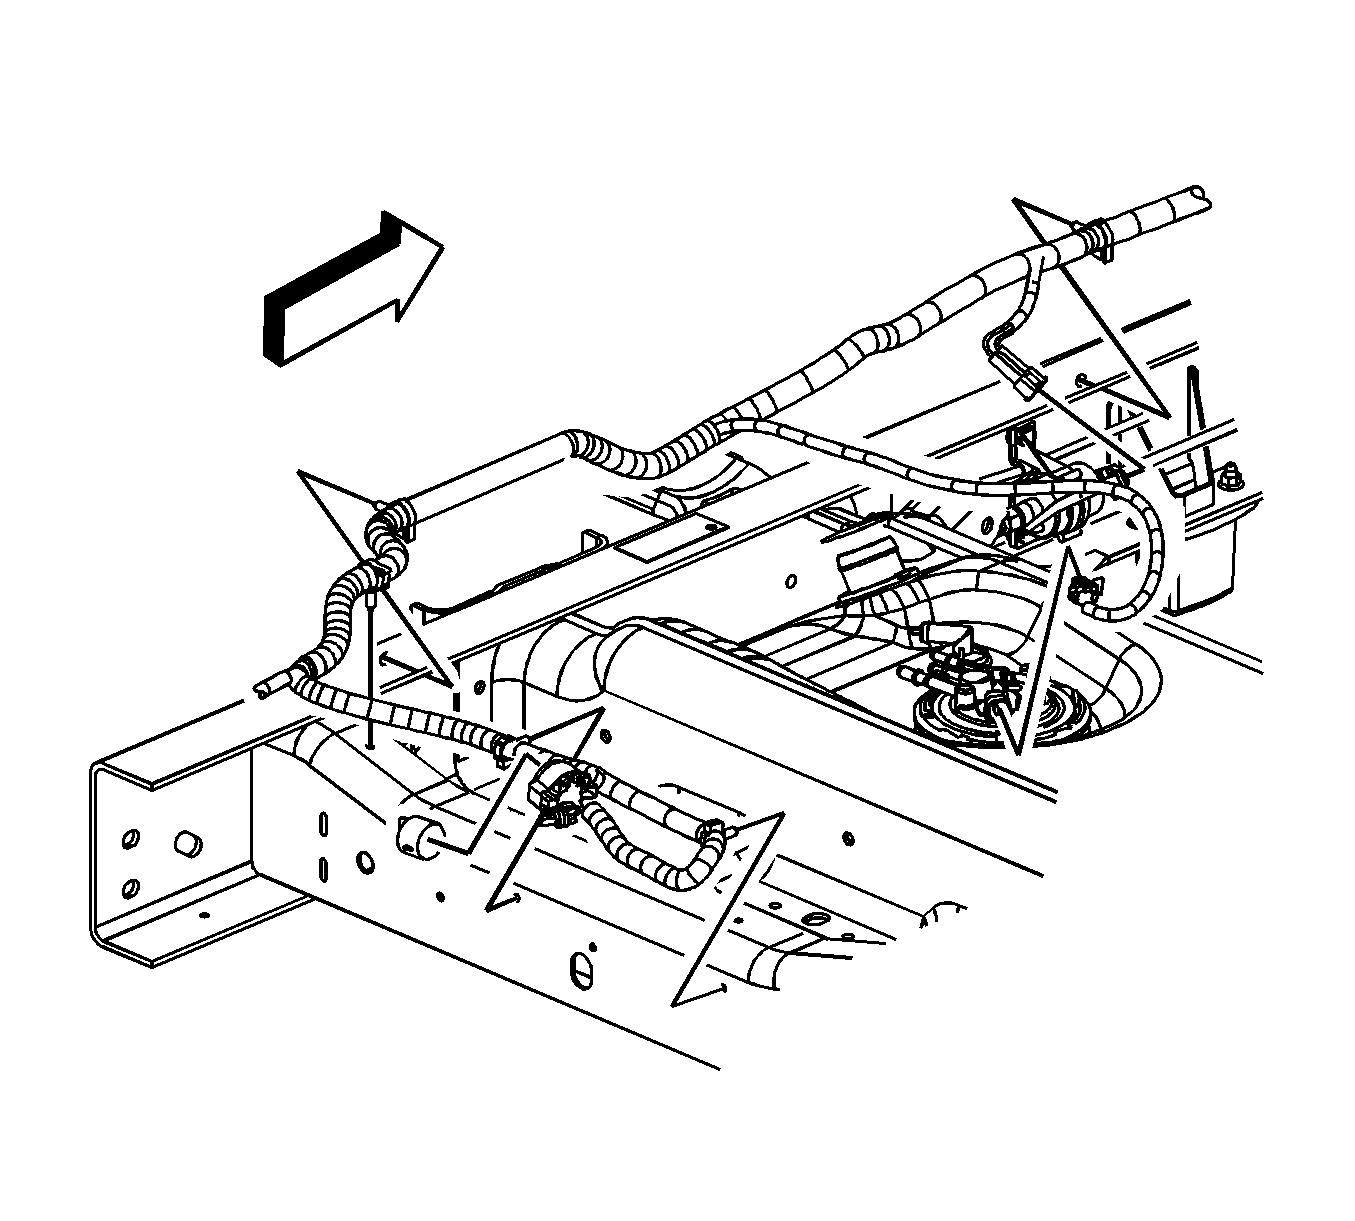
- Loosen the fill pipe vent hose clamp (1) at the fuel tank.
- Remove the fill pipe vent hose from the fuel tank.
- Remove the fill pipe.
- Remove the fuel system cooler. Refer to Fuel Cooler Replacement.
- If equipped, remove the fuel tank shield bolts.
- If equipped, remove the fuel tank shield.
- Disconnect the fuel feed and return lines. Refer to Metal Collar Quick Connect Fitting Service.
- Cap the fuel lines in order to prevent possible fuel system contamination.
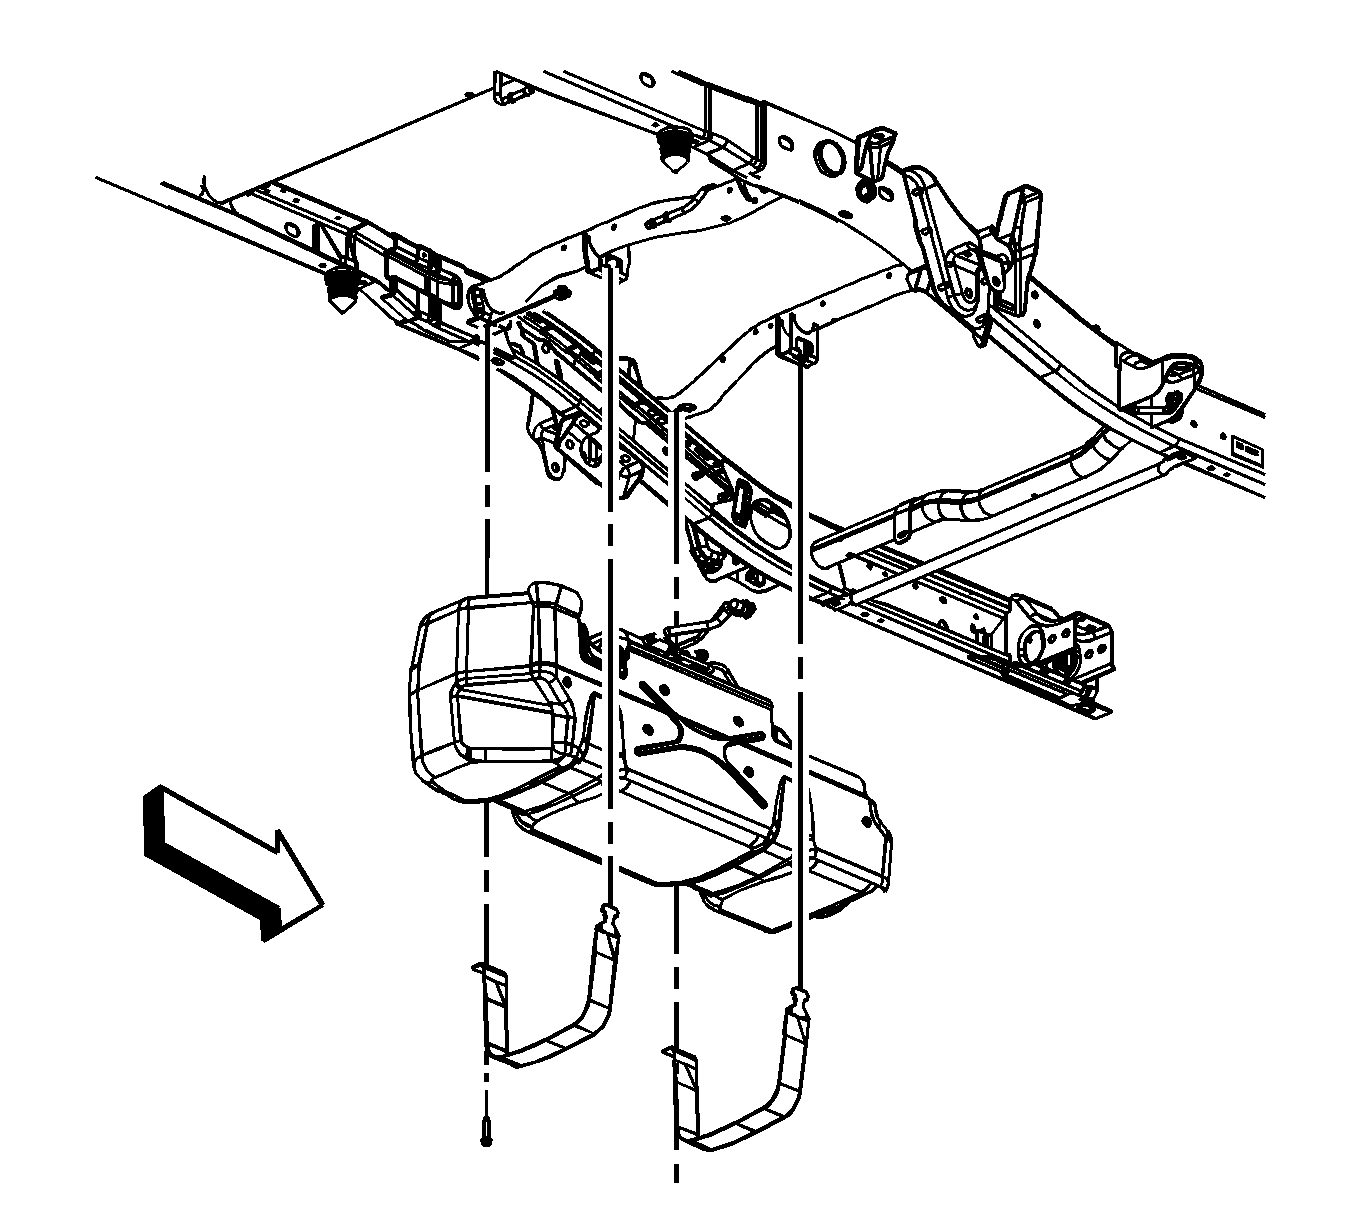
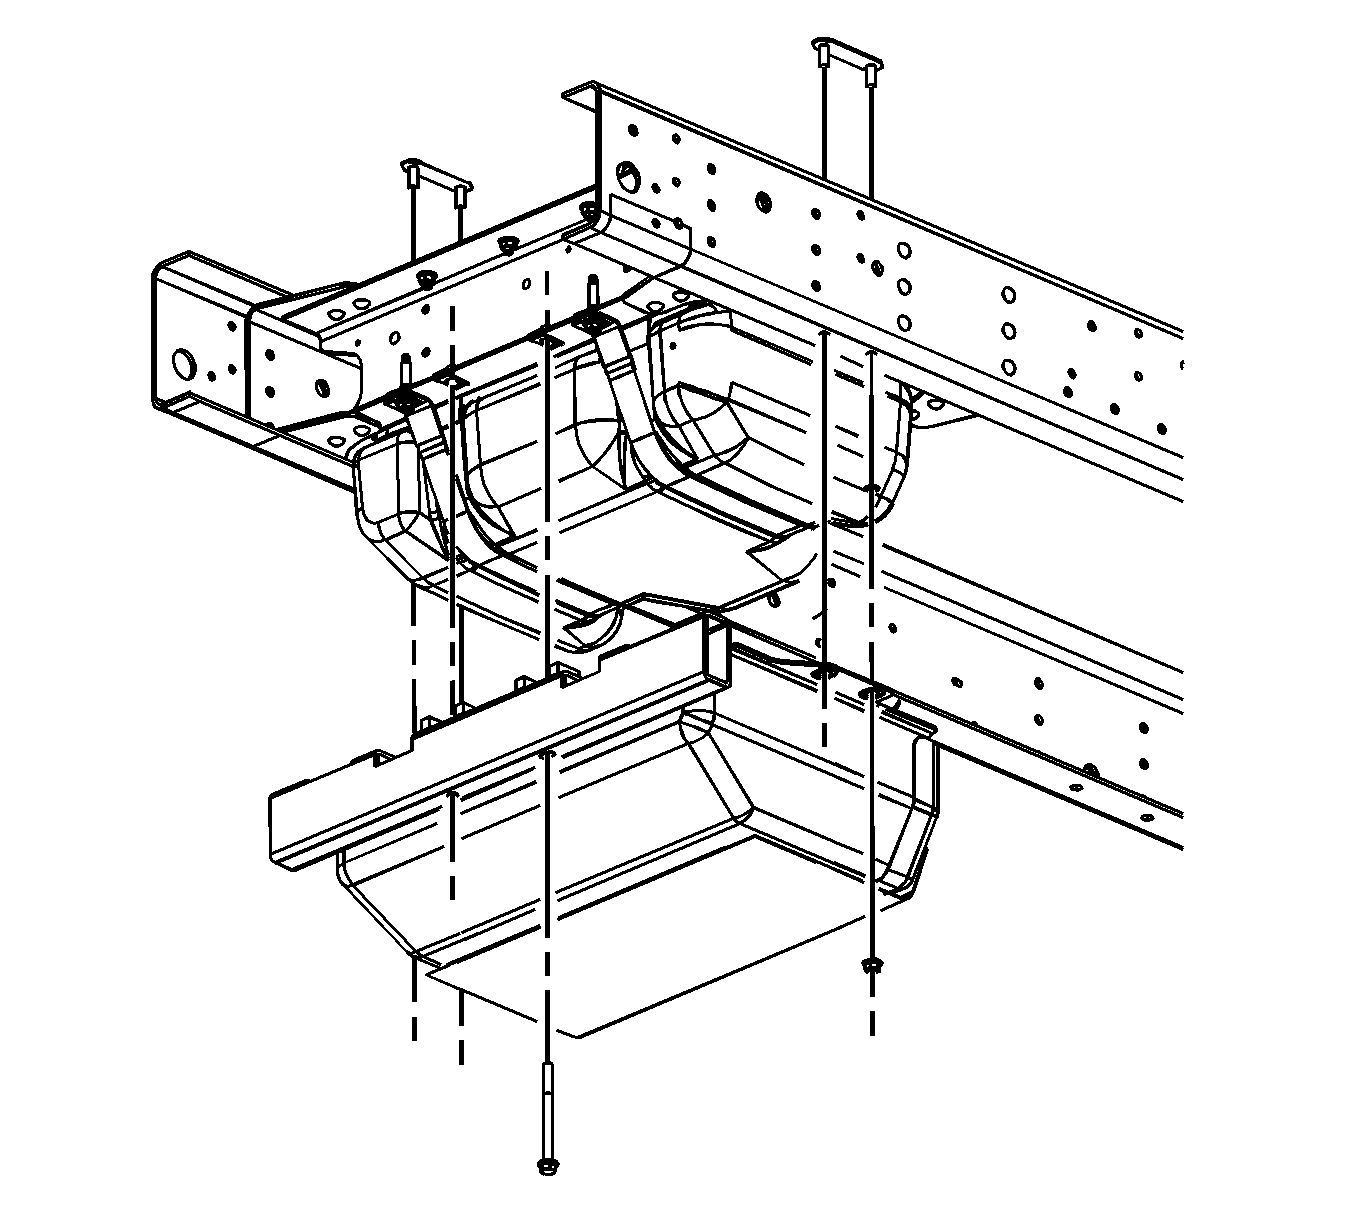
- Place a suitable adjustable jack under the fuel tank.
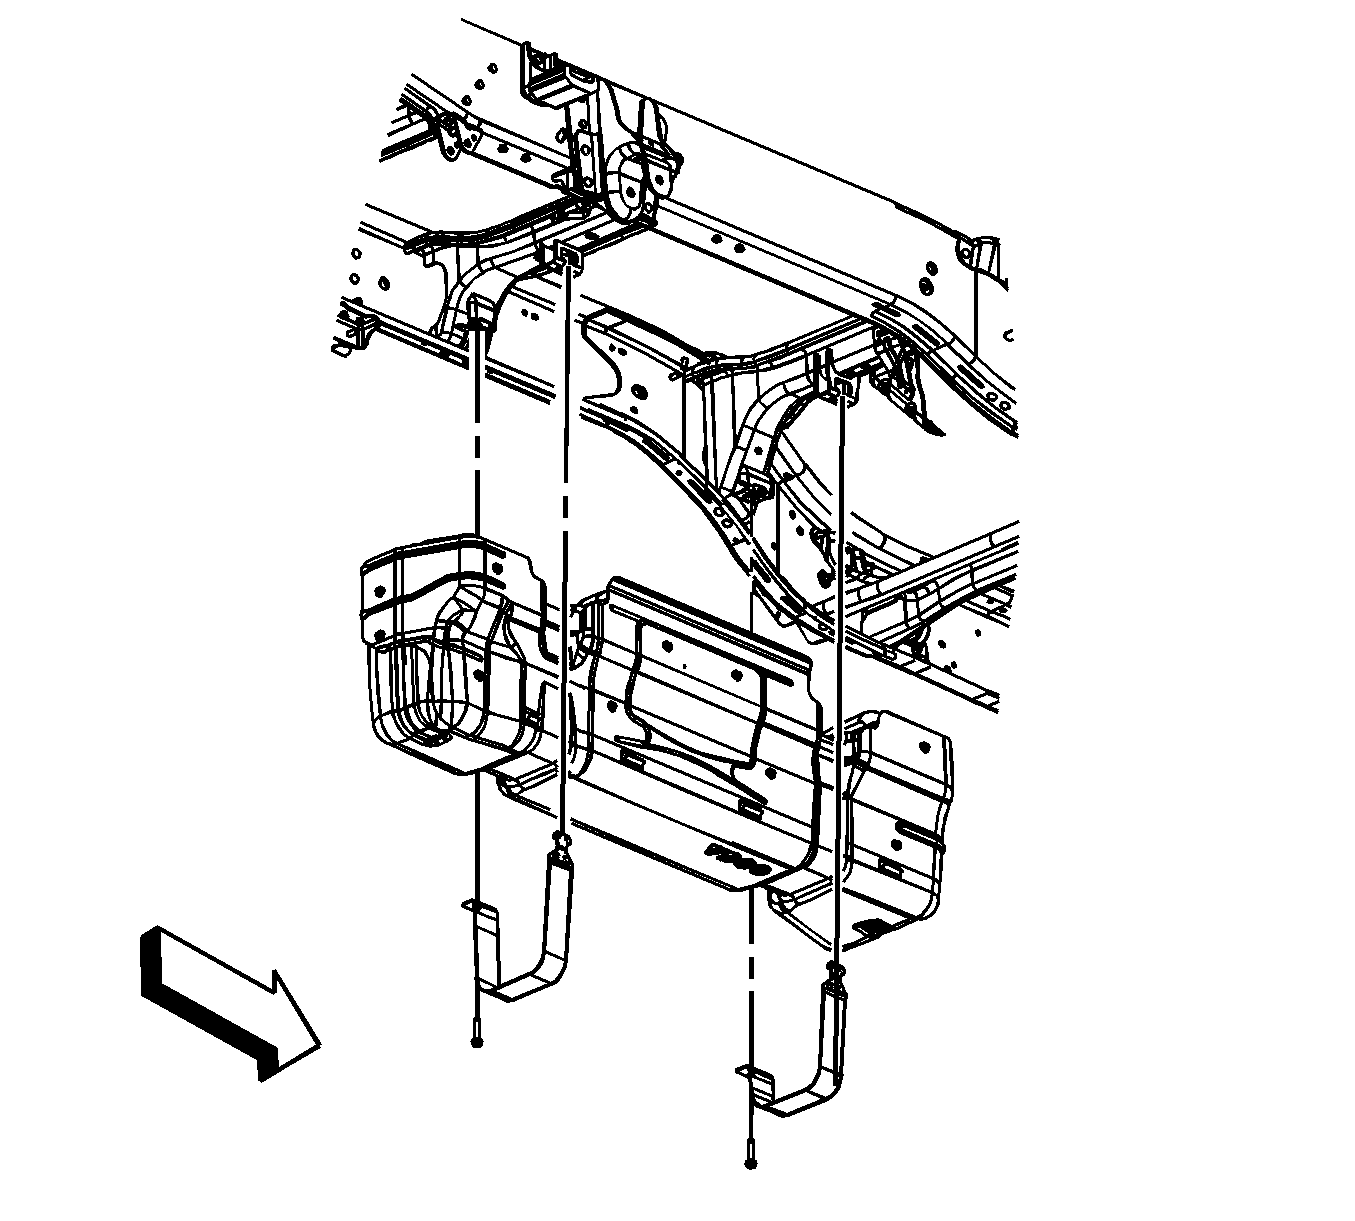
- Remove the fuel tank strap bolts.
- Remove the fuel tank straps.
- Lower the fuel tank until the sending unit electrical connector is accessible.
- Disconnect the sending unit electrical connector.
- Completely lower the fuel tank.
- With the aid of an assistant, place the fuel tank in a suitable work area.
- If necessary, disconnect and remove the fuel feed (1) and return (2) lines from the sending unit and retaining clips. Refer to Metal Collar Quick Connect Fitting Service.
- If replacing the fuel tank, remove the sending unit. Refer to Fuel Sender Assembly Replacement.


Caution: Refer to Fuel Tank Strap Fastener Caution in the Preface section.
Installation Procedure
- If the fuel tank was replaced, install the sending unit. Refer to Fuel Sender Assembly Replacement.
- Install and connect the fuel feed (1) and return (2) lines to the sending unit and retaining clips. Refer to Metal Collar Quick Connect Fitting Service.
- With the aid of an assistant, place the fuel tank on the jack.
- Raise the fuel tank until the sending unit electrical connection can be made.
- Connect the sending unit electrical connector.
- Install the fuel tank.
- Install the fuel tank straps.
- Install the fuel tank strap bolts.
- Remove the jack from under the fuel tank.
- Remove the caps from the fuel lines.
- Connect the fuel feed and return lines to the fuel tank. Refer to Metal Collar Quick Connect Fitting Service.
- If necessary, install the fuel tank shield.
- If necessary, install the fuel tank shield bolts.
- Install the fuel system cooler. Refer to Fuel Cooler Replacement.
- Install the fuel tank fill pipe and vent hose to the fuel tank.
- Tighten the fuel tank fill pipe clamp (2) at the fuel tank.
- Tighten the fuel tank vent hose clamp (1) at the fuel tank.
- Position the fuel tank ground strap (3).
- Install the fuel tank ground strap bolt (1).
- Install the rear axle vent hose to the clip on the fuel fill pipe bracket.
- Lower the vehicle.
- Install the fuel tank filler housing.
- Install the fuel tank filler housing to fuel tank fill pipe screws.
- Install the fuel tank filler housing to body screws (1), and retainer (2).
- Fill the fuel tank.
- Install the fuel fill cap.
- Connect the negative battery cable. Refer to Battery Negative Cable Disconnection and Connection.
- Prime the fuel system. Refer to Fuel System Priming.
- Start the engine. If the engine stalls, repeat the above step.
- Once the engine starts, inspect for fuel leaks.
Caution: Refer to Fastener Caution in the Preface section.
Tighten
Tighten the bolts to 40 N·m (30 lb ft).
Tighten
Tighten the bolts to 18 N·m (13 lb ft).
Tighten
Tighten the clamp to 2.5 N·m (22 lb in).
Tighten
Tighten the clamp to 2.5 N·m (22 lb in).
Tighten
Tighten the bolt to 9 N·m (80 lb in).
Tighten
Tighten the screws to 2.3 N·m (20 lb in).
Tighten
Tighten the screws to 2.3 N·m (20 lb in).
Fuel Tank Replacement Cab/Chassis - Front
Removal Procedure
- Disconnect the fuel feed and pressure balance rear lines. Refer to Metal Collar Quick Connect Fitting Service.
- Loosen the fuel fill and vent hose clamps (1, 2) at the fuel tank.
- Remove the fuel fill pipe and vent hose from the tank.
- Drain the fuel tank. Refer to Fuel Tank Draining.
- Disconnect the sending unit electrical connectors (1).
- Disconnect the fuel feed and return lines from the fuel tank. Refer to Metal Collar Quick Connect Fitting Service.
- Raise and suitably support the vehicle. Refer to Lifting and Jacking the Vehicle.
- If necessary, remove the fuel tank shield bolts.
- If necessary, remove the fuel tank shield.
- Place a suitable adjustable jack under the fuel tank.
- Remove the fuel tank strap bolts.
- Remove the fuel tank straps.
- Lower the fuel tank.
- With the aid of an assistant, place the fuel tank in a suitable work area.
- Cap the fuel lines on the vehicle in order to prevent possible fuel system contamination.
- If replacing the fuel tank, remove the sending unit. Refer to Fuel Sender Assembly Replacement.

Caution: Refer to Fuel Tank Strap Fastener Caution in the Preface section.
Installation Procedure
- If the fuel tank was replaced, install the sending unit. Refer to Fuel Sender Assembly Replacement.
- Remove the caps from the fuel lines.
- With the aid of an assistant, place the fuel tank on the jack.
- Raise the fuel tank.
- Install the fuel tank straps.
- Install the fuel tank strap bolts.
- Remove the jack from under the fuel tank.
- If necessary, install the fuel tank shield.
- If necessary, install the fuel tank shield bolts.
- Lower the vehicle.
- Connect the fuel feed and return lines at the fuel tank. Refer to Metal Collar Quick Connect Fitting Service.
- Connect the sending unit electrical connectors (1).
- Install the fuel fill pipe and vent hose to the tank.
- Tighten the fuel fill and vent hose clamps (1, 2) at the fuel tank.
- Connect the fuel feed and pressure balance rear lines. Refer to Metal Collar Quick Connect Fitting Service.
- Fill the fuel tank.
- Install the fuel fill cap.
- Connect the negative battery cable. Refer to Battery Negative Cable Disconnection and Connection.
- Prime the fuel system. Refer to Fuel System Priming.
- Start the engine. If the engine stalls, repeat the above step.
- Once the engine starts, inspect for fuel leaks.
Caution: Refer to Fastener Caution in the Preface section.
Tighten
Tighten the bolts to 40 N·m (30 lb ft).
Tighten
Tighten the bolts to 18 N·m (13 lb ft).
Tighten
Tighten the clamps to 2.5 N·m (22 lb in).
Fuel Tank Replacement Cab/Chassis - Rear
Removal Procedure
- Loosen the fuel fill and vent hose clamps (1, 2) at the tank.
- Remove the fuel fill and vent hose from the tank.
- Drain the fuel tank. Refer to Fuel Tank Draining.
- Disconnect the sending unit electrical connector.
- Disconnect the fuel feed and return lines from the sending unit. Refer to Metal Collar Quick Connect Fitting Service.
- Raise and suitably support the vehicle. Refer to Lifting and Jacking the Vehicle.
- If equipped, remove the fuel tank shield bolts.
- If equipped, remove the fuel tank shield.
- Remove the fuel tank strap bolts.
- Remove the fuel tank straps.
- Lower the fuel tank.
- With the aid of an assistant, place the fuel tank in a suitable work area.
- Cap the fuel lines in order to prevent possible fuel system contamination.
- If replacing the fuel tank, remove the sending unit. Refer to Fuel Sender Assembly Replacement.
Caution: Refer to Fuel Tank Strap Fastener Caution in the Preface section.
Installation Procedure
- If the fuel tank was replaced, install the sending unit. Refer to Fuel Sender Assembly Replacement.
- Remove the caps from the fuel lines.
- With the aid of an assistant, place the fuel tank on the jack.
- Raise the fuel tank.
- Install the fuel tank straps.
- Install the fuel tank strap bolts.
- Remove the jack from under the fuel tank.
- If equipped, install the fuel tank cover.
- If equipped, install the fuel tank cover bolts.
- Lower the vehicle.
- Connect the fuel feed and return lines to the sending unit. Refer to Metal Collar Quick Connect Fitting Service.
- Connect the sending unit electrical connector.
- Install the fuel fill and vent hose to the tank.
- Tighten the fuel fill and vent hose clamps (1, 2) at the tank.
- Fill the fuel tank.
- Install the fuel fill cap.
- Install the negative battery cable. Refer to Battery Negative Cable Disconnection and Connection.
- Using a scan tool, command the fuel transfer pump on.
- Prime the fuel system. Refer to Fuel System Priming.
- Start the engine. If the engine stalls, repeat the above step.
- Once the engine starts, inspect for fuel leaks.
Caution: Refer to Fastener Caution in the Preface section.
Tighten
Tighten the bolts to 40 N·m (30 lb ft).

Tighten
Tighten the bolts to 18 N·m (13 lb ft).
Tighten
Tighten the hose clamps to 2.5 N·m (22 lb in).
