Battery Negative Cable Replacement 4.8L, 5.3L, 6.0L, and 6.2L
Removal Procedure
- Disconnect the negative battery cable. Refer to Battery Negative Cable Disconnection and Connection .
- Remove the air cleaner outlet duct. Refer to Air Cleaner Resonator Outlet Duct Replacement .
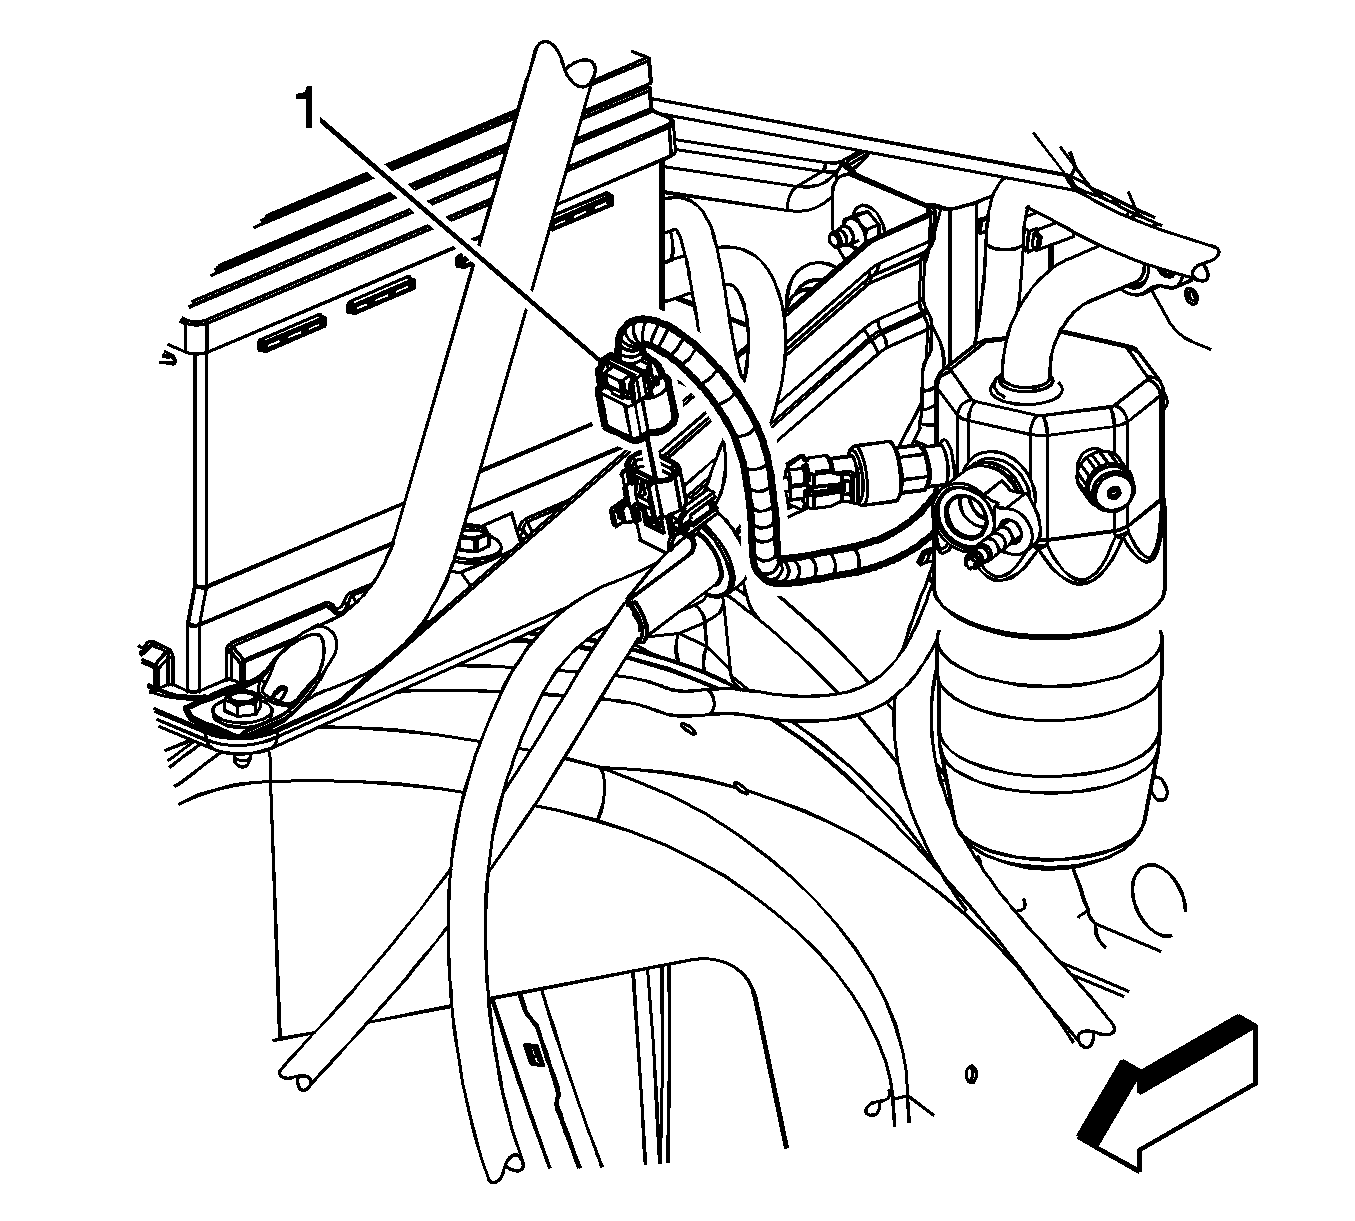
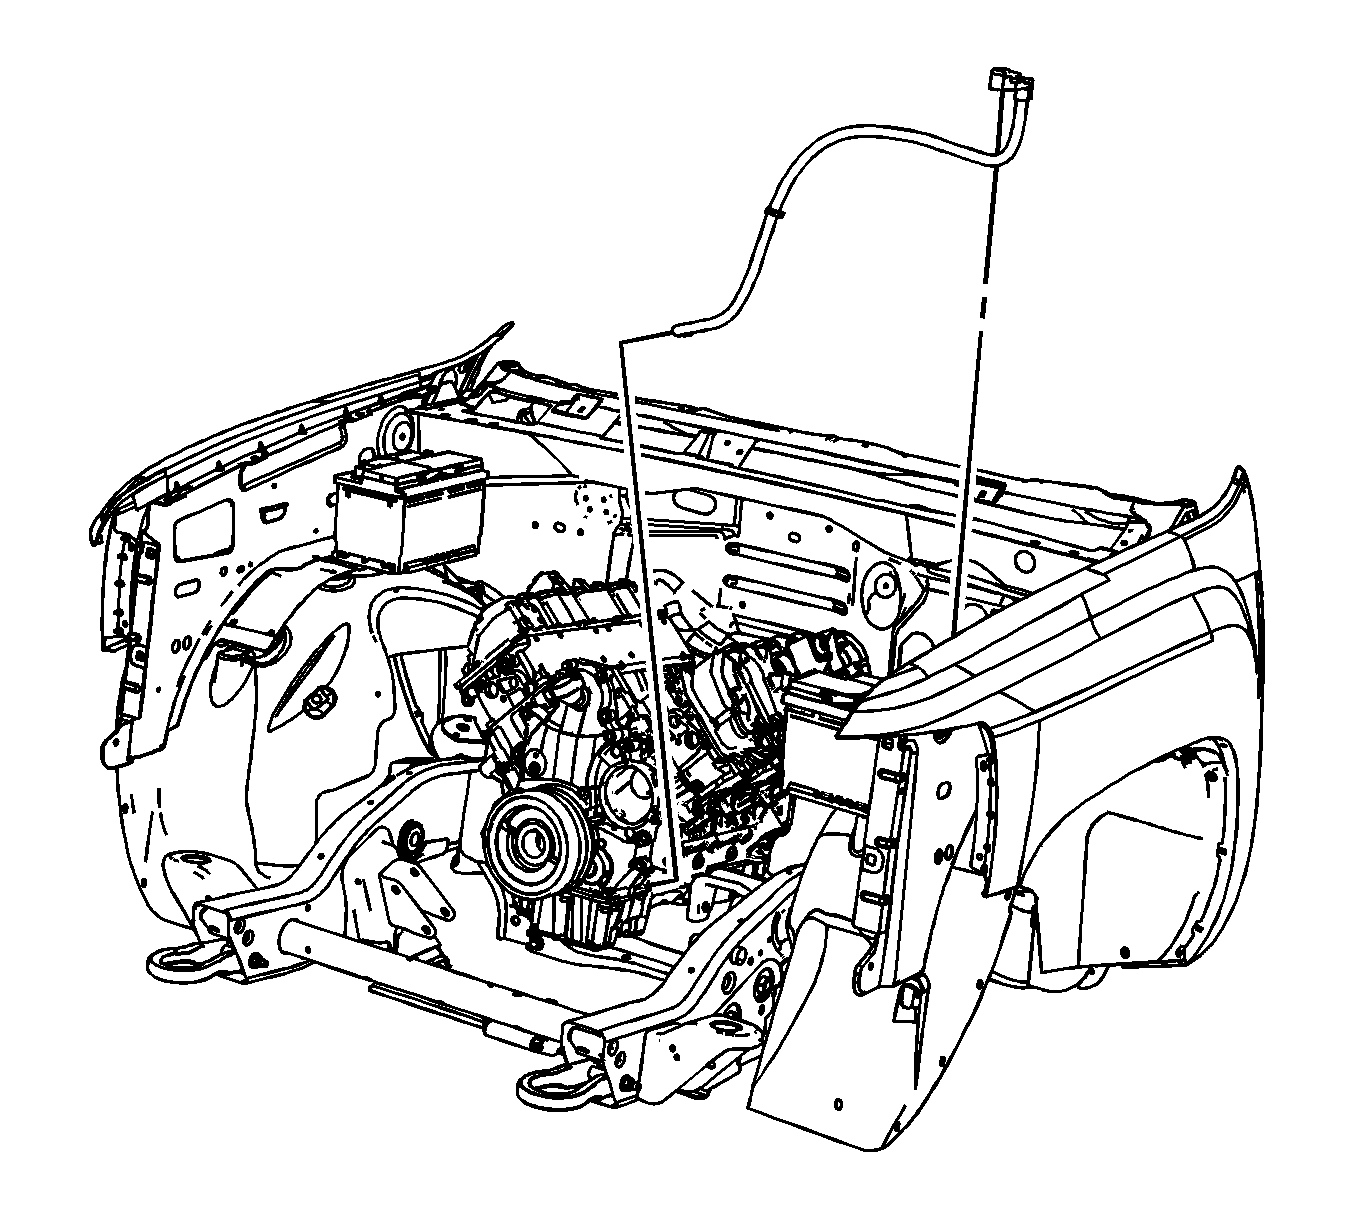
- Disconnect the engine harness electrical connector (1) from the battery current sensor.
- Remove the battery current sensor (3) clip from the battery tray, if equipped with a battery current sensor.
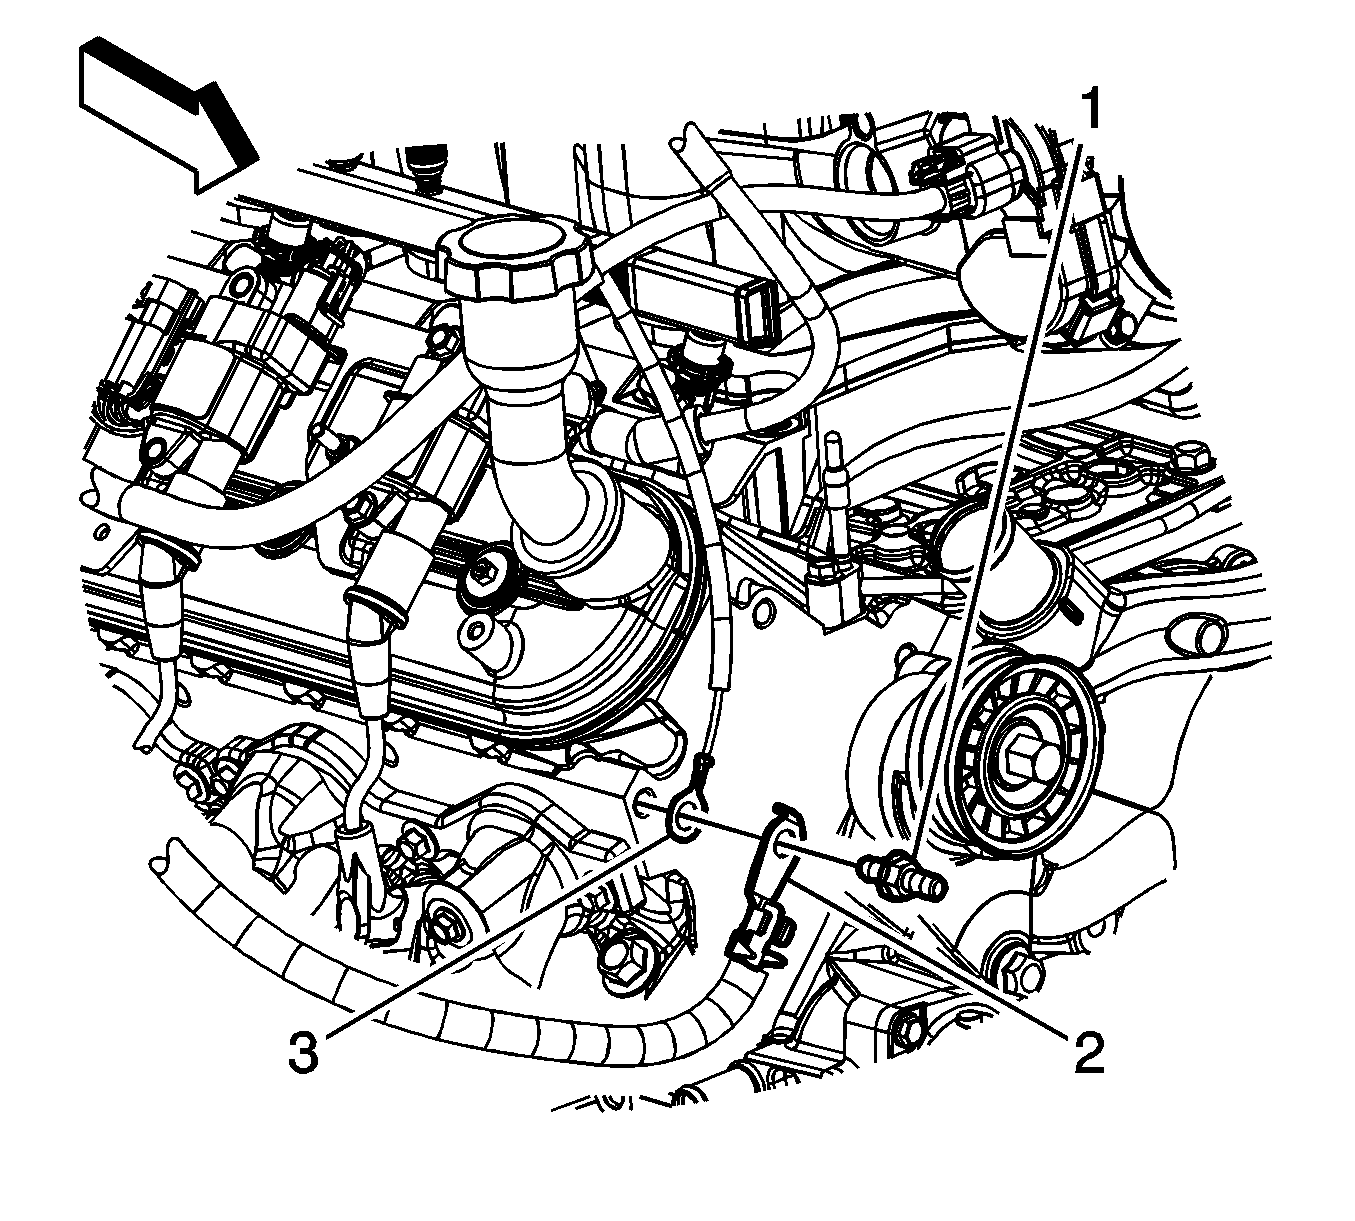
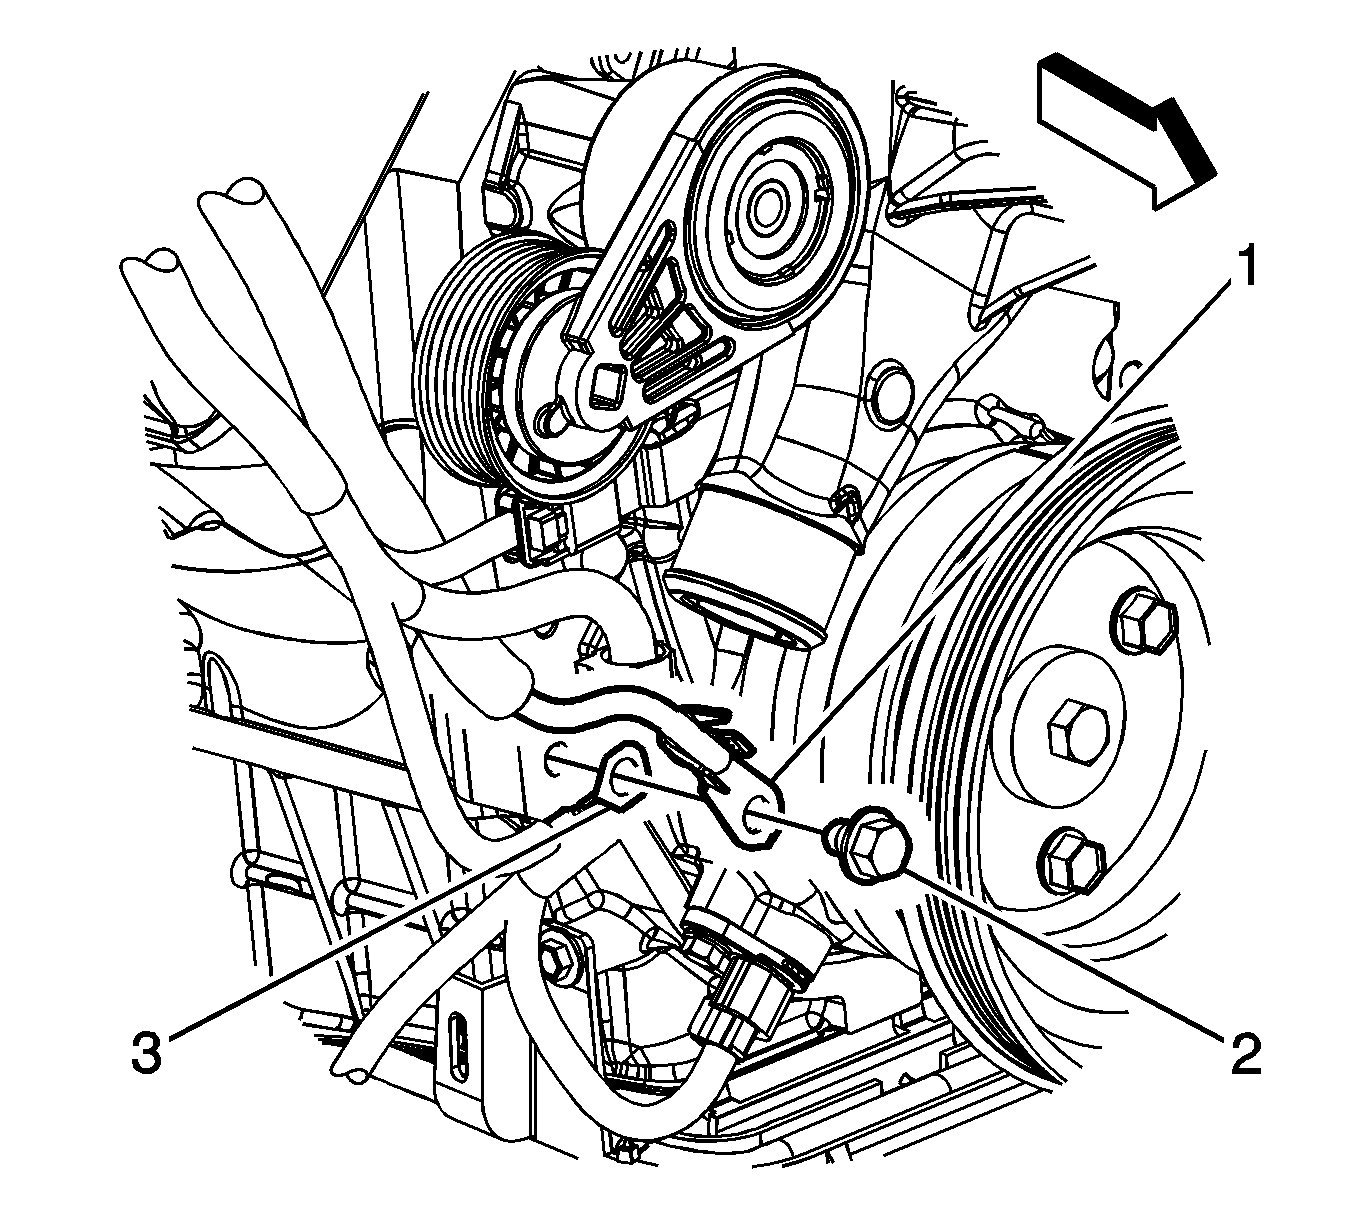
- Remove the negative battery cable stud (1) from the front of the right cylinder head.
- Remove the negative battery cable terminal (2) from the cylinder head.
- Raise and support the vehicle. Refer to Lifting and Jacking the Vehicle .
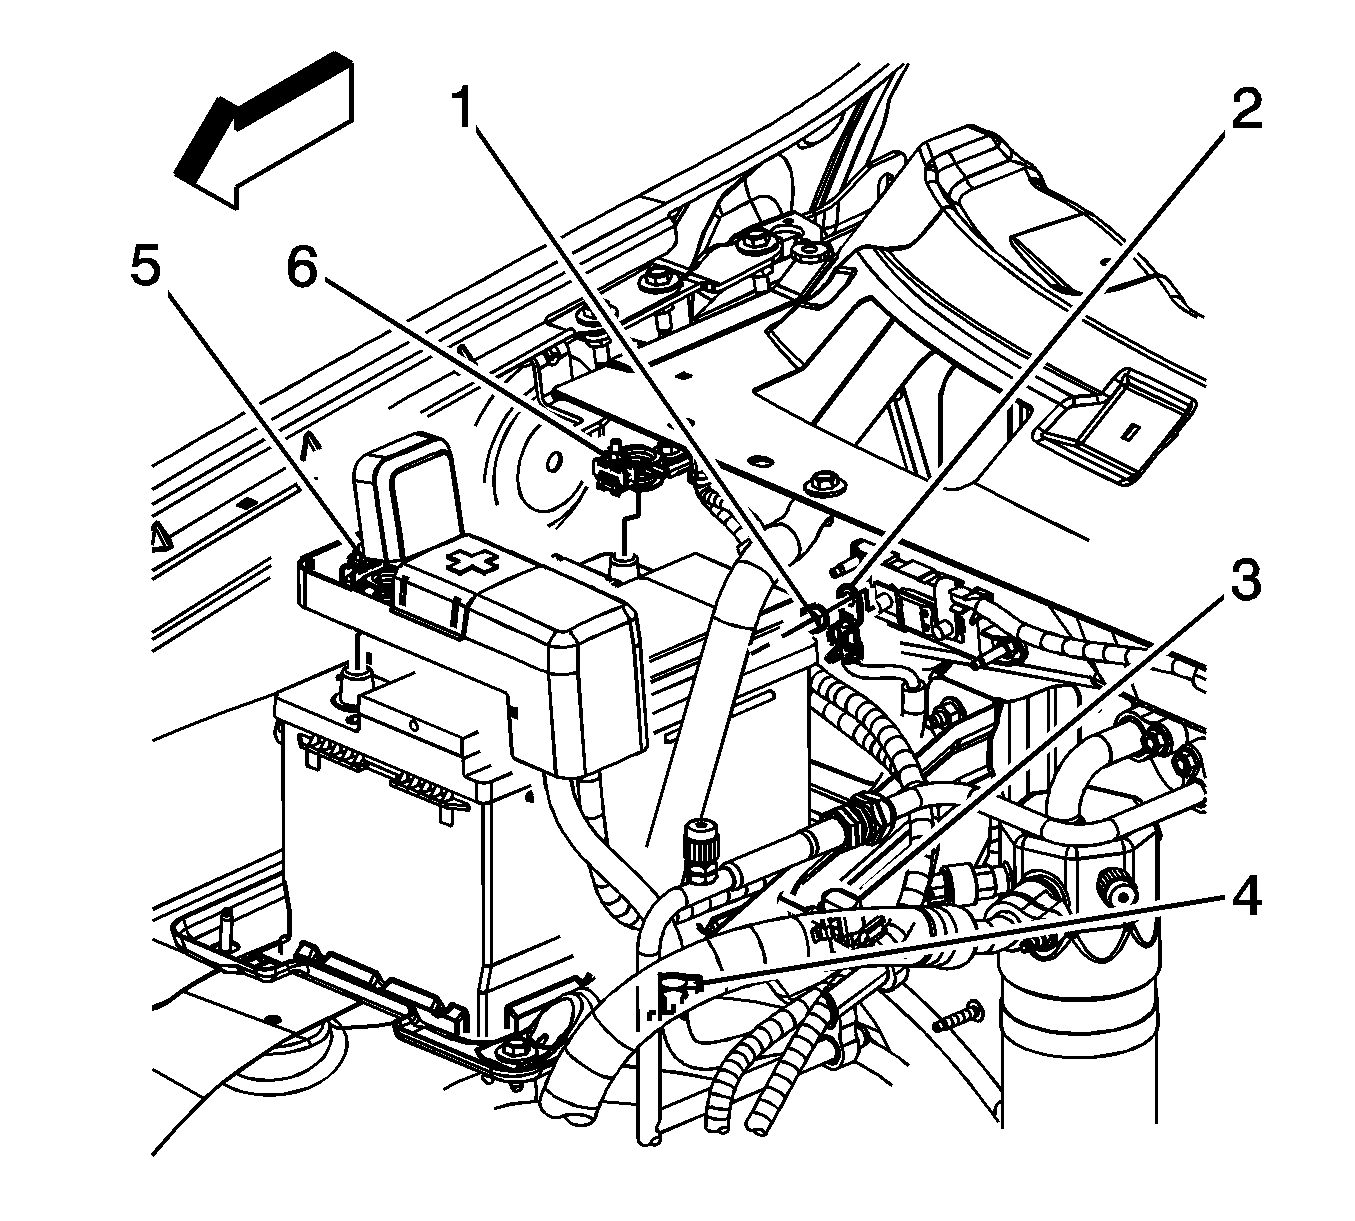
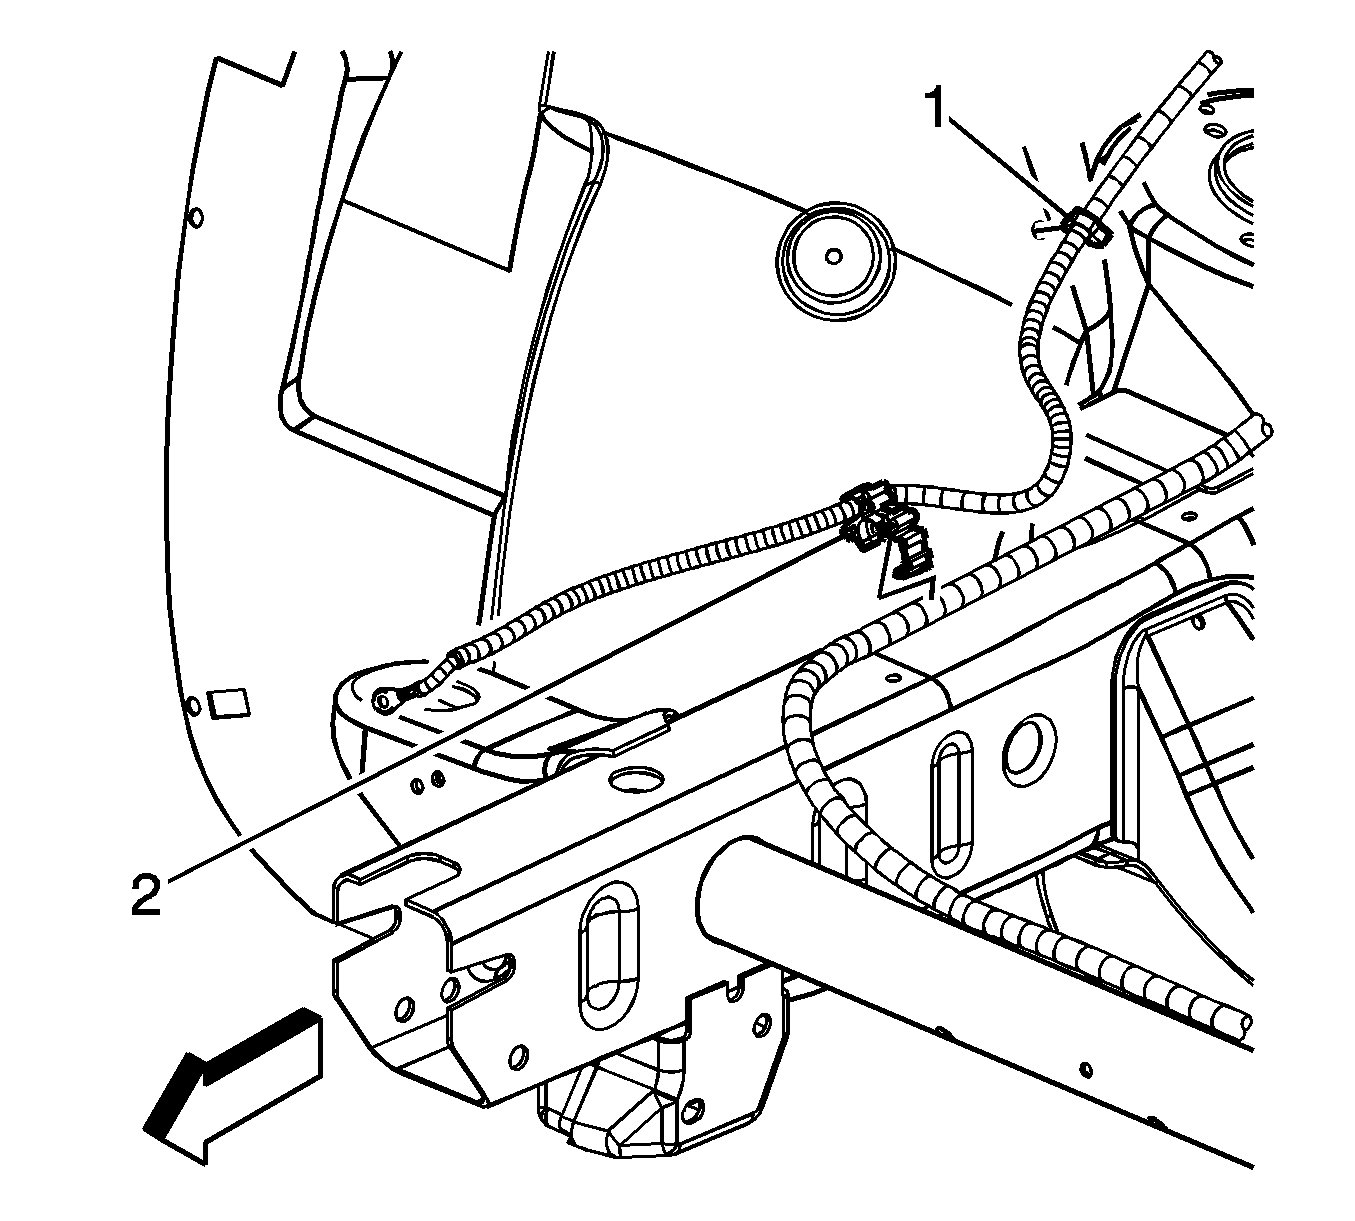
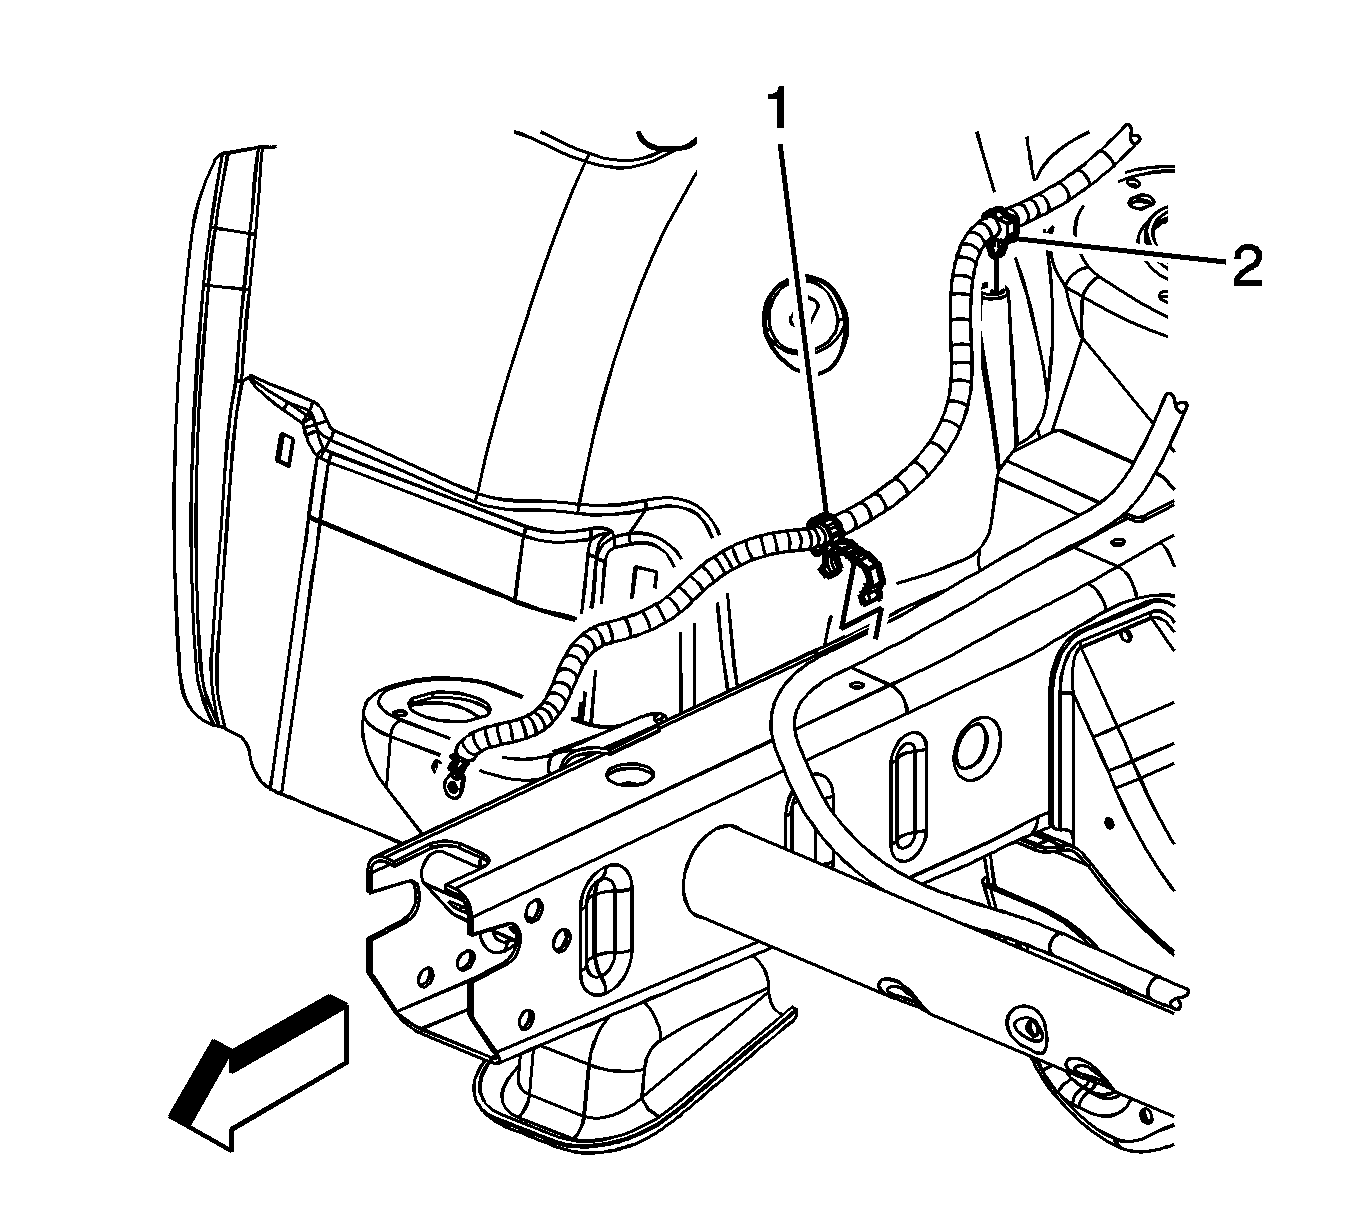
- Remove the forward lamp wiring harness ground bolt (1).
- Remove the forward lamp wiring harness terminal (2) from the frame.
- Remove the negative battery cable terminal (3) out through the opening between the radiator support and frame.
- Remove the negative battery cable clip (2) from the chassis harness.
- Lower the vehicle.
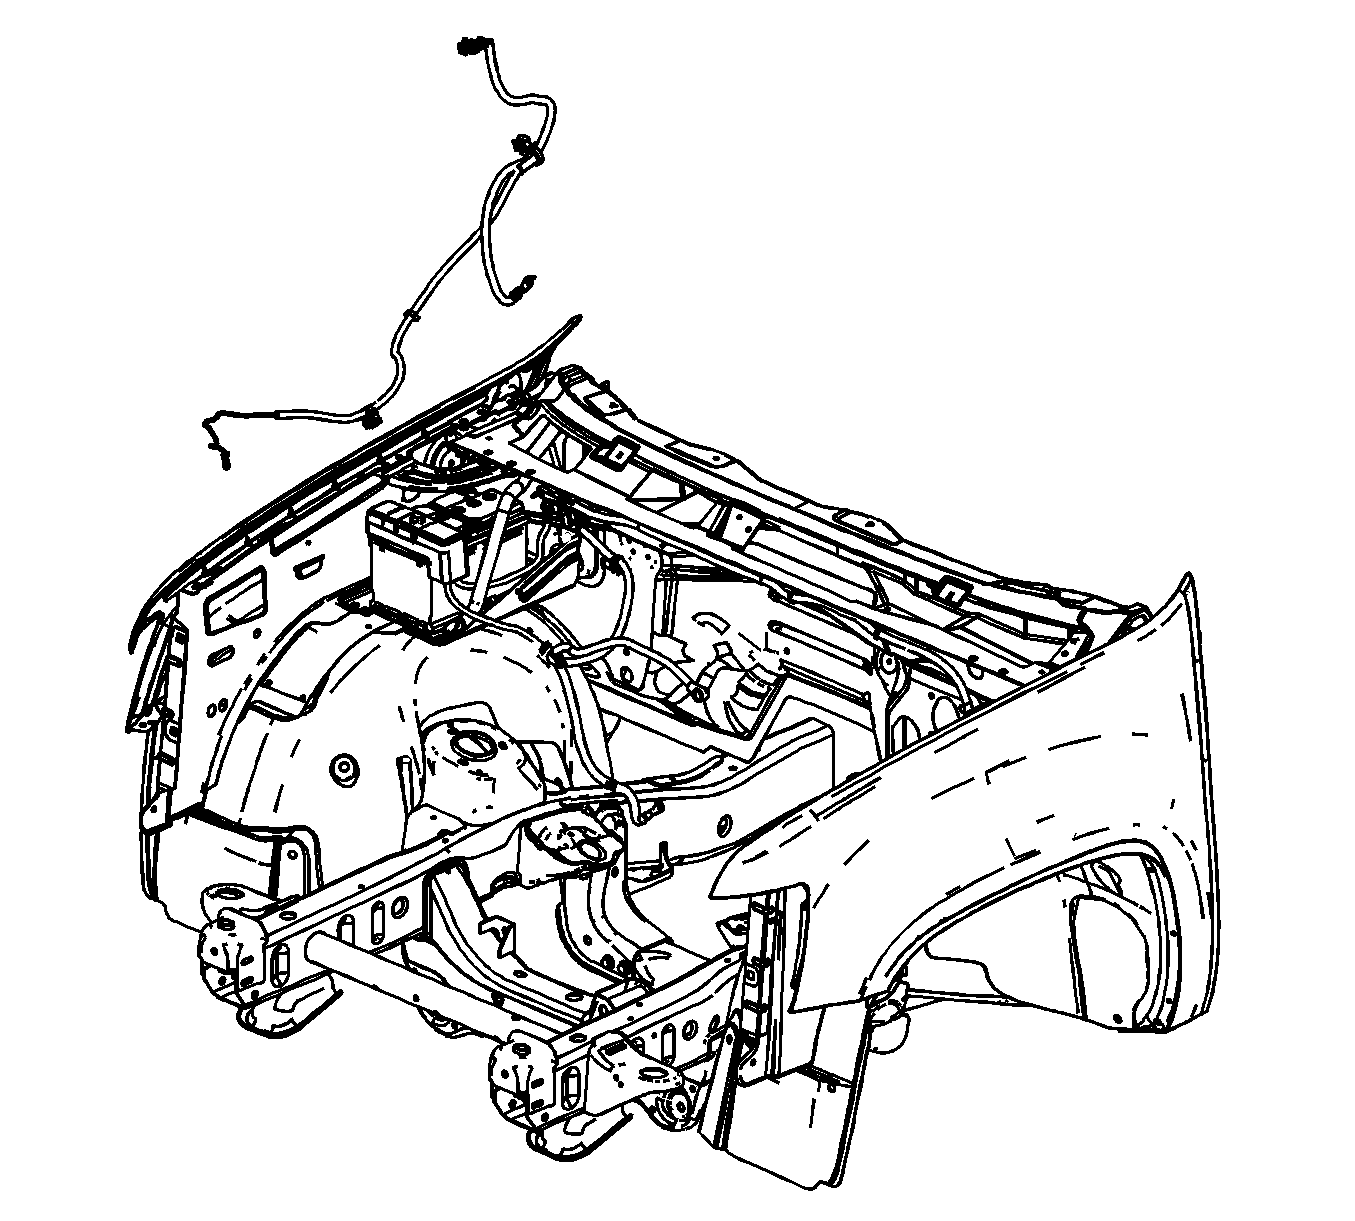
- Remove the negative battery cable clip (1) from the right wheelhouse liner.
- Remove the negative battery cable from the vehicle, if equipped without a battery current sensor.
- Remove the negative battery cable from the vehicle, if equipped with a battery current sensor.
- If replacing the negative battery cable, remove the battery current sensor, if equipped. Refer to Battery Current Sensor Replacement .

Installation Procedure
- If the negative battery cable was replaced, install the battery current sensor, if equipped. Refer to Battery Current Sensor Replacement .
- Install the negative battery cable to the vehicle, if equipped with a battery current sensor.
- Install the negative battery cable to the vehicle, if equipped without a battery current sensor.
- Ensure that the engine harness terminal (3) is position behind the negative battery terminal (2).
- Position the negative battery cable terminal (2) to the cylinder head.
- Install the negative battery cable stud (1) to the front of the right cylinder head.
- Install the negative battery cable clip (1) to the right wheelhouse liner.
- Raise the vehicle.
- Install the negative battery cable clip (2) to the chassis harness.
- Route the negative battery cable terminal (3) through the opening between the radiator support and frame.
- Ensure that the negative battery cable is positioned behind the forward lamp harness.
- Install the forward lamp wiring harness terminal (2) to the frame. Ensure that the anti-rotation tab is inserted into the hole in the frame.
- Install the forward lamp wiring harness ground bolt (1).
- Lower the vehicle.
- Install the battery current sensor (3) clip to the battery tray, if equipped with a battery current sensor.
- Connect the engine harness electrical connector (1) to the battery current sensor.
- Install the air cleaner outlet duct. Refer to Air Cleaner Resonator Outlet Duct Replacement .
- Connect the negative battery cable. Refer to Battery Negative Cable Disconnection and Connection .
Notice: Refer to Fastener Notice in the Preface section.
Tighten
Tighten the stud to 25 N·m (18 lb ft).
Tighten
Tighten the bolt to 25 N·m (18 lb ft).
Battery Negative Cable Replacement 6.6L
Removal Procedure
Caution: Unless directed otherwise, the ignition and start switch must be in the OFF or LOCK position, and all electrical loads must be OFF before servicing any electrical component. Disconnect the negative battery cable to prevent an electrical spark should a tool or equipment come in contact with an exposed electrical terminal. Failure to follow these precautions may result in personal injury and/or damage to the vehicle or its components.
- Disconnect the negative battery cable. Refer to Battery Negative Cable Disconnection and Connection .
- Remove the negative battery cable clip (1) from the positive and negative cable bracket.
- Raise and suitably support the vehicle. Refer to Lifting and Jacking the Vehicle .
- Remove the engine wiring harness ground bolt (3).
- Reposition the engine wiring harness ground (4) and remove the negative battery cable (2) from the engine block.
- Lower the vehicle.
- Remove the negative battery cable from the vehicle.

Installation Procedure
- Install the negative battery cable to the vehicle.
- Raise the vehicle.
- Position the negative battery cable (2) to the engine block and position the engine wiring harness ground (4) on top of the negative battery cable terminal.
- Install the engine wiring harness ground bolt (3).
- Lower the vehicle.
- Install the negative battery cable clip (1) to the positive and negative cable bracket.
- Connect the negative battery cable. Refer to Battery Negative Cable Disconnection and Connection .
Notice: Refer to Fastener Notice in the Preface section.
Tighten
Tighten to bolt to 25 N·m (18 lb ft).
Battery Negative Cable Replacement 4.3L
Removal Procedure
- Disconnect the negative battery cable. Refer to Battery Negative Cable Disconnection and Connection .
- Remove the air cleaner outlet resonator. Refer to Air Cleaner Outlet Resonator Replacement .
- Disconnect the engine wiring harness electrical connector (1) from the battery current sensor.
- Remove the battery current sensor (3) clip from the battery tray.
- Raise and support the vehicle. Refer to Lifting and Jacking the Vehicle .
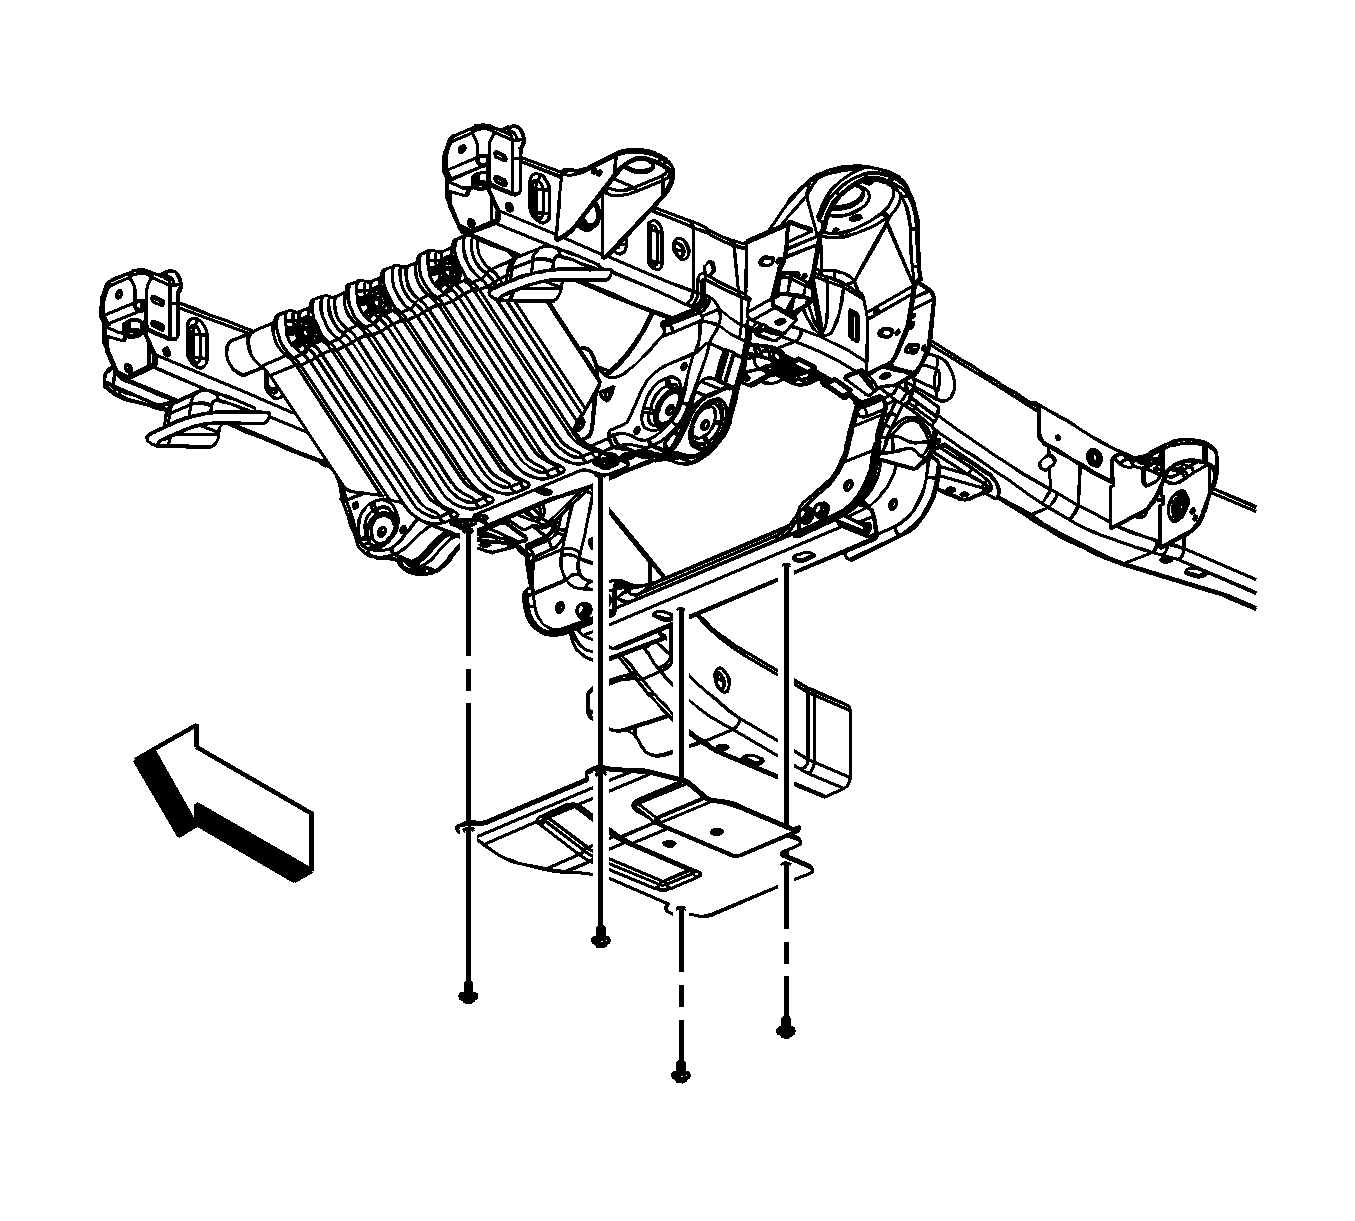
- Remove the oil pan skid plate and bolts, if equipped.
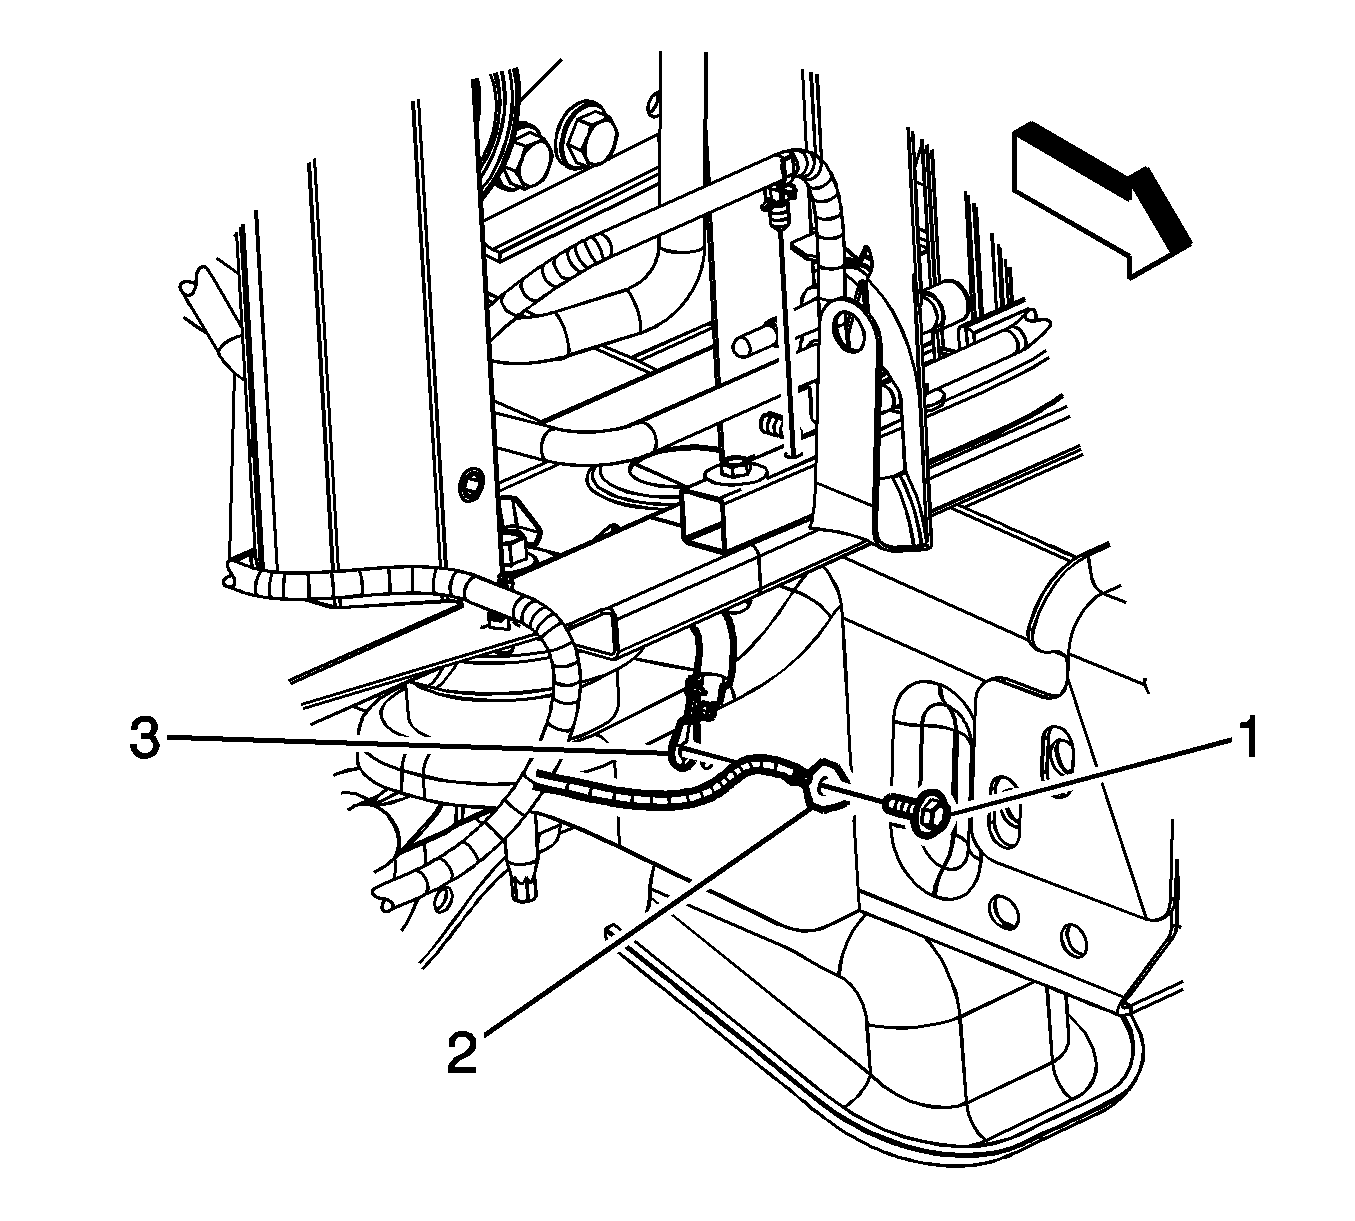
- Remove the negative battery cable bolt (2) from the front of the engine block.
- Reposition the negative battery cable terminal (1) and the engine wiring harness terminal (3) from the engine block.
- Remove the forward lamp wiring harness ground bolt (1).
- Remove the forward lamp wiring harness terminal (2) from the frame.
- Remove the negative battery cable terminal (3) out through the opening between the radiator support and frame.
- Remove the negative battery cable clip (1) from the chassis harness.
- Lower the vehicle.
- Remove the negative battery cable clip (2) from the right wheelhouse liner.
- Remove the negative battery cable from the vehicle.
- If replacing the negative battery cable, remove the battery current sensor. Refer to Battery Current Sensor Replacement .

Installation Procedure
- If the negative battery cable was replaced, install the battery current sensor. Refer to Battery Current Sensor Replacement .
- Install the negative battery cable to the vehicle.
- Install the negative battery cable clip (2) to the right wheelhouse liner.
- Raise and support the vehicle.
- Install the negative battery cable clip (1) to the chassis harness.
- Route the negative battery cable terminal (3) through the opening between the radiator support and frame.
- Ensure that the negative battery cable is positioned behind the forward lamp harness.
- Install the forward lamp wiring harness terminal (2) to the frame. Ensure that the anti-rotation tab is inserted into the hole in the frame.
- Install the forward lamp wiring harness ground bolt (1).
- Position the engine wiring harness terminal (3) against the engine block and position the negative battery cable terminal (1) on top of the engine wiring harness terminal.
- Install the negative battery cable bolt (2) to the front of the engine block.
- Position the oil pan skid plate and install the bolts, if equipped.
- Lower the vehicle.
- Install the battery current sensor (3) clip to the battery tray.
- Connect the engine wiring harness electrical connector (1) to the battery current sensor.
- Install the air cleaner outlet resonator. Refer to Air Cleaner Outlet Resonator Replacement .
- Connect the negative battery cable. Refer to Battery Negative Cable Disconnection and Connection .
Tighten
Tighten the bolt to 25 N·m (18 lb ft).
Tighten
Tighten the bolt to 25 N·m (18 lb ft).
Tighten
Tighten the bolt to 28 N·m (21 lb ft).
