Starter Replacement 4.8L, 5.3L, 6.0L, and 6.2L
Removal Procedure
- Disconnect the negative battery cable. Refer to Battery Negative Cable Disconnection and Connection .
- Raise and support the vehicle. Refer to Lifting and Jacking the Vehicle .
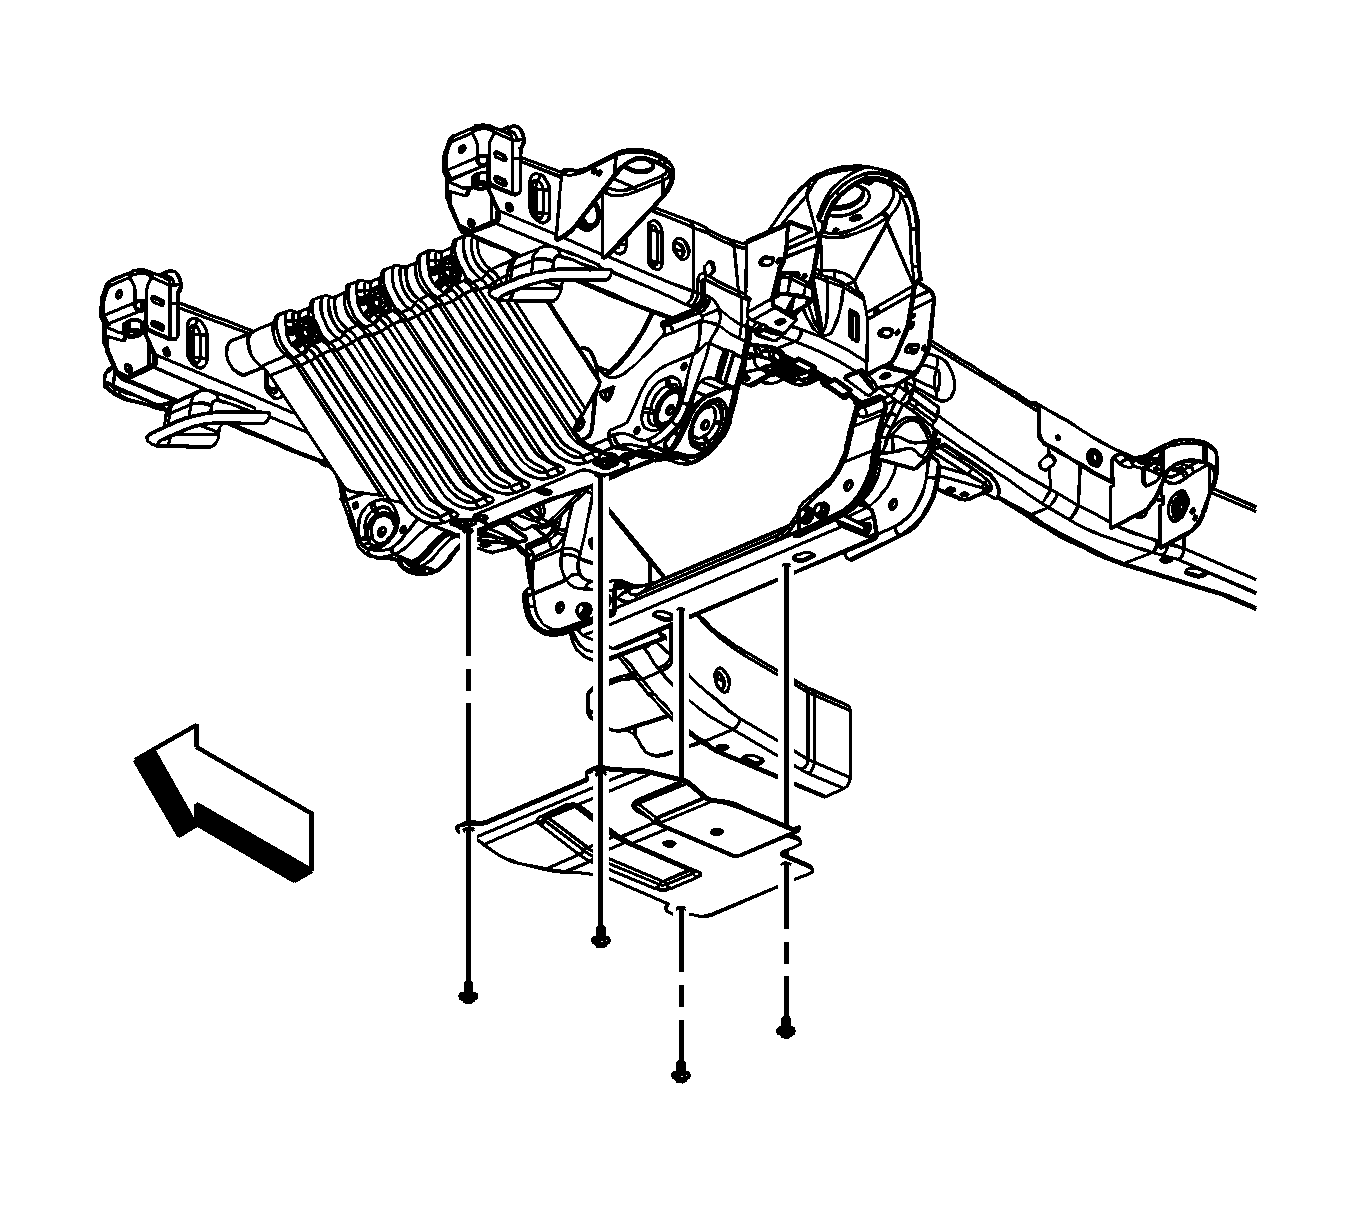
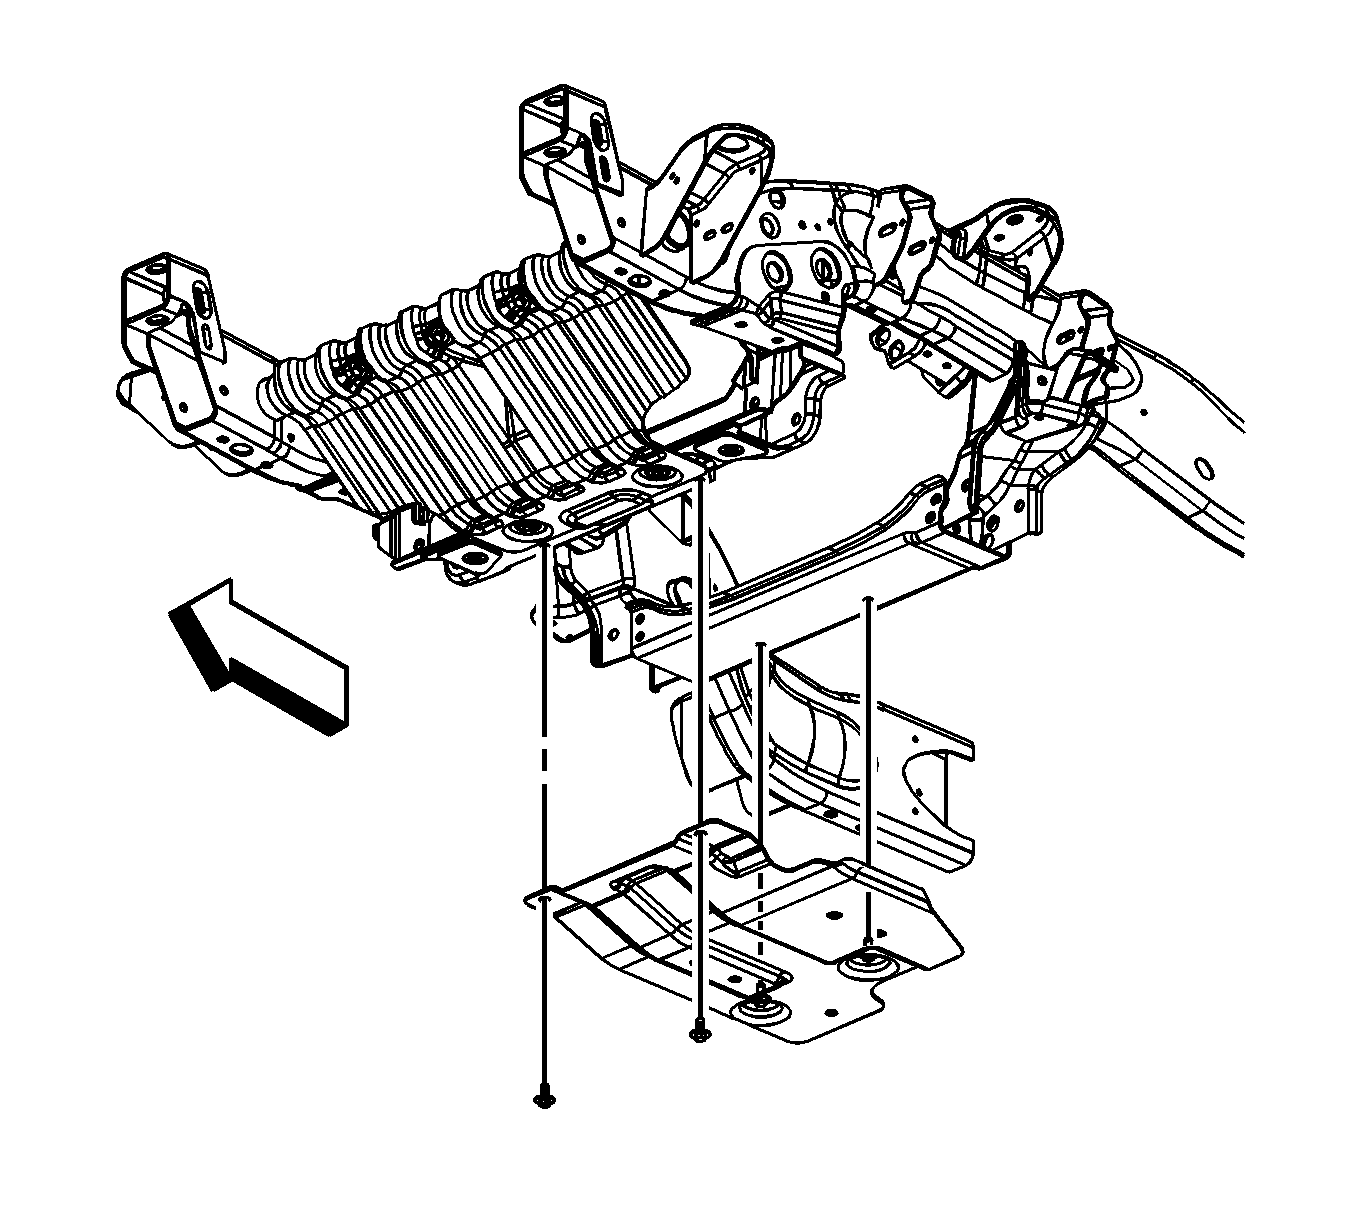
- For 2500 series vehicles, remove the front 2 oil pan skid plate bolts, loosen the rear 2 bolts and remove the skid plate, if equipped.
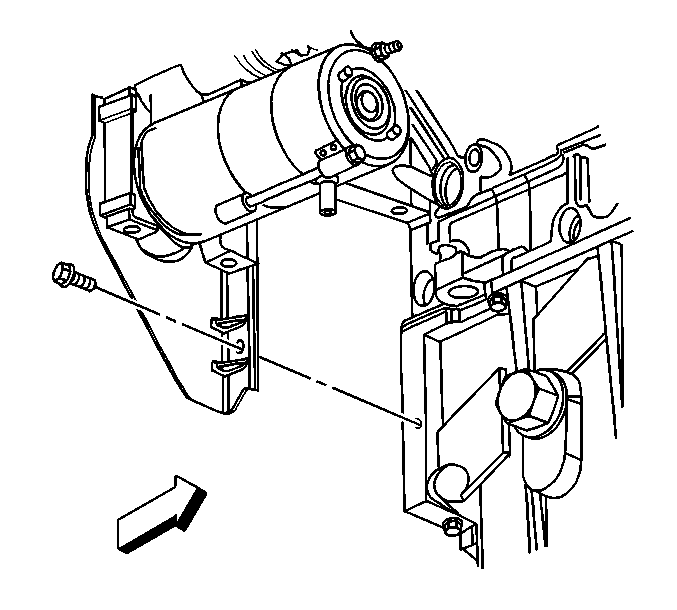
- Remove the transmission cover bolt.
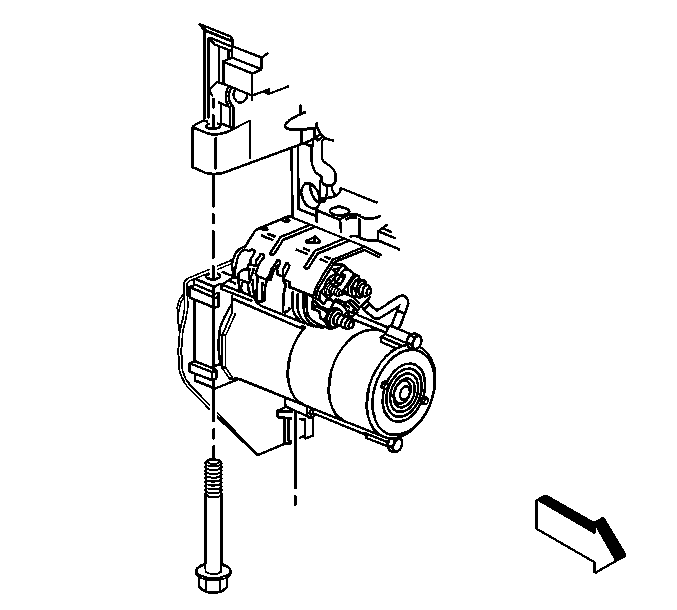
- Remove the starter bolts.
- Disconnect the engine wiring harness electrical connector (4) from the oil level sensor.
- Slide the starter forward until the starter clears the transmission and properly support the starter.
- Lower the vehicle half way.
- Remove the right front wheel and tire. Refer to Tire and Wheel Removal and Installation .
- Remove the right front wheelhouse liner. Refer to Front Wheelhouse Liner Replacement - Right Side .
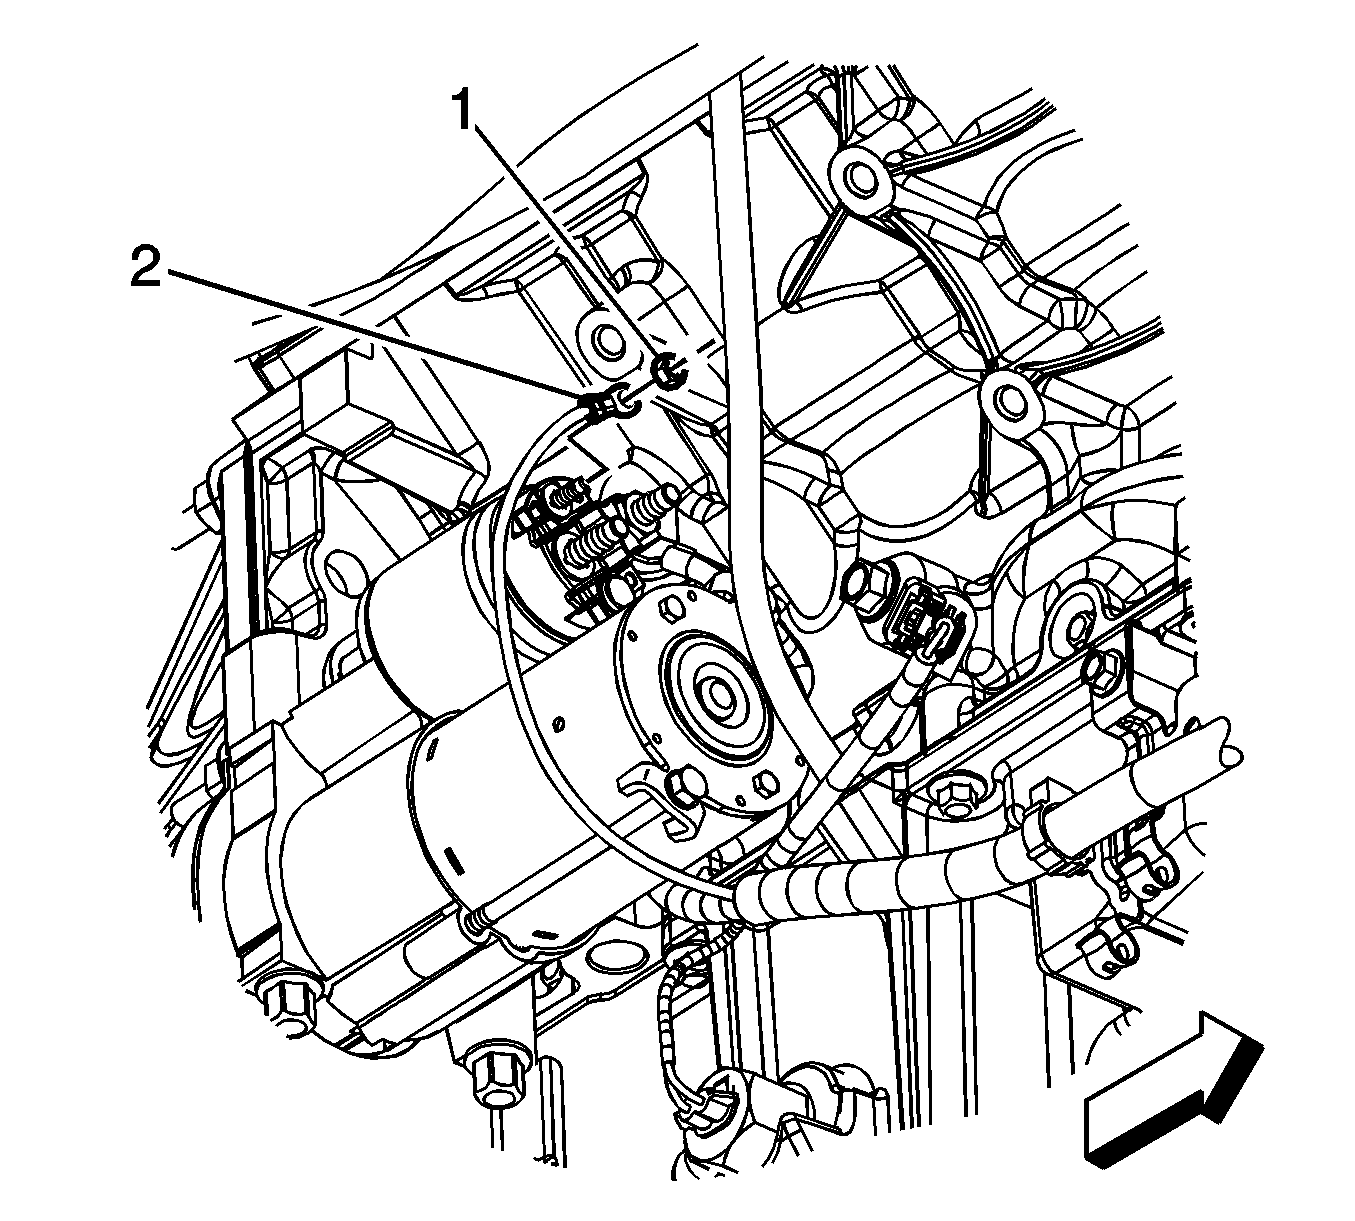
- Remove the engine wiring harness lead nut (1).
- Remove the engine wiring harness lead terminal (2) from the starter.
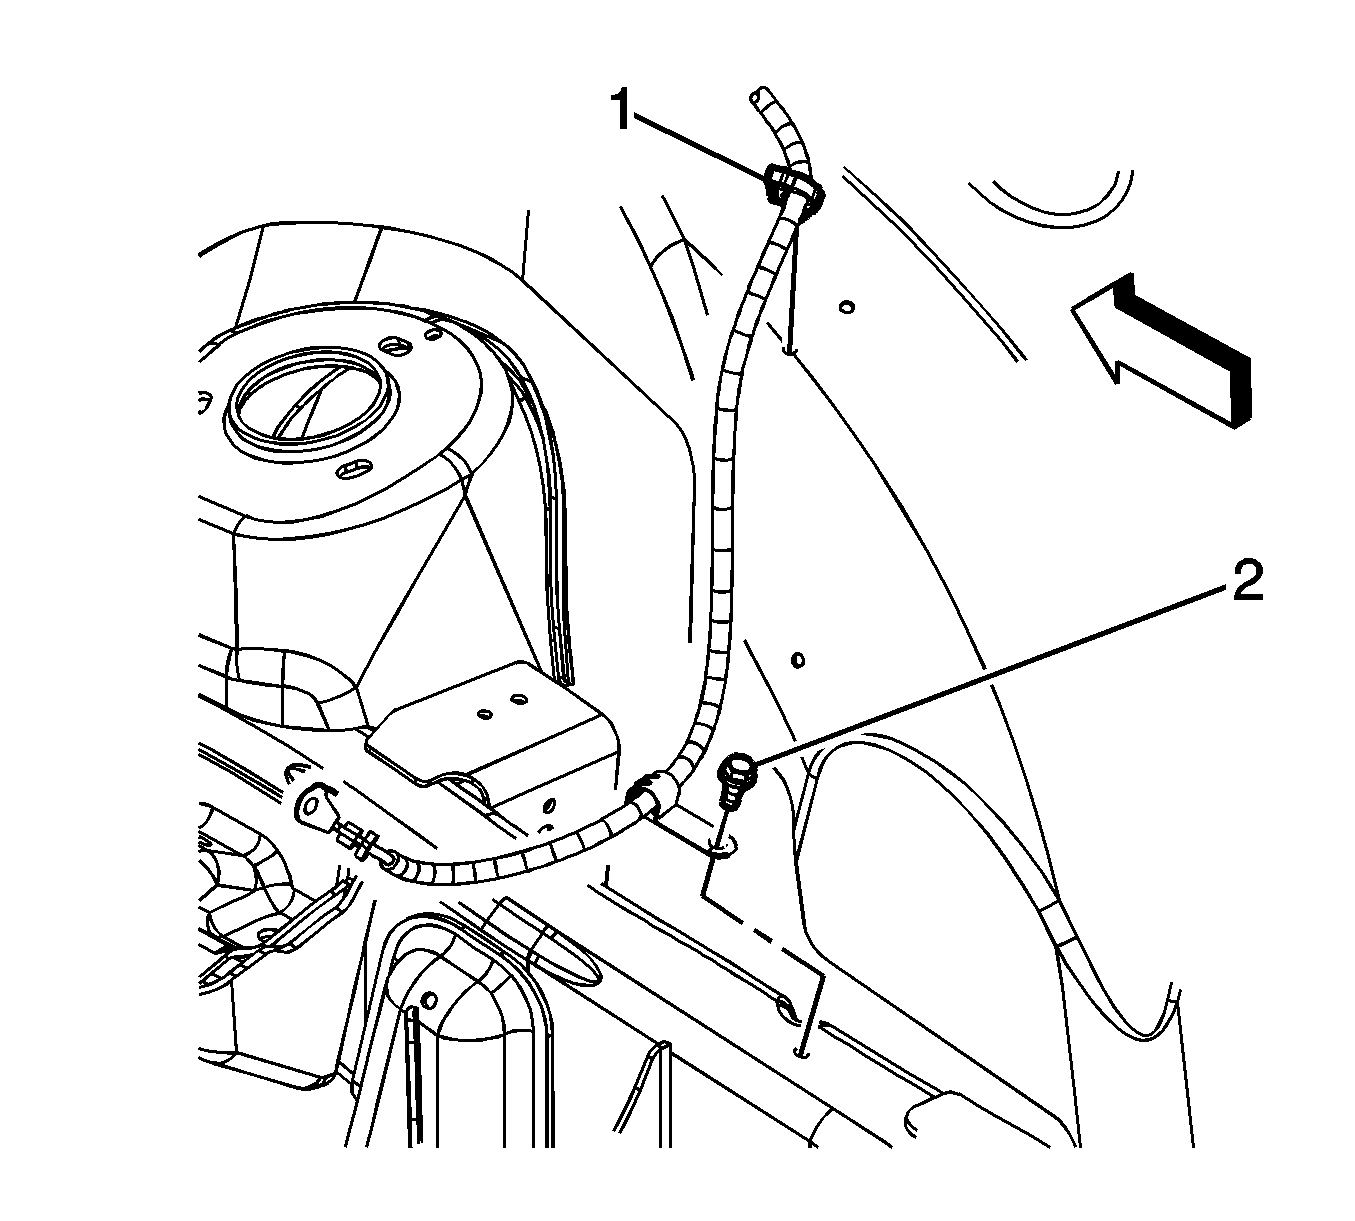
- Remove the starter solenoid cable clip bolt (2) from the frame.
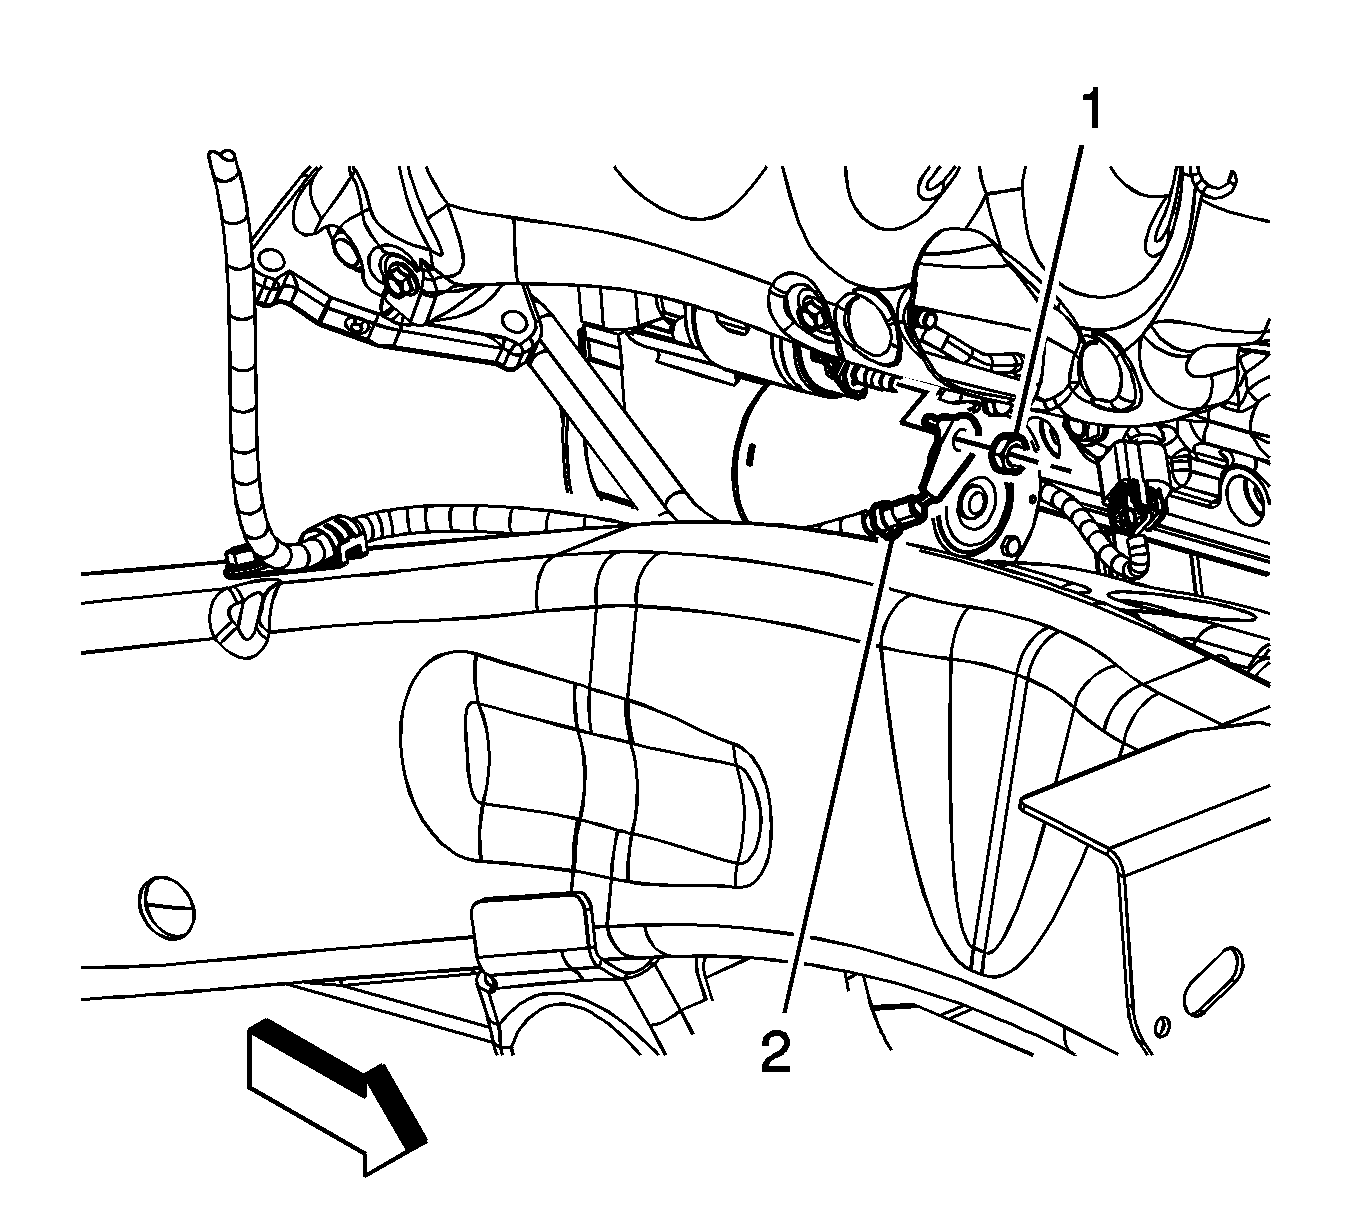
- Remove the starter solenoid cable nut (1).
- Remove the starter solenoid cable (2) from the starter.
- Remove the starter out through the wheel well opening.
- If replacing the starter, unsnap the transmission cover from the starter.
- If replacing the starter, remove the starter heat shield.
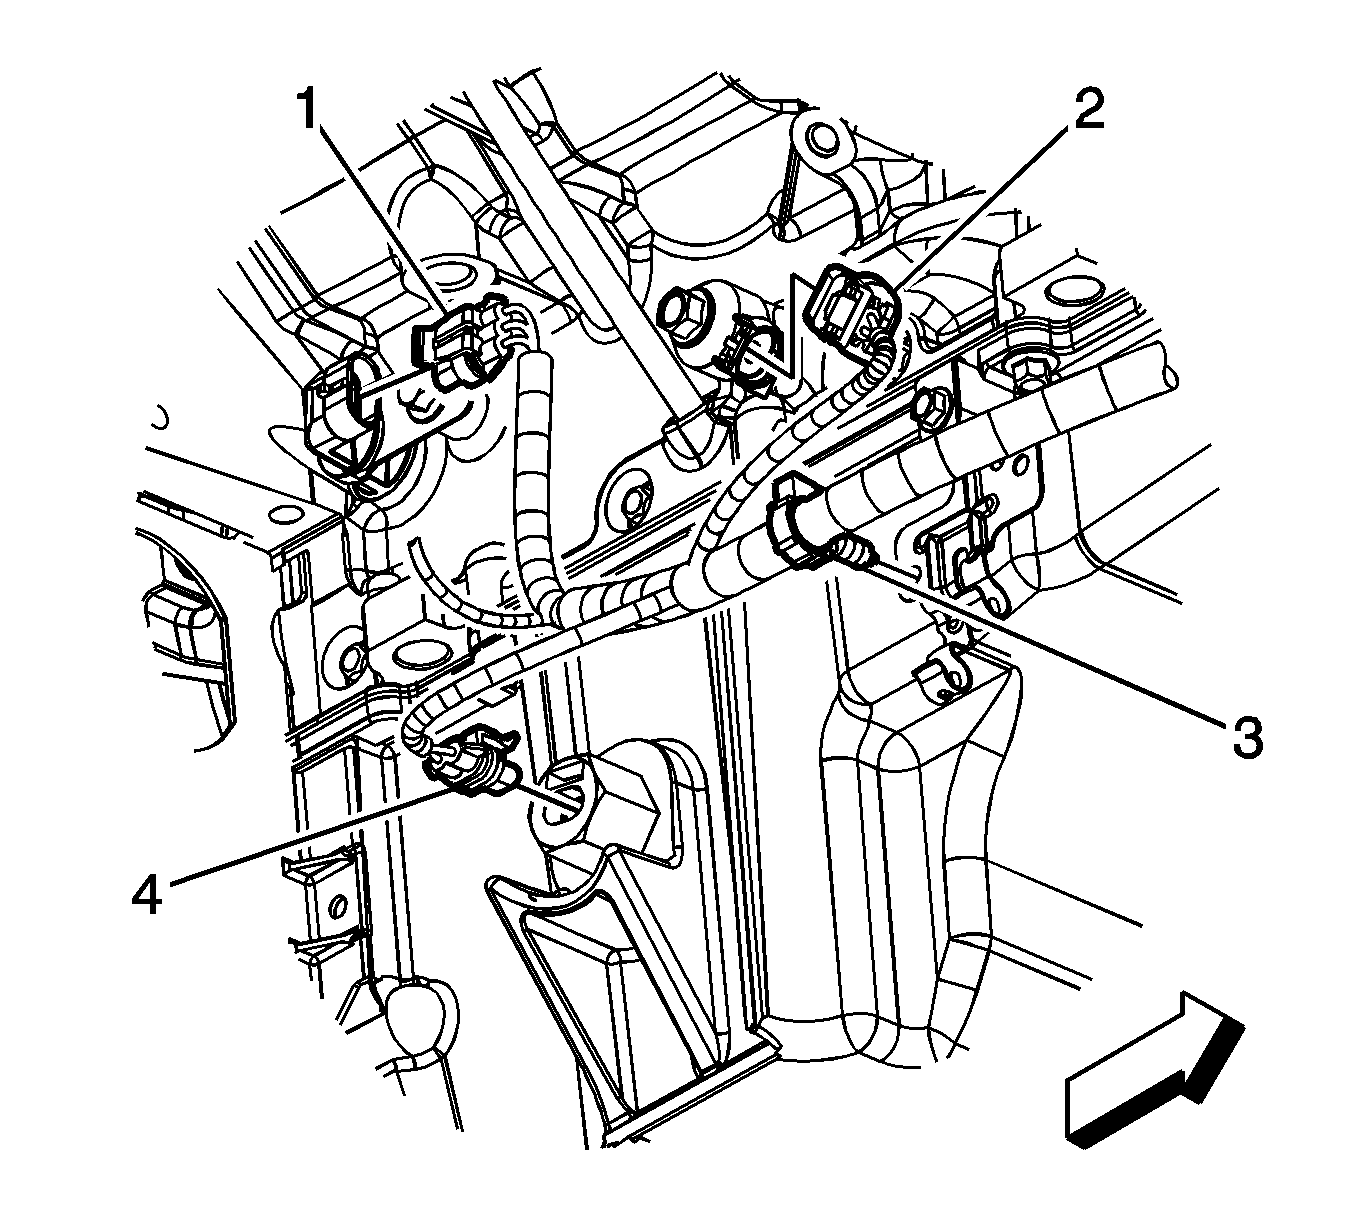
Notice: Avoid cable and wiring damage. DO NOT suspend the starter by the cables or wires attached to the solenoid terminals. Use a rope or mechanics wire to suspend the starter.
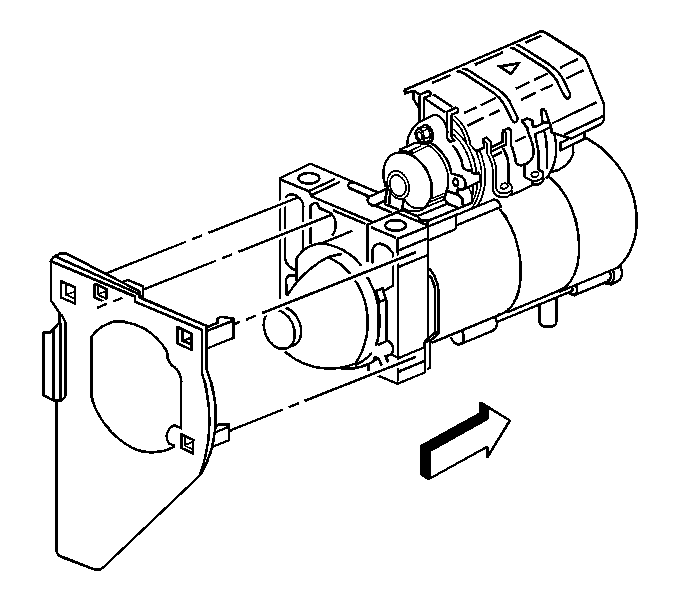
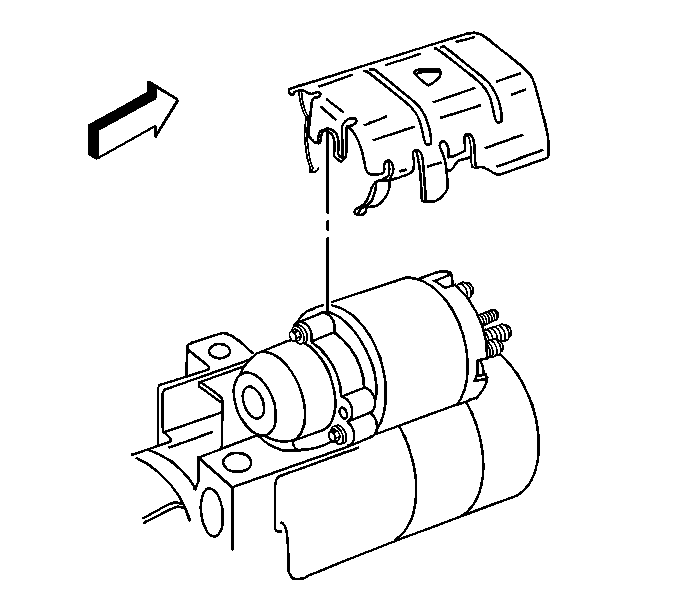
Important: If the starter shield is damaged, replace the starter shield.
Installation Procedure
- If the starter was replaced, install the starter heat shield.
- If the starter was replaced, snap the transmission cover onto the starter.
- Install the starter in through the wheel well opening.
- Install the starter solenoid cable to the starter.
- Install the starter solenoid cable nut (1).
- Position the starter solenoid cable clip to the frame and install the starter solenoid cable clip bolt (2).
- Install the engine wiring harness lead terminal (2) to the starter.
- Install the engine wiring harness lead nut (1).
- Position the starter into place.
- Install the starter bolts.
- Install the right front wheelhouse liner. Refer to Front Wheelhouse Liner Replacement - Right Side .
- Install the right front wheel and tire. Refer to Tire and Wheel Removal and Installation .
- Raise and support the vehicle.
- Connect the engine wiring harness electrical connector (4) to the oil level sensor.
- Install the transmission cover bolt.
- For 2500 series vehicles, install the oil pan skid plate and tighten the rear 2 bolts and install and tighten the front 2 bolts, if equipped.
- Lower the vehicle.
- Connect the negative battery cable. Refer to Battery Negative Cable Disconnection and Connection .


Notice: Refer to Fastener Notice in the Preface section.
Tighten
Tighten the nut to 9 N·m (80 lb in).

Tighten
Tighten the bolt to 10 N·m (89 lb in).

Tighten
Tighten the nut to 3.4 N·m (30 lb in).

Tighten
Tighten the bolts to 50 N·m (37 lb ft).


Tighten
Tighten the bolt to 9 N·m (80 lb in).

Tighten
Tighten the bolts to 28 N·m (21 lb ft).
Starter Replacement 6.6L
Removal Procedure
Caution: Refer to Battery Disconnect Caution in the Preface section.
- Disconnect the negative battery cable. Refer to Battery Negative Cable Disconnection and Connection.
- Remove the wheelhouse liner. Refer to Front Wheelhouse Liner Replacement - Right Side.
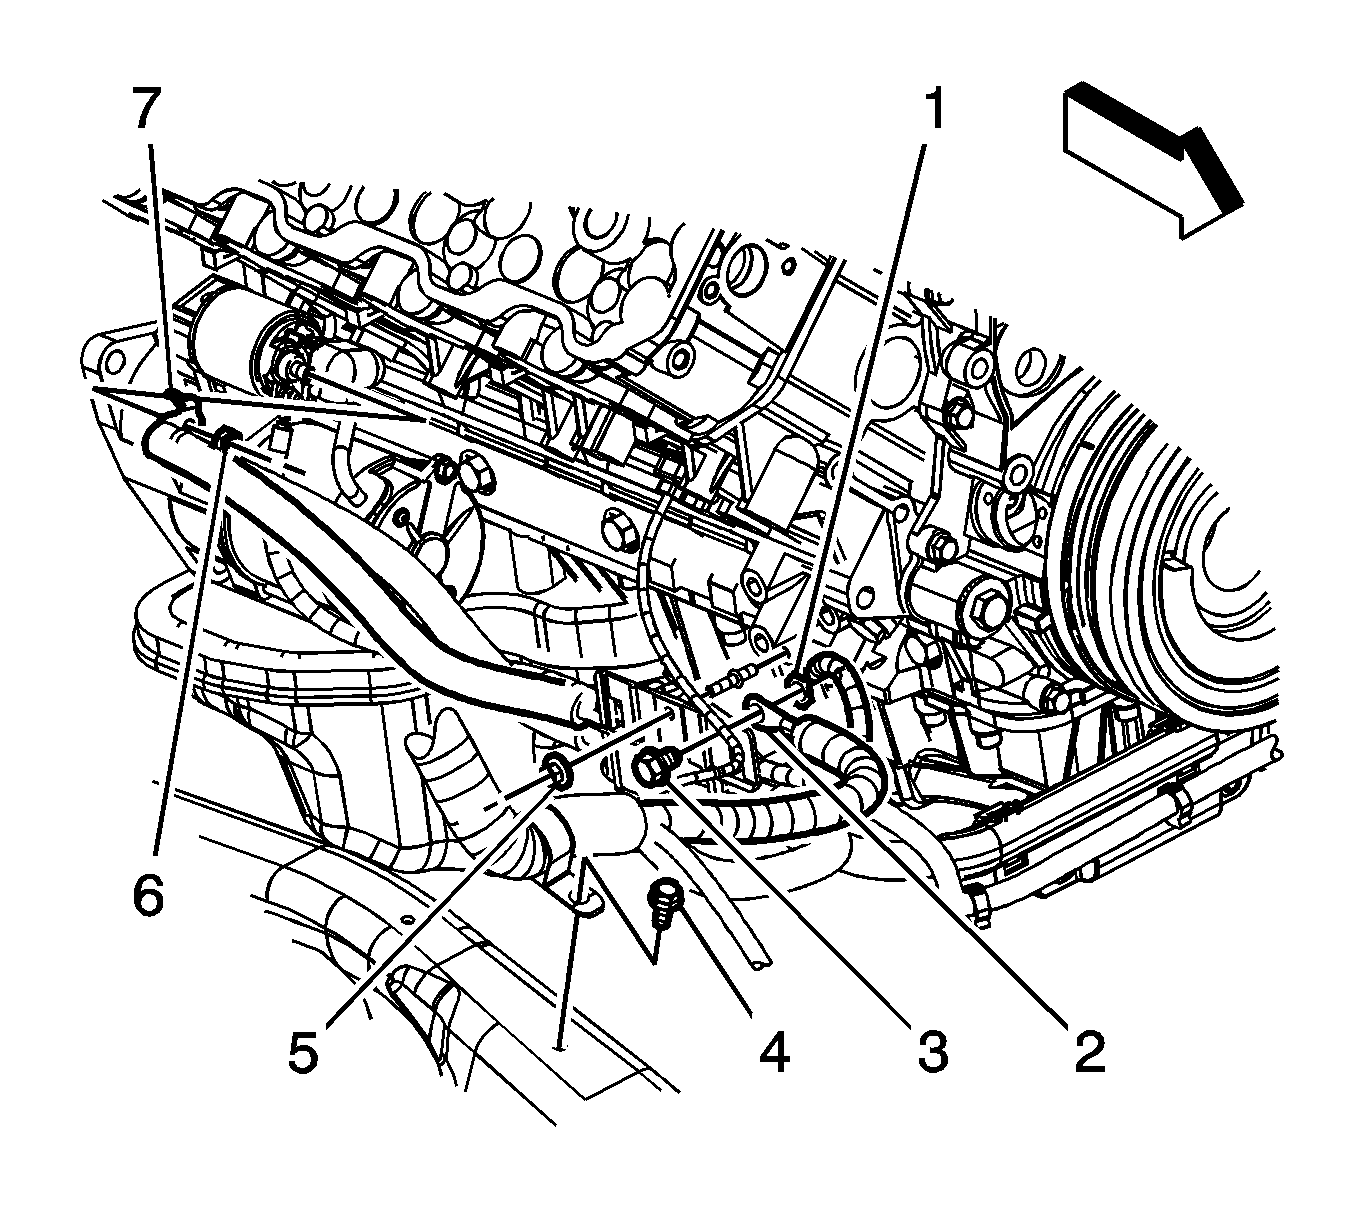
- Working through the wheelhouse, remove the starter solenoid cable nut (6) from the starter.
- Remove the starter solenoid cable (7) from the starter.
- Working through the wheelhouse, remove the engine wiring harness lead nut (3).
- Remove the engine wiring harness lead (2) from the starter motor.
- Remove the exhaust manifold-to-catalytic converter pipe. Refer to Catalytic Converter Replacement.
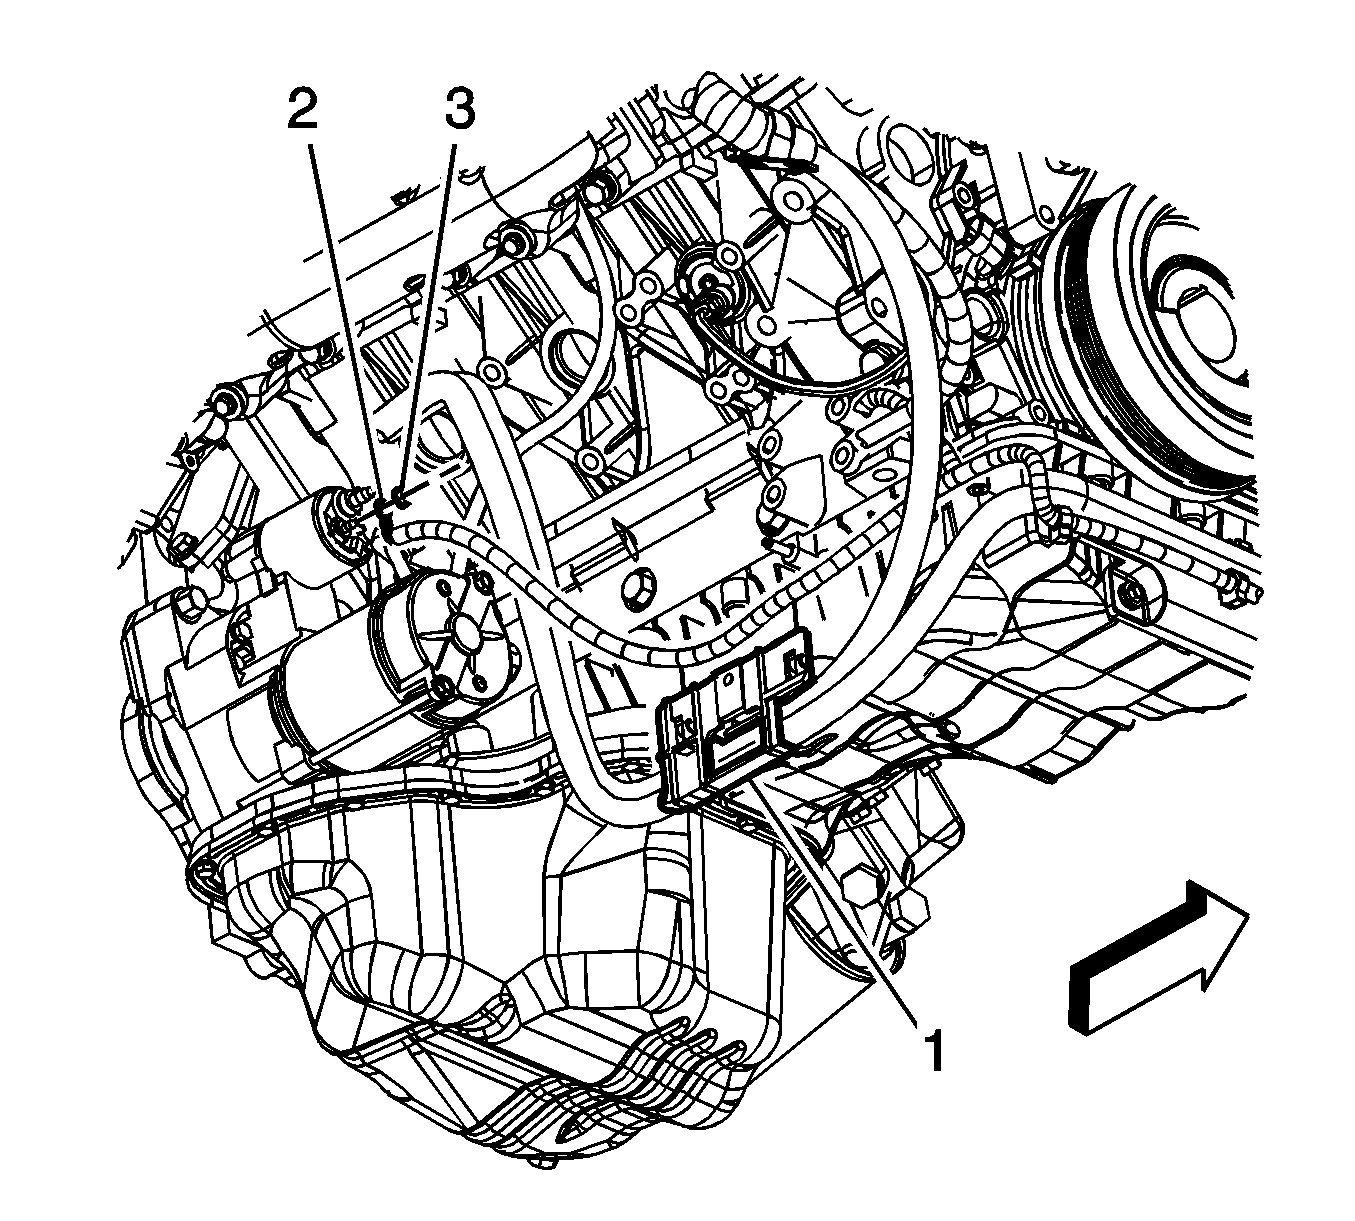
- From under the vehicle, remove the starter motor bolts (1).
- Remove the starter motor.
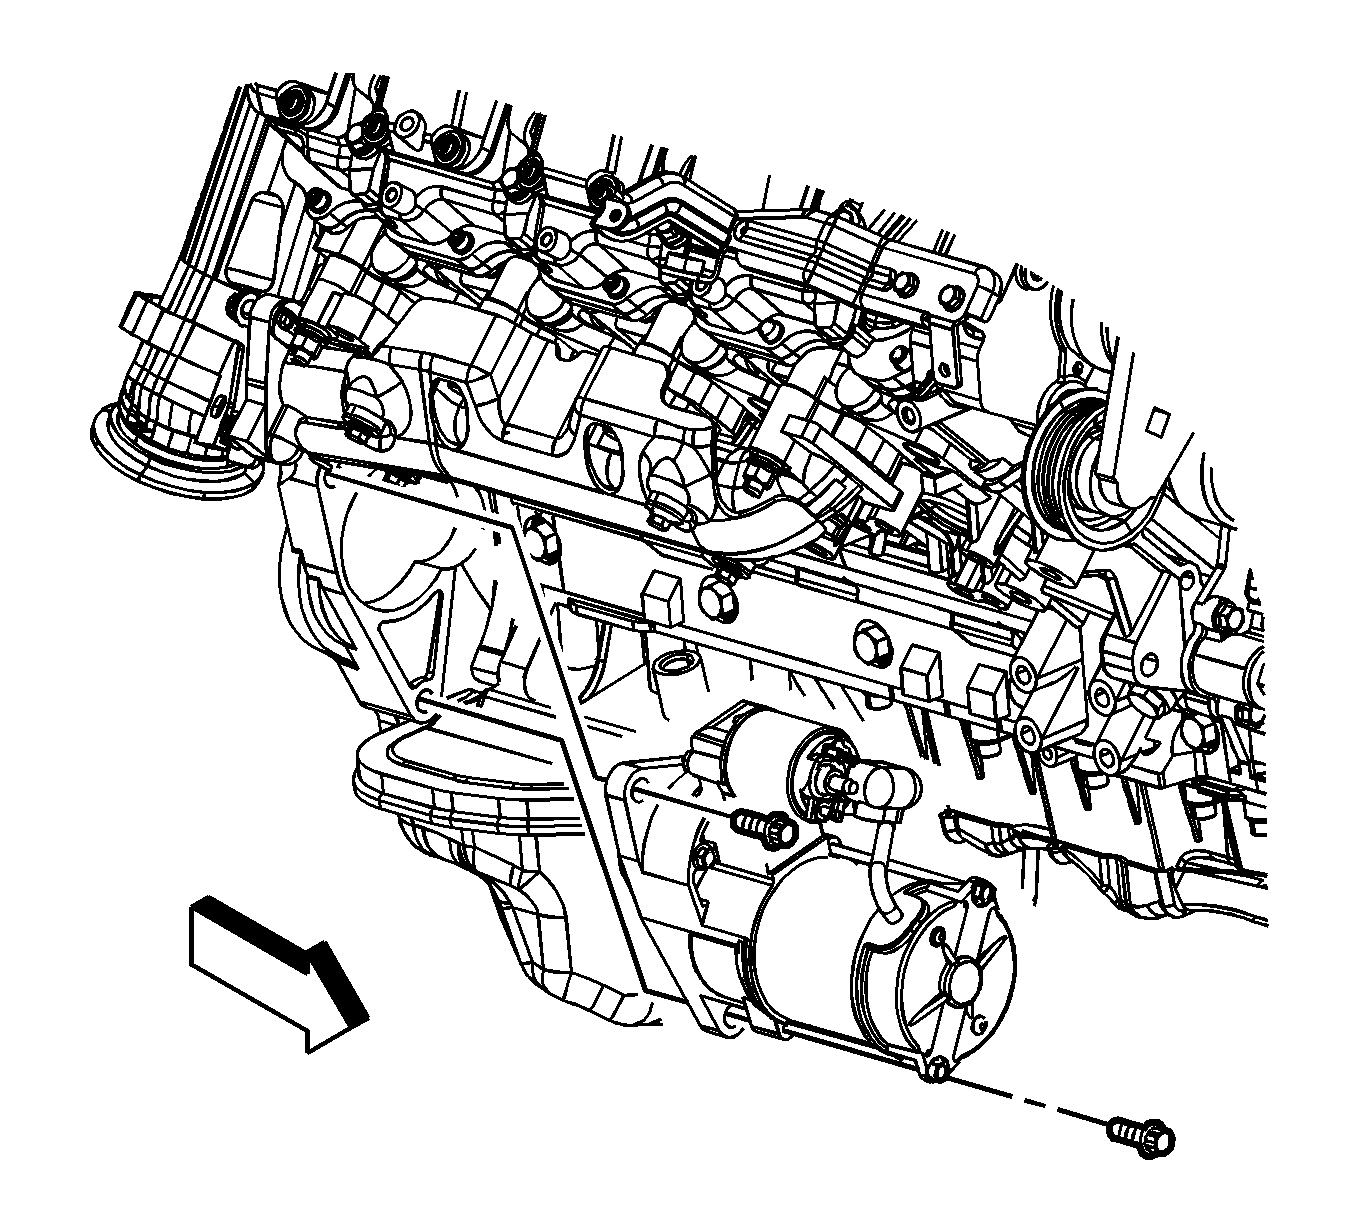
Installation Procedure
- Install the starter motor.
- Install the starter motor bolts (1).
- Install the exhaust manifold-to-catalytic converter pipe. Refer to Catalytic Converter Replacement.
- Install the engine wiring harness lead (2) to the starter motor.
- Install the engine wiring harness lead nut (3).
- Install the starter solenoid cable (7) to the starter.
- Install the starter solenoid cable nut (6) to the starter.
- Install the wheelhouse liner. Refer to Front Wheelhouse Liner Replacement - Right Side.
- Connect the negative battery cable. Refer to Battery Negative Cable Disconnection and Connection.

Notice: Refer to Fastener Notice in the Preface section.
Tighten
Tighten the bolts to 85 N·m (63 lb ft).

Tighten
Tighten the nut to 3.4 N·m (30 lb in).

Tighten
Tighten the nut to 9 N·m (80 lb in).
Starter Replacement 4.3L
Removal Procedure
Caution: Unless directed otherwise, the ignition and start switch must be in the OFF or LOCK position, and all electrical loads must be OFF before servicing any electrical component. Disconnect the negative battery cable to prevent an electrical spark should a tool or equipment come in contact with an exposed electrical terminal. Failure to follow these precautions may result in personal injury and/or damage to the vehicle or its components.
- Disconnect the negative battery cable. Refer to Battery Negative Cable Disconnection and Connection .
- Raise and suitably support the vehicle. Refer to Lifting and Jacking the Vehicle .
- Remove the oil pan skid plate bolts and plate, if equipped.
- Remove the starter solenoid cable clip bolt (2) from the frame.
- Remove the starter motor bolts.
- Remove the starter solenoid cable lead nut (1).
- Remove the starter solenoid cable lead (2) from the starter.
- Remove the engine wiring harness lead nut (2).
- Remove the engine wiring harness lead (5) from the starter.
- Remove the starter from the vehicle.
- If replacing the starter, remove the starter heat shield.


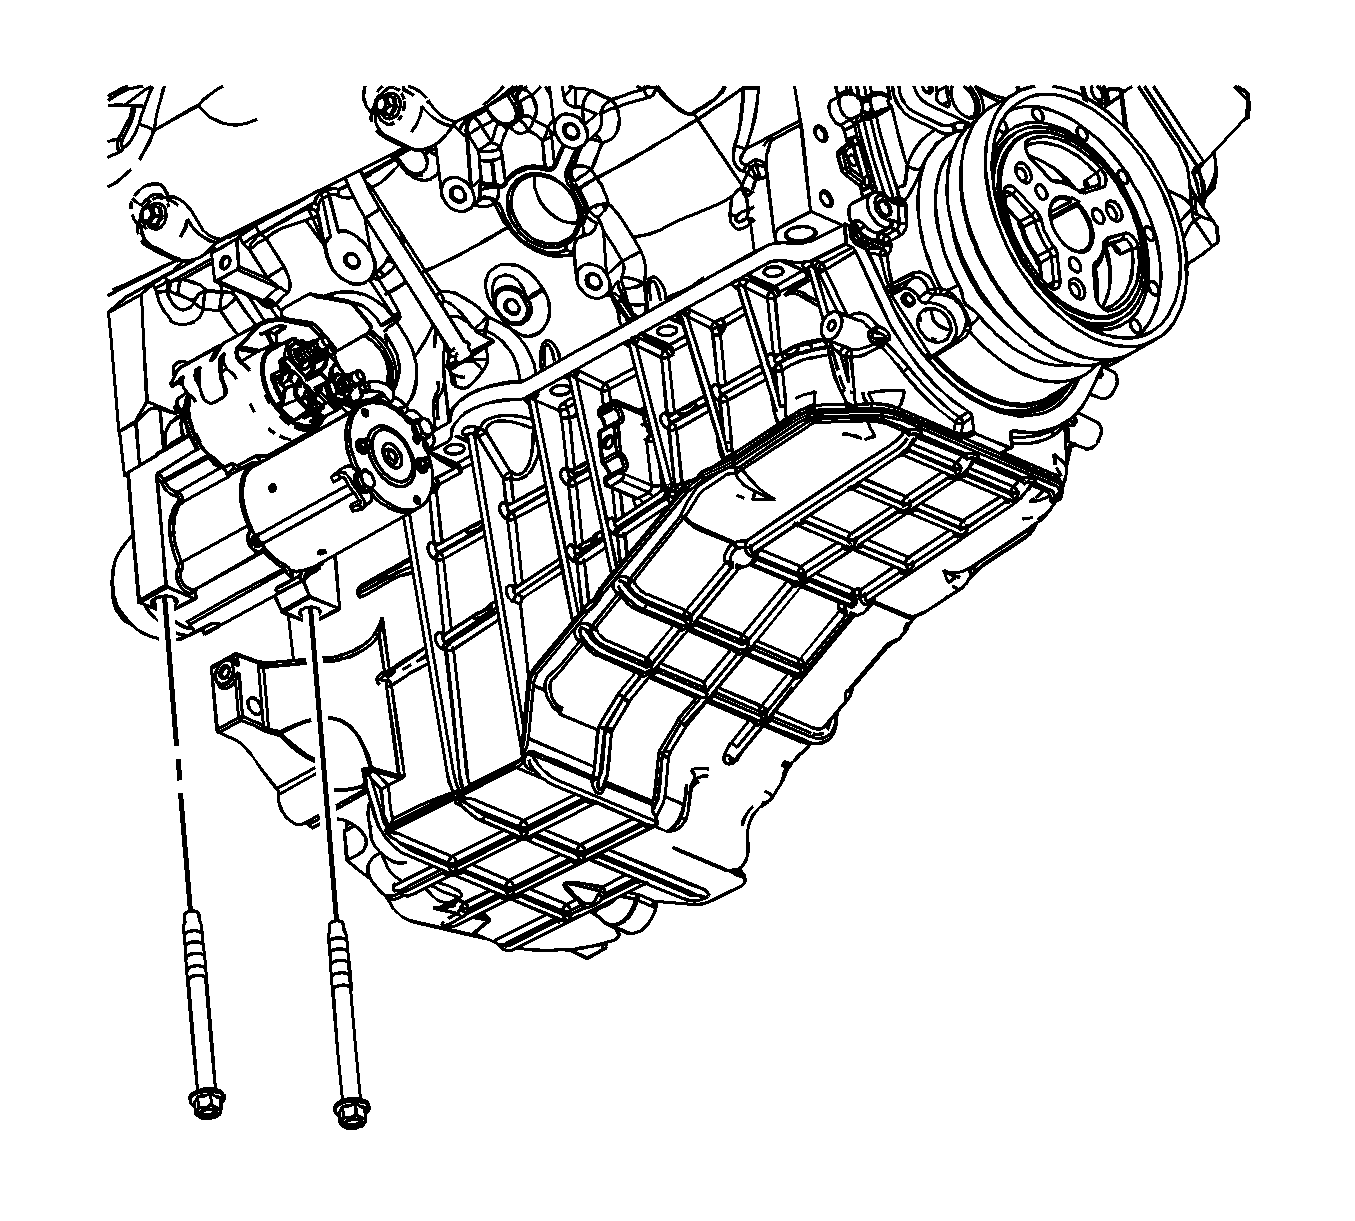

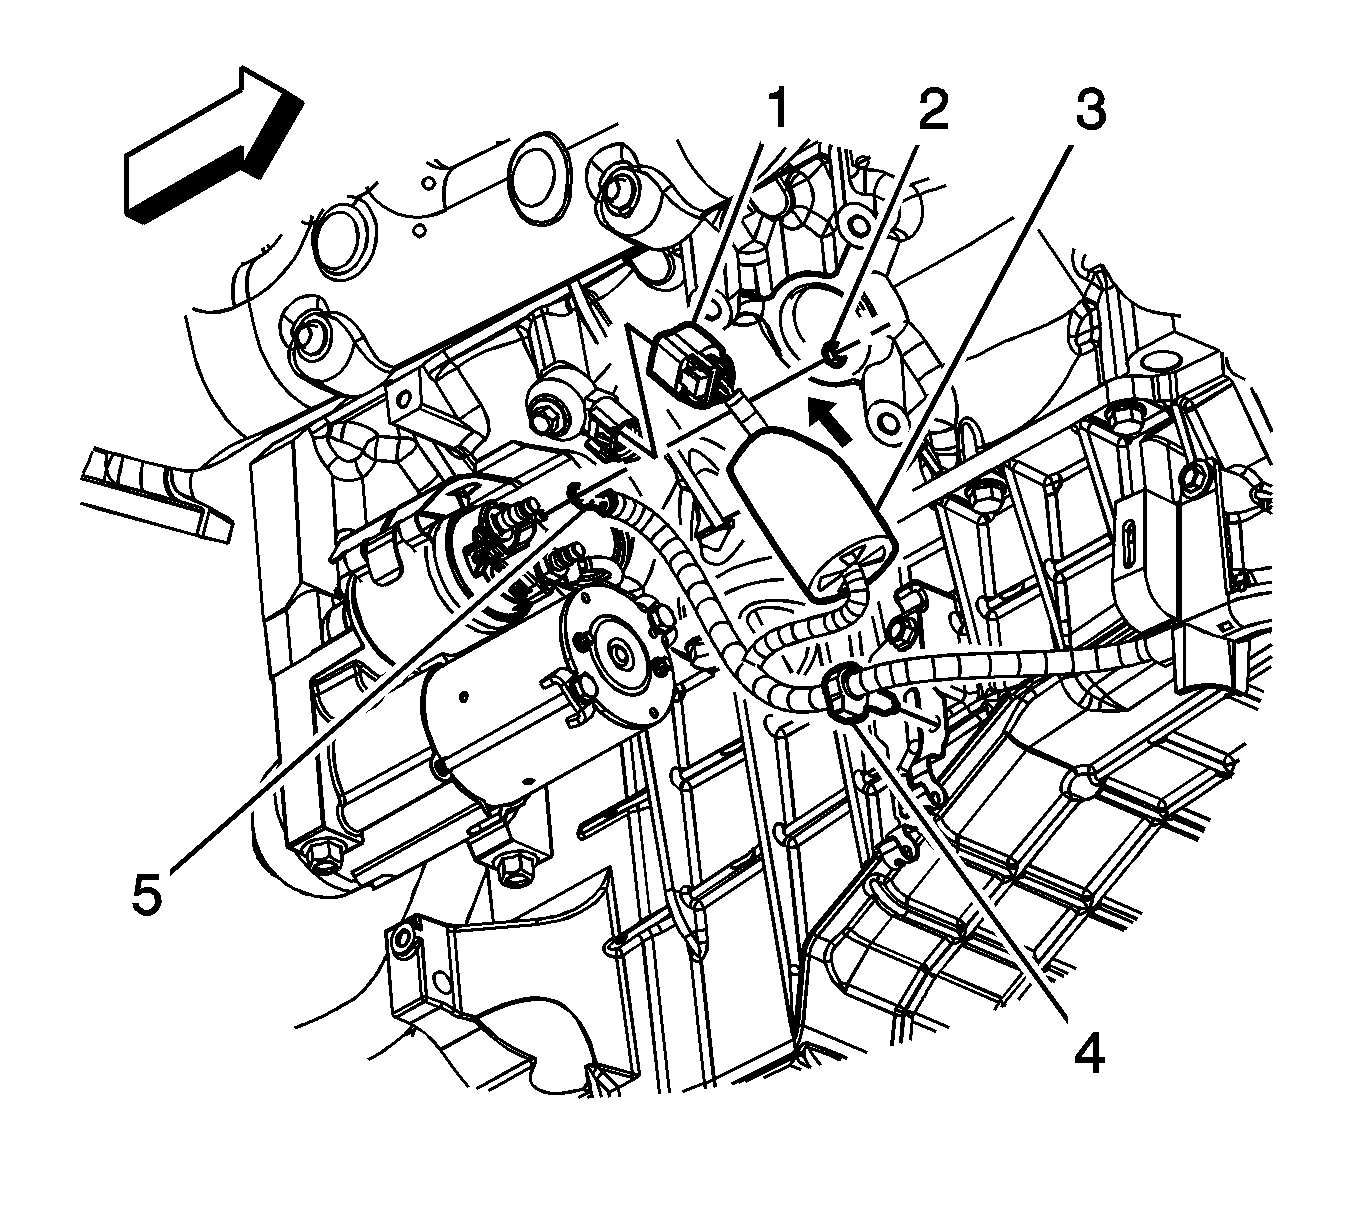
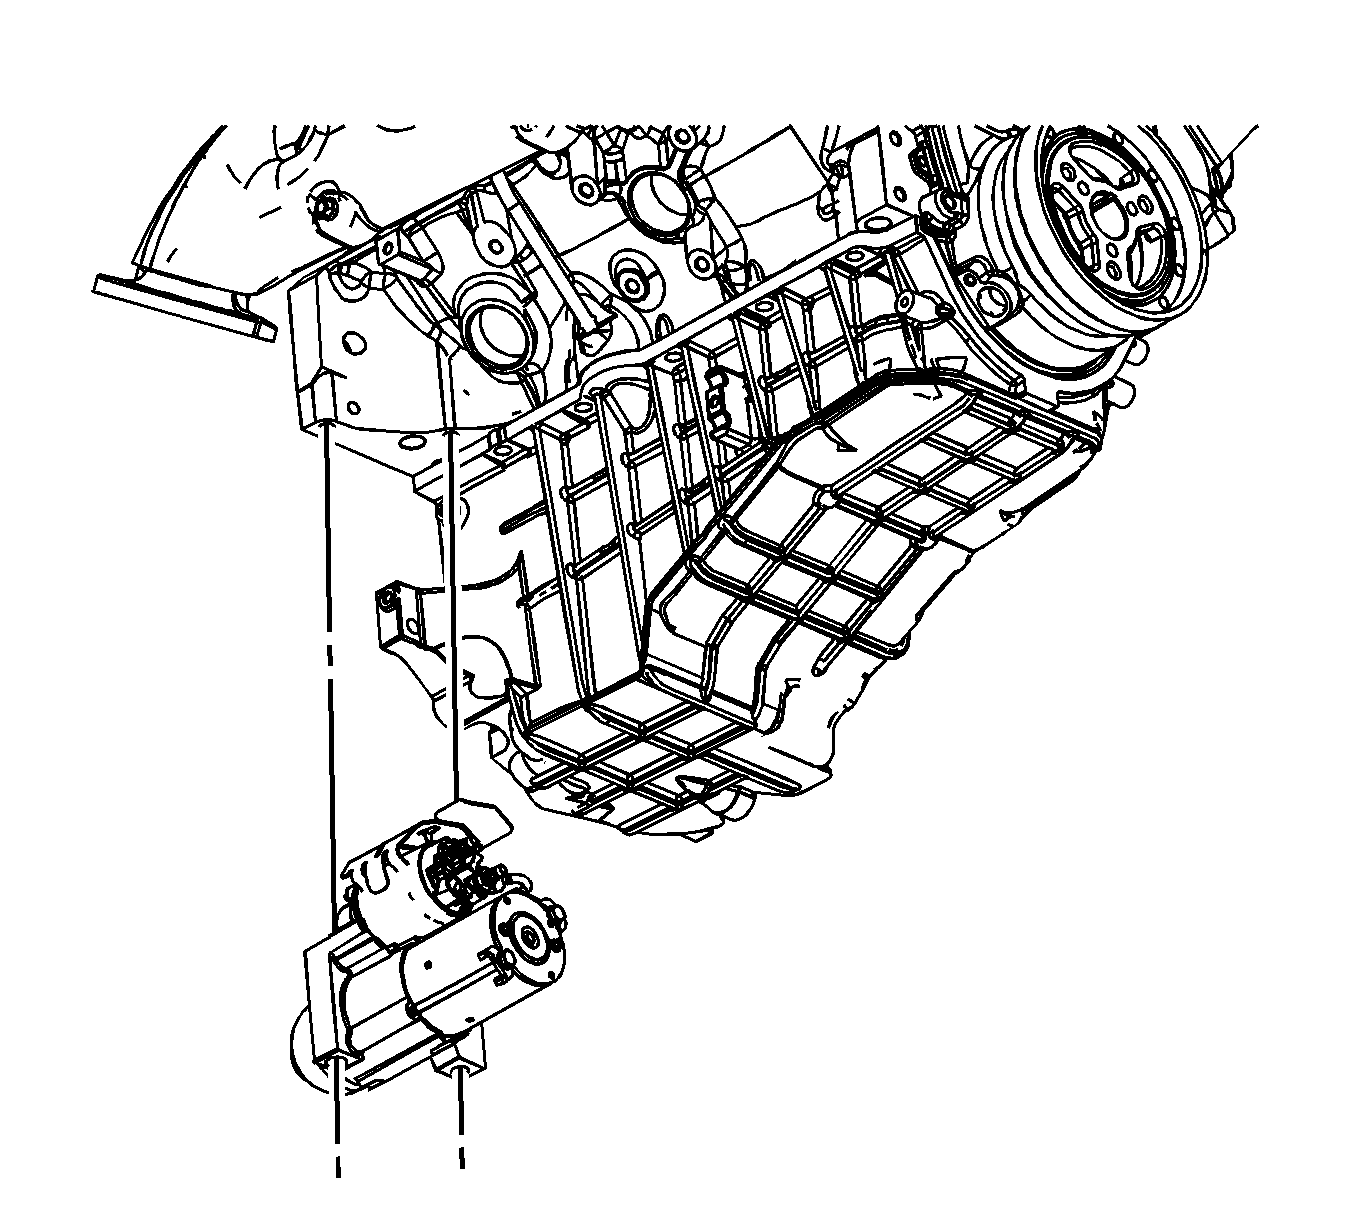

Important: If the starter shield is damaged, replace the starter shield.
Installation Procedure
- If the starter was replaced, install the starter heat shield to the starter.
- Position the starter to the vehicle.
- Install the engine wiring harness lead (5) to the starter.
- Install the engine wiring harness lead nut (2).
- Install the starter solenoid cable lead (2) to the starter.
- Install the starter solenoid cable (1) nut.
- Install the starter motor bolts.
- Position the starter solenoid cable clip to the frame and install the starter solenoid cable clip bolt (2).
- Position the oil pan skid plate and install the bolts, if equipped.
- Lower the vehicle.
- Connect the negative battery cable. Refer to Battery Negative Cable Disconnection and Connection .


Notice: Refer to Fastener Notice in the Preface section.
Tighten
Tighten the nut to 3.4 N·m (30 lb in).

Tighten
Tighten the nut to 9 N·m (80 lb in).

Tighten
Tighten the bolts to 50 N·m (37 lb ft).

Tighten
Tighten the bolt to 10 N·m (89 lb in).

Tighten
Tighten the bolts to 28 N·m (21 lb ft).
