For 1990-2009 cars only
Battery Negative Cable Replacement With LMM Primary
Removal Procedure
- Disconnect the battery negative cable from the battery . Refer to Battery Negative Cable Disconnection and Connection .
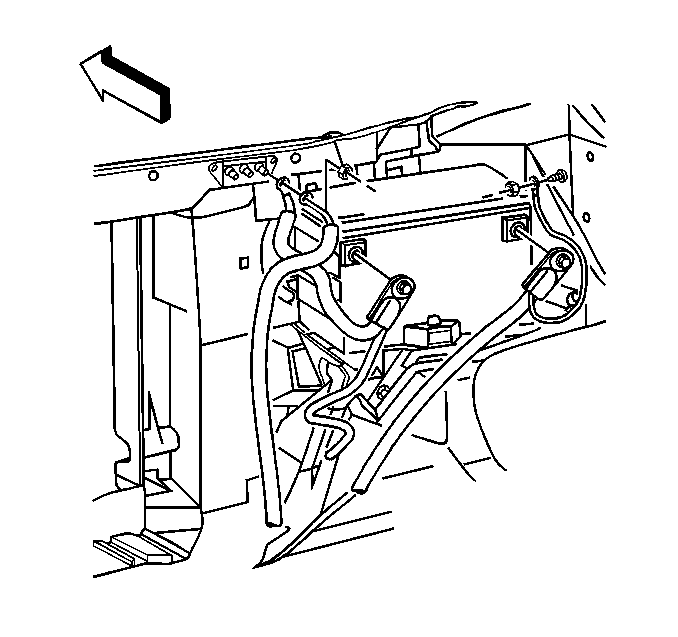
- Disconnect the battery negative cable lead from the inner fender panel.
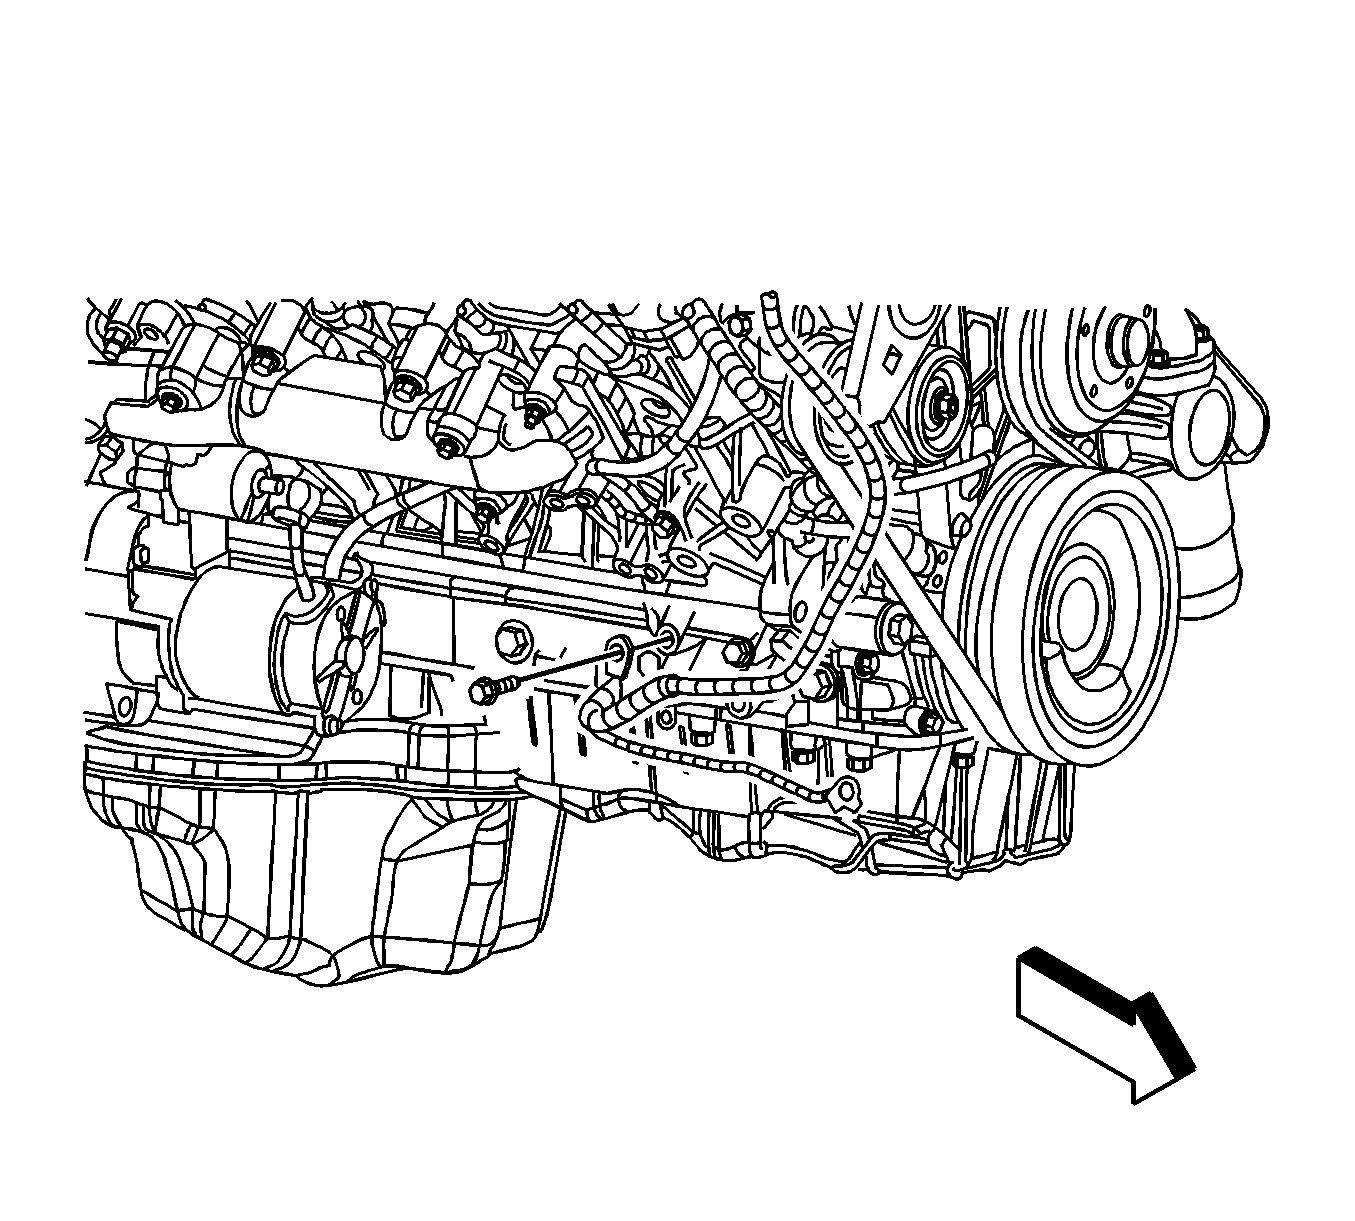
- Disconnect the battery negative cable lead from the engine block.
- Remove the battery negative cable from the vehicle.
Installation Procedure
- Install the battery negative cable to the vehicle.
- Connect the battery negative cable lead to the engine block and tighten to 25 N·m (18 lb ft) .
- Connect the negative cable lead to the inner fender panel.
- Connect the negative cable to the battery. Refer to Battery Negative Cable Disconnection and Connection .
Caution: Refer to Fastener Caution in the Preface section.
Tighten
Tighten the nut that retains the negative cable to the inner fender well to 10 N·m (89 lb in).
Tighten
Tighten the negative cable terminal bolt to 14 N·m (123 lb in).
Battery Negative Cable Replacement With LMM Auxiliary
Removal Procedure
- Raise the vehicle. Refer to Lifting and Jacking the Vehicle .
- Disconnect the battery negative cable from the auxiliary battery. Refer to Battery Negative Cable Disconnection and Connection .
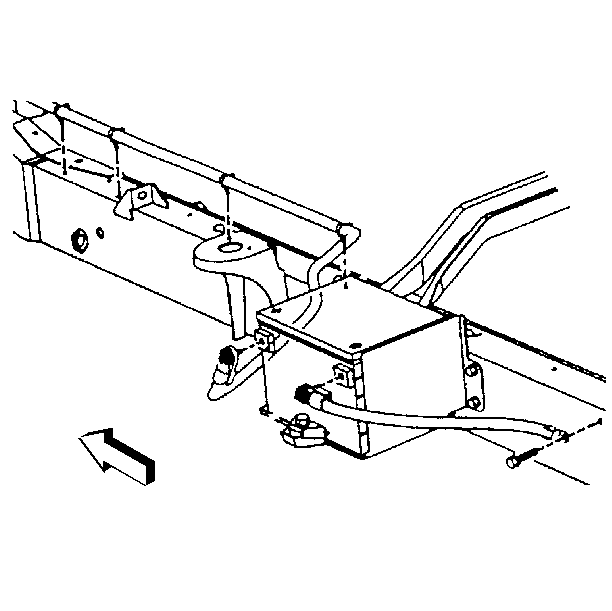
- Disconnect the negative ground leads from the frame.
- Remove the battery negative cable from the vehicle.
Installation Procedure
- Install the battery negative cable to the vehicle.
- Connect the negative ground leads to the frame and tighten to 10 N·m (89 lb in) .
- Connect the battery negative cable to the auxiliary battery and tighten to 14 N·m (123 in lb) .
Caution: Refer to Fastener Caution in the Preface section.
Battery Negative Cable Replacement With LY2, LMF or LY6
Removal Procedure
- On all models, disconnect the battery negative cable from the battery . Refer to Battery Negative Cable Disconnection and Connection .
- Disconnect the battery negative cable lead from the inner fender panel.
- On models with 5.3L engine, disconnect the battery negative cable lead from the frame.
- On all models, disconnect the battery negative cable lead from the engine block.
- On models with 4.8L and 6.0L engine, disconnect the battery negative cable lead from the frame.
- On all models, remove the battery negative cable from the vehicle.
Installation Procedure
- On all models, install the negative cable to the vehicle.
- On models with 4.8L and 6.0L engine, connect the negative cable to the frame.
- On all models, connect the negative cable to the engine block and tighten the bolt to 25 N·m (18 lb ft) .
- On models with 5.3L engine, connect the negative cable lead to the frame.
- On all models, connect the negative cable lead to the inner fender panel and tighten the nut to 10 N·m (89 lb in) .
- Connect the negative cable to the battery. Refer to Battery Negative Cable Disconnection and Connection .
Caution: Refer to Fastener Caution in the Preface section.
Battery Negative Cable Replacement With LU3 and RVS
Removal Procedure
- Disconnect the negative battery cable. Refer to Battery Negative Cable Disconnection and Connection .
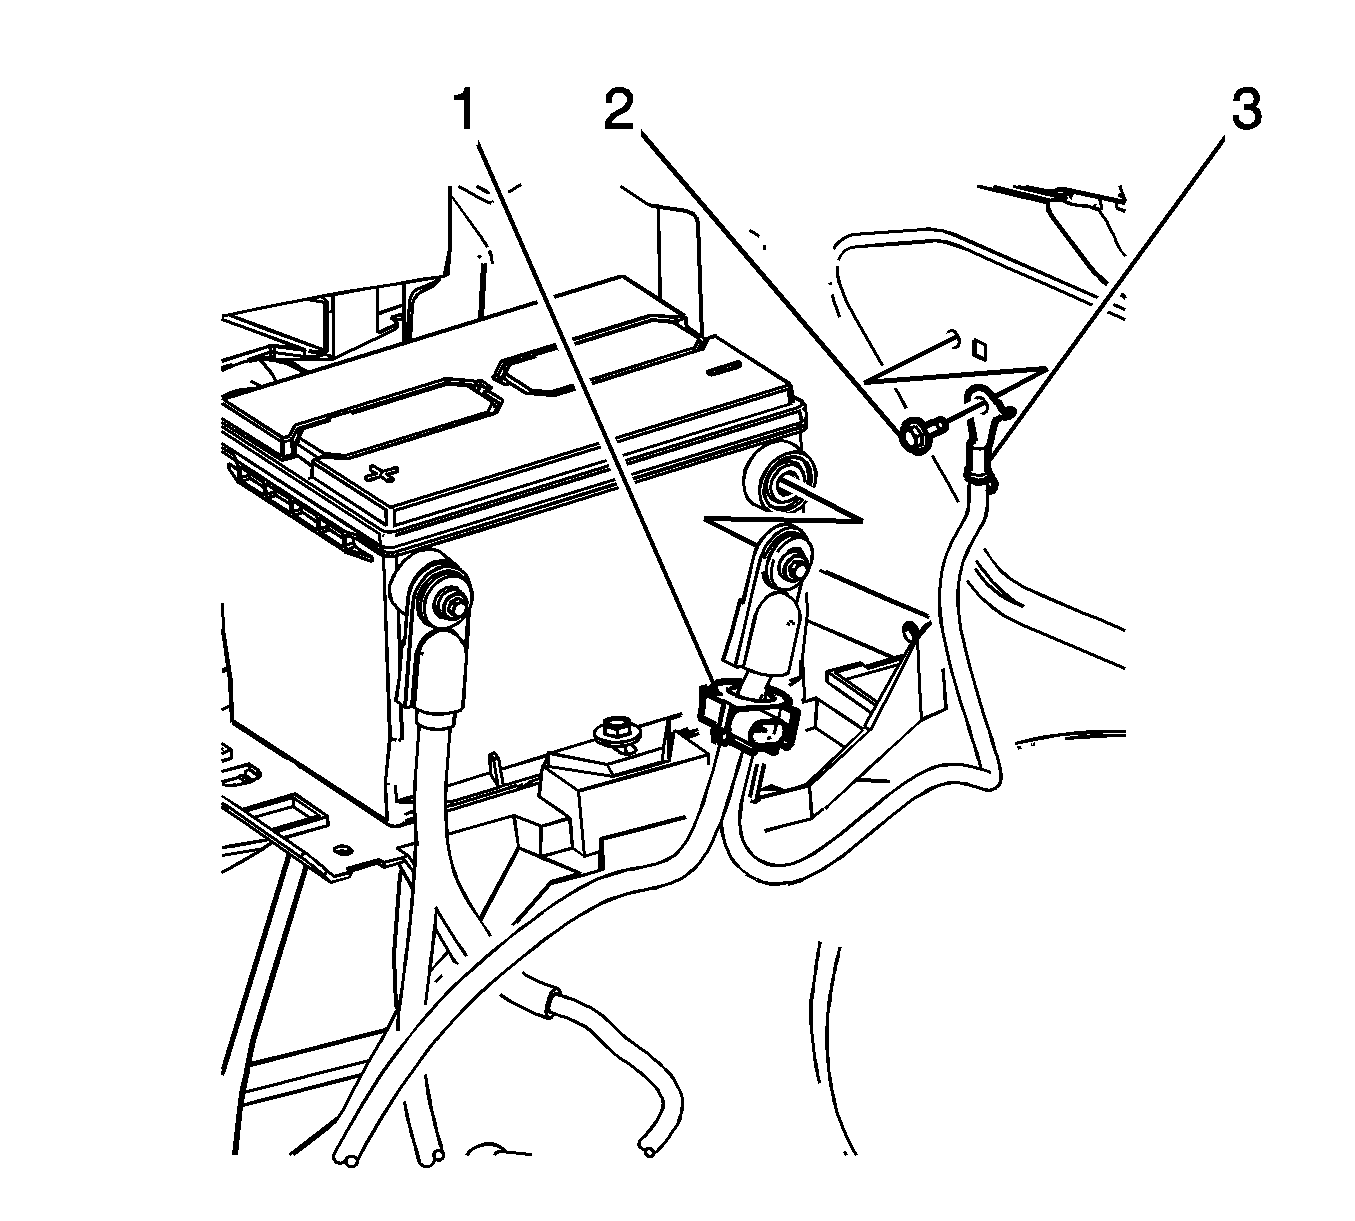
- Disconnect the battery current sensor (1) harness connector.
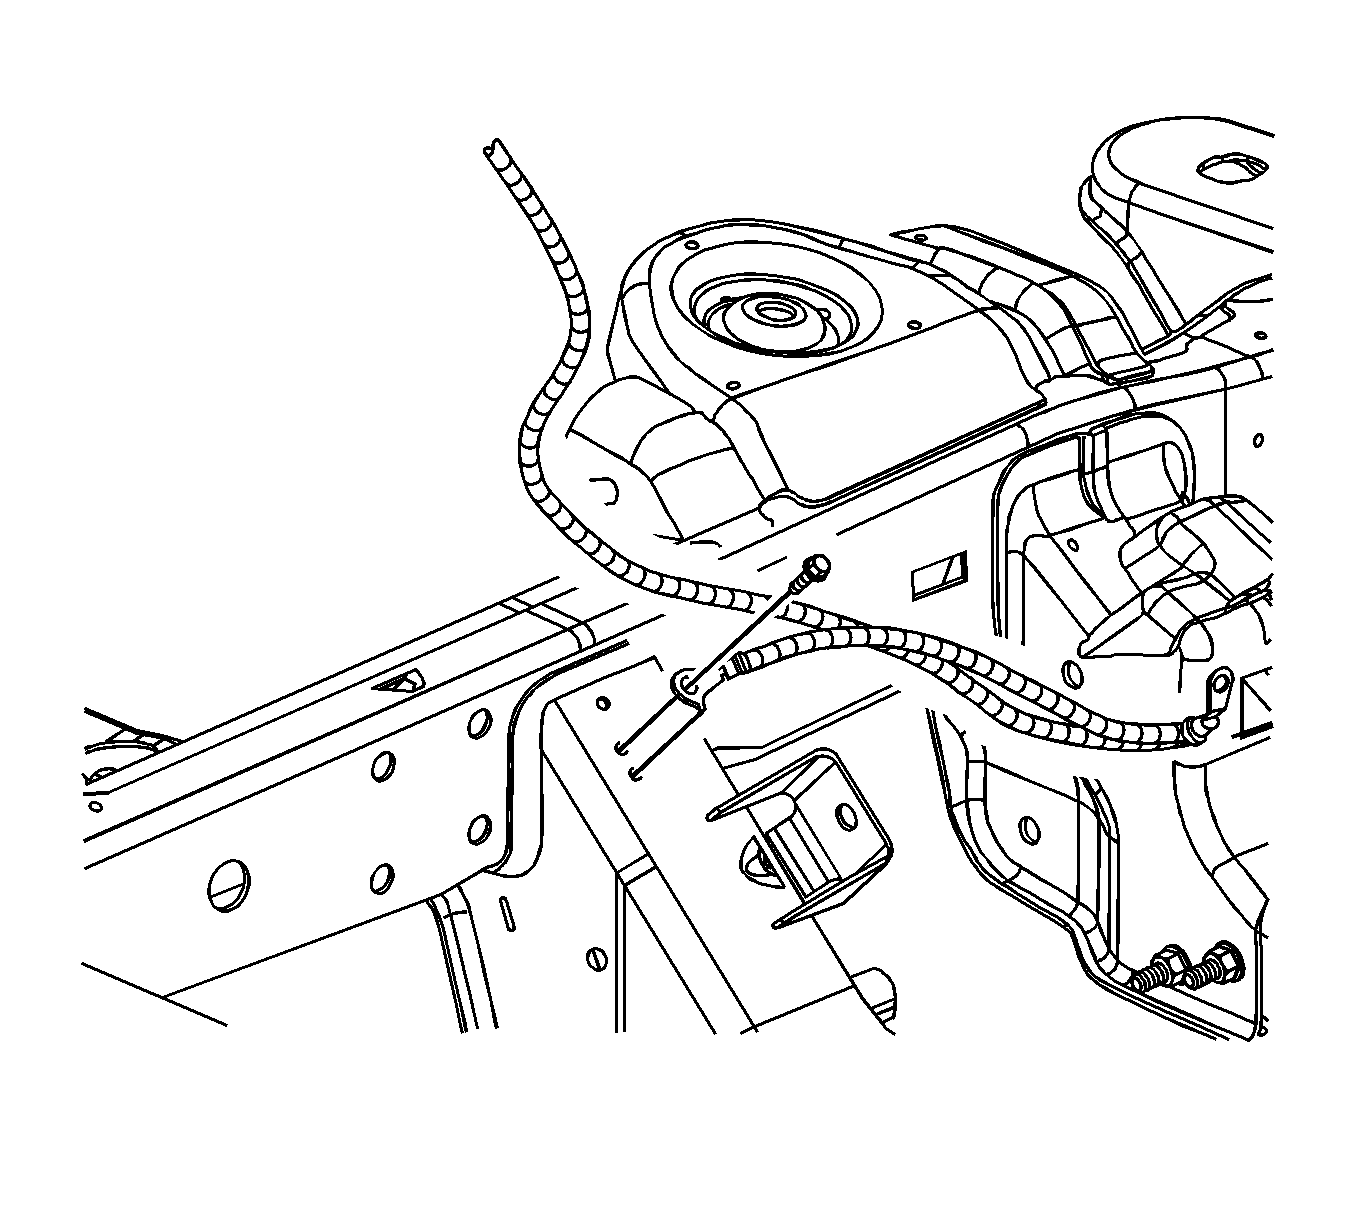
- Remove the negative battery cable ground bolt (2) from the inner fender panel.
- Remove the negative battery cable ground lead (3) from the inner fender panel.
- Raise and support the vehicle. Refer to Lifting and Jacking the Vehicle .
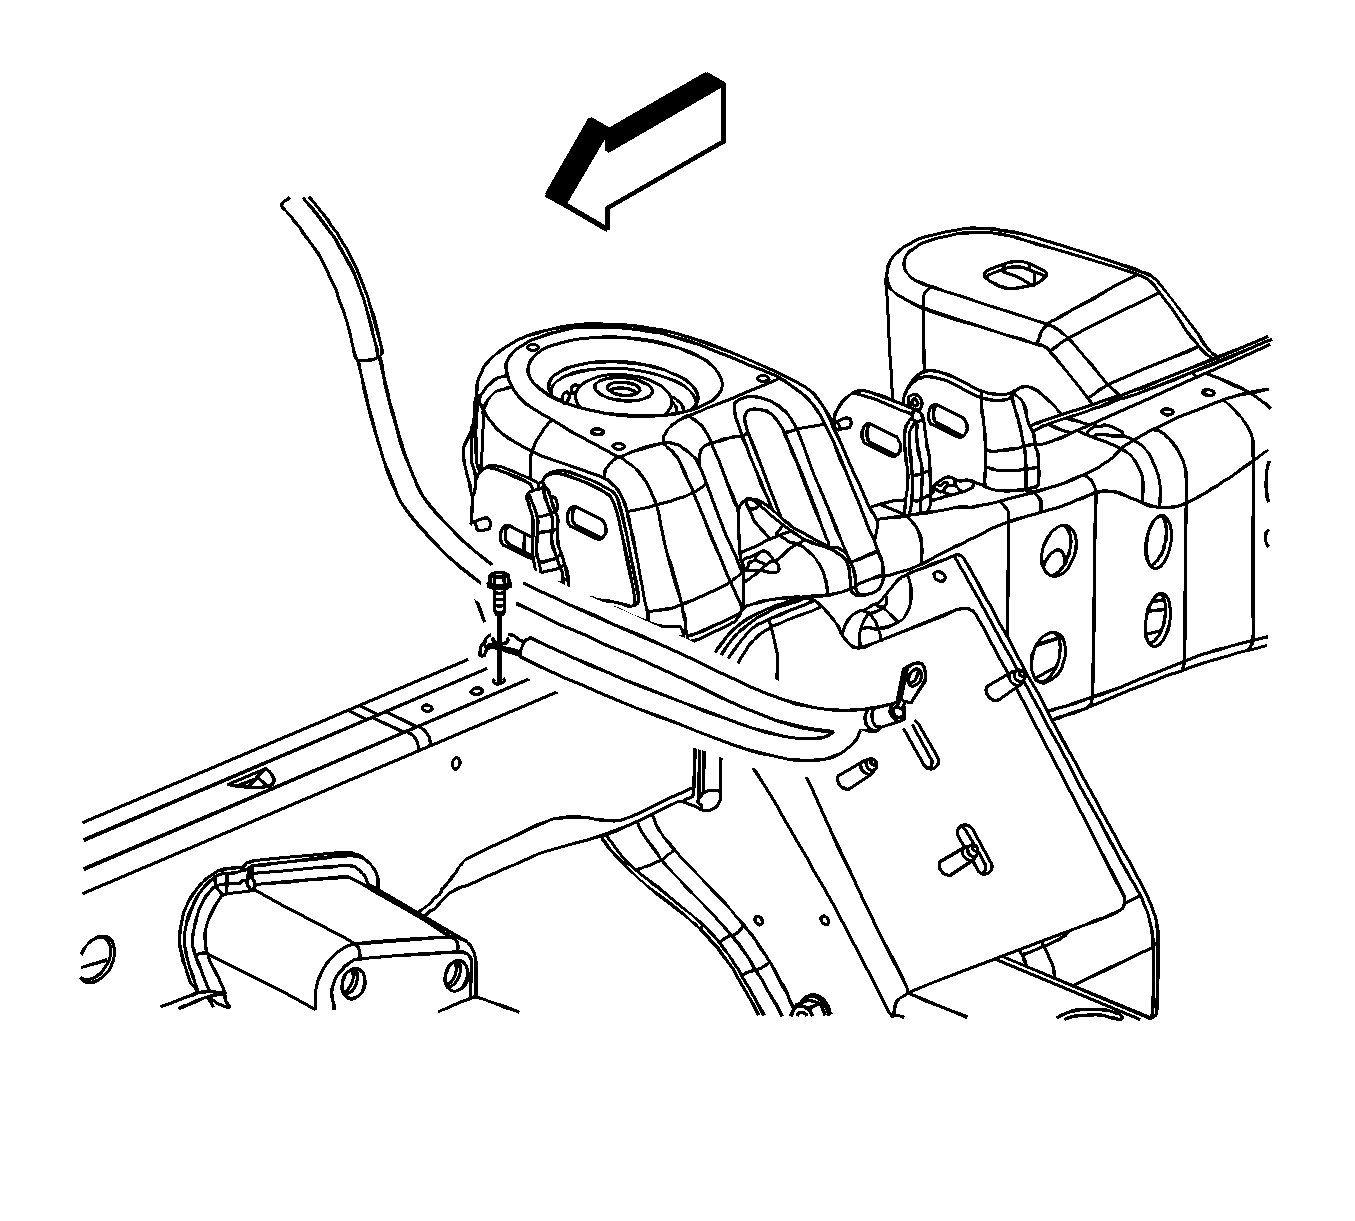
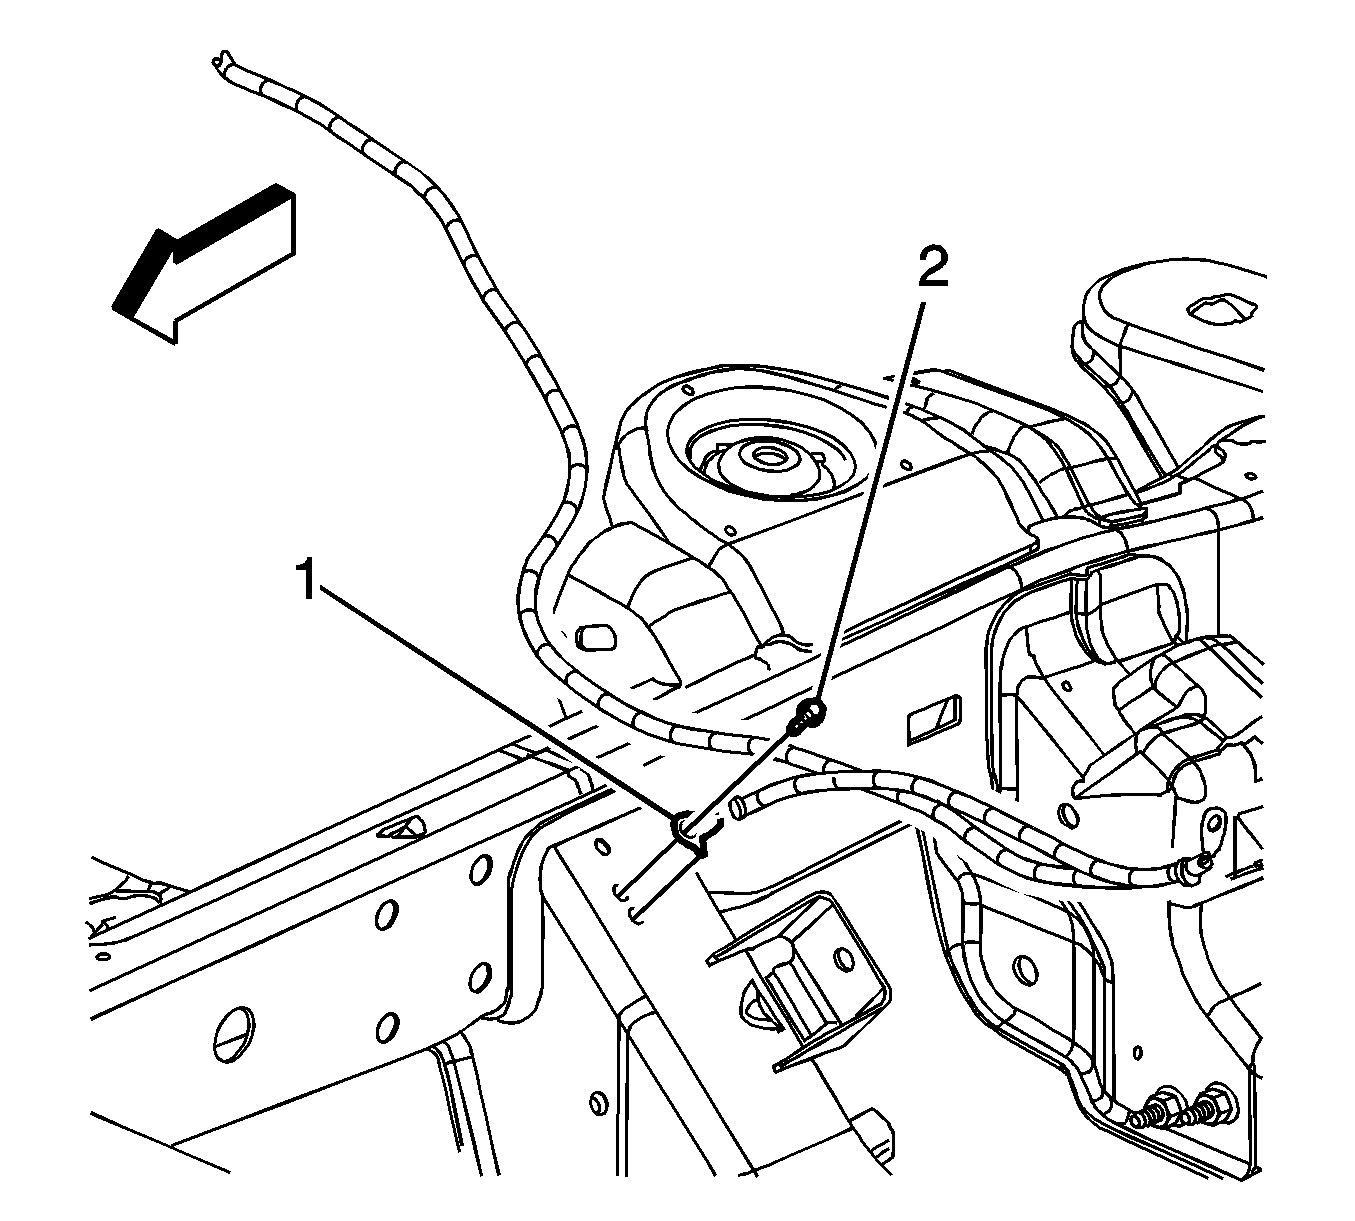
- Remove the negative battery cable ground lead bolt (2) at the crossmember.
- Remove the negative battery cable ground (1) from the crossmember.
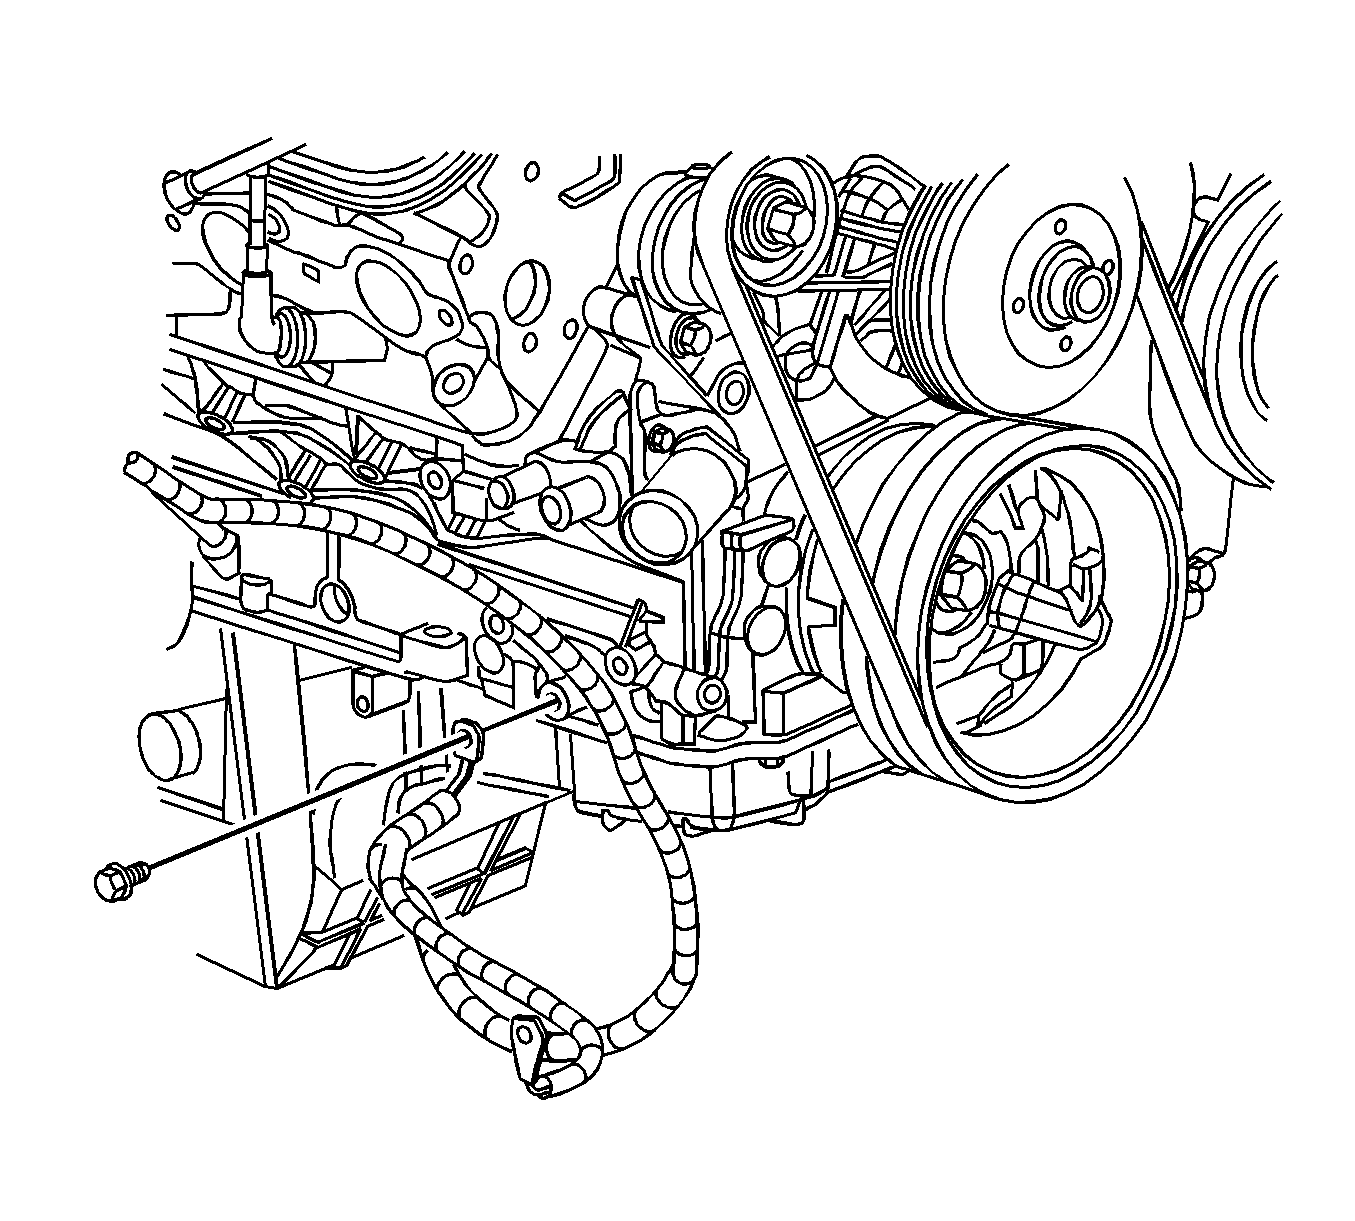
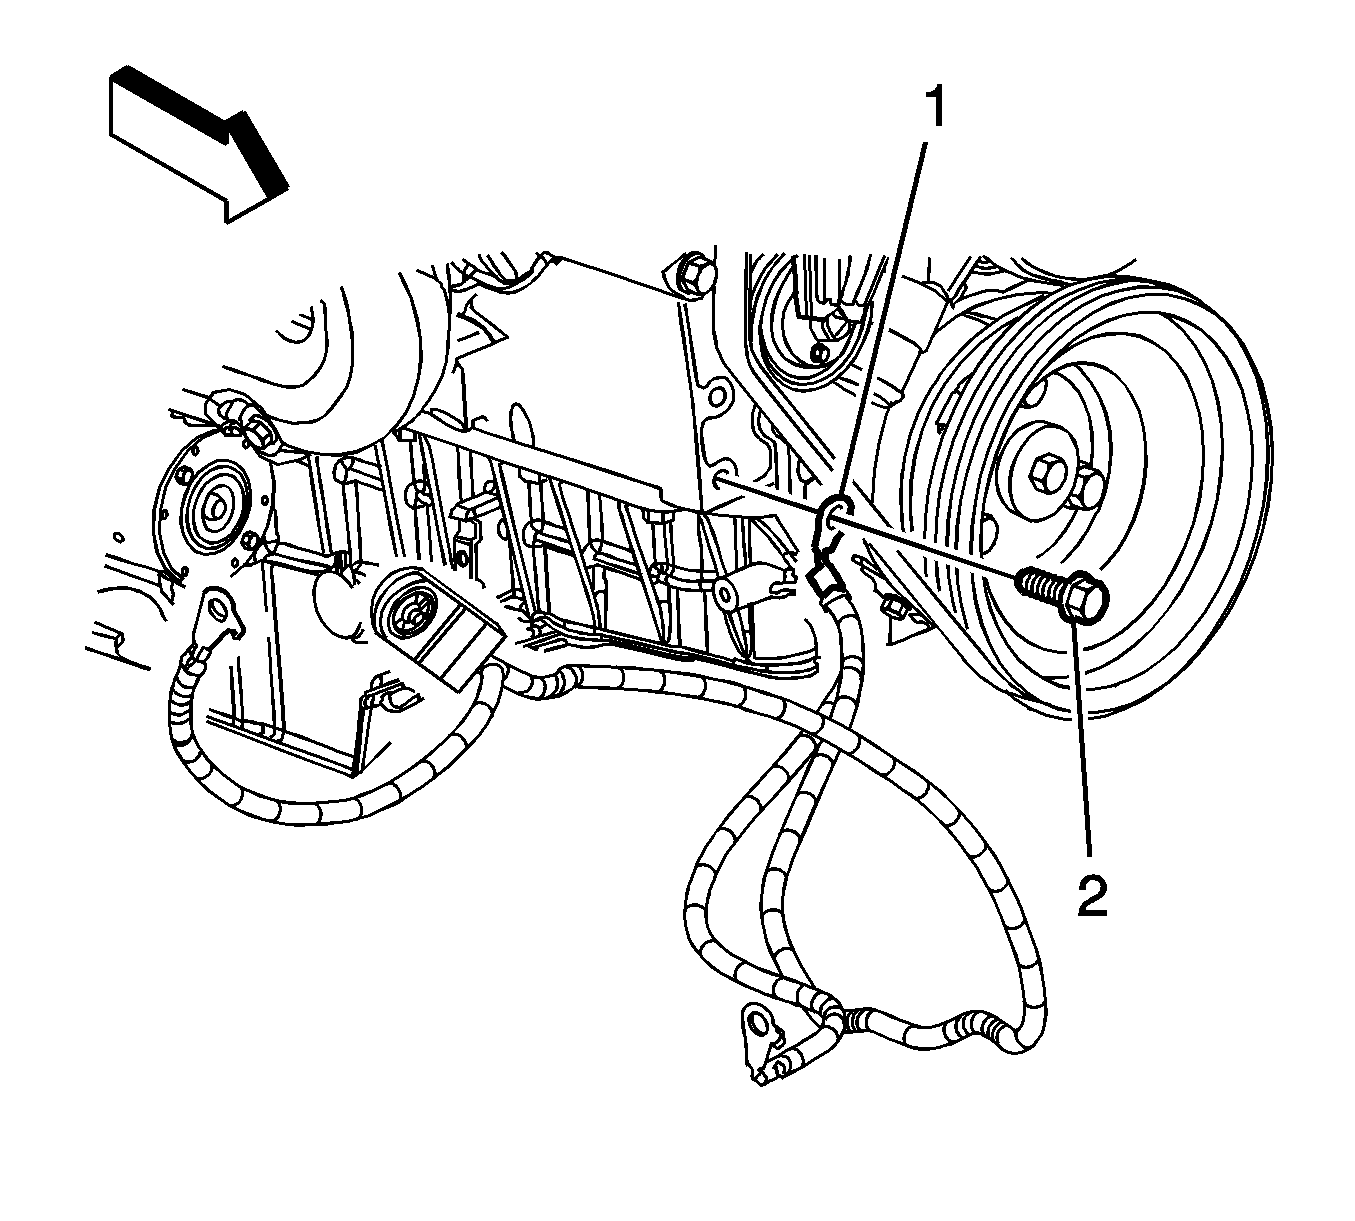
- Remove the negative battery cable ground bolt (2) from the engine block.
- Remove the negative battery cable ground (1) from the block.
- Lower the vehicle.
- Remove the negative battery cable from the vehicle.
Installation Procedure
- Install the negative battery cable to the vehicle.
- Raise the vehicle.
- Position the negative cable ground lead (1) to the engine block.
- Install the negative cable ground bolt (2) to the engine block and tighten the bolt to 25 N·m (18 lb ft) .
- Install the negative cable ground lead (1) to the crossmember.
- Install the negative cable ground bolt (2) at the crossmember and tighten to 10 N·m (89 lb in) .
- Lower the vehicle.
- Position the negative cable ground (3) to the inner fender panel.
- Install the negative cable ground bolt (2) to the inner fender panel and tighten to 14 N·m (123 lb in) .
- Connect the battery current sensor (1) harness connector.
- Connect the negative cable to the battery. Refer to Battery Negative Cable Disconnection and Connection .
Caution: Refer to Fastener Caution in the Preface section.
