Exhaust Manifold Replacement - Left Side 4.3L
Removal Procedure
- Remove the left front wheel and tire. Refer to Tire and Wheel Removal and Installation.
- Remove the left wheelhouse splash shield. Refer to Wheelhouse Splash Shield Replacement.
- Remove the catalytic converter assembly. Refer to Catalytic Converter Replacement.
- Remove the spark plugs. Refer to Spark Plug Replacement.
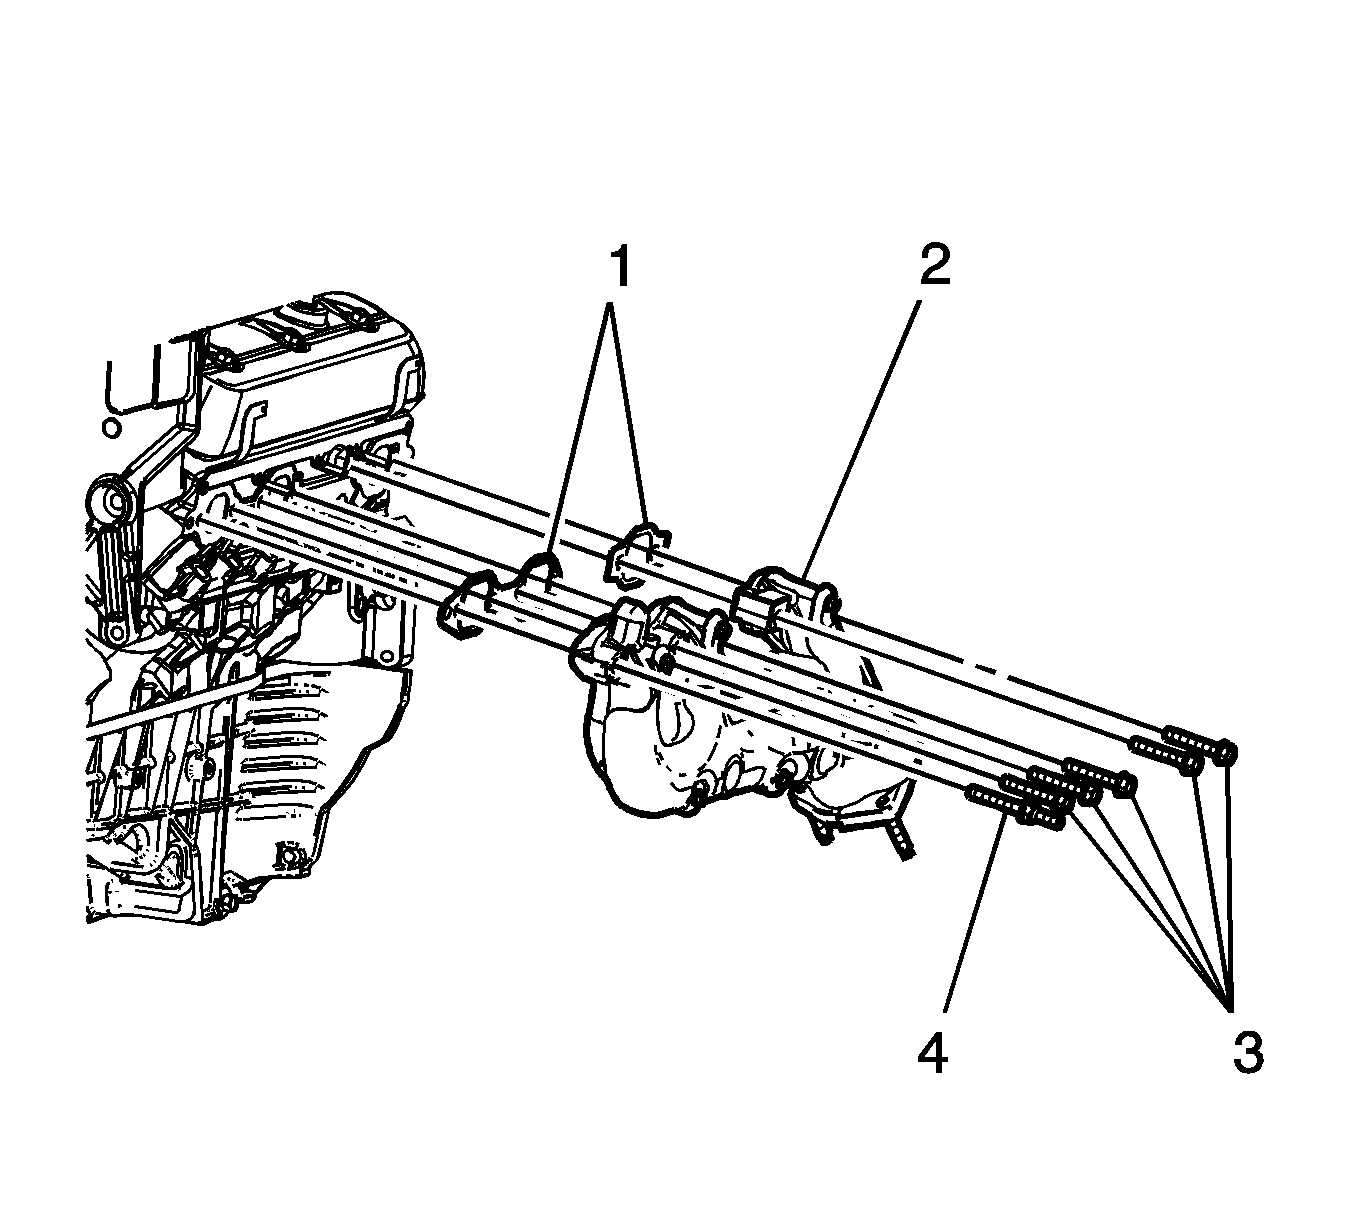
- Remove the exhaust manifold bolts (3) and stud (4).
- Remove the exhaust manifold (2).
- Remove and discard the exhaust manifold gaskets (1).
Installation Procedure
Note: To aid in installing the exhaust manifold to the engine, the bolt holes on the NEW exhaust manifold gaskets have tabs that will hold the gasket and the bolts in place.
- Install the exhaust manifold bolts (3) and stud (4) to the manifold.
- Install NEW exhaust manifold gaskets (1) onto the bolt and stud.
- Position and install the exhaust manifold (2) to the cylinder head.
- Install the spark plugs. Refer to Spark Plug Replacement.
- Install the catalytic converter assembly. Refer to Catalytic Converter Replacement.
- Install the left wheelhouse splash shield. Refer to Wheelhouse Splash Shield Replacement.
- Install the left front wheel and tire. Refer to Tire and Wheel Removal and Installation.
Caution: Refer to Fastener Caution in the Preface section.
| 3.1. | Tighten the bolts/stud a first pass to 15 N·m (11 lb ft). |
| 3.2. | Tighten the bolts/stud a final pass to 30 N·m (22 lb ft). |
Exhaust Manifold Replacement - Left Side 4.8L/5.3L/6.0L
Removal Procedure
- Raise and support the vehicle. Refer to Lifting and Jacking the Vehicle.
- Separate the catalytic converter from the exhaust manifold. Refer to Catalytic Converter Replacement.
- Lower the vehicle.
- Remove the engine cover. Refer to Engine Cover Replacement.
- Disconnect the exhaust gas recirculation (EGR) pipe from the exhaust manifold, if equipped.
- Remove the spark plug wires from the spark plugs. Refer to Spark Plug Wire Replacement.
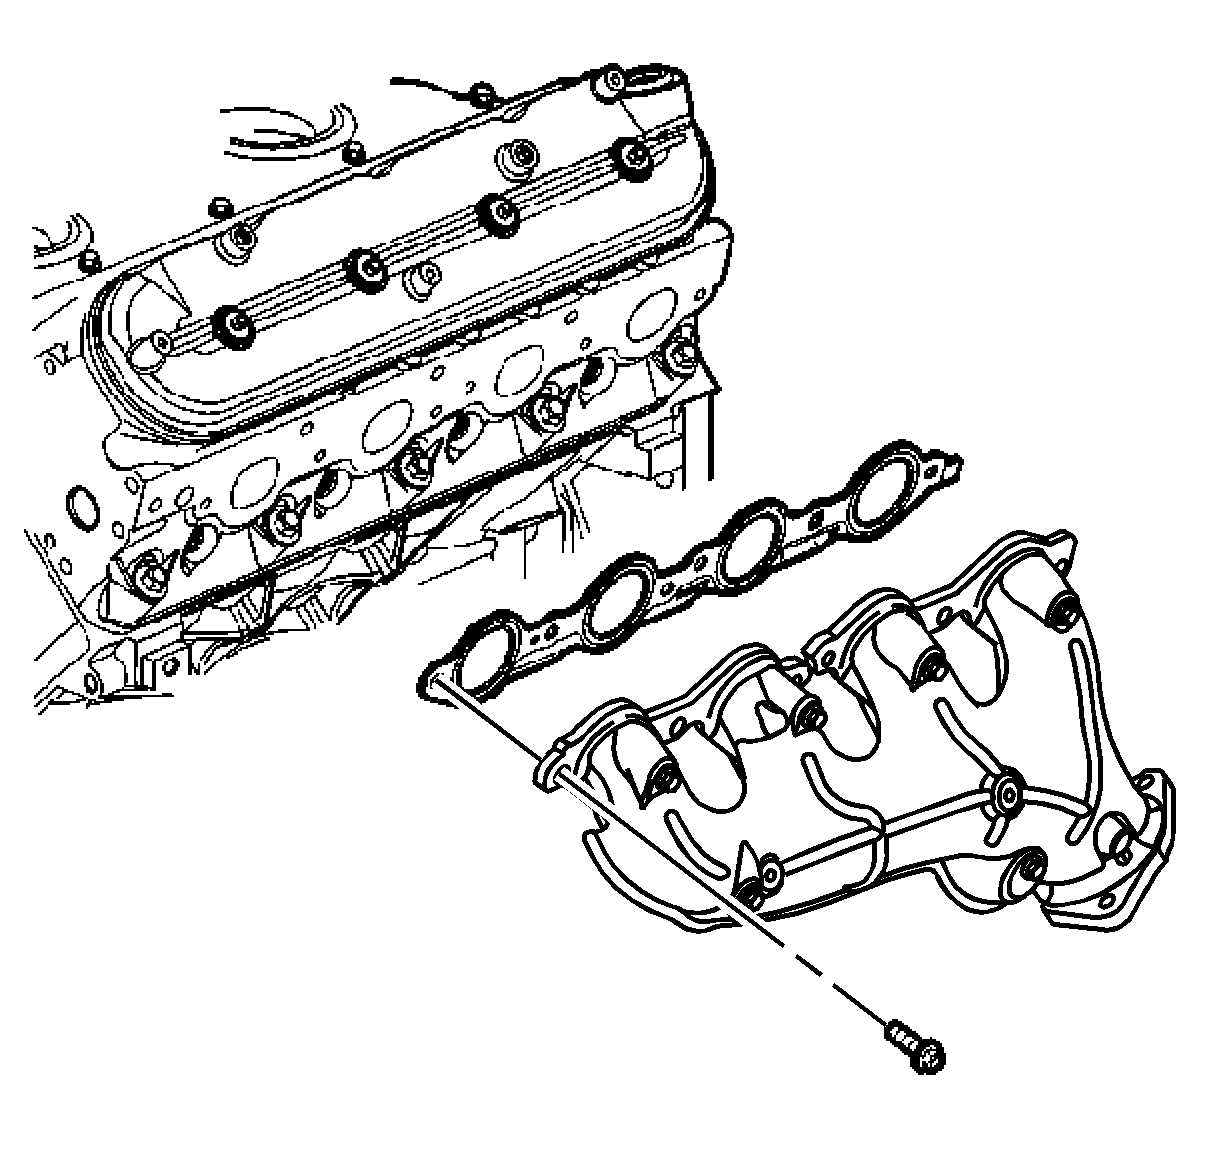
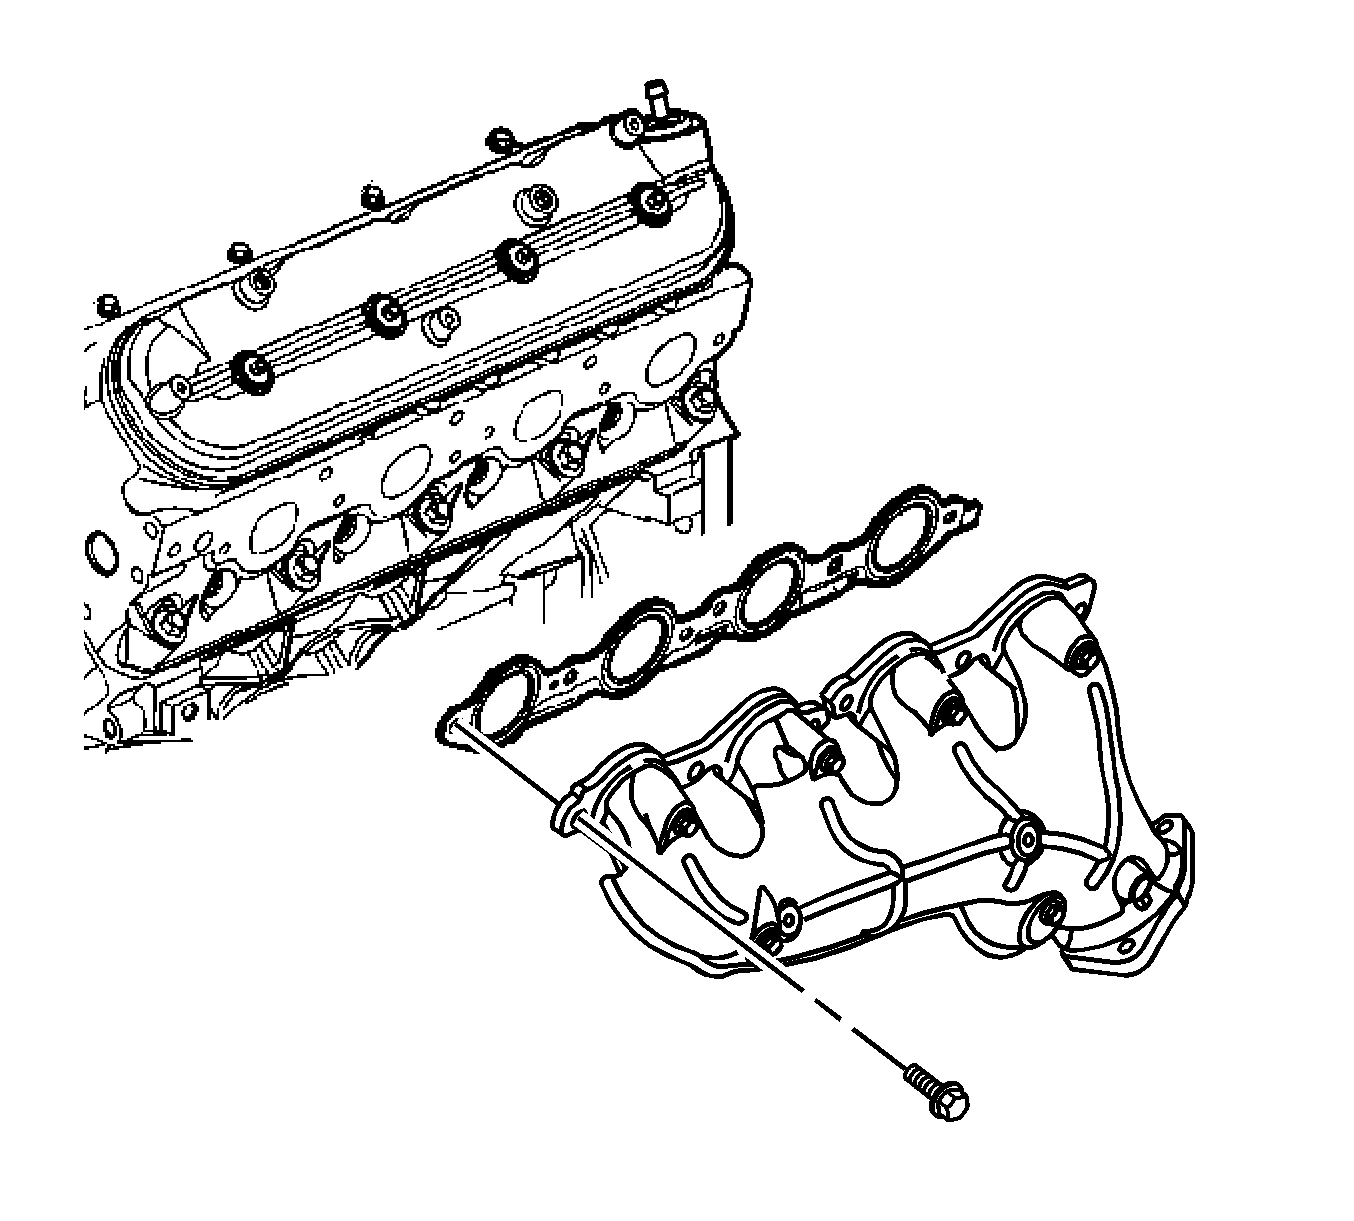
- Remove the exhaust manifold bolts and remove the exhaust manifold from the vehicle.
- Discard the gasket and the exhaust manifold to catalytic converter seal.
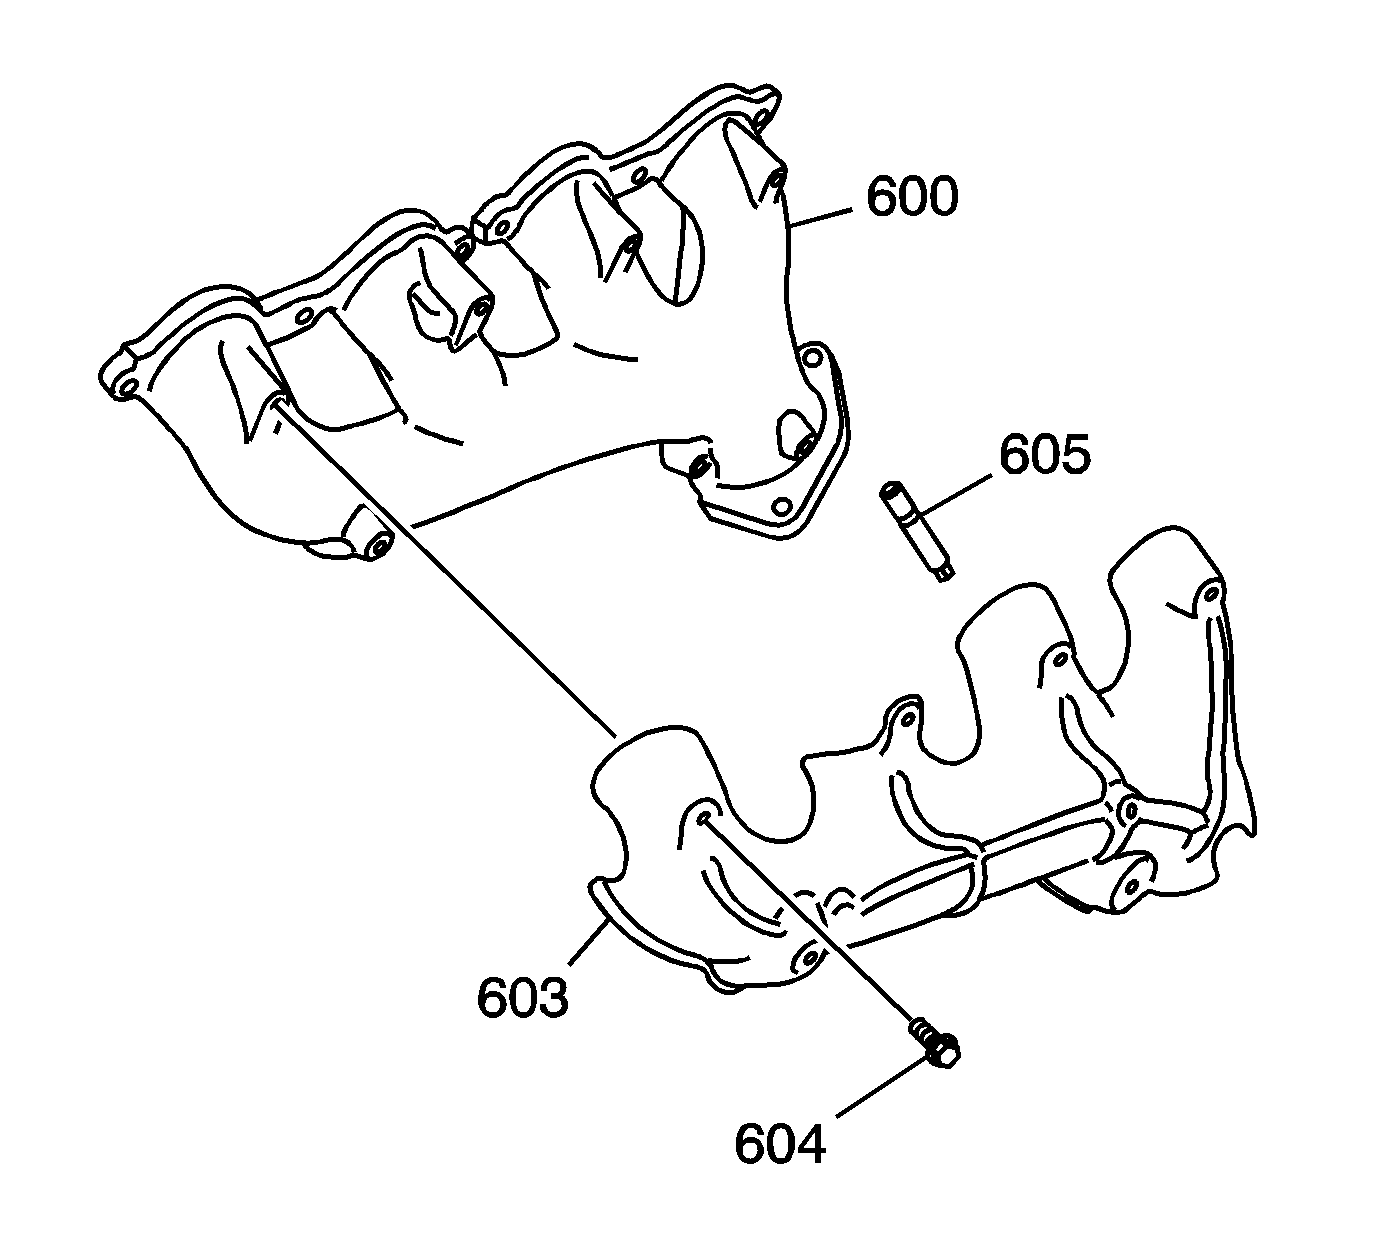
- Remove the heat shield (603) and bolts (604) from the manifold (600), as required.
- Remove the studs (605), as required.
Installation Procedure
- Install the heat shield (603) and bolts (604)and tighten to 9 N·m (80 lb in).
- Install the exhaust pipe studs (605) and tighten to 20 N·m (15 lb ft).
- Apply a 5 mm (0.2 in) wide band of threadlock GM P/N 12345493 (Canadian P/N 10953488), or equivalent, to the threads of the exhaust manifold bolts. Refer to Adhesives, Fluids, Lubricants, and Sealers.
- Position the exhaust manifold gasket to the manifold with two manifold bolts.
- Install the exhaust manifold to the cylinder head.
- Using a flat punch, bend over the exposed edge of the manifold gasket at the rear of the cylinder head.
- Connect the EGR pipe to the manifold, if equipped.
- Install the spark plug wires to the spark plugs. Refer to Spark Plug Wire Replacement.
- Using a NEW seal, install the catalytic converter to the exhaust manifold. Refer to Catalytic Converter Replacement.
- Install the engine cover. Refer to Engine Cover Replacement.
- Inspect for exhaust leaks.
Caution: Refer to Fastener Caution in the Preface section.
Note:
• Tighten the exhaust manifold bolts as specified in the service procedure. Improperly installed and/or leaking exhaust manifold gaskets may affect vehicle emissions and/or on-board diagnostic (OBD) II system performance. • The cylinder head exhaust manifold bolt hole threads must be clean and free of debris or threadlocking material. • Do not apply sealant to the first 3 threads of the bolt.
| 5.1. | Tighten the manifold bolts a first pass to 15 N·m (11 lb ft). Tighten the manifold bolts beginning with the center 2 bolts. Alternate from side-to-side, and work toward the outside bolts. |
| 5.2. | Tighten the manifold bolts a final pass to 20 N·m (15 lb ft). Tighten the manifold bolts beginning with the center 2 bolts. Alternate from side-to-side, and work toward the outside bolts. |
Exhaust Manifold Replacement - Left Side 6.6L
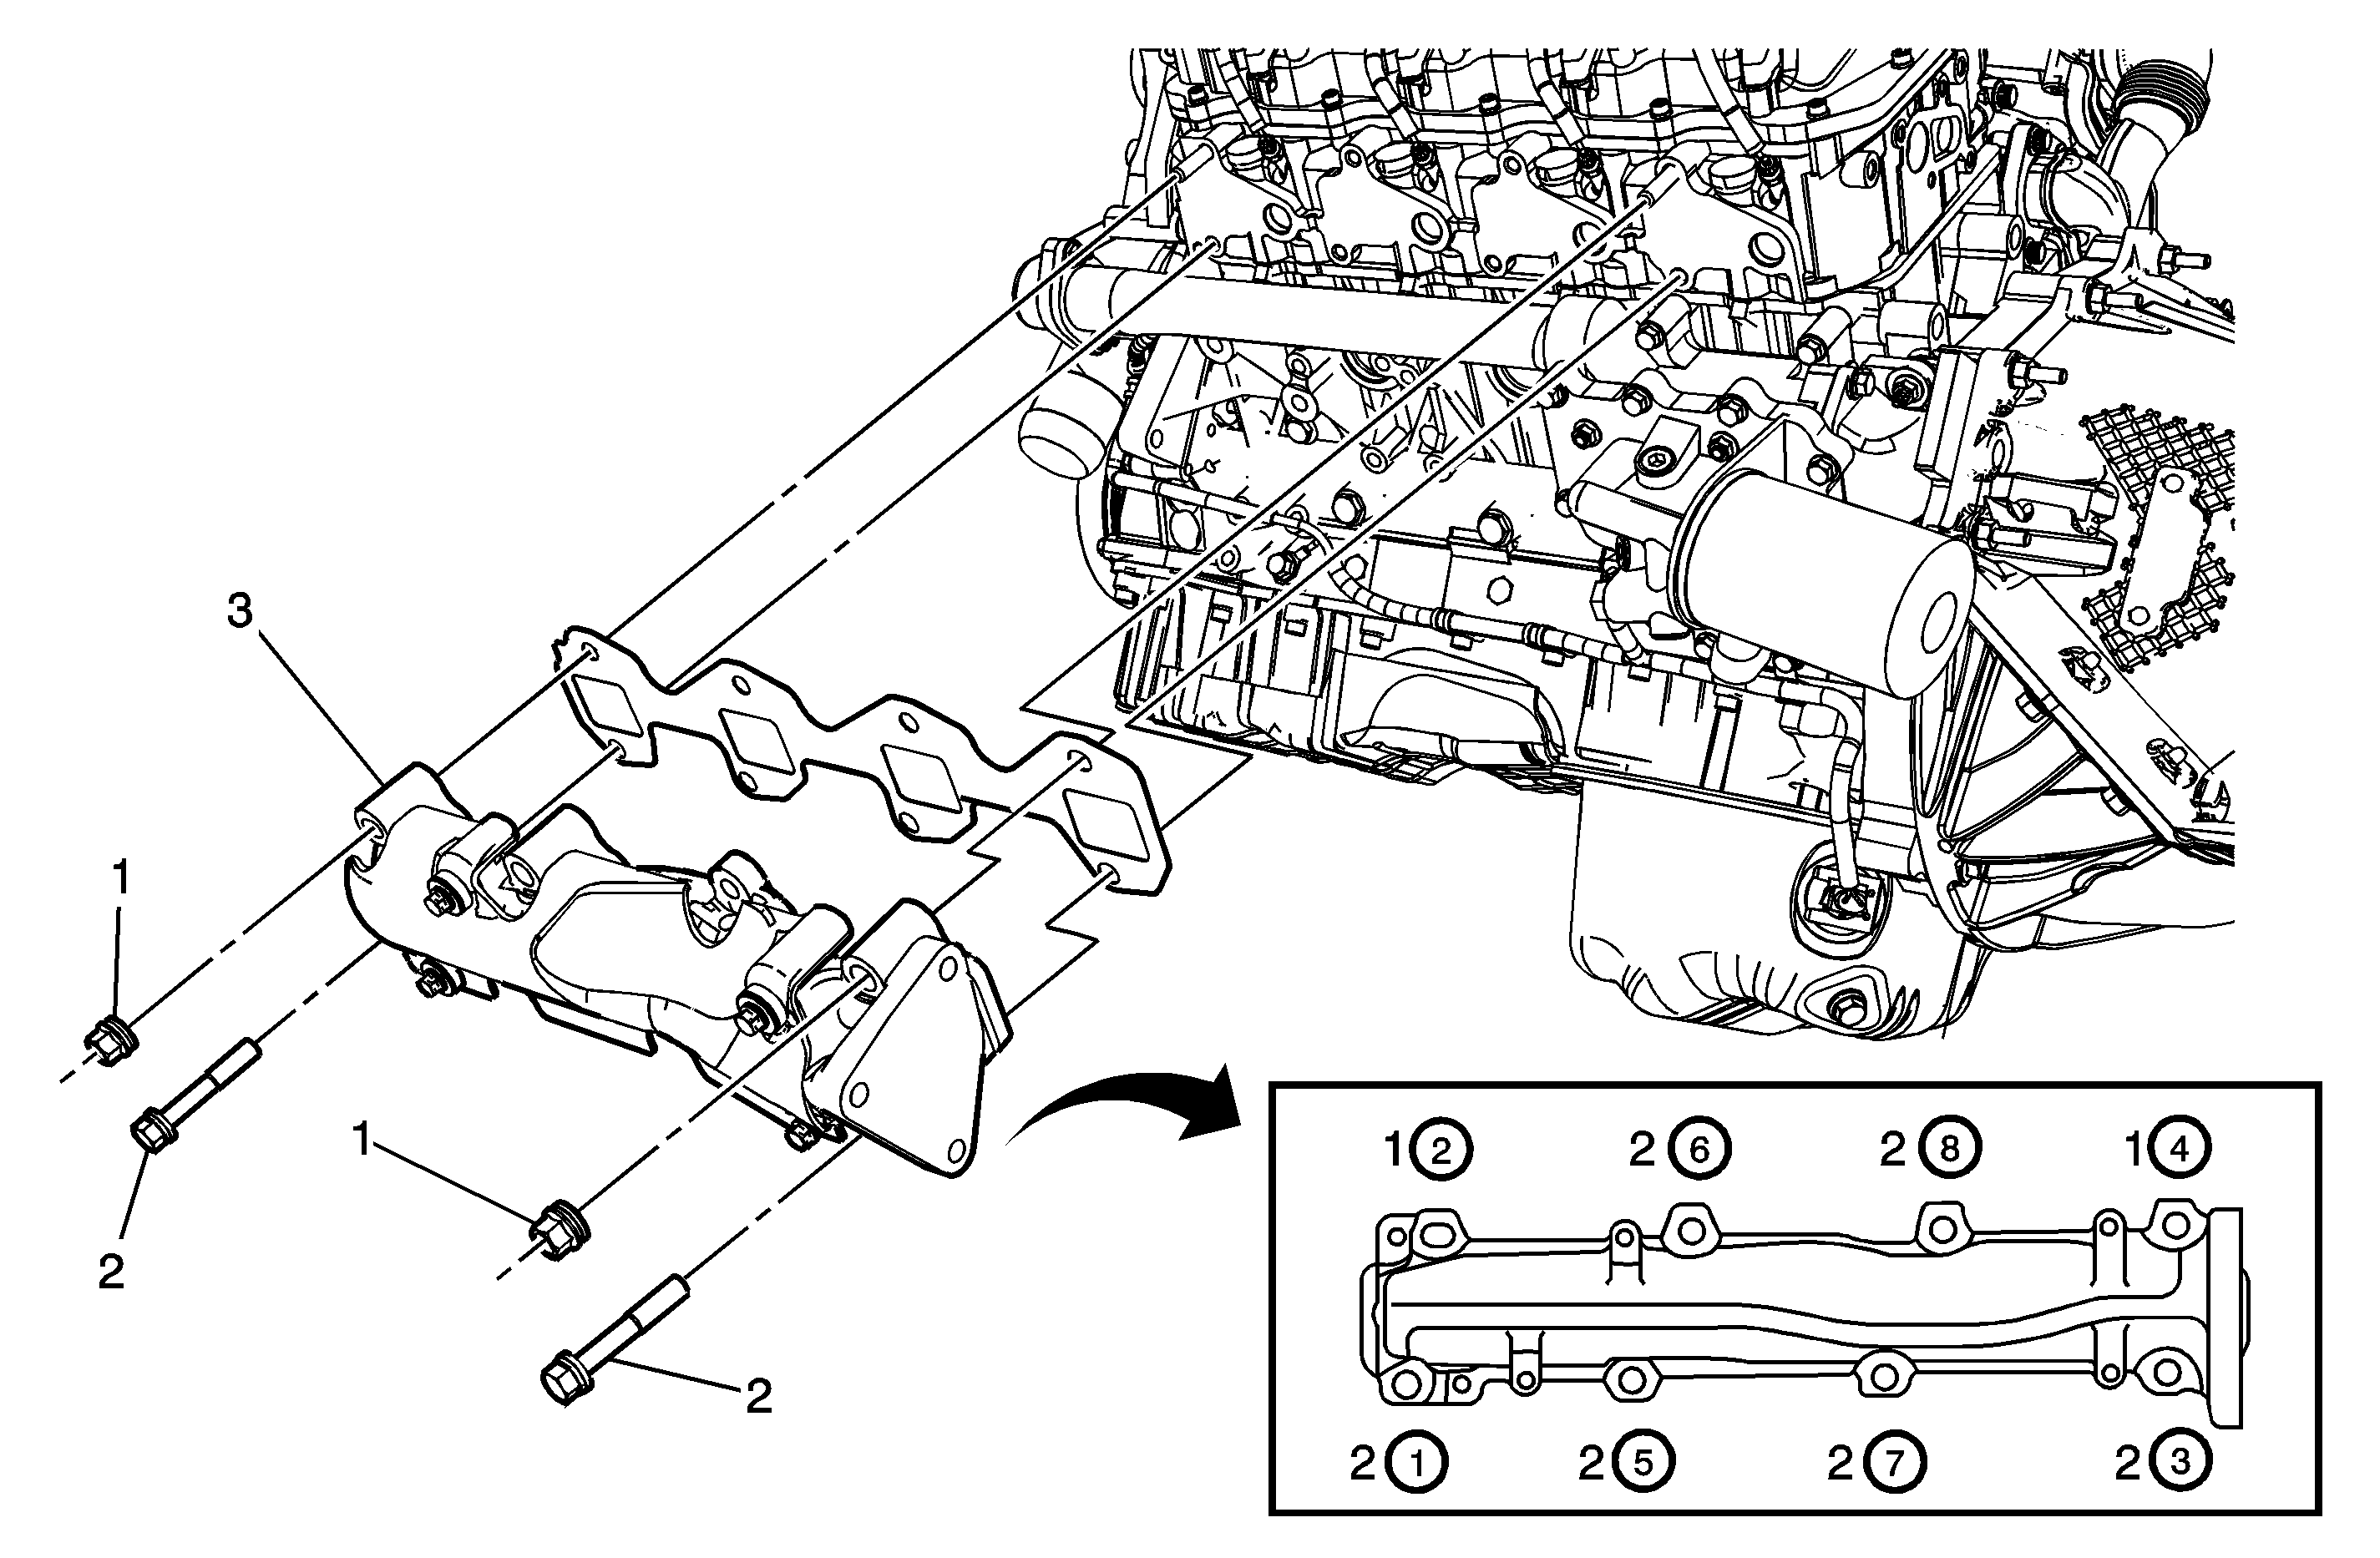
Callout | Component Name |
|---|---|
Preliminary Procedures
| |
1 | Exhaust Manifold Nut (Qty: 2) Caution: Refer to Fastener Caution in the Preface section. Tip Tighten |
2 | Exhaust Manifold Bolt (Qty: 6) Tip Tighten |
3 | Left Side Exhaust Manifold Procedure
|
