For 1990-2009 cars only
Engine Coolant Fan Upper Shroud Replacement 4.3L, 4.8L, 5.3L, 6.0L
Removal Procedure
- Remove the coolant recovery reservoir. Refer to Coolant Recovery Reservoir Replacement .
- Remove the air cleaner assembly. Refer to Air Cleaner Assembly Replacement for the 4.3L engine or Air Cleaner Assembly Replacement for the 4.8L, 5.3L, and 6.0L engines.
- Remove the air cleaner outlet resonator. Refer to Air Cleaner Outlet Resonator Replacement for the 4.3L engine or Air Cleaner Resonator Outlet Duct Replacement for the 4.8L, 5.3L, and 6.0L engines.
- For the 4.3L engine, remove the air conditioning (A/C) suction hose. Refer to Suction Hose Replacement for the 4.3L engine.
- For the 4.8L, 5.3L and 6.0L engine, remove the radiator inlet hose. Refer to Radiator Inlet Hose Replacement .
- Remove the battery cable from the fan shroud clips and reposition.
- Remove the mass air flow (MAF) sensor wire from the fan shroud clip and reposition.
- Remove the transmission oil lever indicator.
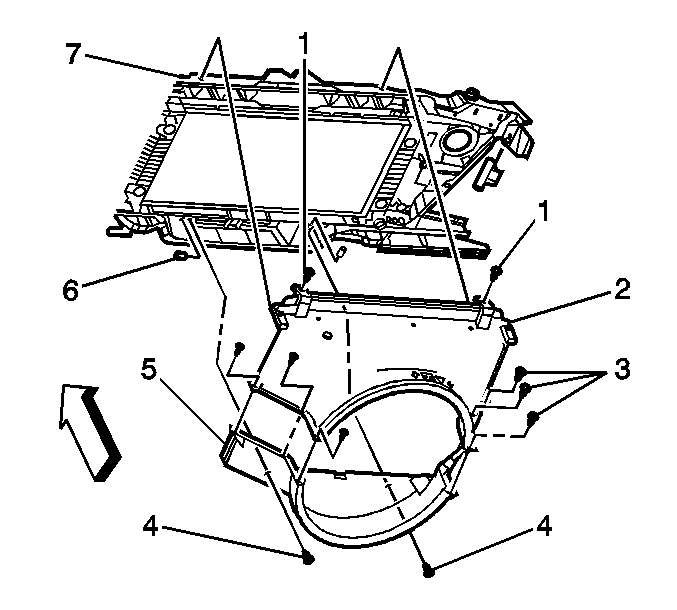
- Remove the fan shroud bolts (1, 3, 4).
- Remove the fan shroud (2, 5).

Installation Procedure
- Install the fan shroud (2, 5).
- Install the fan shroud bolts (1, 3, 4).
- Install the transmission oil lever indicator.
- Install the MAF sensor wire to the fan shroud clip.
- Install the battery cable to the fan shroud clips.
- For the 4.3L engine, install the A/C suction hose. Refer to Suction Hose Replacement for the 4.3L engine.
- For the 4.8L, 5.3L and 6.0L engine, install the radiator inlet hose. Refer to Radiator Inlet Hose Replacement .
- Install the air cleaner outlet resonator. Refer to Air Cleaner Outlet Resonator Replacement for the 4.3L engine or Air Cleaner Resonator Outlet Duct Replacement for the 4.8L, 5.3L, and 6.0L engines.
- Install the air cleaner assembly. Refer to Air Cleaner Assembly Replacement for the 4.8L, 5.3L, and 6.0L engines or Air Cleaner Assembly Replacement for the 4.3L engine.
- Install the coolant recovery reservoir. Refer to Coolant Recovery Reservoir Replacement .
Notice: Refer to Fastener Notice in the Preface section.

Tighten
Tighten the bolts to 6 N·m (53 lb in).
Engine Coolant Fan Upper Shroud Replacement 6.6L
Removal Procedure
- Remove the surge tank. Refer to Radiator Surge Tank Replacement .
- Remove the charge air cooler inlet and outlet hoses. Refer to Charged Air Cooler Hoses/Pipes Replacement .
- Remove the air cleaner assembly. Refer to Air Cleaner Assembly Replacement .
- Disconnect the fan clutch electrical connector, if equipped.
- Remove the intake air heater. Refer to Intake Air Heater Replacement .
- Disconnect the cross car harness at buss bar on right core support.
- Position cross car harness out of way.
- Remove the transmission oil indicator.
- Remove the engine oil indicator.
- Remove the engine oil fill cap.
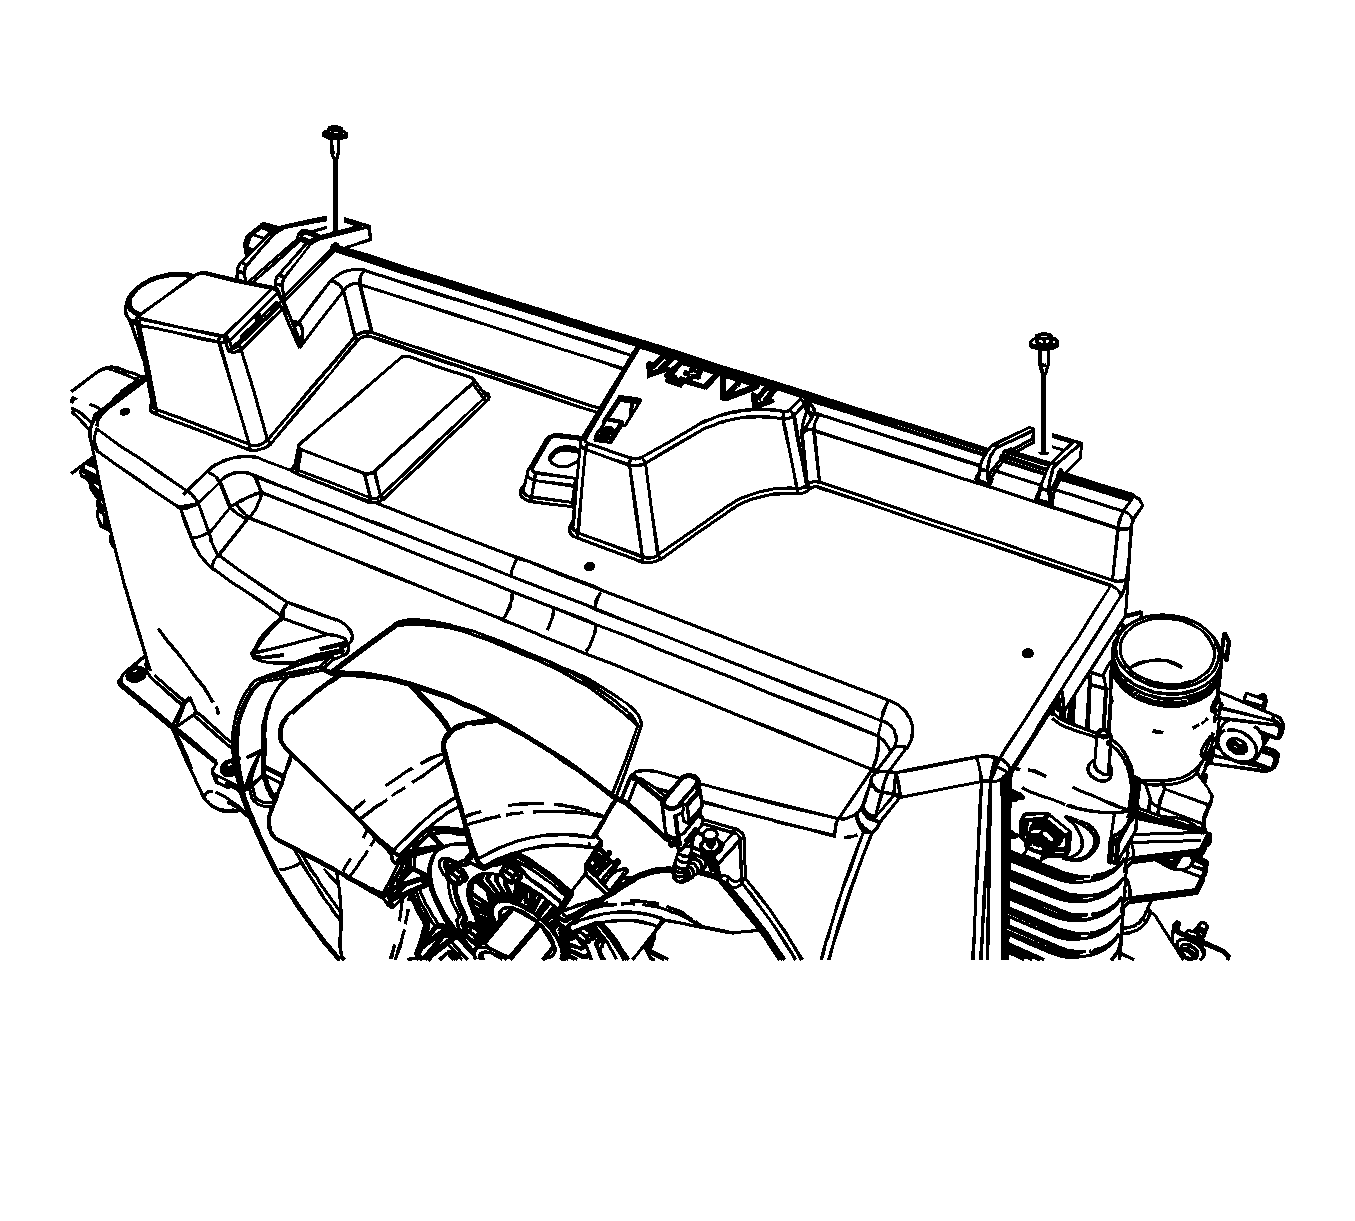
- Remove the 2 upper fan shroud to core support bolts.
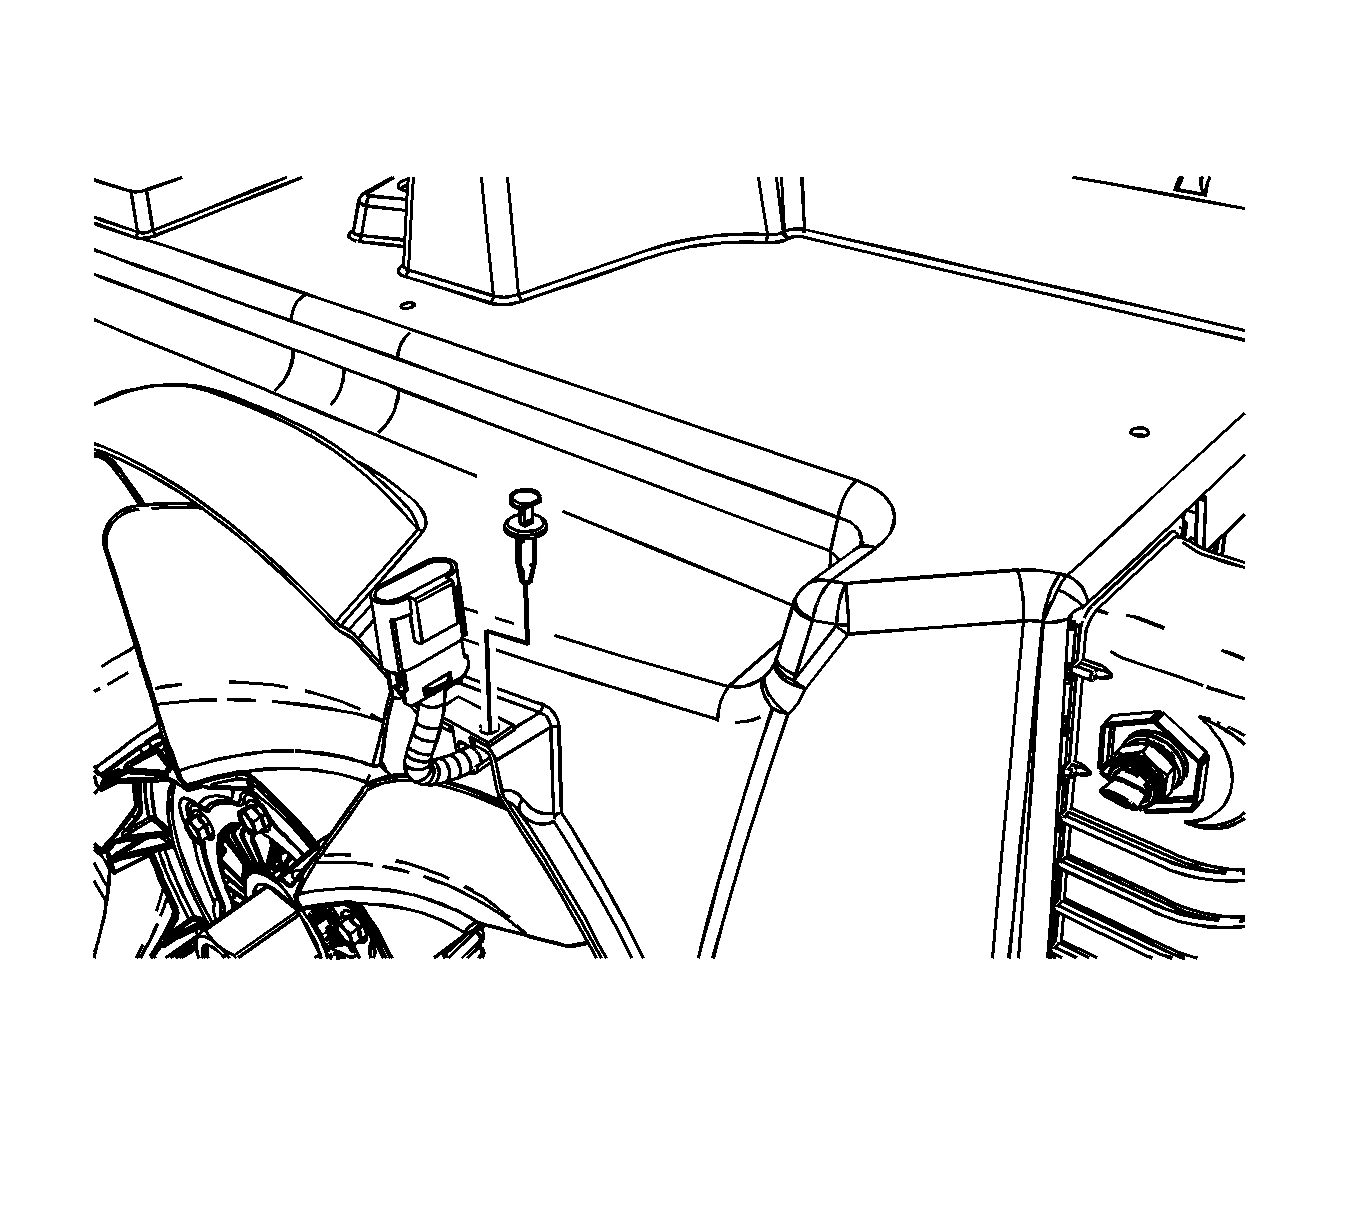
- Remove the fan clutch electrical wiring harness routing clip, if equipped.
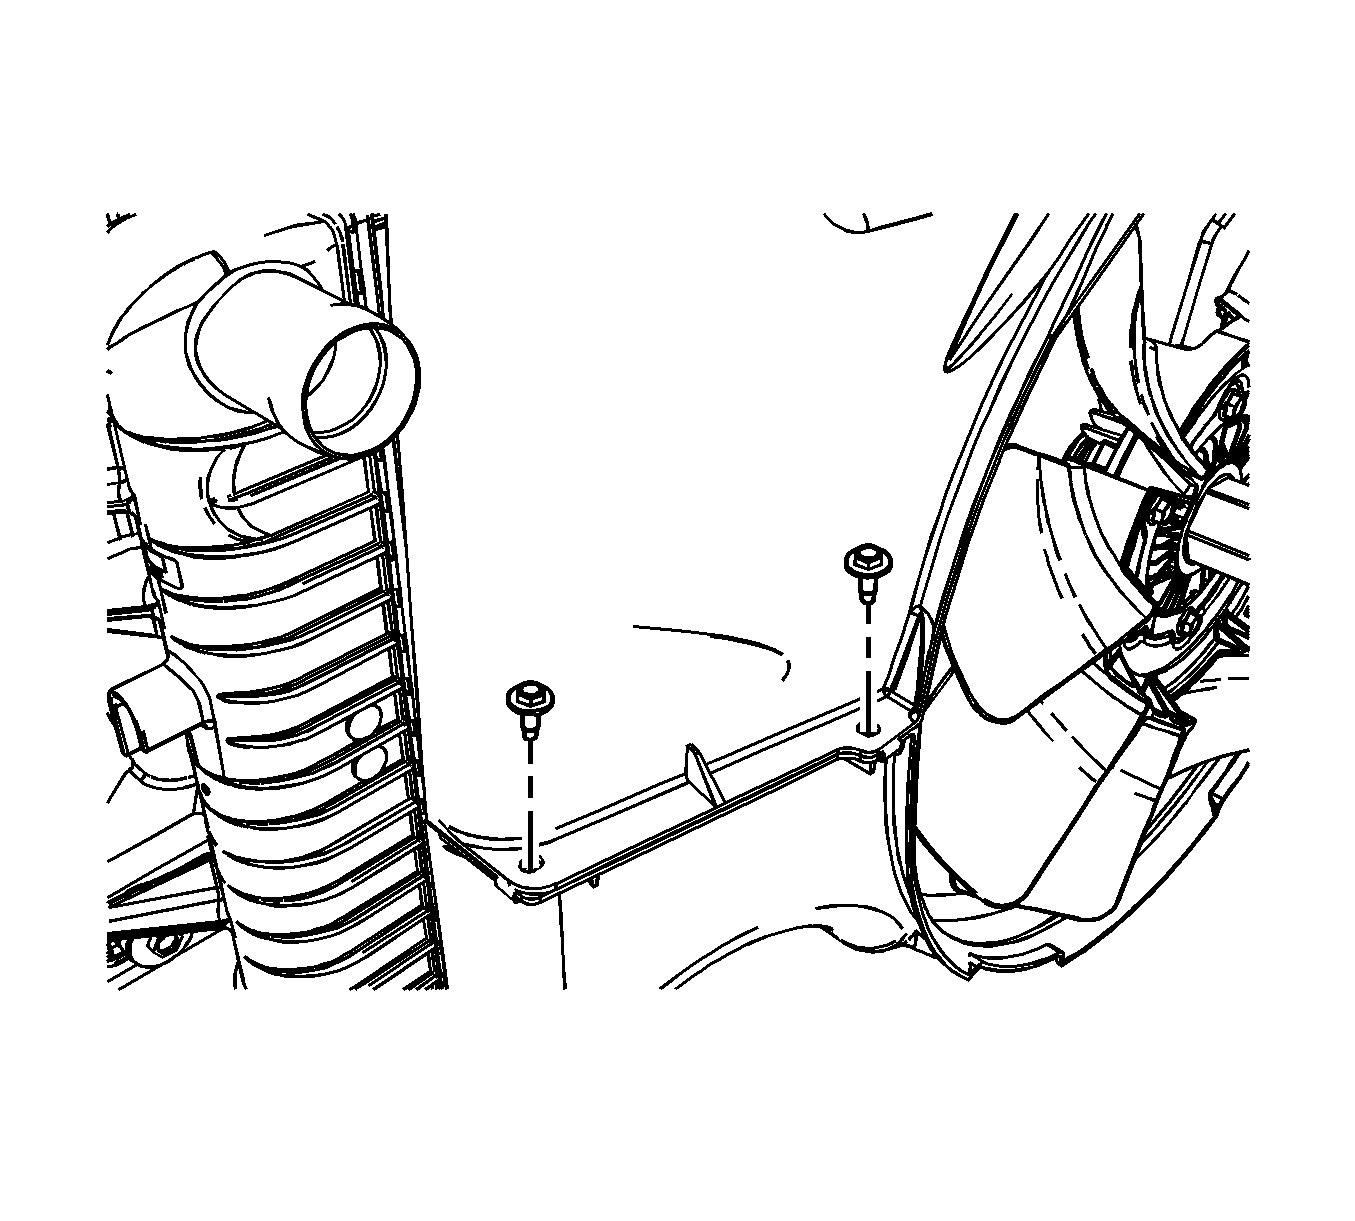
- Remove the 4 upper fan shroud to lower fan shroud bolts.
- Remove the upper fan shroud, while positioning the upper radiator hose.


Installation Procedure
- Position the upper fan shroud in the vehicle, while positioning the upper radiator hose.
- Install the 4 upper fan shroud to lower fan shroud bolts.
- Install the fan clutch electrical wiring harness routing clip, if equipped.
- Install the 2 upper fan shroud to core support bolts.
- Install the engine oil fill cap.
- Install the engine oil indicator.
- Install the transmission oil indicator.
- Position back cross car harness.
- Connect the cross car harness on buss bar at right core support.
- Install the intake air heater. Refer to Intake Air Heater Replacement .
- Connect the fan clutch electrical connector, if equipped.
- Install the air cleaner assembly. Refer to Air Cleaner Assembly Replacement .
- Install the charge air cooler inlet and outlet hoses. Refer to Charged Air Cooler Hoses/Pipes Replacement .
- Install the surge tank. Refer to Radiator Surge Tank Replacement .
Notice: Refer to Fastener Notice in the Preface section.

Tighten
Tighten the upper fan shroud to lower fan shroud bolts to 6 N·m (53 lb in).


Tighten
Tighten the upper fan shroud to core support bolts to 6 N·m (53 lb in).
