For 1990-2009 cars only
Removal Procedure
- If equipped with a power seat adjuster, raise the seat to the full up position.
- Remove the front seat from the vehicle. Refer to Driver and Passenger Seat Replacement .
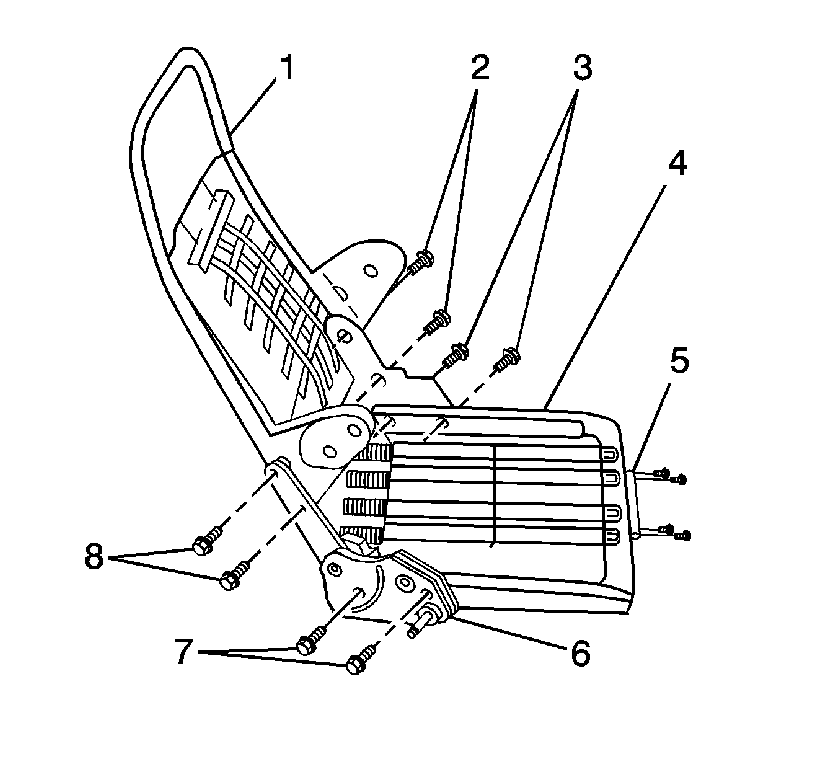
- Remove the seat back cover enough to expose the recliner mechanism bolts (2, 7). Refer to Front Seat Back Cushion Cover and Cushion Pad Replacement .
- Remove the recliner bolts (2, 7).
- Remove the seat back (1) from the seat assembly.
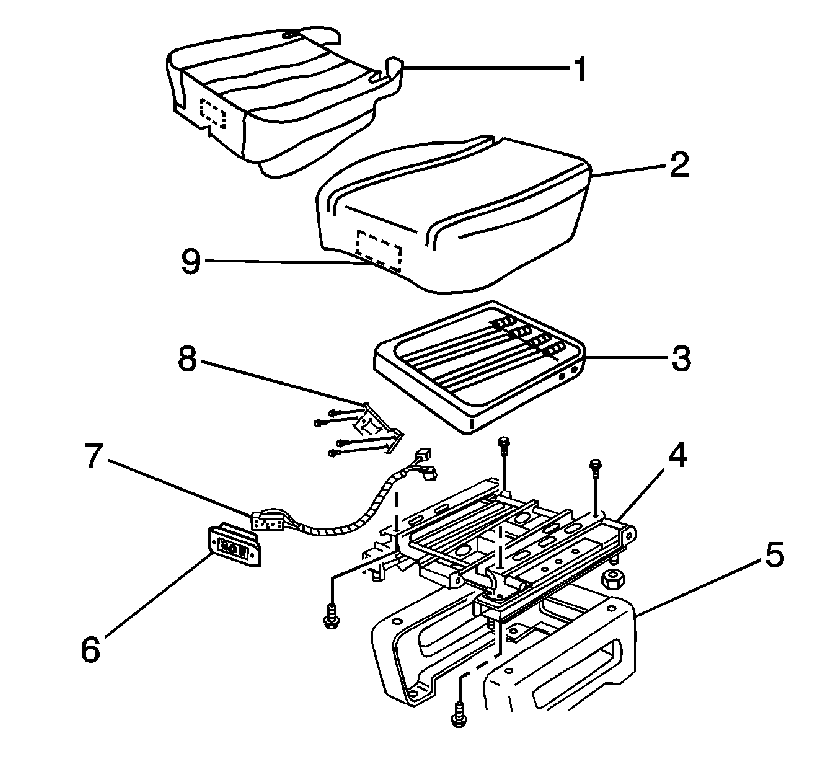
- Remove the seat cushion from the seat adjuster assembly (4).
- Release the seat cushion J channel retainers from the seat cushion frame.
- Release the hook and loop strips that retain the seat cushion cover (1) to the seat cushion pad (2).
- Remove the seat cushion cover from the foam pad.
- Remove the foam pad (2) from the cushion frame (3).
- If replacing the front passenger seat cushion pad, you must also replace the inflatable restraint passenger presence system. Refer to Inflatable Restraint Passenger Presence System Replacement - Front .
| 6.1. | Remove the recliner handle. Refer to Driver Seat and Passenger Seat Recliner Handle Replacement . |
| 6.2. | Remove the power seat adjuster switch, if equipped. Refer to Power Seat Switch Replacement . |
| 6.3. | Remove the bolts securing the seat cushion frame (3) to the adjuster assembly (4). |
Caution: Replace the passenger presence system as a complete assembly to prevent possible injury to the occupant. All the components in the service kit are assembled and calibrated as a unit. Using only some of the components in the service kit will cause the passenger presence system to operate improperly.
Installation Procedure
- When replacing a seat cushion pad (2) on a seat equipped with a power adjuster, remove the perforated section (9) on the front of the cushion pad (2).
- Position the foam pad (2) to the seat cushion frame (3).
- Position the seat cushion cover (1) to the foam pad (2).
- Engage the J channel retainers to secure the seat cushion cover (1) to the seat cushion frame (3).
- When replacing a seat cushion cover on a seat equipped with a power seat adjuster proceed with the following steps:
- Install the power seat switch. Refer to Power Seat Switch Replacement .
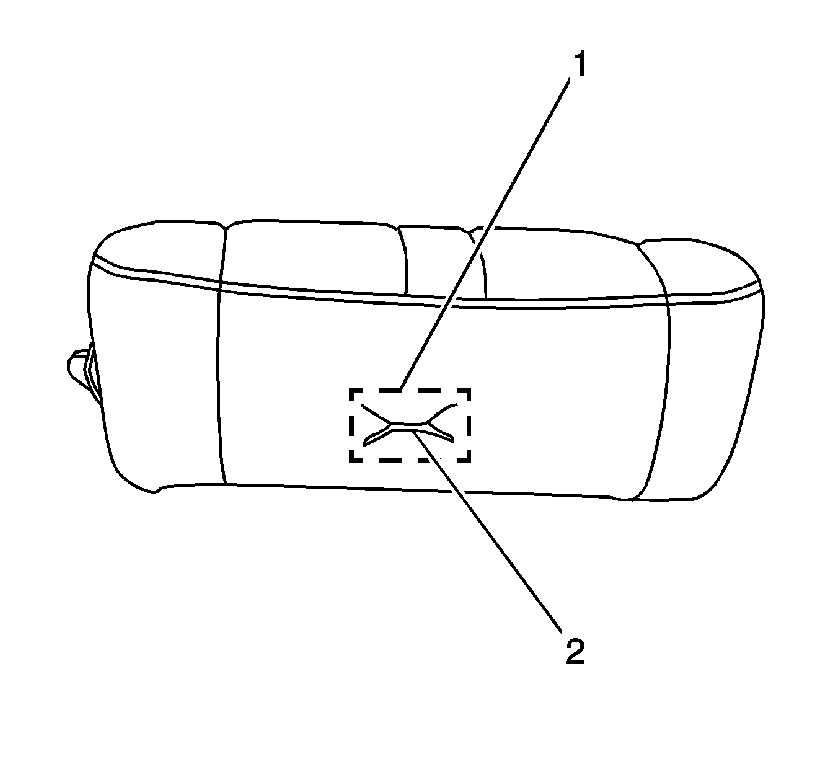
- Locate the position of the recliner mechanism rod (6) through the cushion cover.
- Make a small "X" cut just large enough for the recliner rod (6) to go through.
- Slip the cover over the recliner mechanism rod (6).
- Install the recliner handle. Refer to Driver Seat and Passenger Seat Recliner Handle Replacement .
- Position the seat back to the seat cushion assembly.
- Install the bolts (3, 7).
- Position the seat assembly to the seat adjuster assembly (4).
- Install the bolts to secure the seat assembly to the adjuster (4).
- Install the seat into the vehicle. Refer to Driver and Passenger Seat Replacement .
- Re-zero the inflatable restraint passenger presence system whenever the seat cushion or any component of the passenger presence system is removed. Refer to Passenger Presence System Programming and Setup .
| 5.1. | Locate the opening (1) for the power seat switch within the bracket, through the cover. |
| 5.2. | Using a razor blade make a "X" cut (2) within the opening of the switch bracket. |
Notice: Refer to Fastener Notice in the Preface section.
Tighten
Tighten the bolts to 32 N·m (24 lb ft).
Tighten
Tighten the bolts to 25 N·m (18 lb ft).
Caution: To avoid personal injuries, re-zero the passenger presence system whenever you remove or replace the seat cushion or trim. Failure to do so may cause the system to malfunction.
