For 1990-2009 cars only
Removal Procedure
- Disconnect the negative battery cable. Refer to Battery Negative Cable Disconnection and Connection .
- Raise and suitably support the vehicle. Refer to Lifting and Jacking the Vehicle .
- Remove the upper fan shroud. Refer to Engine Coolant Fan Upper Shroud Replacement .
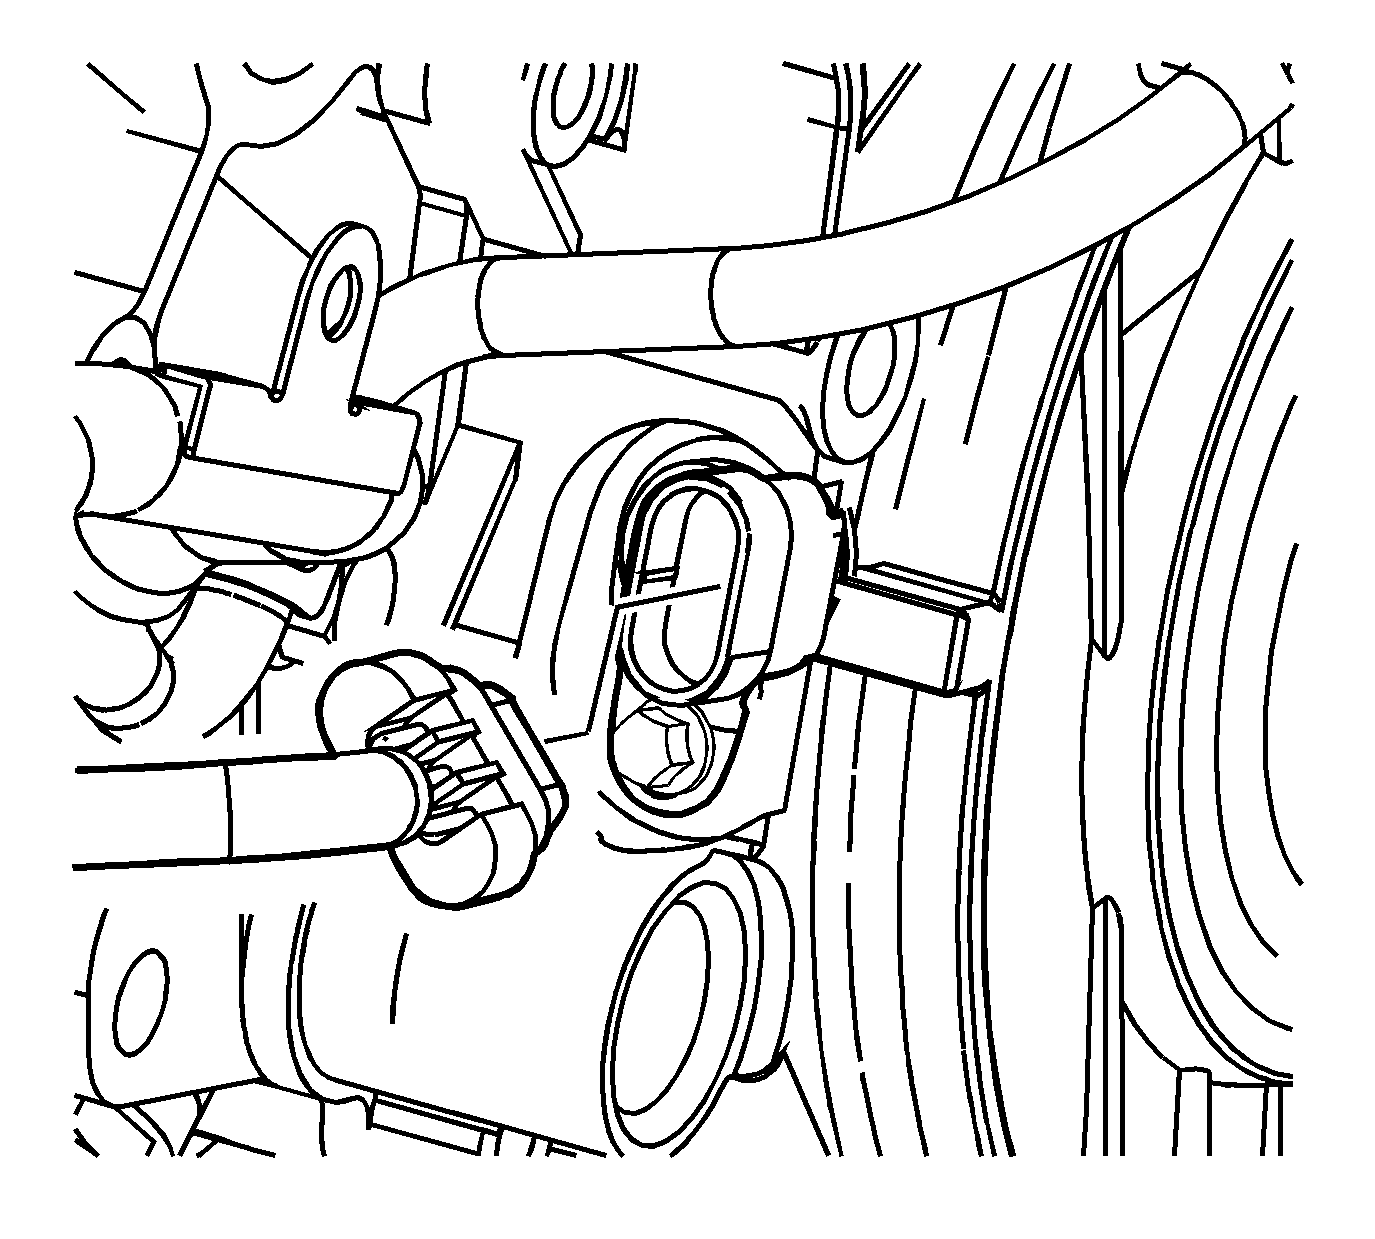
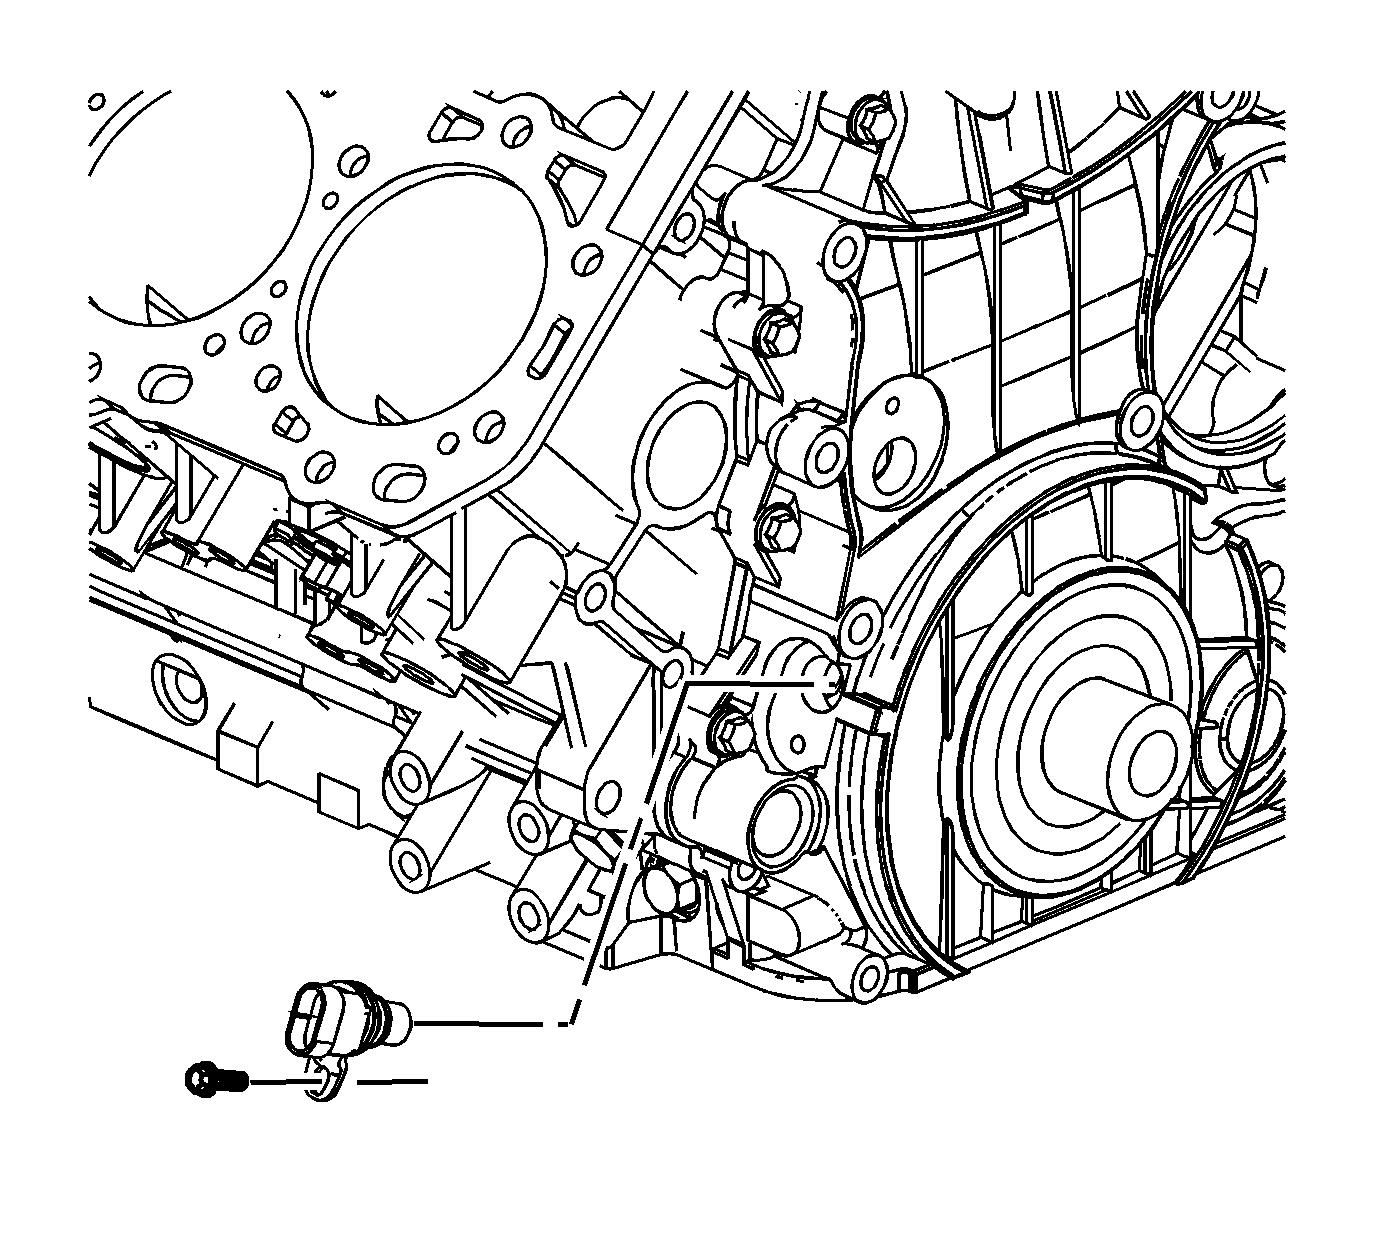
- Disconnect the crankshaft position (CKP) sensor electrical connector.
- Remove the CKP sensor bolt .
- Remove the CKP sensor.
- If necessary, remove the CKP sensor spacer bolts.
- If necessary, remove the CKP sensor spacer.
Installation Procedure
- If necessary, lubricate a NEW CKP spacer O-ring with clean engine oil.
- If necessary, install the NEW O-ring to the CKP sensor spacer.
- If necessary, install the CKP sensor spacer.
- If necessary, install the CKP sensor spacer bolts.
- Lubricate a NEW CKP sensor O-ring with clean engine oil.
- Install the NEW O-ring to the CKP sensor.
- Install the CKP sensor.
- Install the CKP sensor bolt.
- Connect the CKP sensor electrical connector.
- Install the upper fan shroud. Refer to Engine Coolant Fan Upper Shroud Replacement .
- Lower the vehicle.
- Connect the negative battery cable. Refer to Battery Negative Cable Disconnection and Connection .
Important: The crankshaft position sensor spacers are machined with different timing positions. However, if the crankshaft position sensor spacer requires replacement, replace with a grade "C" spacer.
Notice: Refer to Fastener Notice in the Preface section.
Tighten
Tighten the bolts to 10 N·m (89 lb in).
Tighten
Tighten the bolt to 10 N·m (89 lb in).
