For 1990-2009 cars only
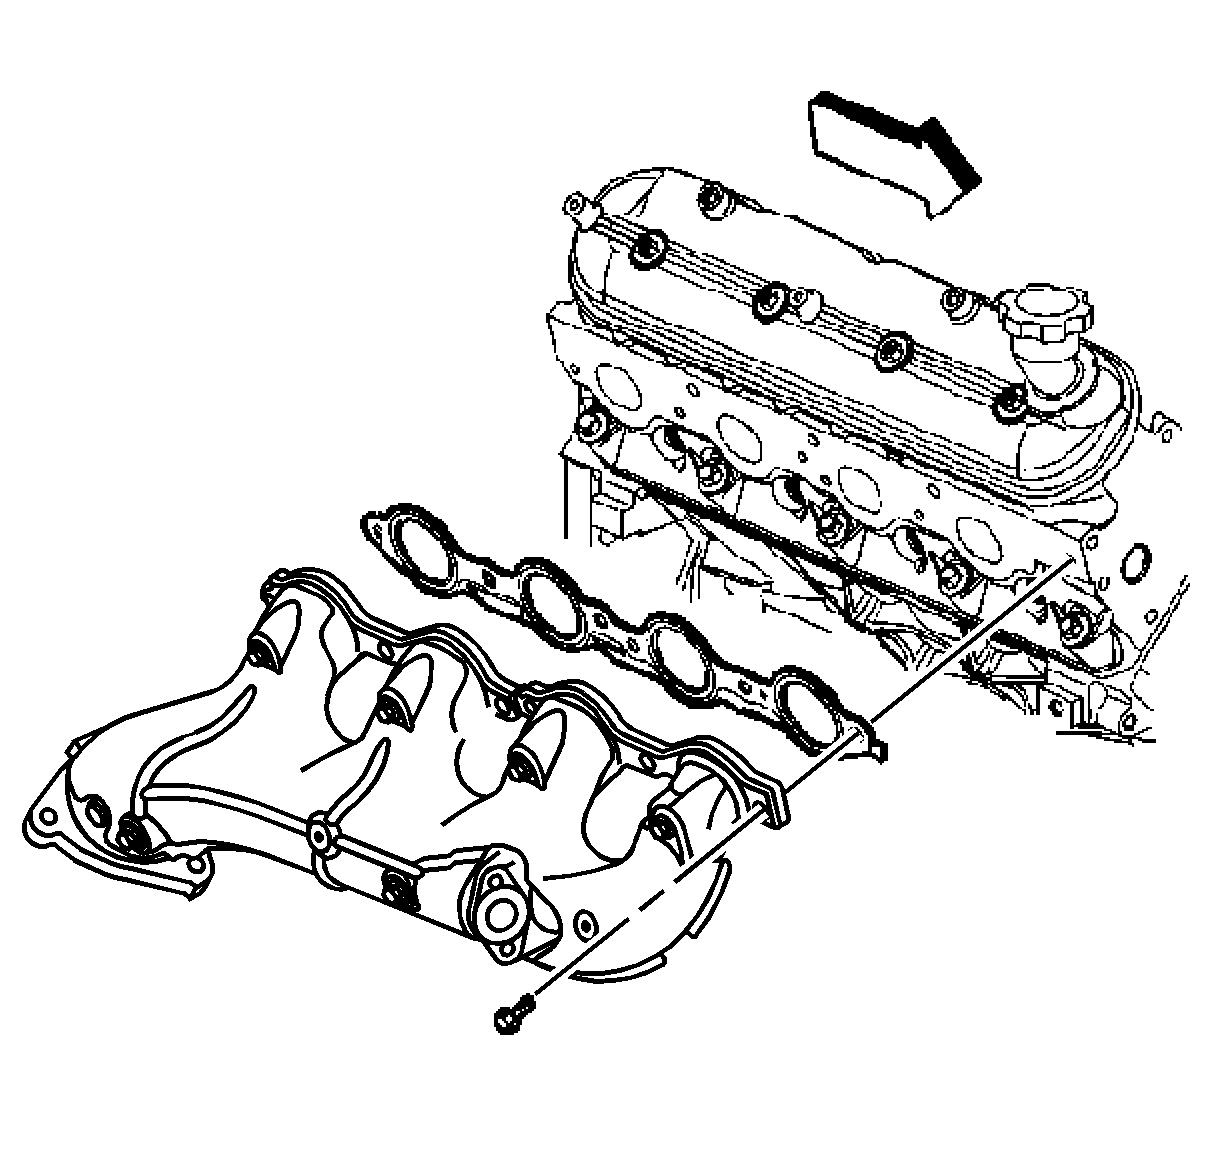
Exhaust Manifold Replacement - Right Side 4.3L
Removal Procedure
- Raise the vehicle. Refer to Lifting and Jacking the Vehicle .
- Remove the right front tire.
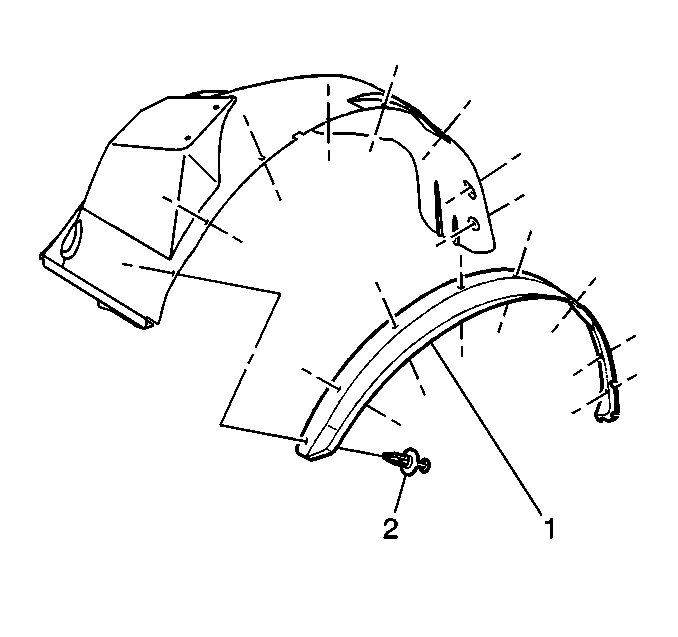
- Remove the right fender wheelhouse extension (1).
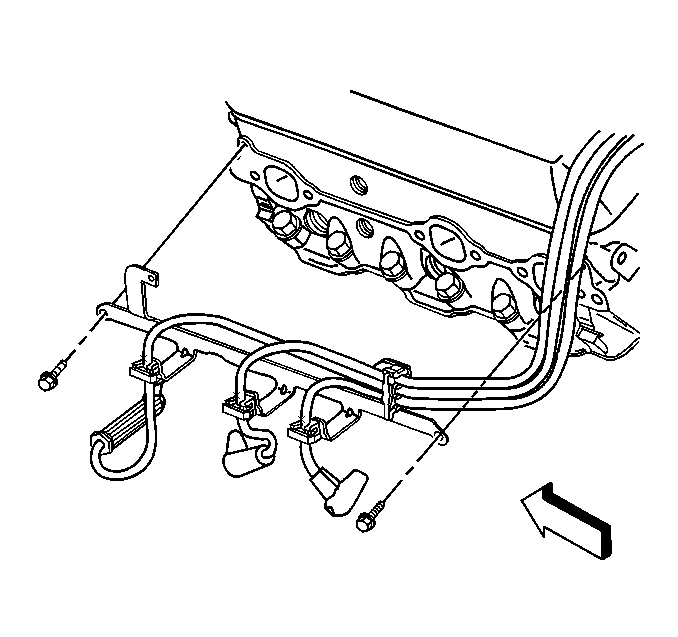
- Disconnect the spark plug wires from the spark plugs.
- Remove the bolts and the spark plug wire support.
- Remove the starter. Refer to Starter Motor Replacement .
- Remove the catalytic converter assembly. Refer to Catalytic Converter Replacement .
- Remove the exhaust manifold bolts through the wheelhouse.
- Remove the exhaust manifold with the exhaust manifold gaskets and the spark plug wire shields from the engine.
- Clean all gasket surfaces.
Installation Procedure
- Sub-assemble the NEW gaskets, the spark plug wire shields, and the bolts to the exhaust manifold.
- Ensure that the exhaust manifold bolts are held in place by the tabs on the exhaust manifold gaskets.
- Install the exhaust manifold.
- Tighten the exhaust manifold bolts - First Pass to 15 N·m (11 lb ft).
- Tighten the exhaust manifold bolts - Second Pass to 30 N·m (22 lb ft).
- Install the catalytic converter assembly. Refer to Catalytic Converter Replacement .
- Install the starter. Refer to Starter Motor Replacement .
- Install the spark plug wire support and bolts.
- Install the spark plug wires. Refer to Spark Plug Wire Replacement .
- Install the fender wheelhouse extension (1).
- Install the front tire. Refer to Tire and Wheel Removal and Installation .
- Lower the vehicle.
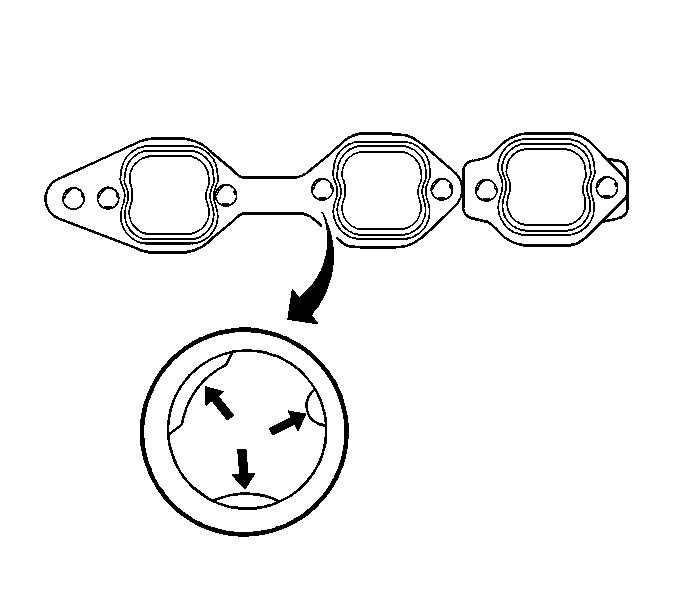
Important: To assist in installing the exhaust manifold to the engine, the tabs on a NEW exhaust manifold gasket will hold the gasket and the bolts in place.
Notice: Refer to Fastener Notice in the Preface section.
Tighten
Tighten
Tighten the spark plug wire support bolts to 12 N·m (106 lb in).
Exhaust Manifold Replacement - Right Side 4.8L, 5.3L, 6.0L
Removal Procedure
- Remove the catalytic converter from the exhaust manifold. Refer to Catalytic Converter Replacement .
- Remove the engine cover. Refer to Engine Cover Replacement .
- Remove the oil level indicator tube. Refer to Oil Level Indicator and Tube Removal .
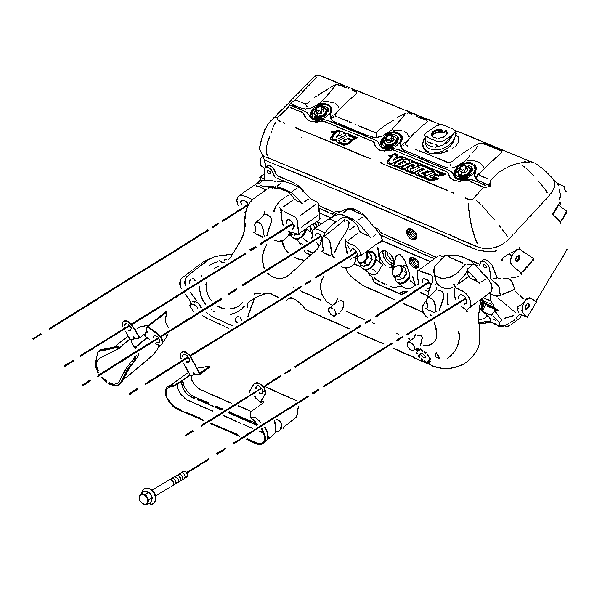
- Remove the exhaust manifold, bolts and exhaust manifold.
- Clean all sealing surfaces.
Installation Procedure
- Install the exhaust manifold and bolts.
- Tighten the exhaust manifold bolts - First Pass to 15 N·m (11 lb ft).
- Tighten the exhaust manifold bolts - Second Pass to 25 N·m (18 lb ft).
- Install the oil level indicator tube. Refer to Oil Level Indicator and Tube Removal .
- Install the catalytic converter to the exhaust manifold.
- Install the engine cover. Refer to Engine Cover Replacement .
Notice: Refer to Fastener Notice in the Preface section.
Tighten
Exhaust Manifold Replacement - Right Side 6.6L
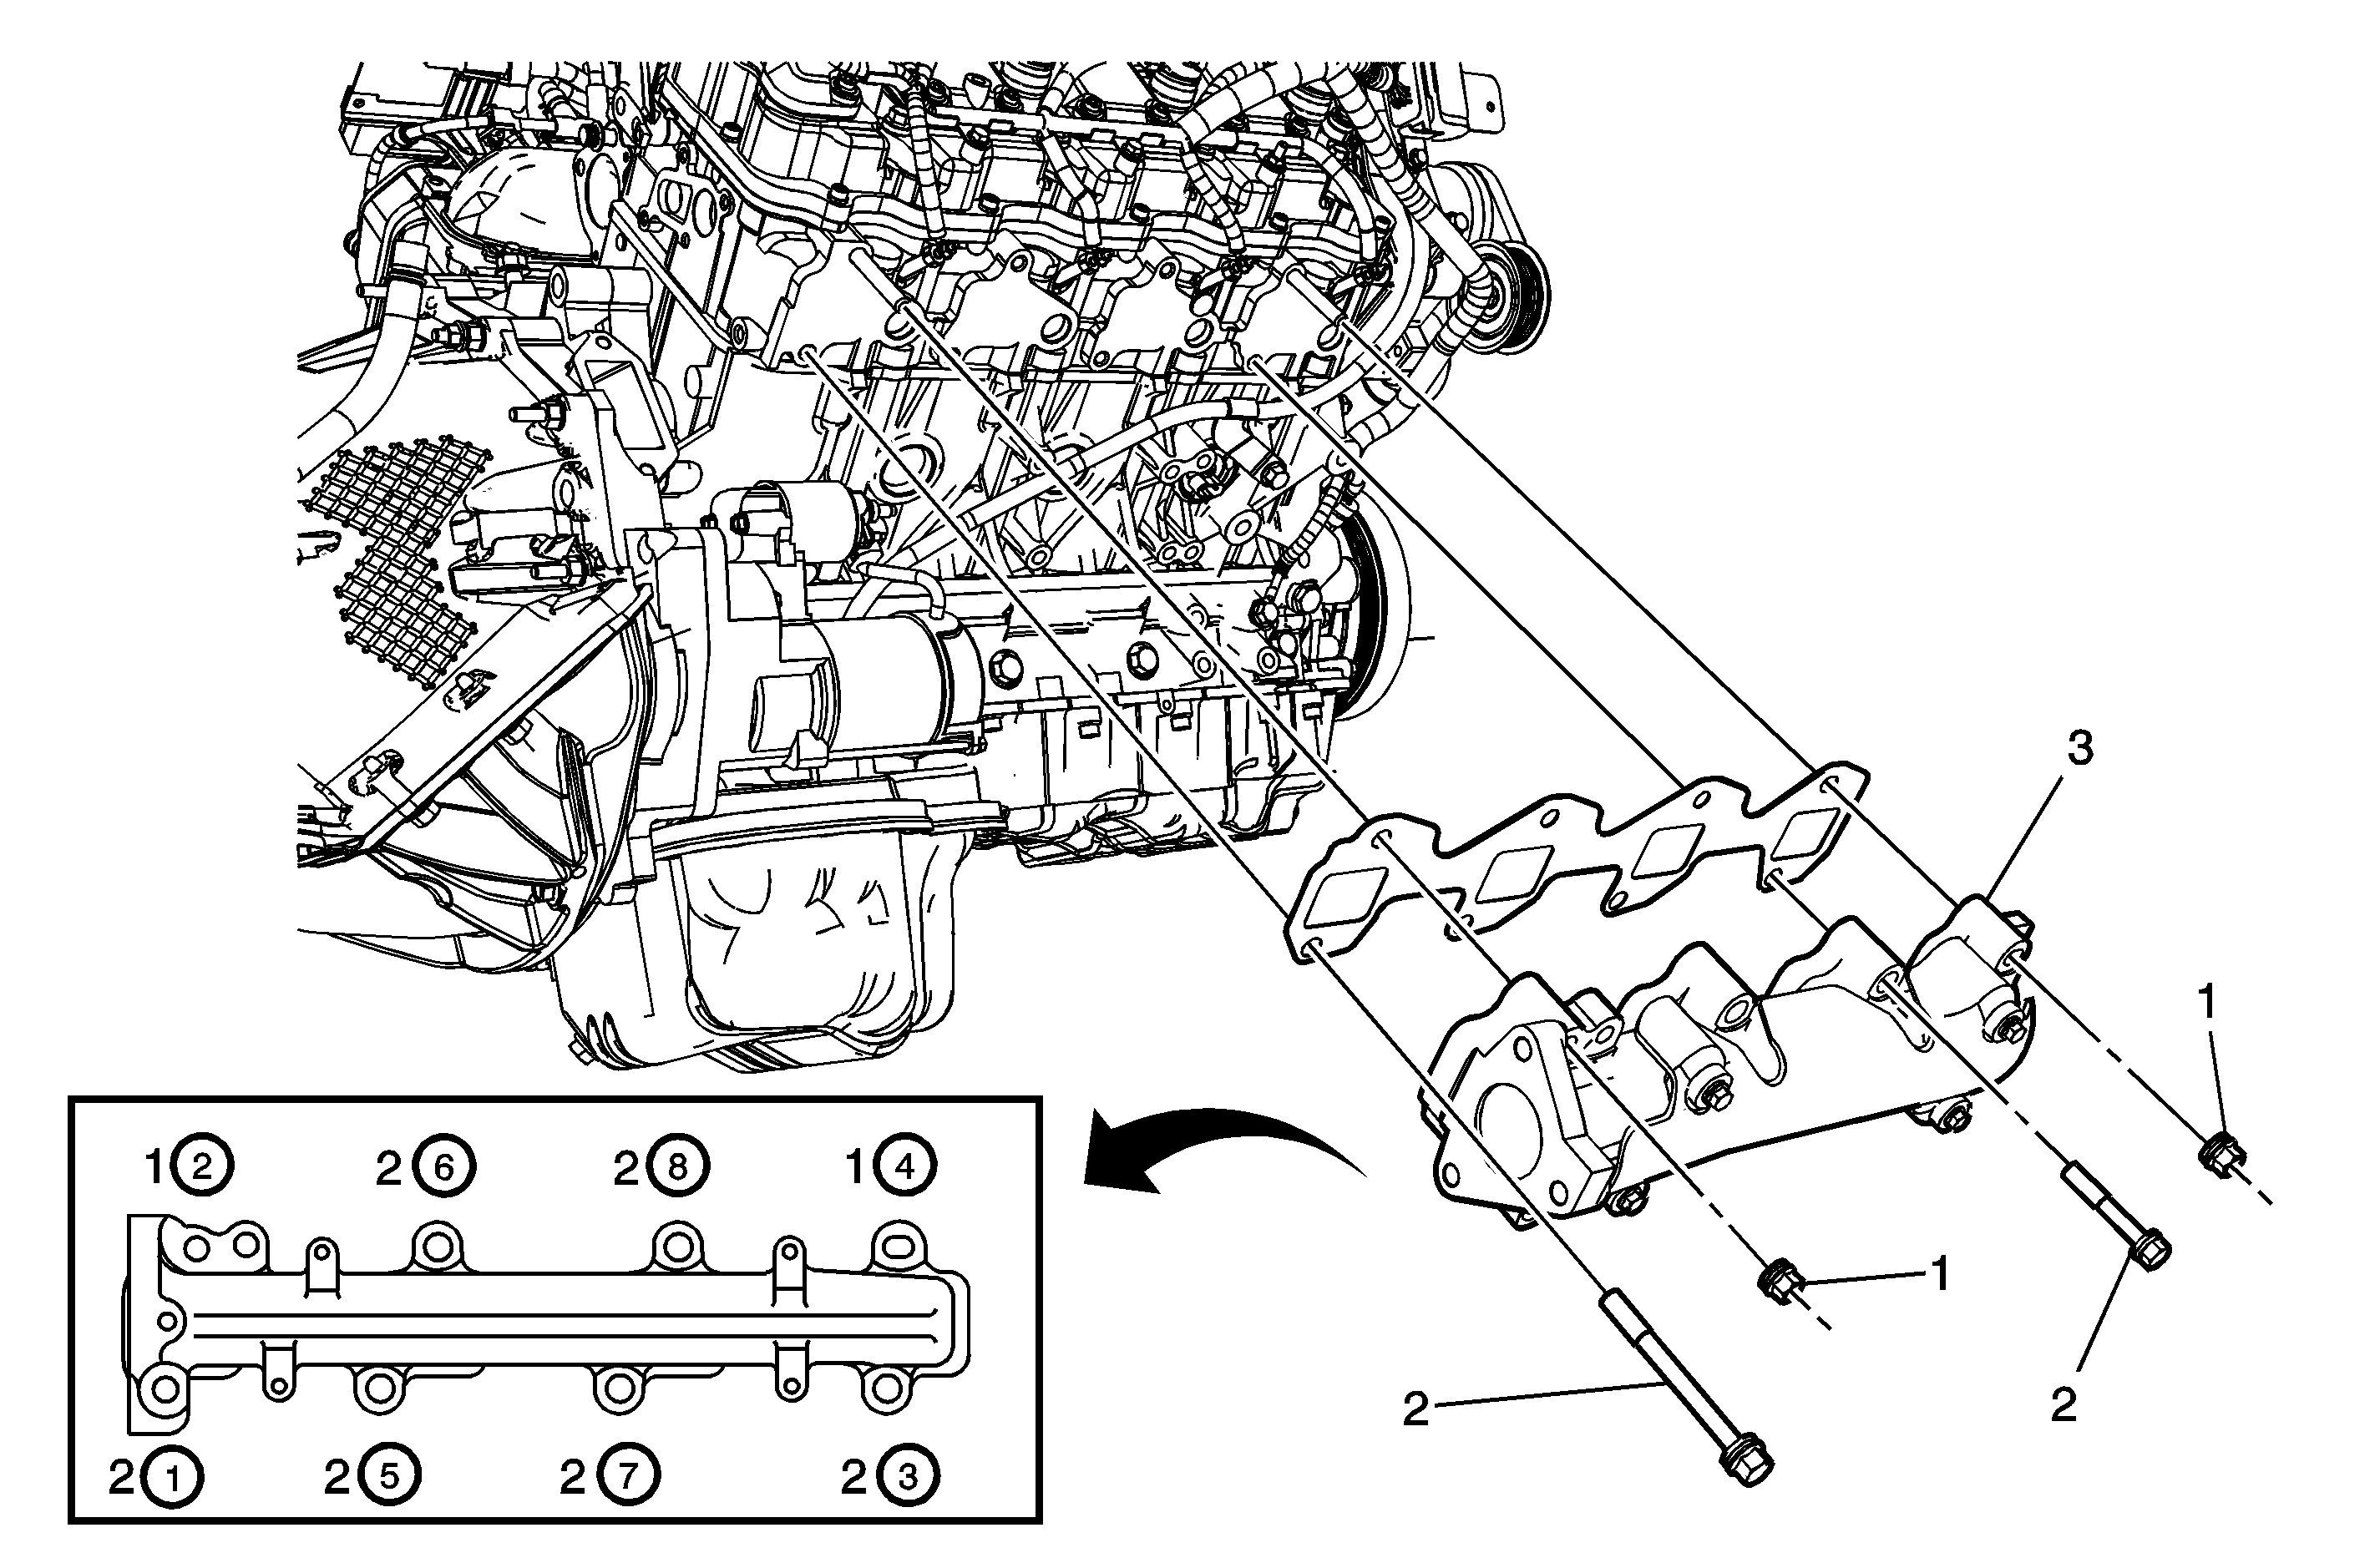
Callout | Component Name |
|---|---|
Preliminary Procedures
| |
1 | Exhaust Manifold Nut (Qty: 2) Tip Tighten |
2 | Exhaust Manifold Bolt (Qty: 6) Tip Tighten |
3 | Right Side Exhaust Manifold Procedure
|
