Battery Positive Cable Replacement Primary 6.6L
Removal Procedure
- Disconnect the negative battery cable. Refer to Battery Negative Cable Disconnection and Connection .
- Disconnect the positive battery cable.
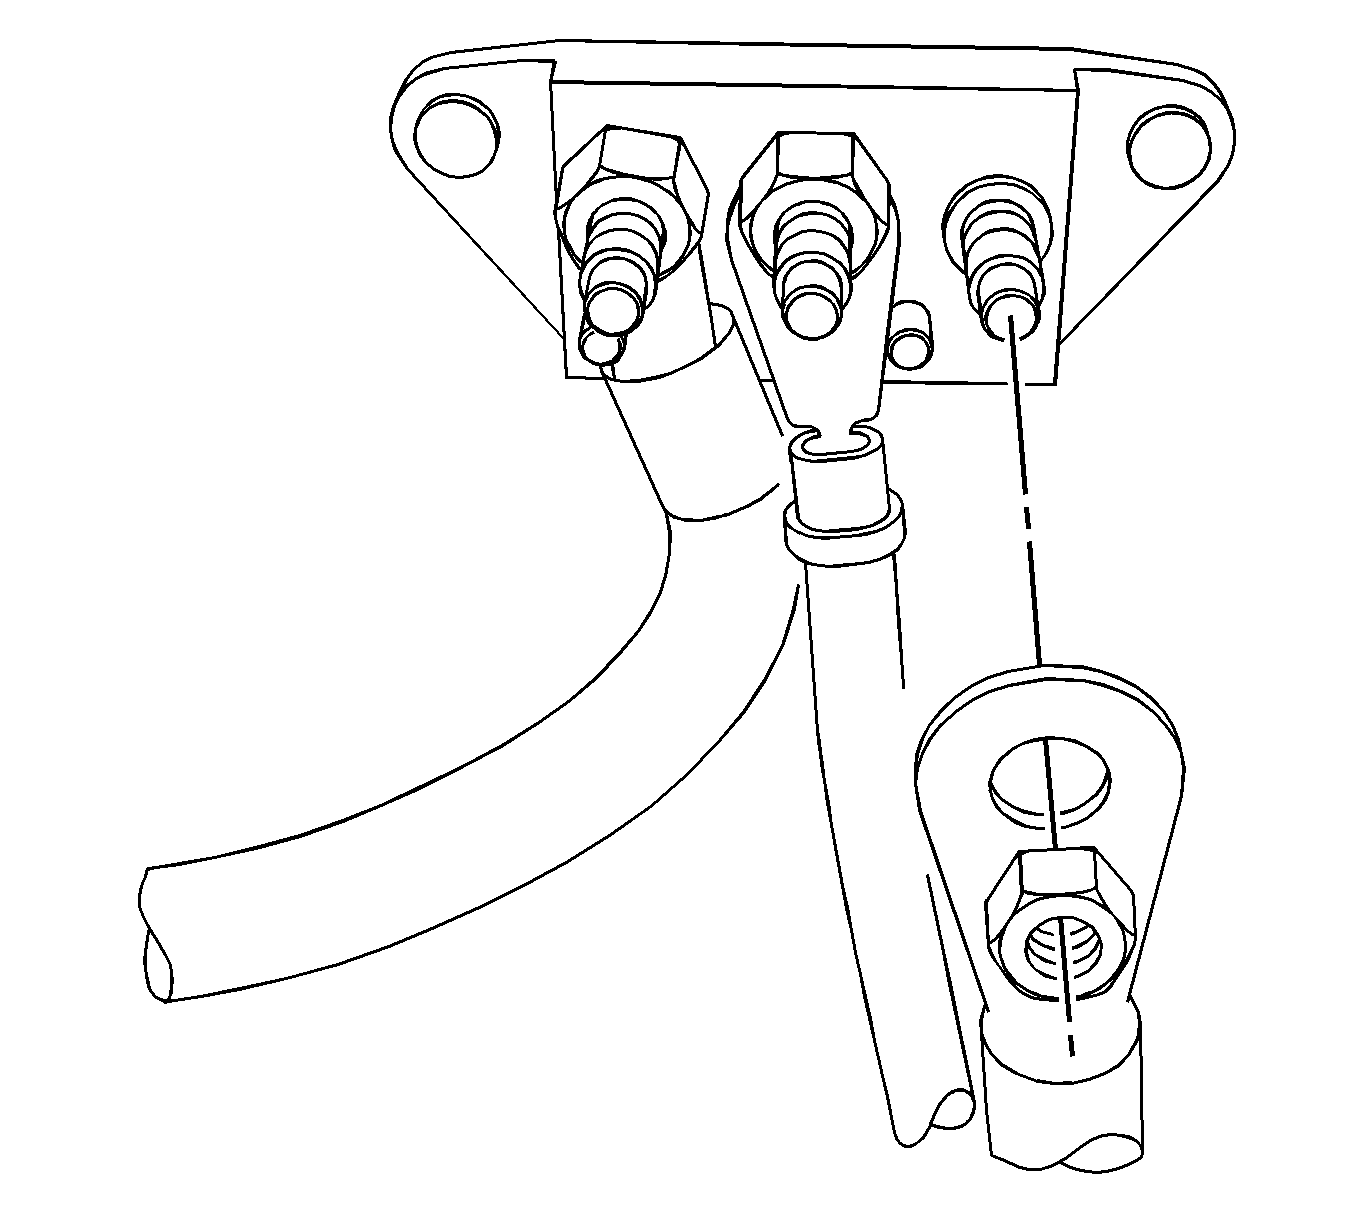
- Remove the positive cable nut from the junction block and disconnect the cable.
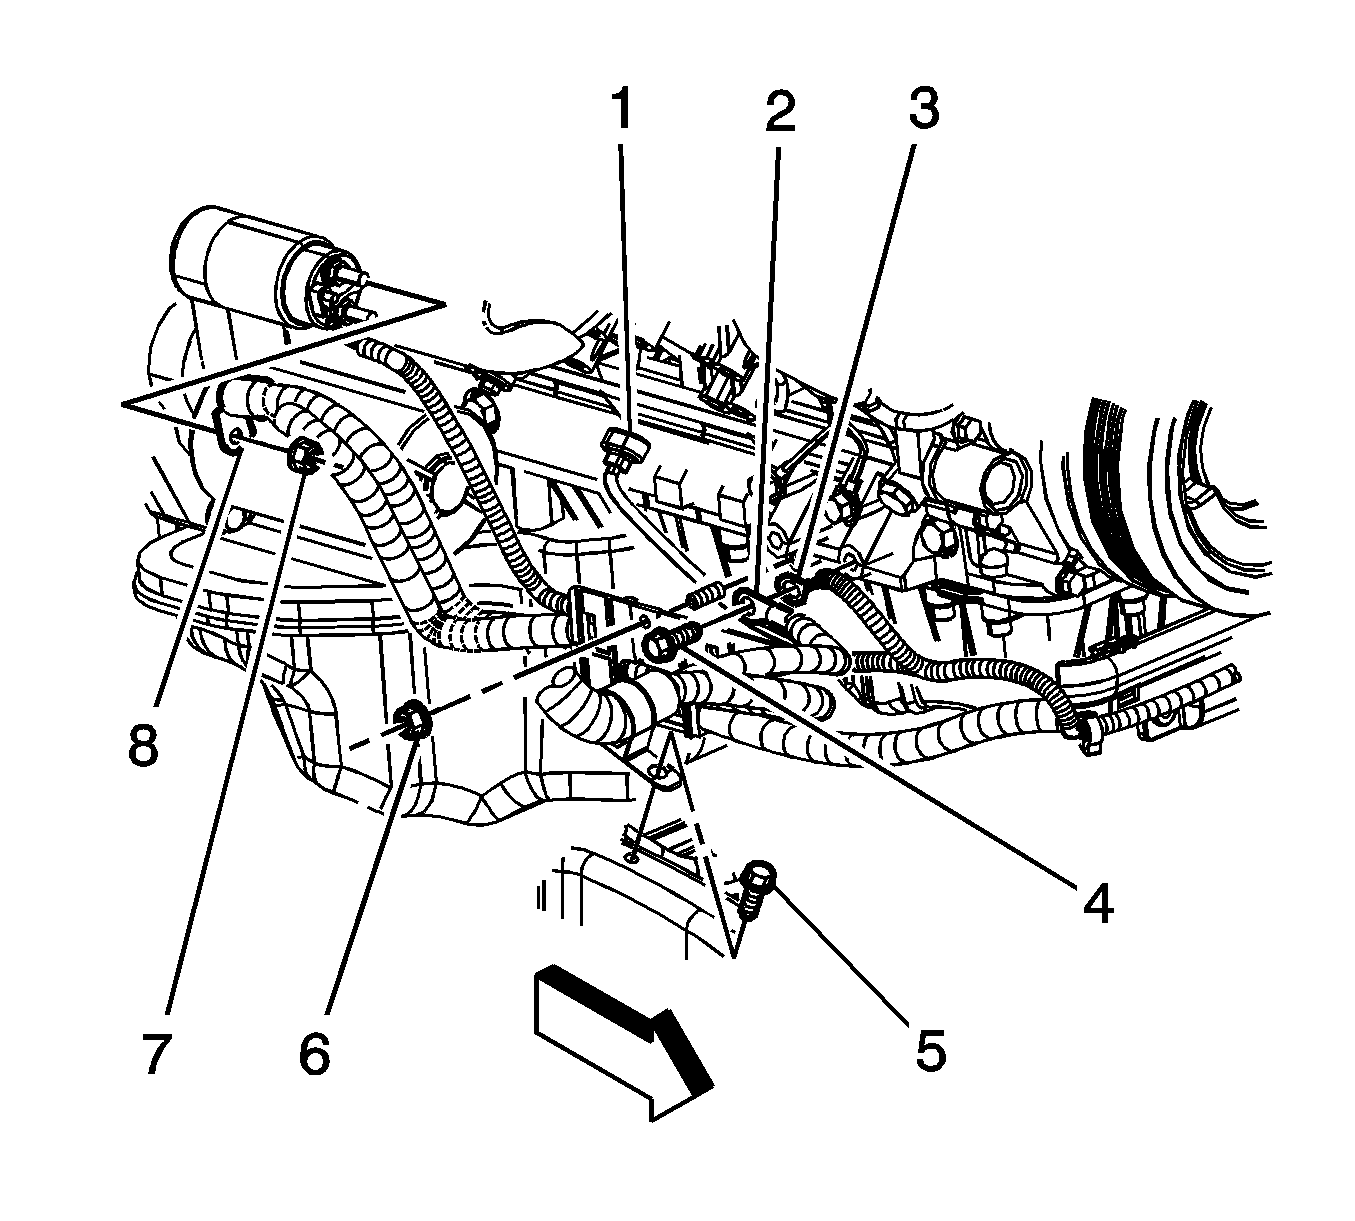
- Remove the positive cable nut from the generator and disconnect the cable.
- Disconnect the wiring harness clips and the positive cable from the glow plug module.
- Remove the positive battery cable nut (7) from the starter and disconnect the cable (8) and the wiring harness clips.
- Remove the positive battery cable.
Installation Procedure
- Position the positive battery cable.
- Position the positive battery cable (8) to the starter and install the nut (7). Connect the wiring harness clips.
- Connect the positive battery cable to the glow plug module and connect the wiring harness clips.
- Install the positive battery cable to the generator and install the nut.
- Position the positive battery cable to the junction block and install the cable nut.
- Connect the positive battery cable to the battery.
- Connect the negative battery cable. Refer to Battery Negative Cable Disconnection and Connection .
Notice: Refer to Fastener Notice in the Preface section.

Tighten
Tighten the positive battery cable to starter nut to 9 N·m (80 lb in).
Tighten
Tighten the positive battery cable to generator nut to 9 N·m (80 lb in).

Tighten
Tighten the positive battery cable to junction block nut to 8 N·m (71 lb in).
Tighten
Tighten the positive battery cable bolt to 17 N·m (13 lb ft).
Battery Positive Cable Replacement Auxiliary 6.6L
Removal Procedure
Caution: Refer to Battery Disconnect Caution in the Preface section.
- Disconnect the auxiliary battery negative cable. Refer to Battery Negative Cable Disconnection and Connection .
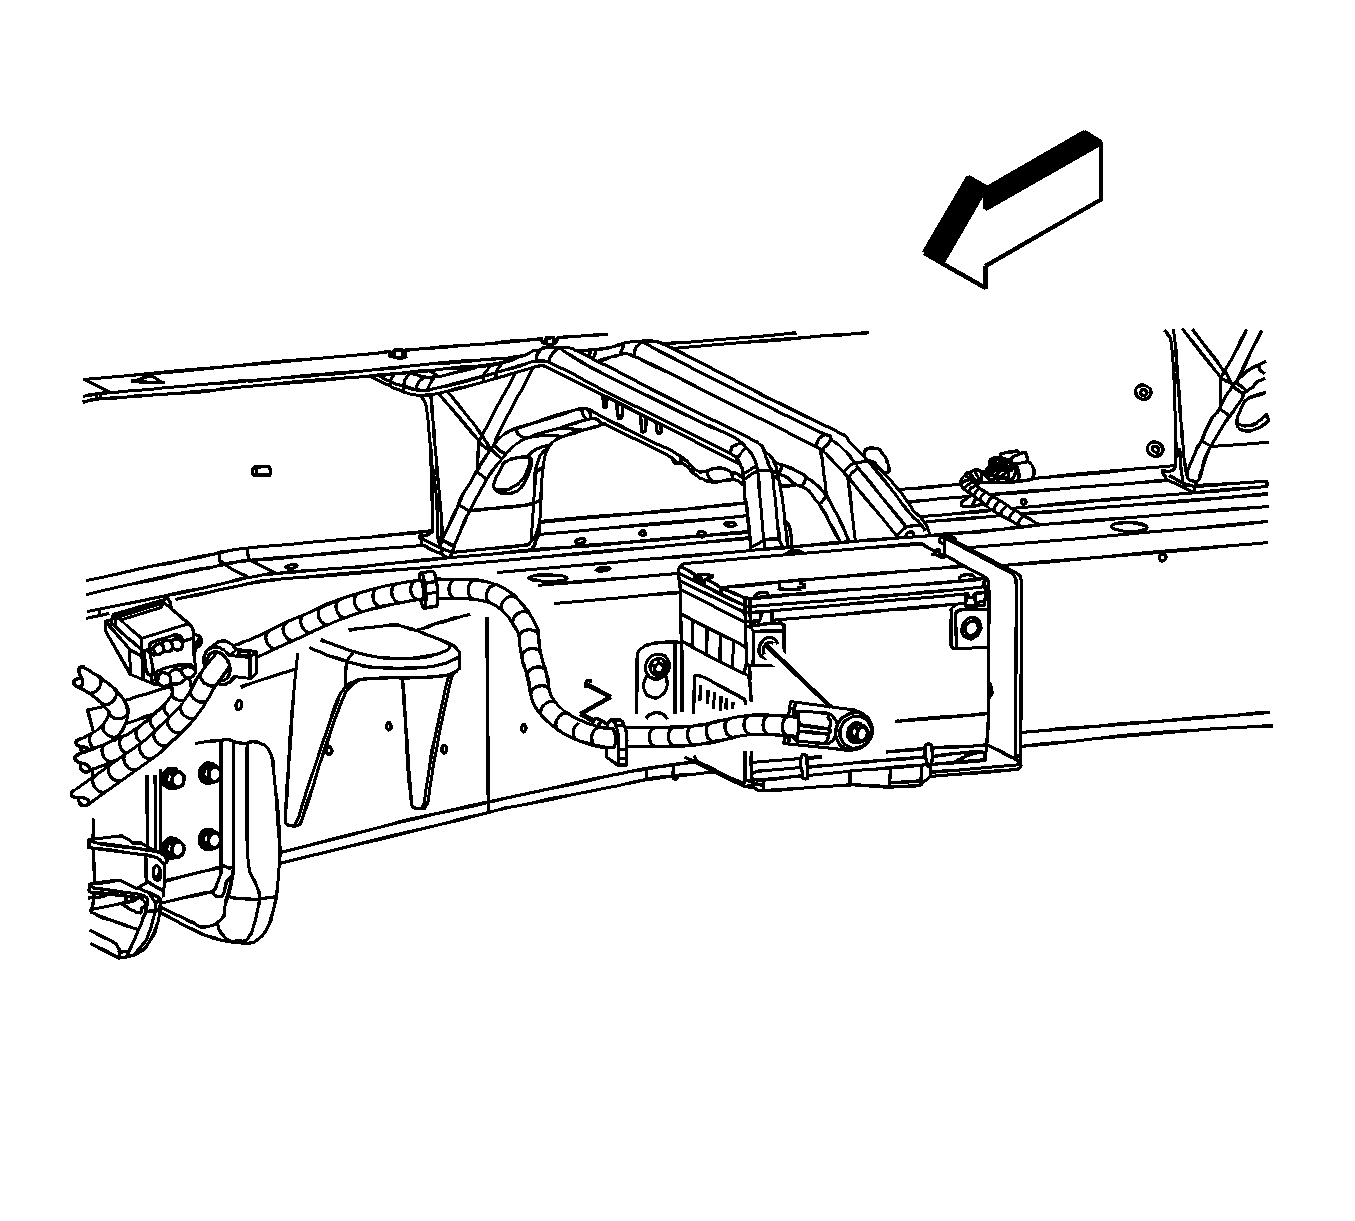
- Disconnect the auxiliary positive battery cable.
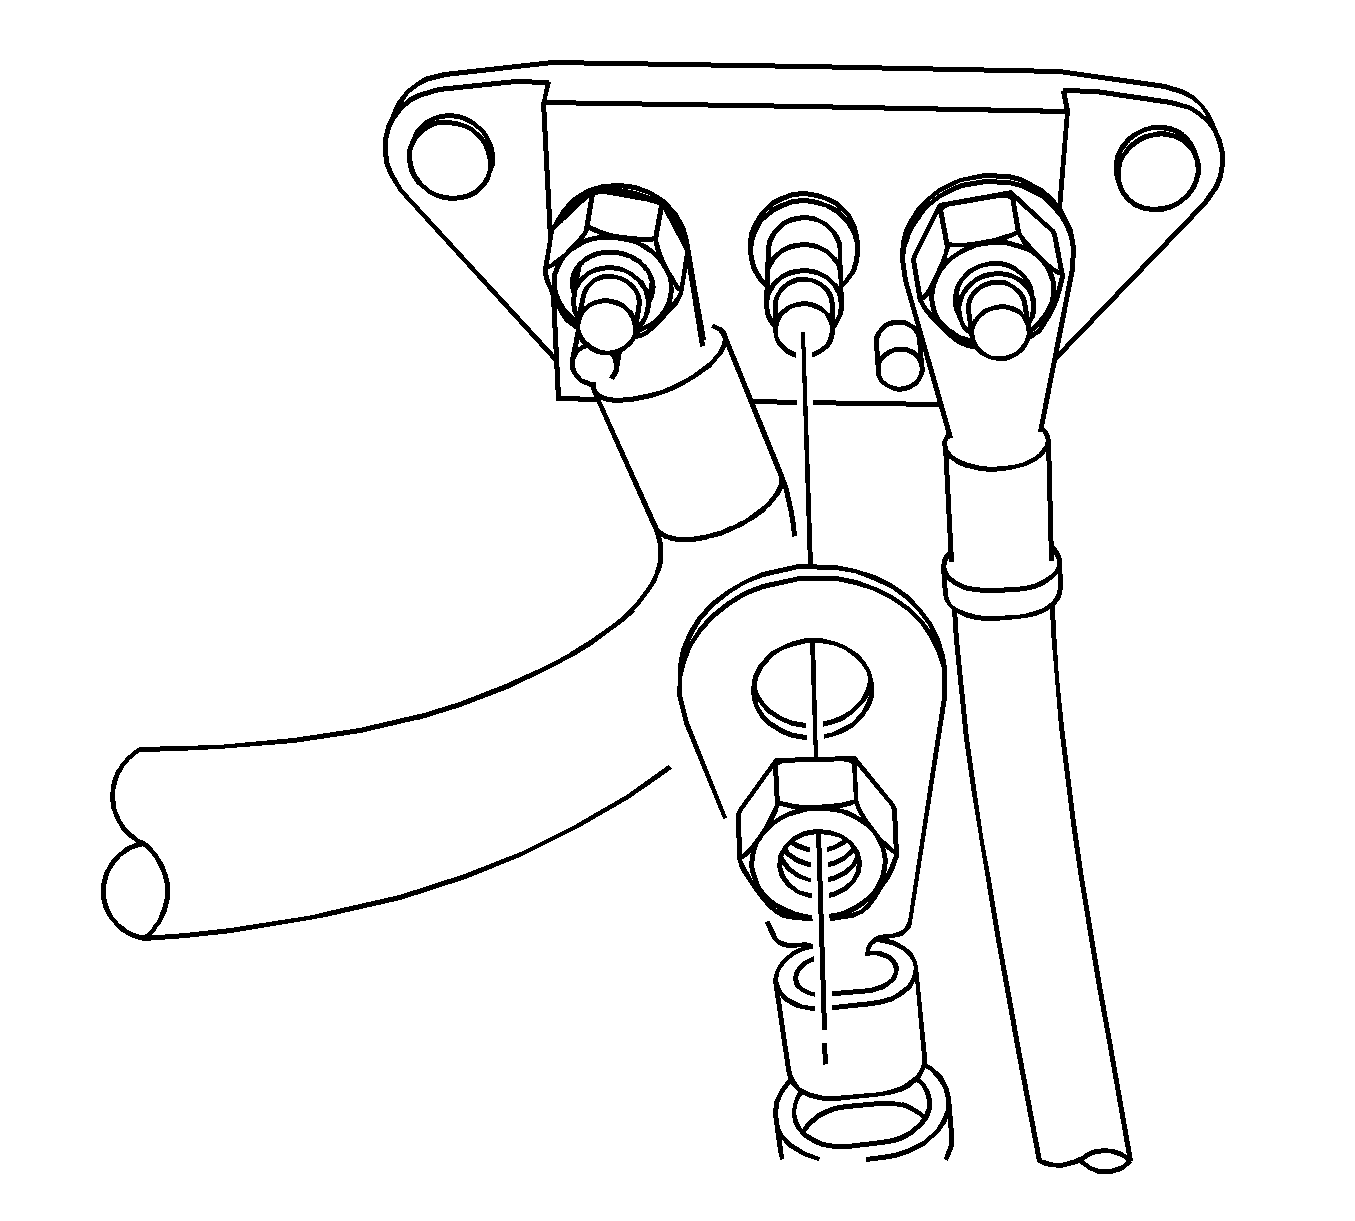
- Remove the auxiliary positive cable nut from the junction block.
- Disconnect the auxiliary positive cable wiring harness clips.
- Remove the auxiliary battery cable.

Installation Procedure
- Position the auxiliary positive battery cable and connect the wiring harness clips.
- Position the auxiliary positive cable to the junction block and install the cable nut.
- Connect the auxiliary positive cable to the auxiliary battery.
- Connect the auxiliary negative battery cable. Refer to Battery Negative Cable Disconnection and Connection .
Notice: Refer to Fastener Notice in the Preface section.

Tighten
Tighten the auxiliary positive cable nut to 8 N·m (71 lb in).

Tighten
Tighten the auxiliary positive cable bolt to 17 N·m (13 lb ft).
Battery Positive Cable Replacement 4.8L, 5.3L, and 6.0L
Removal Procedure
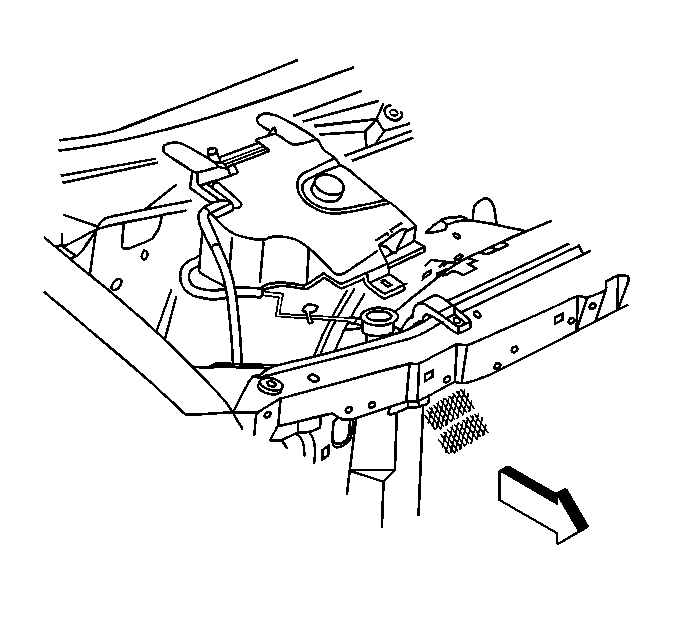
- Remove the bolt retaining the coolant recovery reservoir or surge tank.
- Move the coolant recovery reservoir or the surge tank aside.
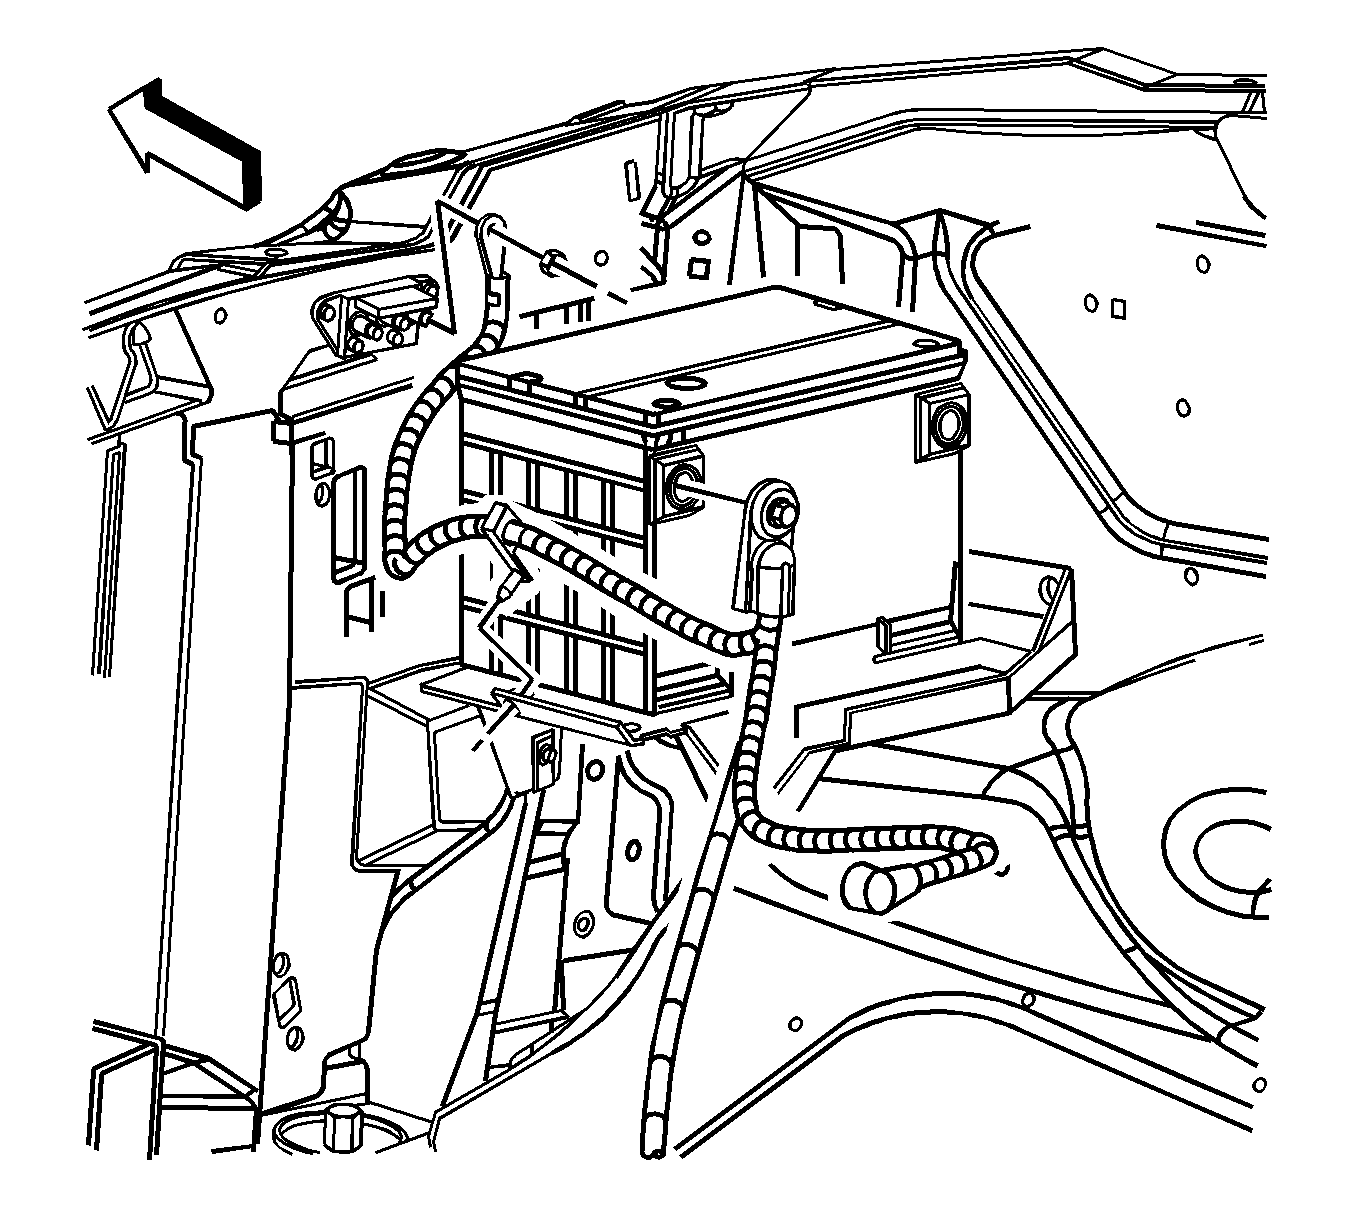
- Disconnect the battery negative cable from the battery. Refer to Battery Negative Cable Disconnection and Connection .
- Disconnect the battery positive cable from the battery.
- If equipped with the 4.8L, 5.3L or 6.0L engine, disconnect the positive lead to the junction block.
- Raise the vehicle. Refer to Lifting and Jacking the Vehicle.
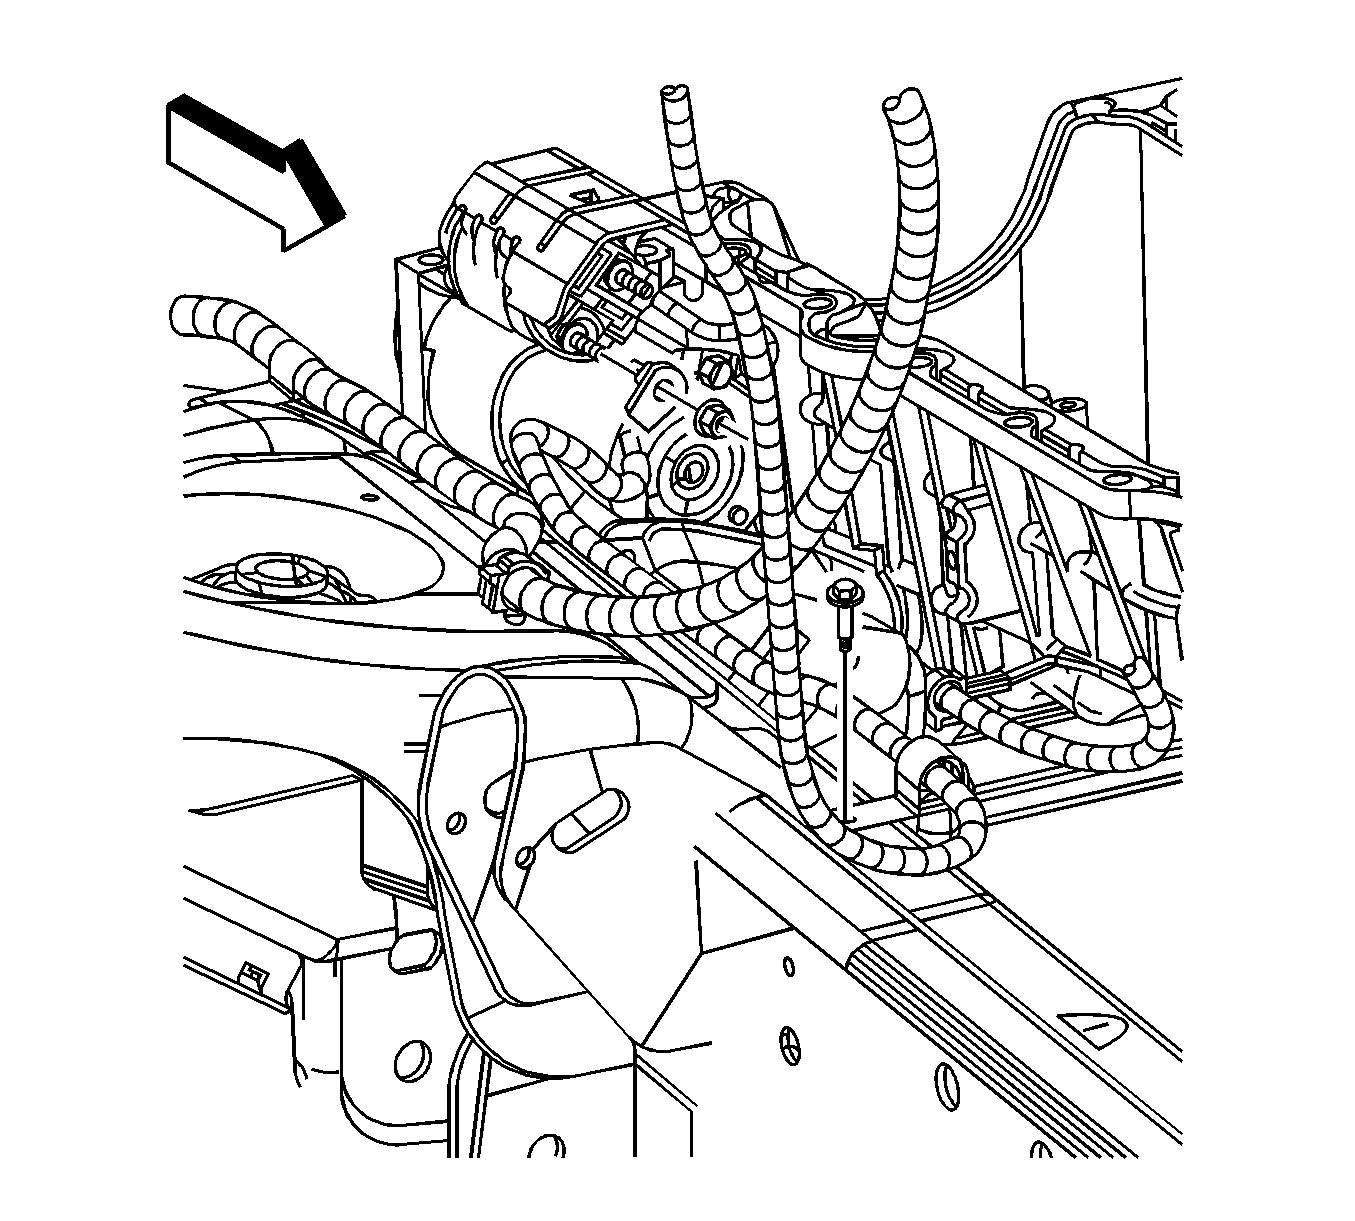
- Disconnect the positive lead to the starter solenoid.
- Lower the vehicle.
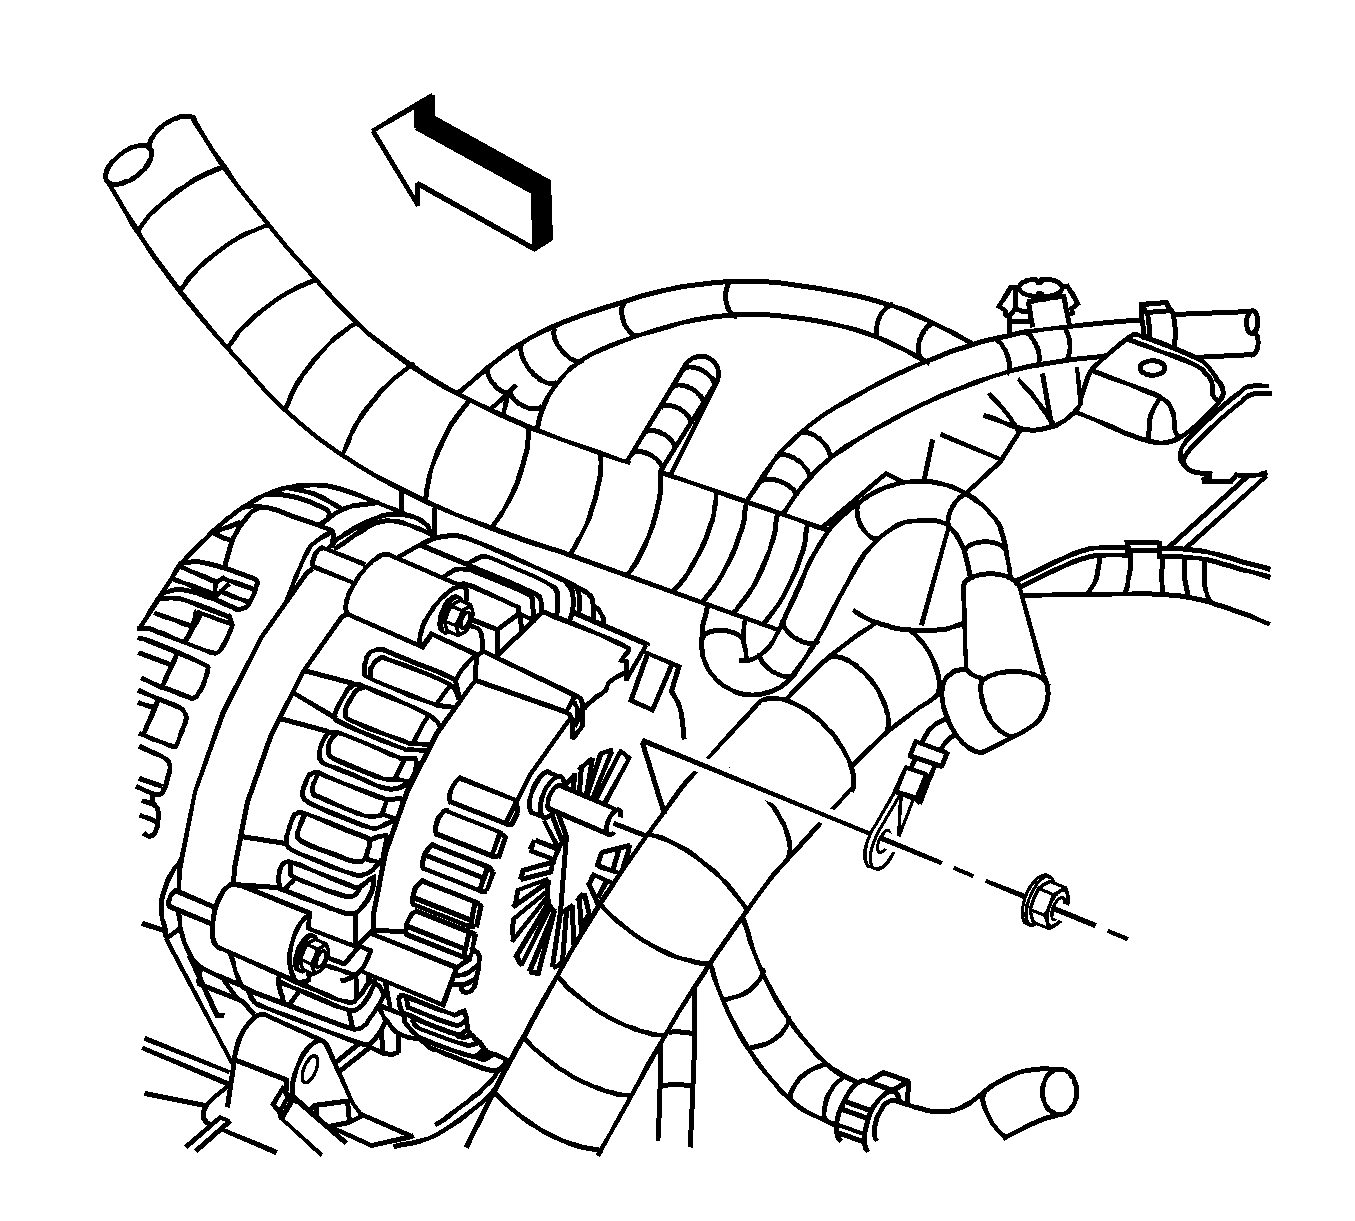
- Disconnect the positive lead to the generator.
- Remove the cable from the vehicle. Note the location of the retaining clips.
Installation Procedure
- Install the cable to the vehicle.
- Connect the positive lead to the generator.
- Raise the vehicle. Refer to Lifting and Jacking the Vehicle.
- Install the positive lead to the starter solenoid.
- Lower the vehicle.
- If equipped with the 4.8L, 5.3L or 6.0L engine, install the positive lead to the junction block.
- Connect the battery positive cable to the battery.
- Connect the battery negative cable to the battery. Refer to Battery Negative Cable Disconnection and Connection .
- Install the coolant recovery reservoir or surge tank and the bolt.
Ensure the cable is routed correctly and installed in the retainer clips.
Notice: Refer to Fastener Notice in the Preface section.

Tighten
Tighten the generator output (BAT) nut to 18 N·m (13 lb ft).

Tighten
Tighten the positive lead to starter solenoid to 10 N·m (89 lb in).

Tighten
Tighten the junction block nut to 10 N·m (89 lb in).
Tighten
Tighten the battery terminals to 17 N·m (13 lb ft).

Tighten
Tighten the coolant recovery reservoir or surge tank bolt to 11 N·m (97 lb in).
Battery Positive Cable Replacement With 4.3L
Removal Procedure
- Disconnect the battery negative cable from the battery. Refer to Battery Negative Cable Disconnection and Connection .
- Remove the engine cover. Refer to Engine Cover Replacement.
- Remove the air cleaner assembly. Refer to Air Cleaner Assembly Replacement
- Remove the bolt retaining the coolant recovery reservoir or surge tank.
- Remove the air cleaner outlet resonator. Refer to Air Cleaner Outlet Resonator Replacement
- Remove the accelerator and cruse control cables with accelerator bracket ONLY from the throttle body. Refer to Throttle Body Assembly Replacement
- Remove the bolt retaining the coolant recovery reservoir or surge tank.
- Move the coolant recovery reservoir or the surge tank aside.
- Disconnect the battery positive cable from the battery.
- Raise the vehicle. Refer to Lifting and Jacking the Vehicle.
- Disconnect the positive lead to the starter solenoid.
- Lower the vehicle.
- Disconnect the positive lead to the generator.
- Remove the cable from the vehicle. Note the location of the retaining clips.


Installation Procedure
- Install the cable to the vehicle.
- Connect the positive lead to the generator.
- Raise the vehicle. Refer to Lifting and Jacking the Vehicle.
- Install the positive lead to the starter solenoid.
- Lower the vehicle.
- Connect the battery positive cable to the battery.
- Install the accelerator and cruse control cables with accelerator bracket ONLY to the throttle body. Refer to Throttle Body Assembly Replacement
- Install the air cleaner outlet resonator. Refer to Air Cleaner Outlet Resonator Replacement
- Install the coolant recovery reservoir or surge tank and the bolt.
- Install the air cleaner assembly. Refer to Air Cleaner Assembly Replacement
- Install the engine cover. Refer to Engine Cover Replacement.
- Connect the battery negative cable to the battery. Refer to Battery Negative Cable Disconnection and Connection .
Ensure the cable is routed correctly and installed in the retainer clips.
Notice: Refer to Fastener Notice in the Preface section.

Tighten
Tighten the generator output (BAT) nut to 18 N·m (13 lb ft).

Tighten
Tighten the positive lead to starter solenoid to 10 N·m (89 lb in).
Tighten
Tighten the battery terminals to 17 N·m (13 lb ft).

Tighten
Tighten the coolant recovery reservoir or surge tank bolt to 11 N·m (97 lb in).
