Valve Rocker Arm Cover Replacement - Upper Right Side LLY, LBZ
Removal Procedure
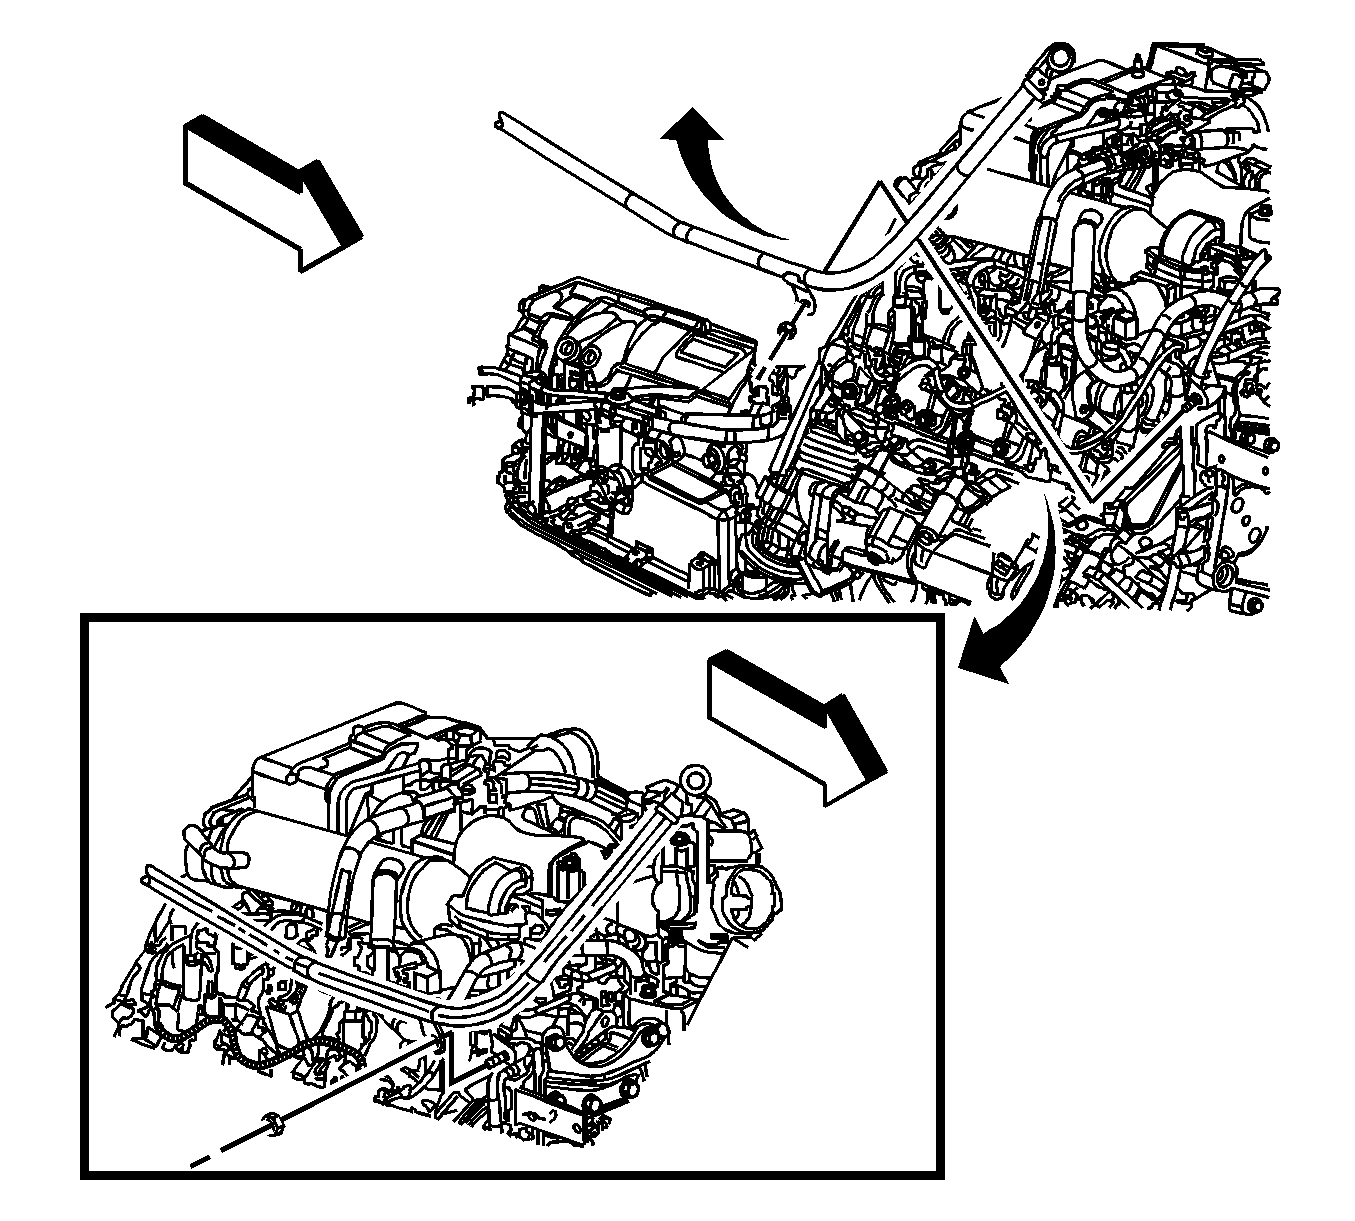
- Remove the exhaust gas recirculation (EGR) cooler tube. Refer to Exhaust Gas Recirculation Valve Cooler Replacement .
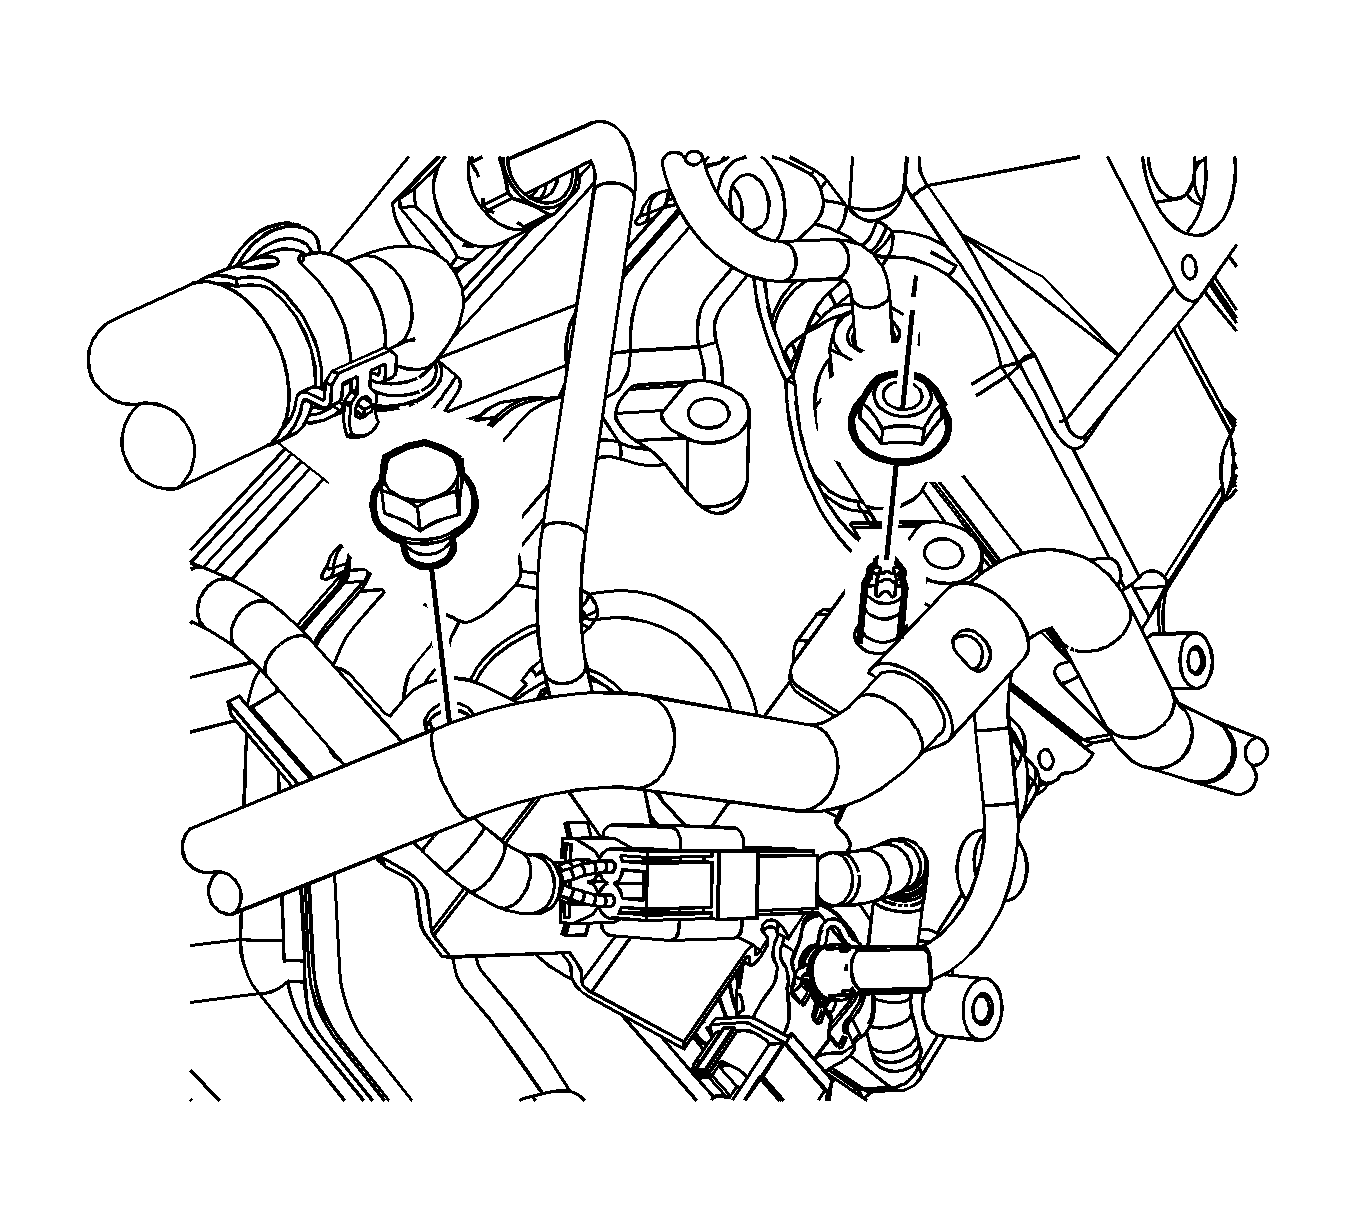
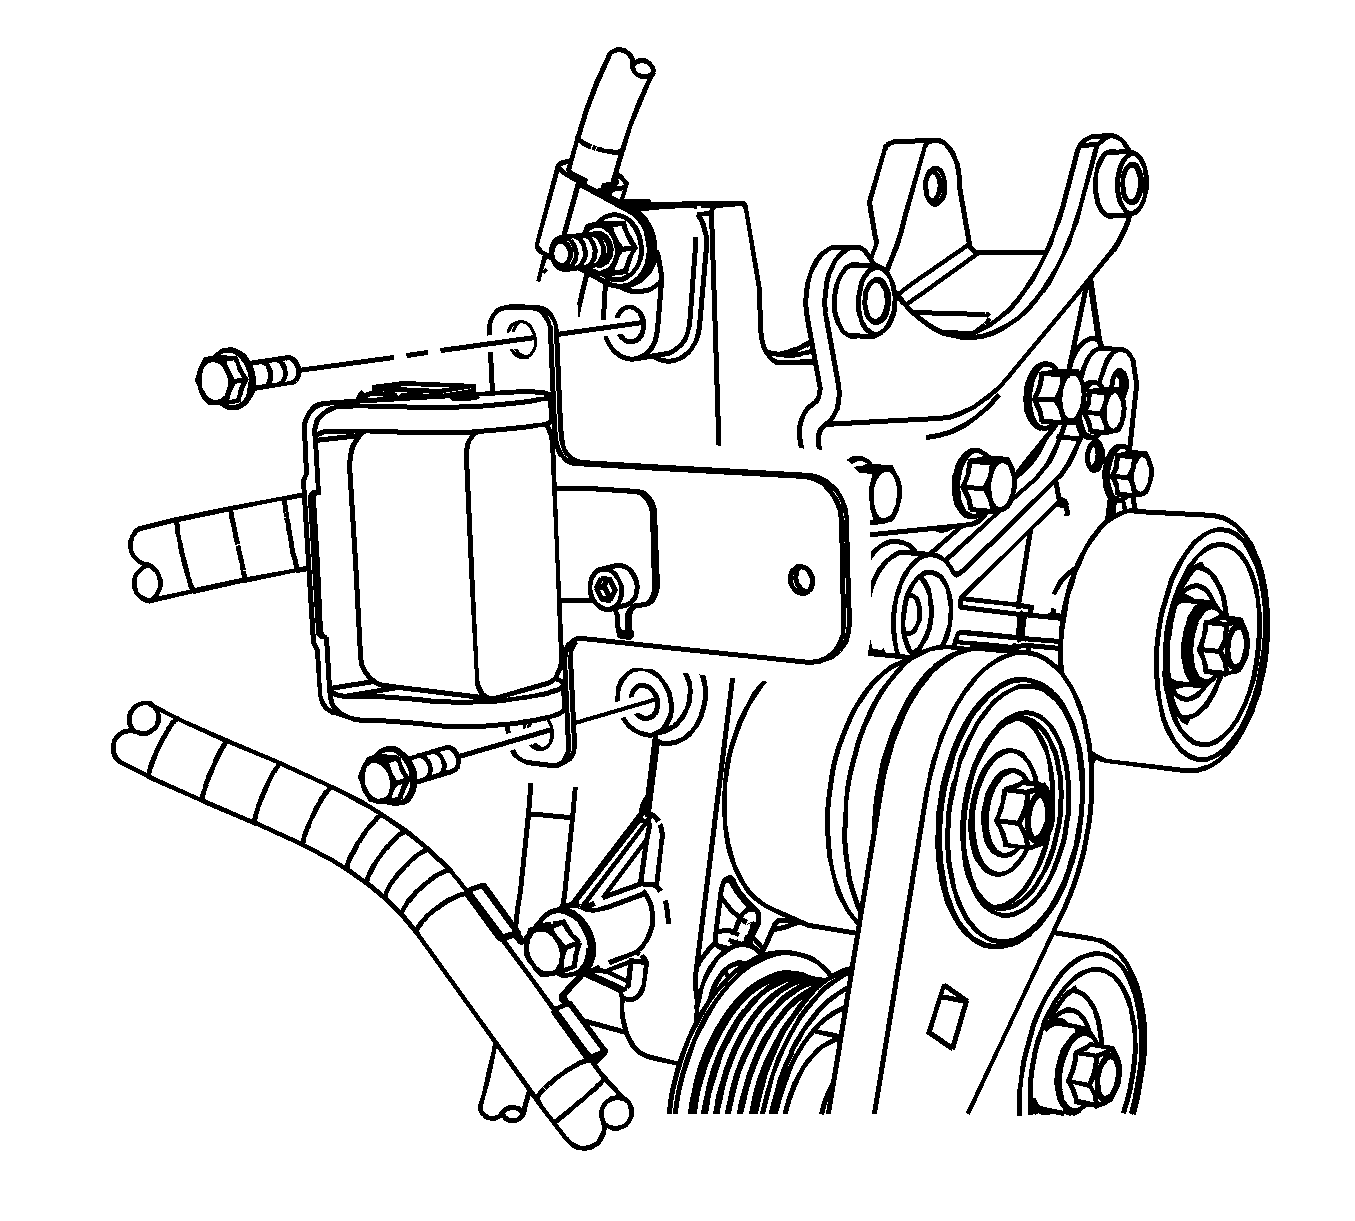
- Remove the glow plug nuts (3).
- Remove the engine wiring harness from the glow plugs.
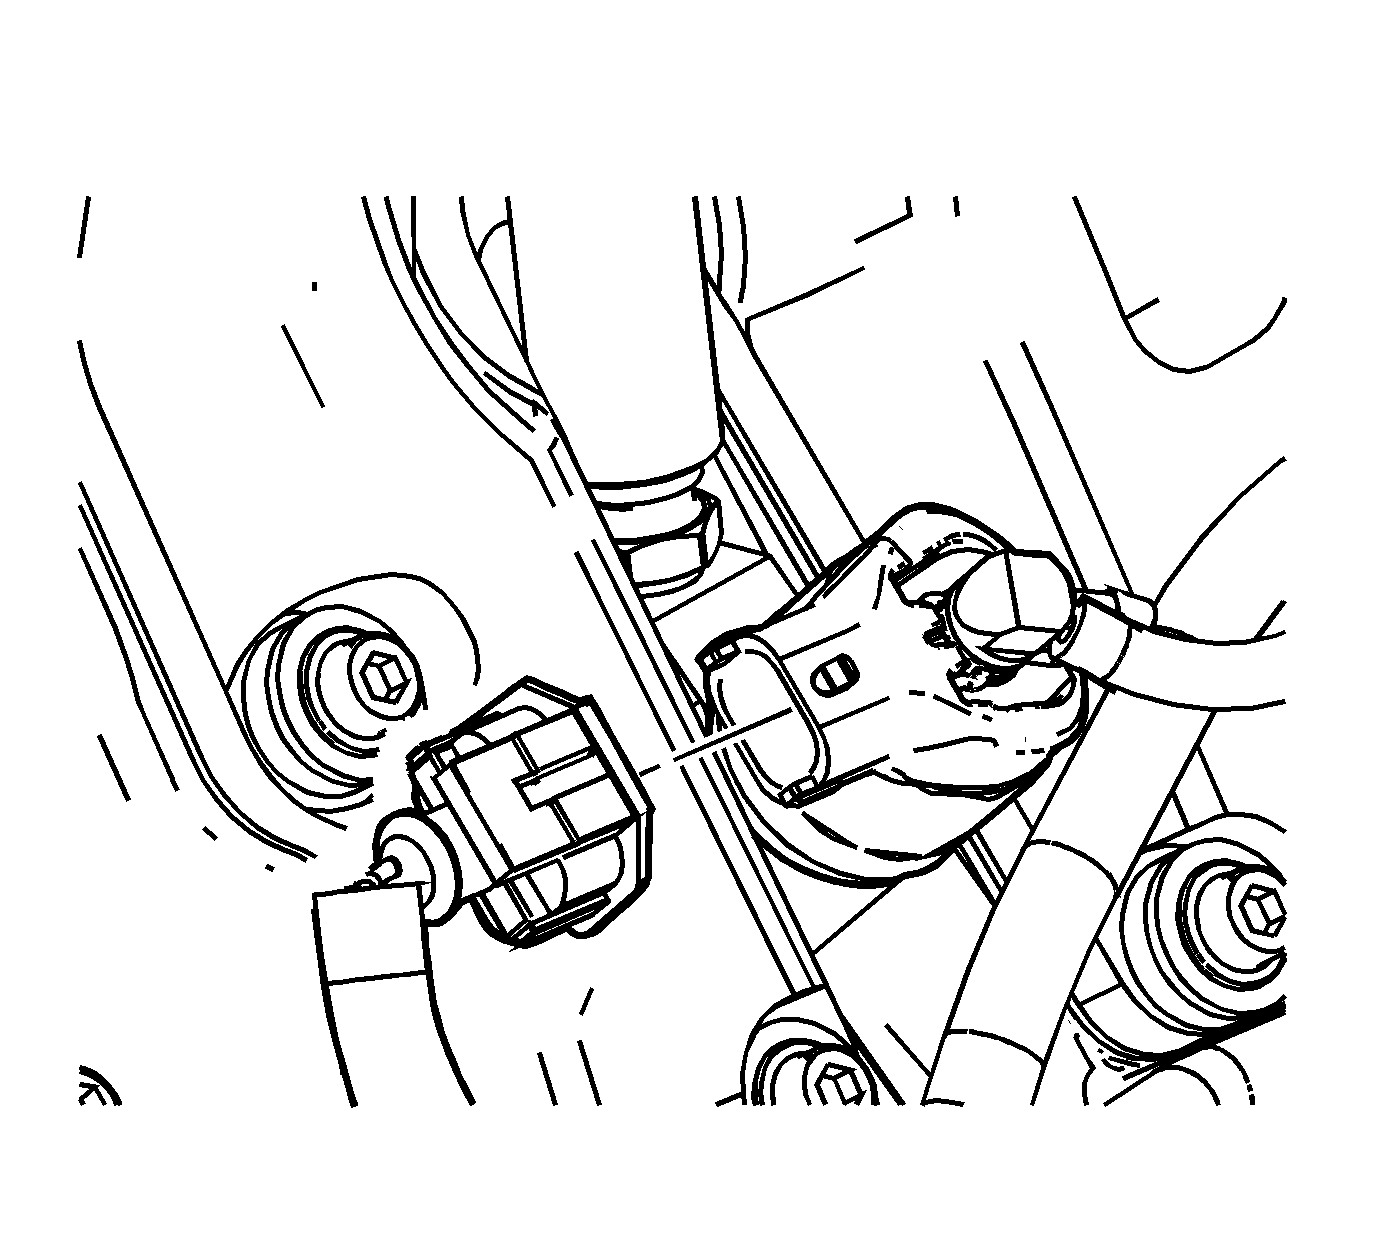
- Remove the glow plug harness bracket bolts (1) and nut (2).
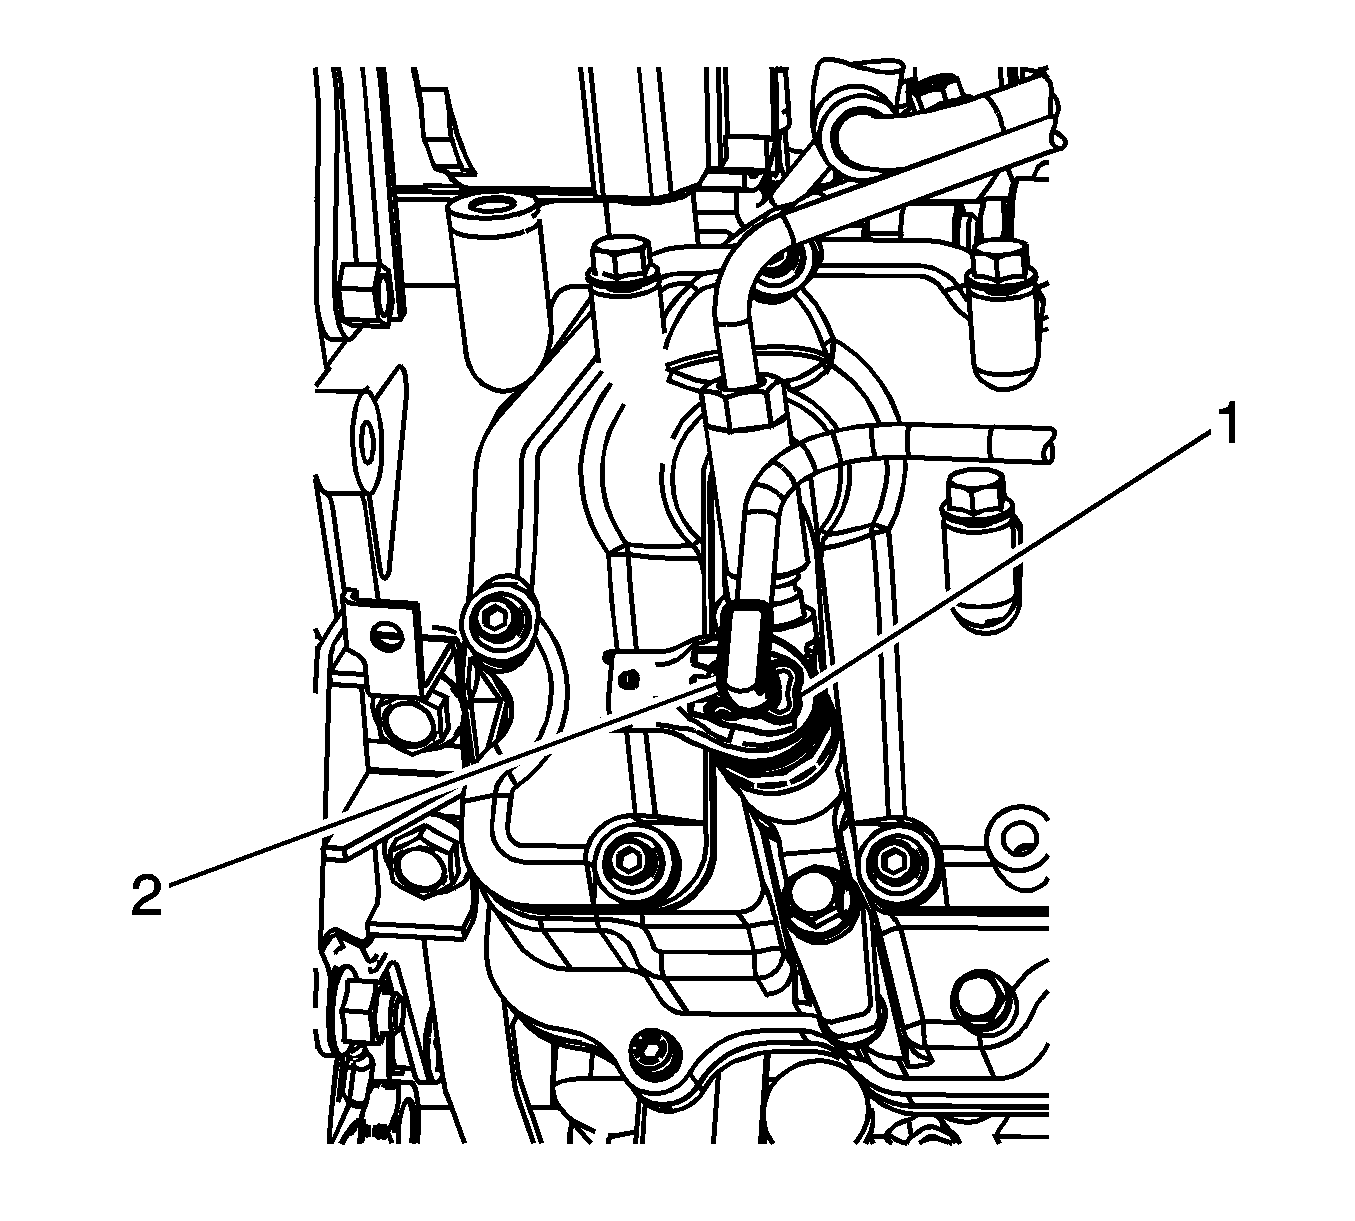
- Remove the fuel rail pressure sensor electrical connector bracket bolt and nut.
- Remove the bracket from the stud.
- Remove the transmission tube support nut at the bell housing.
- Remove the transmission fluid fill tube upper nut and reposition the tube.
- Remove the EGR heater inlet hose/pipe retainer stud at the rear of the engine.
- Remove the EGR heater inlet hose/pipe retainer nut at the center of the lower right cylinder head.
- Remove the injector wire harness stud at the center lower right cylinder head.
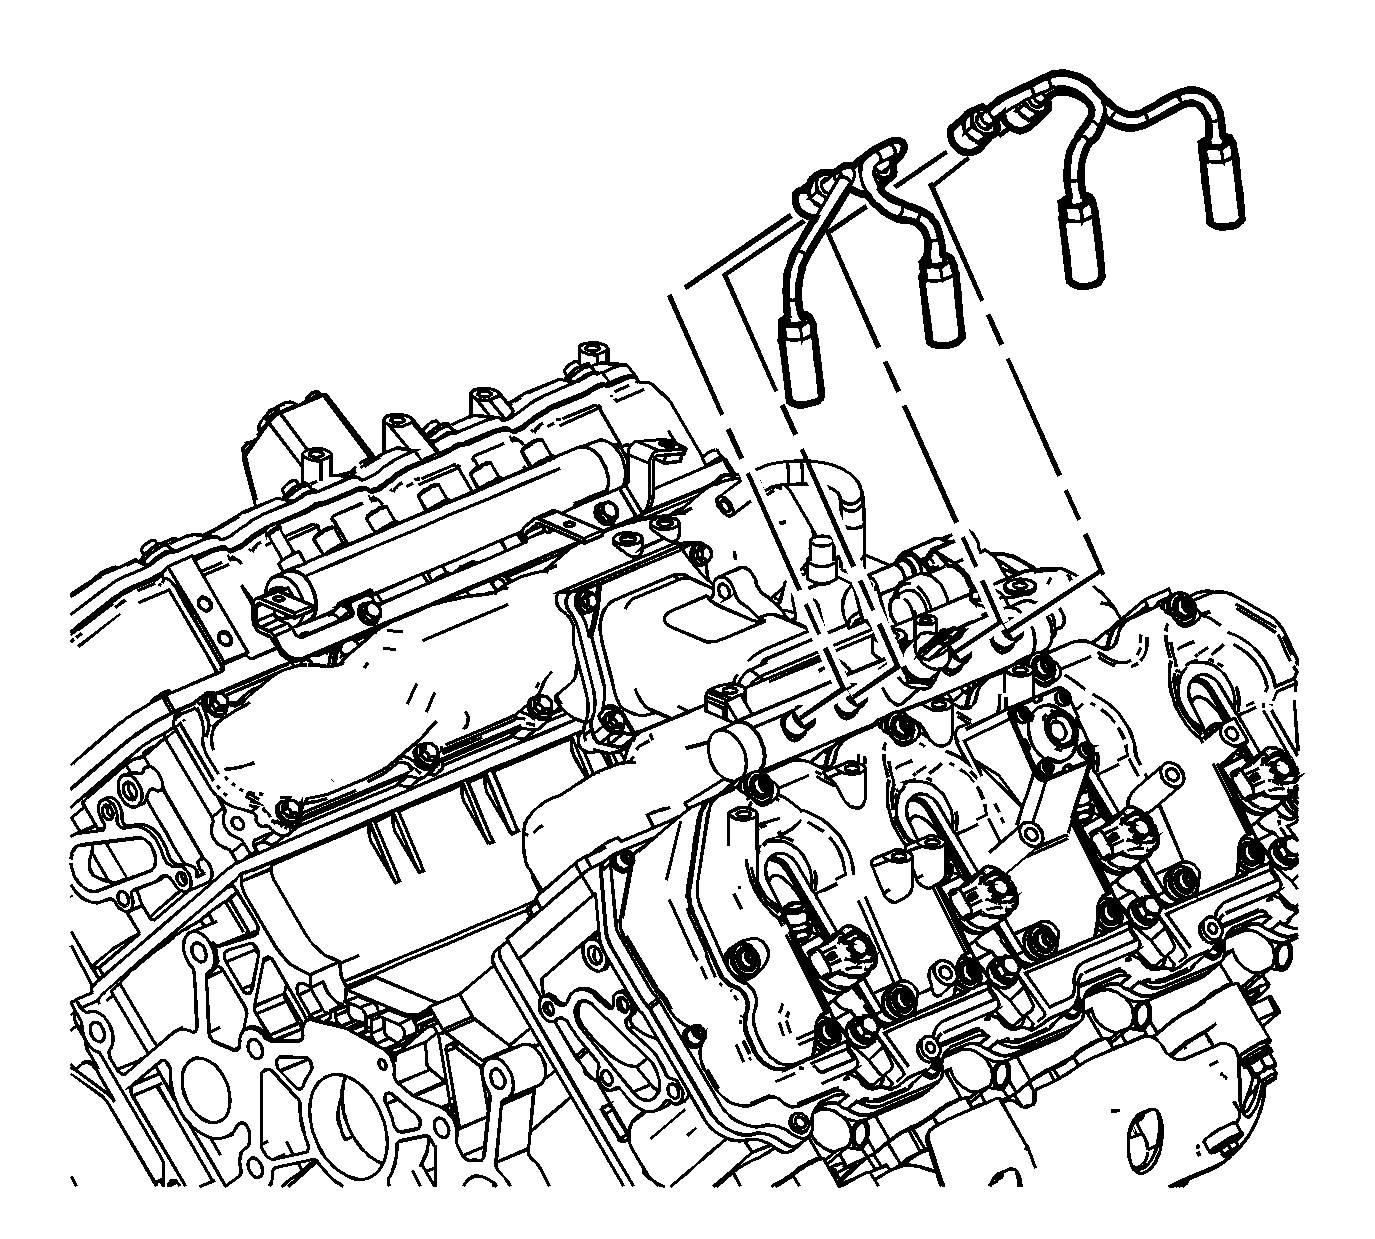
- Disconnect the engine harness electrical connectors from the fuel injectors.
- Remove the fuel injector return line clip (1) from the injector.
- Remove the fuel injector return line fitting (2) from the injector.
- Perform the above 2 steps for the other 3 fuel injectors.
- Reposition the injector return line out of the way.
- Disconnect the right side main engine harness connector.
- Remove the main connector bracket bolts.
- Reposition the engine wiring harness out of the way.
- Prior to removing the fuel injector pipes, use compressed air to blow any debris from between the injector line and fittings. Wipe the fittings clean of debris.
- Spray lithium grease between the fuel injector line and fittings to assist in containing any debris during removal. Refer to Adhesives, Fluids, Lubricants, and Sealers .
- Remove the right fuel injector pipes.
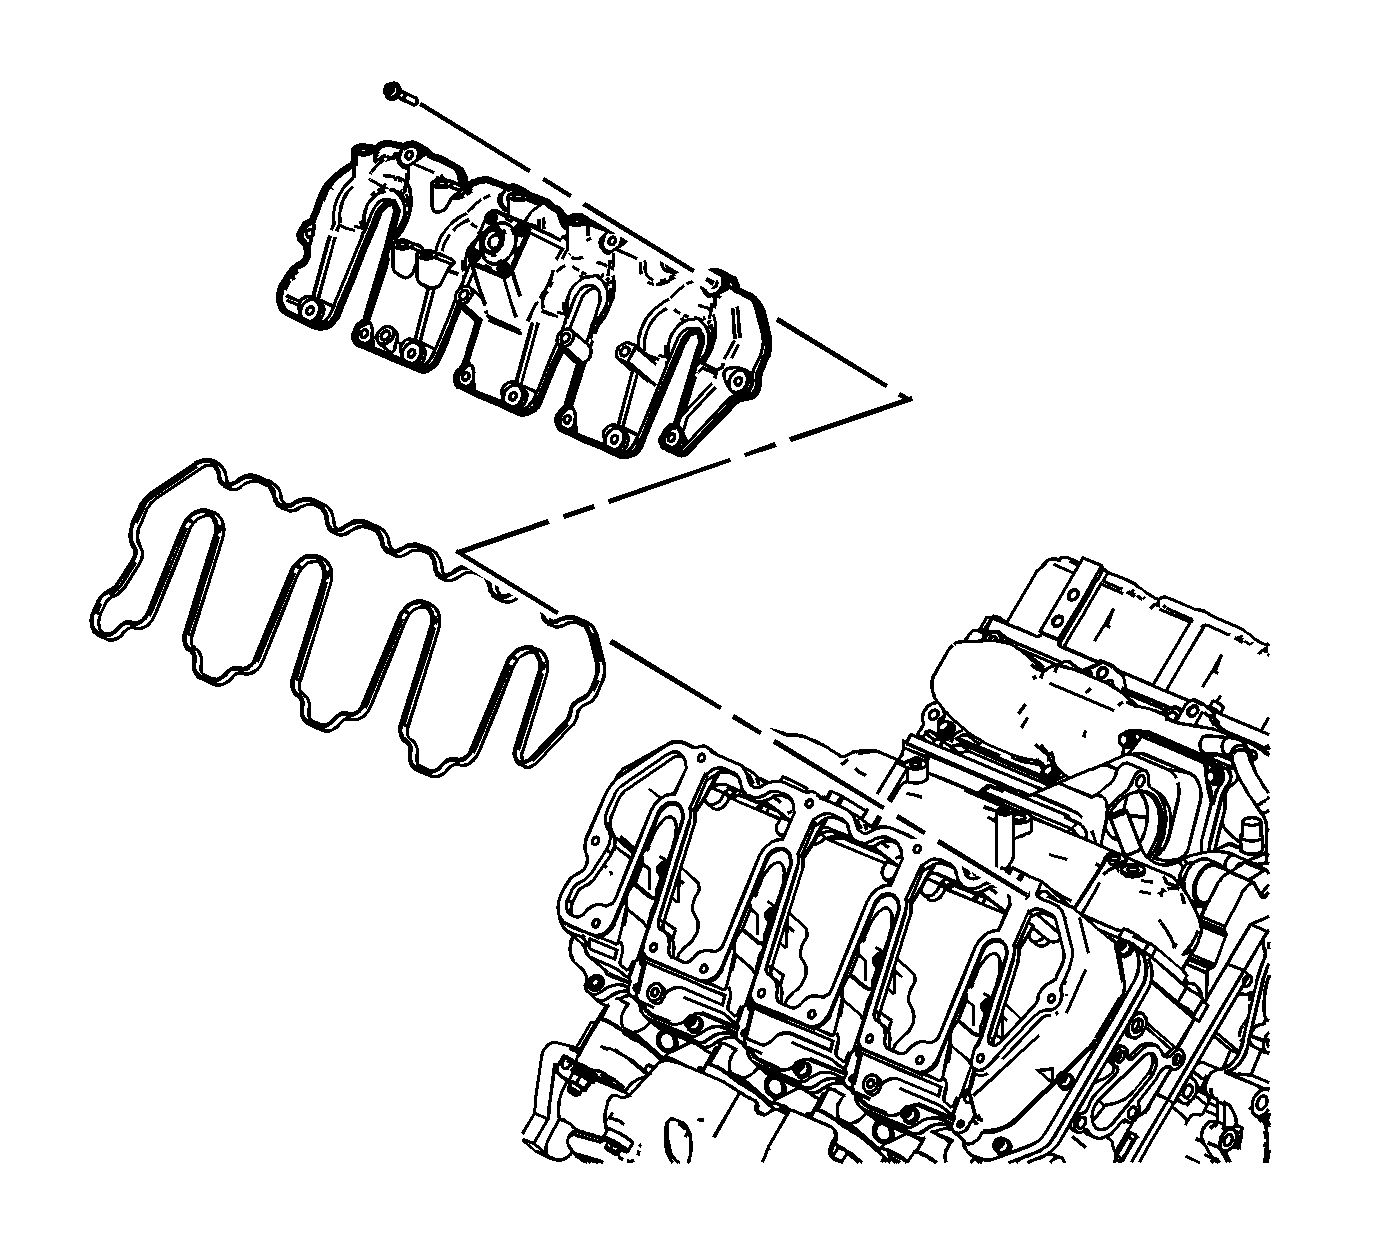
- Remove the upper valve rocker arm cover bolts.
- Remove the upper valve rocker arm cover.
- Remove the upper valve rocker arm cover gasket.
- Inspect the upper valve rocker arm cover gasket for damage, replace if necessary. Otherwise reuse the old gasket.


Notice: Label all the injector electrical connectors before the connectors are removed in order to prevent reconnecting to the wrong injector. Failure to properly connect the injectors in the correct sequence will cause severe engine damage.
Notice: DO NOT use compressed air to clean debris from the fuel injector inlet after the fuel line is removed. Using compressed air can allow debris to enter the fuel injector inlet and damage the fuel injector.
Installation Procedure
- Install the upper valve rocker arm cover gasket.
- Install the upper valve rocker arm cover.
- Install the upper valve rocker arm cover bolts.
- Tighten the upper valve rocker arm cover bolts.
- Install the fuel injector pipes.
- After installing the fuel injector pipes, clean the injector pipes and apply sealant at the fittings to prevent moisture and debris from collecting between the line and fitting. Refer to Adhesives, Fluids, Lubricants, and Sealers .
- Position the engine wiring harness.
- Position the main connector bracket to the generator bracket.
- Install the main connector bracket bolts.
- Connect the right side main engine harness connector.
- Position the injector return line.
- Install the fuel injector return line clip (1) to the injector.
- Install the fuel injector return line fitting (2) to the injector.
- Perform the above 2 steps for the other 3 fuel injectors.
- Install the fuel rail pressure sensor electrical connector bracket to the stud.
- Install the bracket bolt and nut.
- Position the transmission fluid fill tube and install the upper nut.
- Install the transmission tube support nut at the bell housing.
- Install the injector wire harness stud at the center lower right cylinder head.
- Install the EGR heater inlet hose/pipe retainer nut at the center of the lower right cylinder head.
- Install the EGR heater inlet hose/pipe retainer stud at the rear of the engine.
- Connect the engine harness electrical connectors to the fuel injectors.
- Install the engine wiring harness to the glow plugs.
- Install the glow plug harness bracket bolts (1) and nut (2).
- Install the glow plug nuts (3).
- Install the EGR cooler tube. Refer to Exhaust Gas Recirculation Valve Cooler Replacement .
Notice: Refer to Fastener Notice in the Preface section.
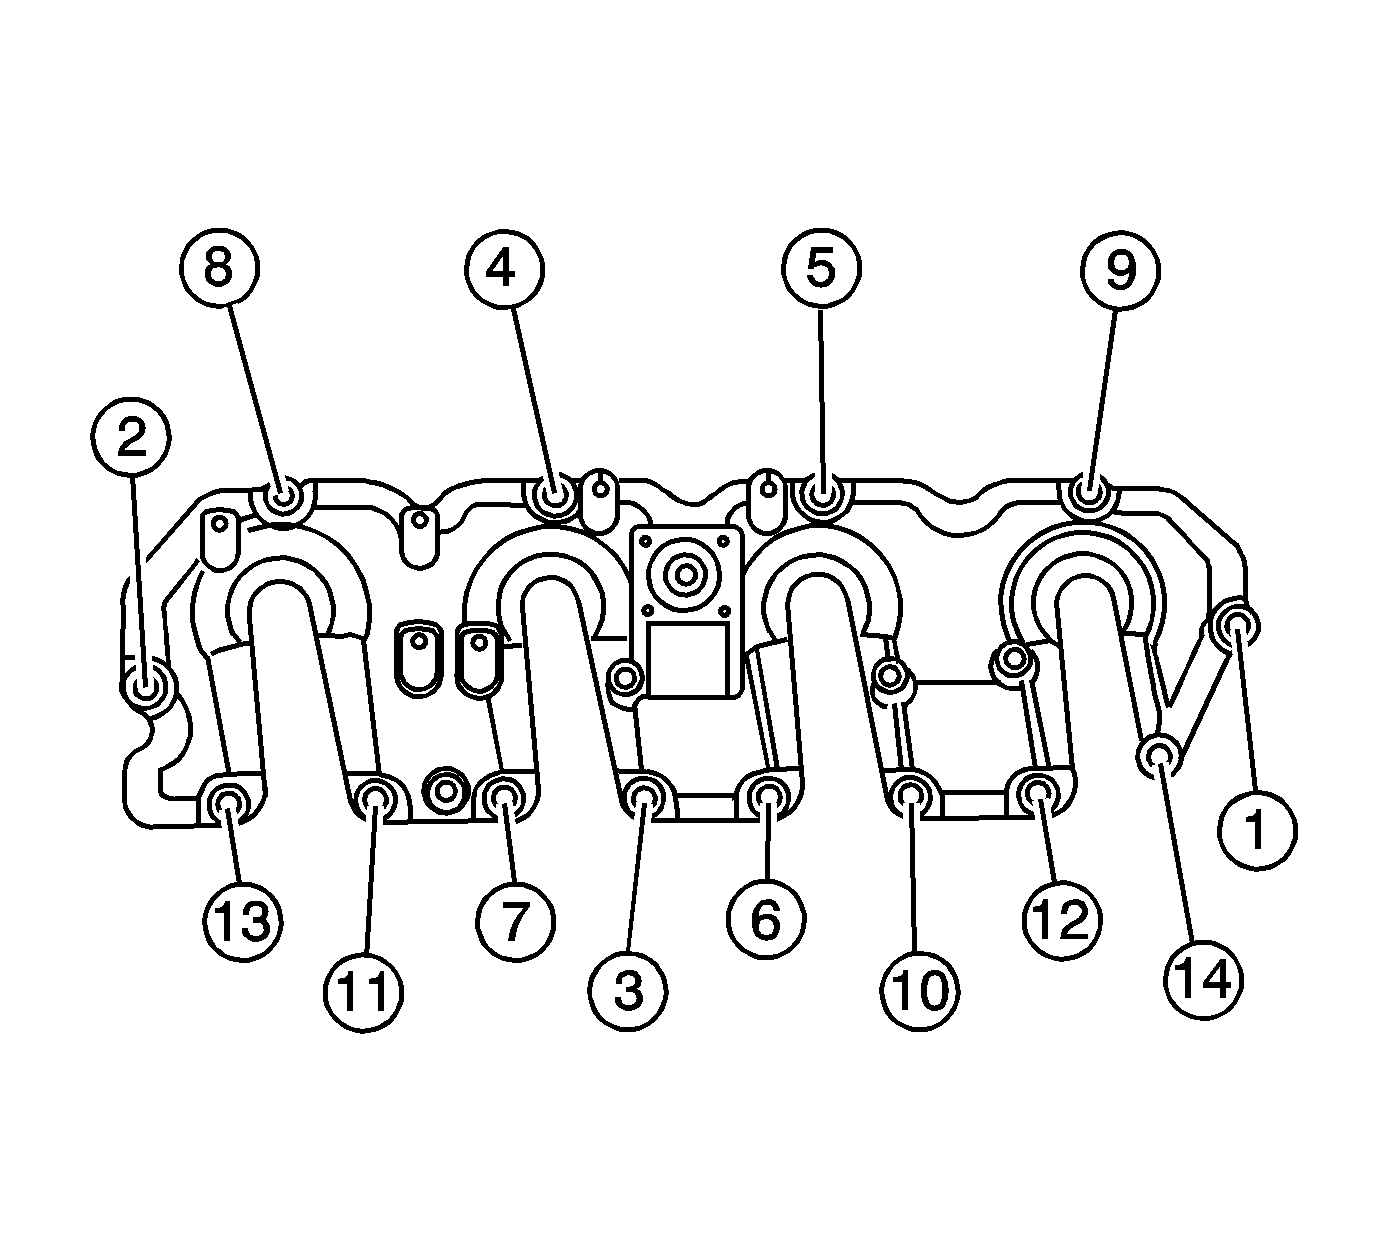
Tighten
Tighten the bolts in the sequence shown to 8 N·m (71 lb in).
Notice: Ensure proper torquing of the fuel injector line. An under-torqued fuel injector line will not seal properly and an over-torqued fuel injector line may damage the fuel injector fitting. An improperly sealed or damaged fuel injector line or fuel injector fitting will cause a fuel leak.
Tighten
Tighten the pipes to 41 N·m (30 lb ft).
Tighten
Tighten the bolts to 10 N·m (89 lb in).
Tighten
Tighten the bolt/nut to 10 N·m (89 lb in).
Tighten
Tighten the nut to 25 N·m (18 lb ft).
Tighten
Tighten the nut to 25 N·m (18 lb ft).
Tighten
Tighten the stud to N·m ( lb ft).
Tighten
Tighten the bolts to 10 N·m (89 lb in).
Tighten
Tighten the nuts to 2 N·m (18 lb in).
