For 1990-2009 cars only
Removal Procedure
- Raise the vehicle. Refer to Lifting and Jacking the Vehicle .
- Remove the transfer case from the vehicle. Refer to Transfer Case Assembly Replacement .
- Remove the mounting bolts from the adapter to the transmission.
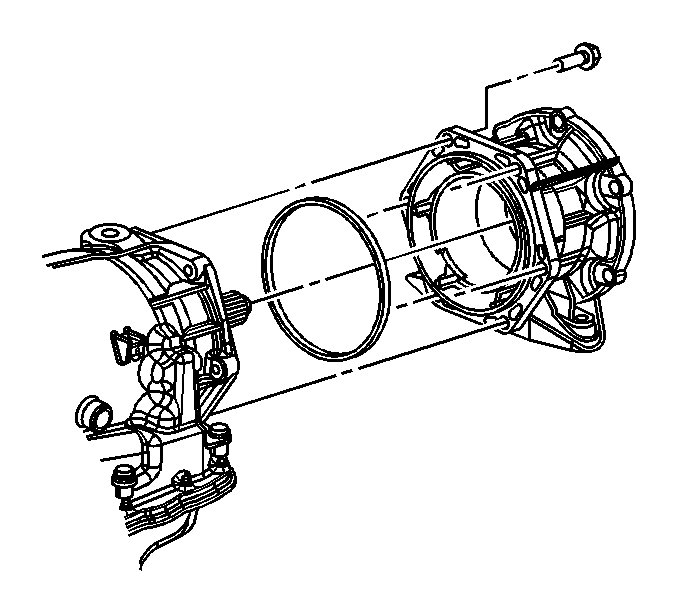
- Remove the adapter from the transmission.
- Remove the seal between the transfer case and the adapter.
- Remove the transfer case to the adapter gasket.
Installation Procedure
- Install the new seal on the adapter.
- Install the adapter to the transmission.
- Install the adapter mounting bolts to the transmission.
- Install the new gasket to the adapter.
- Install the transfer case to the adapter. Refer to Transfer Case Assembly Replacement .
- Install the transmission support crossmember. Refer to Transmission Support Crossmember Replacement .
- Remove the transmission jack from the transmission.
- Check the fluid level of the transfer case. Refer to Transfer Case Fluid Replacement .
- Lower the vehicle. Refer to Lifting and Jacking the Vehicle .
Important: Always use a new gasket and seal for the adapter. Do not use any type of sealant or adhesive in place of or with the gasket or the seal.
Important: The transfer case adapter must be installed so that the adapter is evenly seated to the transmission before installing the retaining nuts.
Notice: Refer to Fastener Notice in the Preface section.
Tighten
Tighten the mounting bolts to 50 N·m (37 lb ft).
Important: The locating tab on the gasket should always be pointing up.
