For 1990-2009 cars only
Installation Procedure
- Lubricate a new TV cable O-ring (1) with A/T fluid.
- Install the new O-ring to the TV cable (2).
- Install the TV cable to the transmission case (3).
- Measure the accumulator piston outer diameter and accumulator spring length before installation. Refer to Accumulator Piston and Spring Specifications . Replace as necessary.
- Lubricate the following components with A/T fluid:
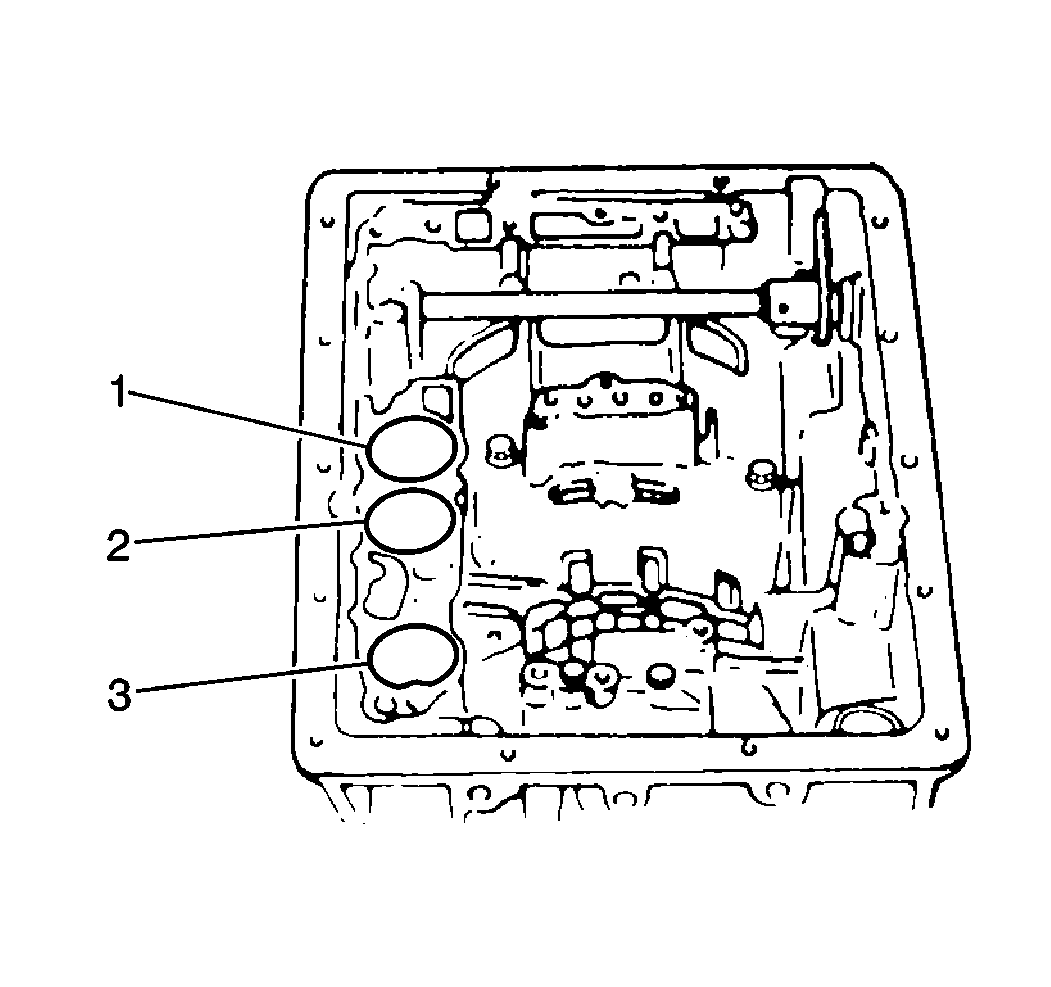
- Install the new O-rings to the accumulator pistons (1,3,4).
- Install the accumulator springs.
- Install the accumulator pistons to the transmission case (1,2,3).
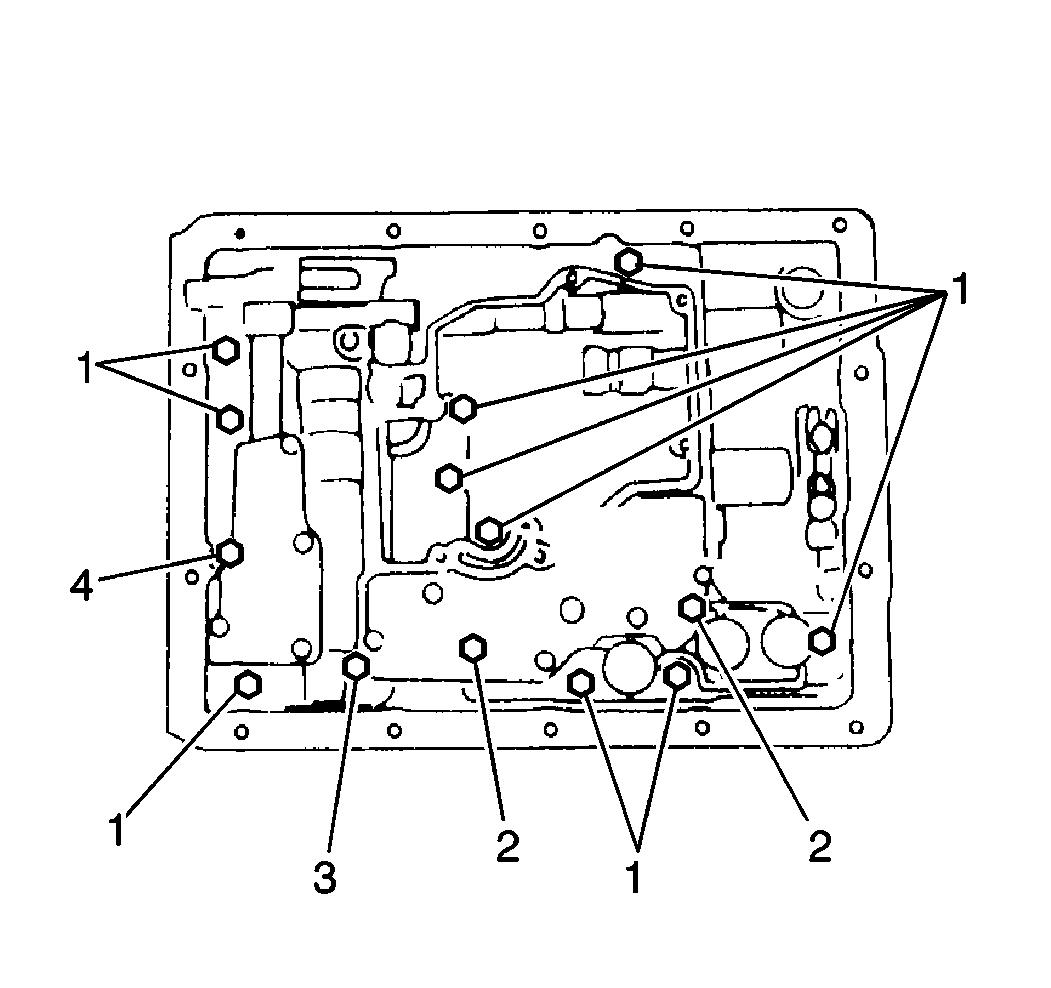
- Install the valve body to the transmission case.
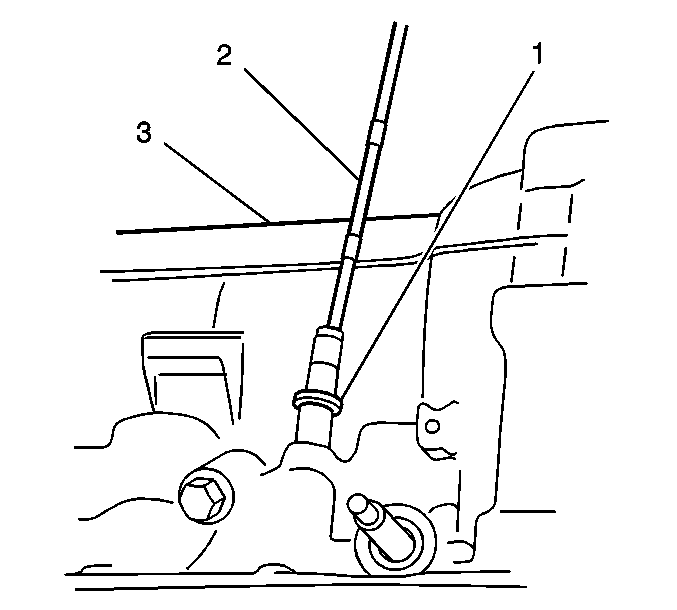
- Slowly lift the valve body in order to install the TV cable to the cam.
- Inspect that the accumulator pistons are fully seated.
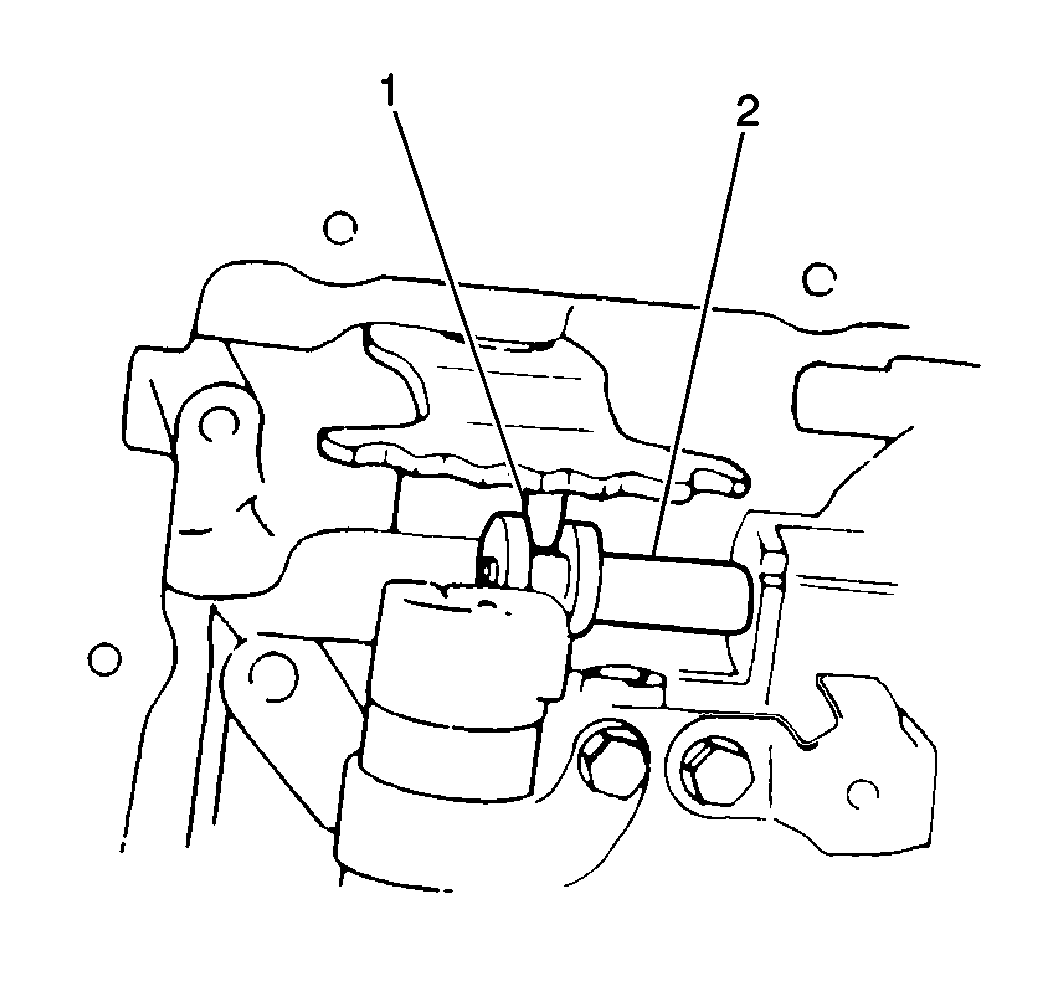
- Match the manual shift lever pin (1) with the manual valve groove.
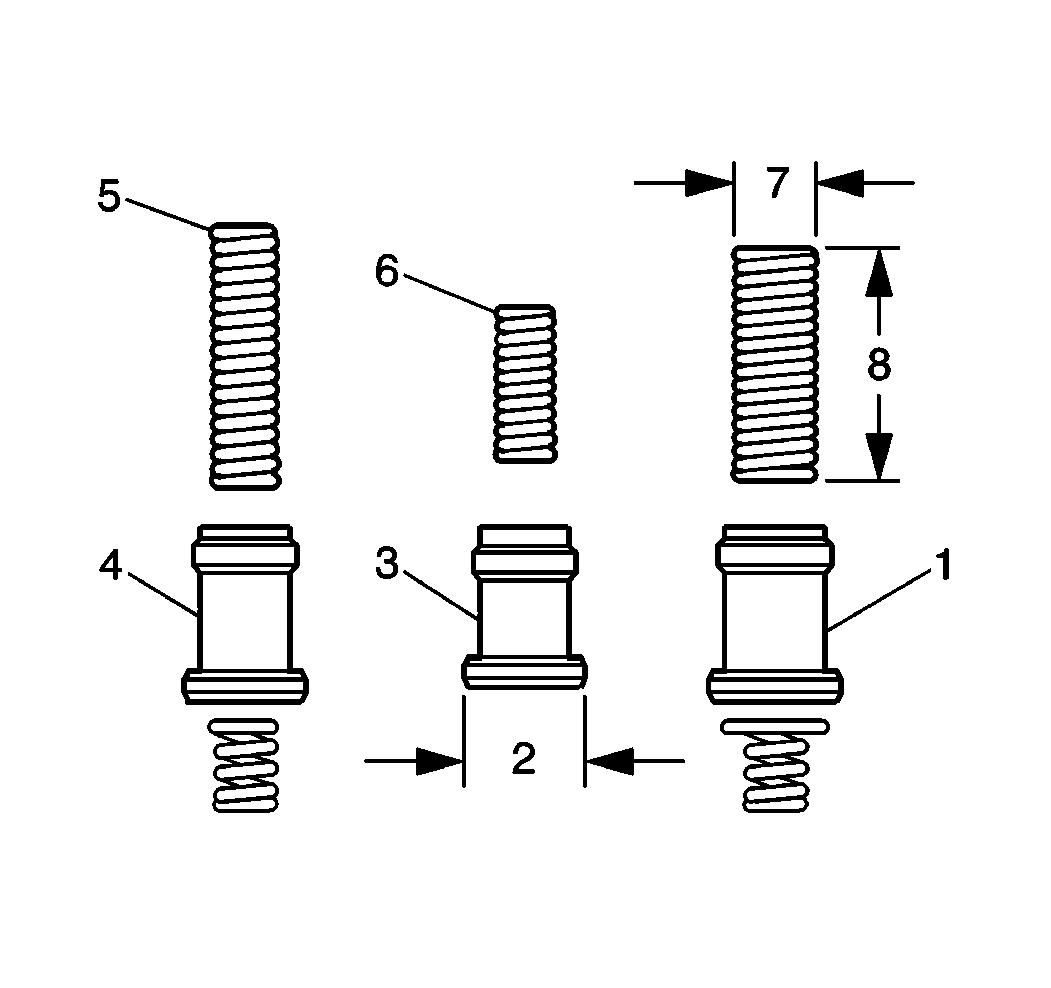
- Use 14 valve body bolts of the following lengths:
- Install the 14 valve body bolts according to the following lengths:
- Lubricate a new solenoid wiring harness grommet O-ring with A/T fluid.
- Install the new O-ring to the solenoid wiring harness grommet.
- Install the solenoid wiring harness to the transmission case.
- Install the solenoid wiring harness bolt. Refer to Accumulator Piston and Spring Specifications .
| • | The new piston O-rings |
| • | The accumulator springs |
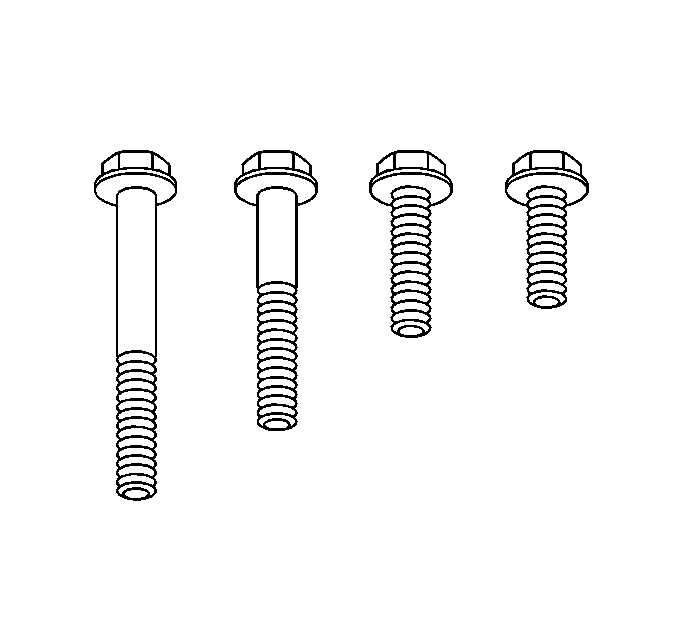
| • | 60.0 mm (2.36 in) bolt |
| • | 47.0 mm (1.85 in) bolts |
| • | 30.0 mm (1.18 in) bolts |
| • | 25.0 mm (0.98 in) bolt |
Notice: Use the correct fastener in the correct location. Replacement fasteners must be the correct part number for that application. Fasteners requiring replacement or fasteners requiring the use of thread locking compound or sealant are identified in the service procedure. Do not use paints, lubricants, or corrosion inhibitors on fasteners or fastener joint surfaces unless specified. These coatings affect fastener torque and joint clamping force and may damage the fastener. Use the correct tightening sequence and specifications when installing fasteners in order to avoid damage to parts and systems.
| • | 10 30.0 mm (1.18 in) bolts (1) |
| • | 2 47.0 mm (1.85 in) bolts (2) |
| • | 1 25.0 mm (0.98 in) bolt (3) |
| • | 1 60.0 mm (2.36 in) bolt (4) |
Tighten
Tighten all valve body bolts to 10 N·m (89 lb in).
