For 1990-2009 cars only
Tools Required
| • | J 34673 Flat Gage Bar |
| • | J 9617 Pump Seal Installer |
| • | J 36850 Transjel® Transmission Assembly Lubricant |
Removal Procedure
- Remove the oil pump seal from the oil pump body.
- Remove the oil pump thrust washer and bearing from the rear of the oil pump cover.
- Remove the oil pump seal rings (2).
- Remove the 6 oil pump body bolts from the oil pump cover.
- Remove the oil pump body.
- Remove the input shaft oil seal from the oil pump body.
Cleaning and Inspection Procedure
- Clean all oil pump components.
- Allow the components to air dry.
- Inspect the following oil pump components for excessive damage or wear. Replace as needed:
- Inspect the following oil pump components for distortion or warp. Replace as needed:
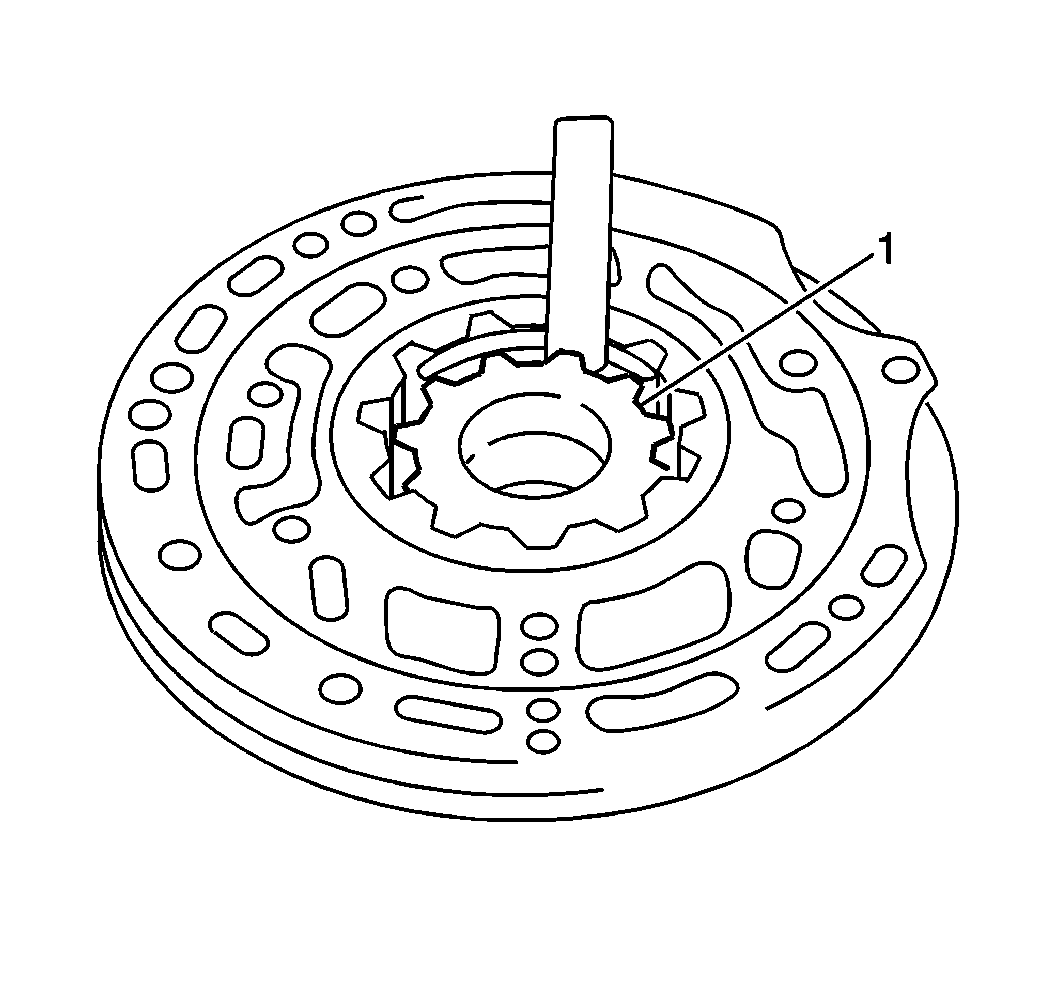
- Perform the following steps in order to measure the oil pump body-to-driven gear clearance:
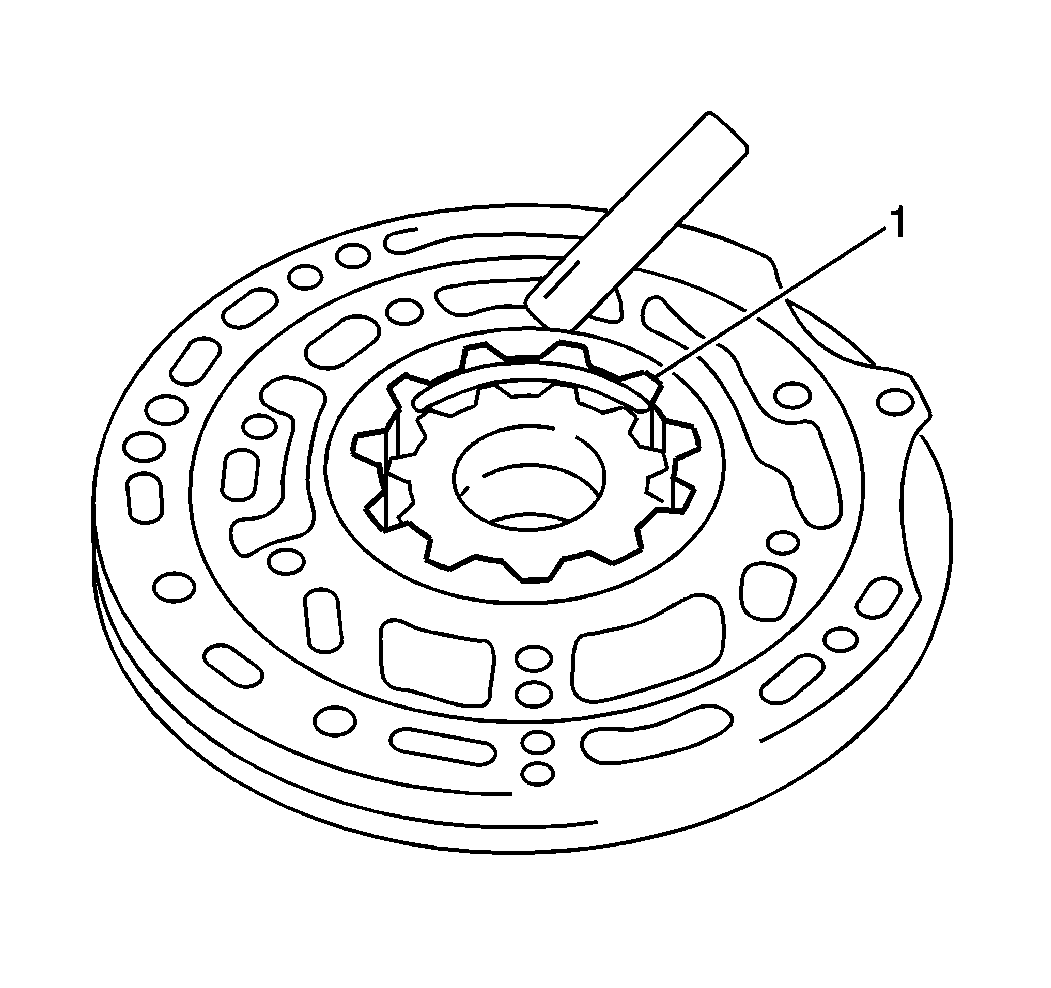
- Perform the following steps in order to measure the oil pump drive gear tip clearance (1):
- Measure the oil pump drive gear and driven gear side clearance using a J 34673 and a feeler gage:
| • | The drive gear |
| • | The driven gear (1) |
| • | The cover |
| • | The body |
| • | The stator oil pump cover |
| 5.1. | Using a feeler gage, measure the clearance on one side. |
Specification
| • | Oil pump body-to-driven gear standard clearance: 0.07-0.15 mm (0.0028-0.0059 in) |
| • | Oil pump body-to-driven gear maximum clearance: 0.30 mm (0.118 in) |
| 5.2. | Push the oil pump driven gear to one side of the oil pump body while measuring the clearance on the opposite side. |
| 5.3. | Replace the oil pump if the clearance exceeds the maximum specified. |
| 6.1. | Using a feeler gage, measure the clearance between the oil pump drive gear teeth and crescent. |
Specification
| • | Oil pump drive gear tip standard clearance: 0.11-0.14 mm (0.0044-0.0055 in) |
| • | Oil pump drive gear tip maximum clearance: 0.30 mm (0.118 in) |
| 6.2. | Replace the oil pump if the clearance exceeds the maximum specified. |
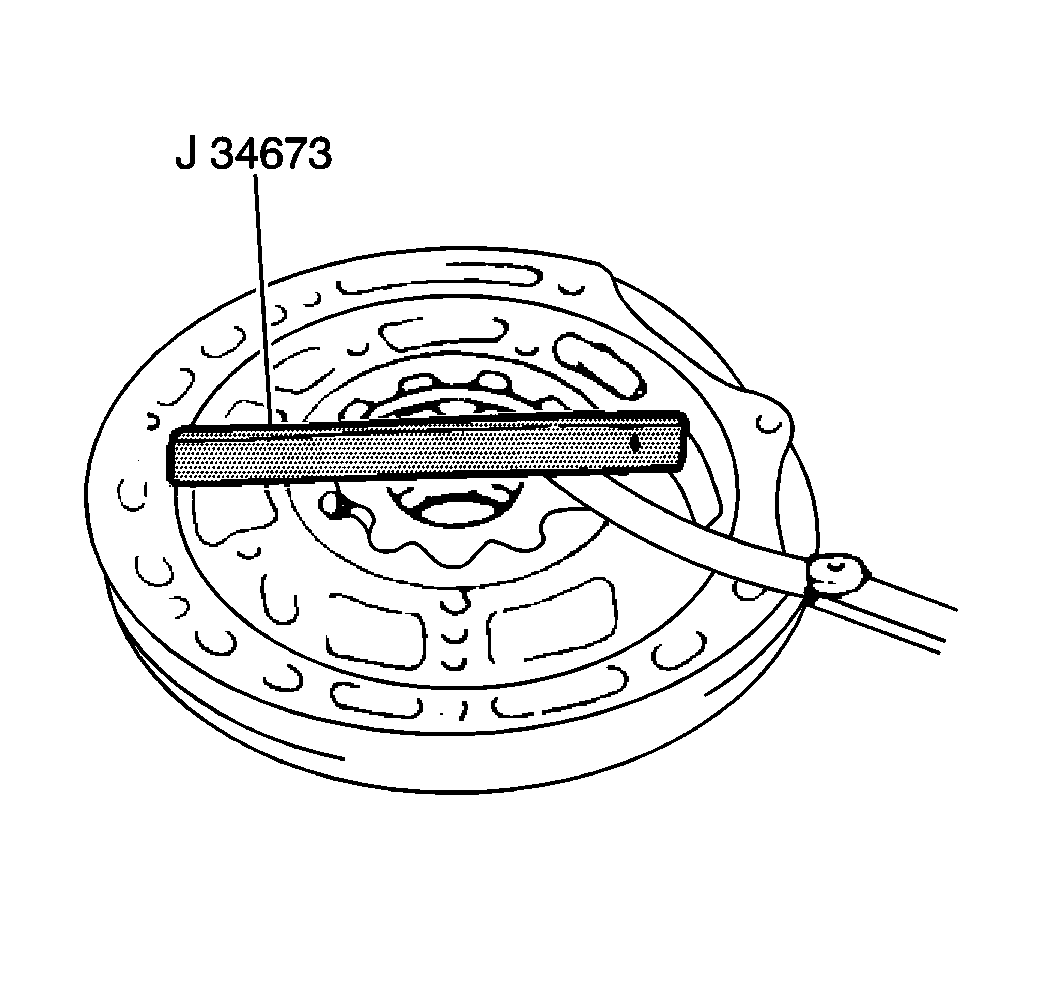
| 7.1. | Place the J 34673 across the oil pump body. |
| 7.2. | Measure the clearance between the drive gear and the driven gear and the oil pump body mating surface. |
Specification
| • | Oil pump drive gear and driven gear side standard clearance: 0.02-0.05 mm (0.0008-0.0019 in) |
| • | Oil pump drive gear tip maximum clearance: 0.10 mm (0.0039 in) |
| 7.3. | Replace the oil pump body if the clearance exceeds the maximum specified. |
Installation Procedure
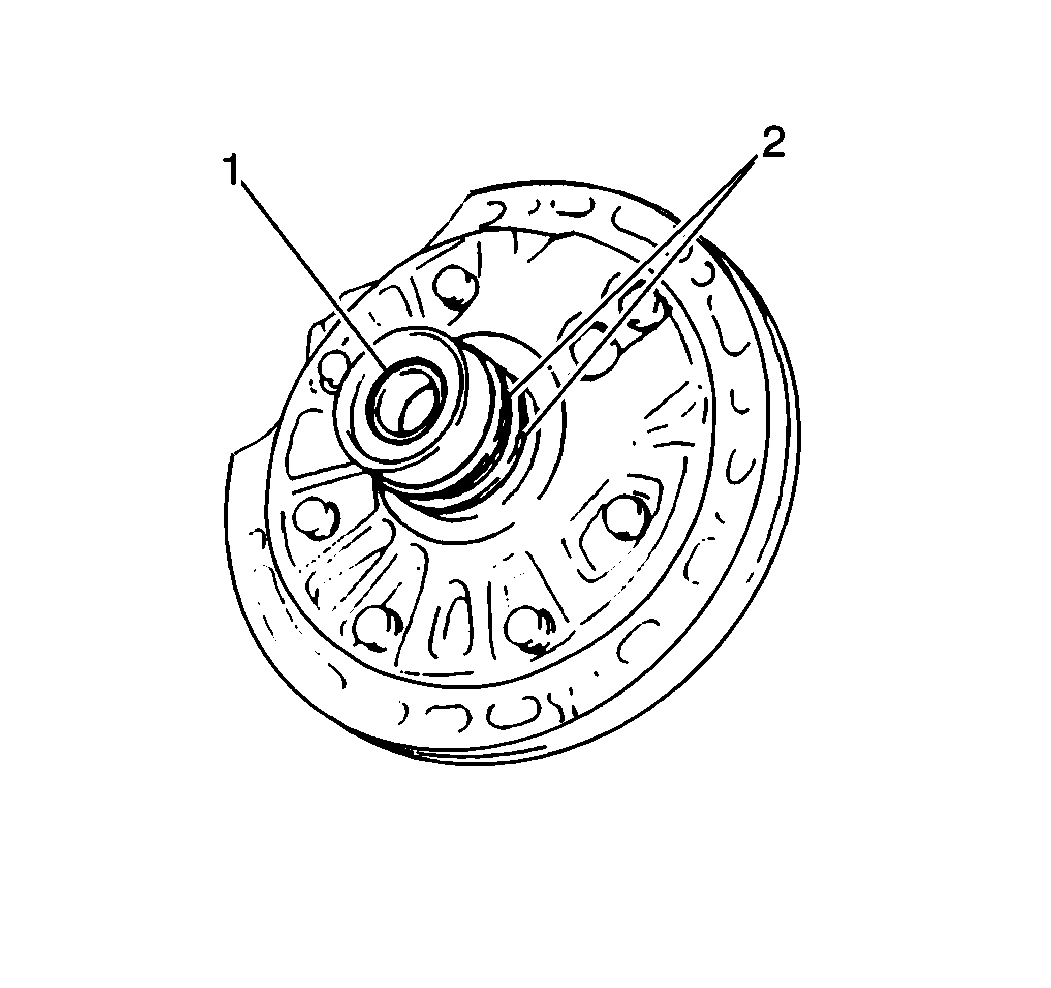
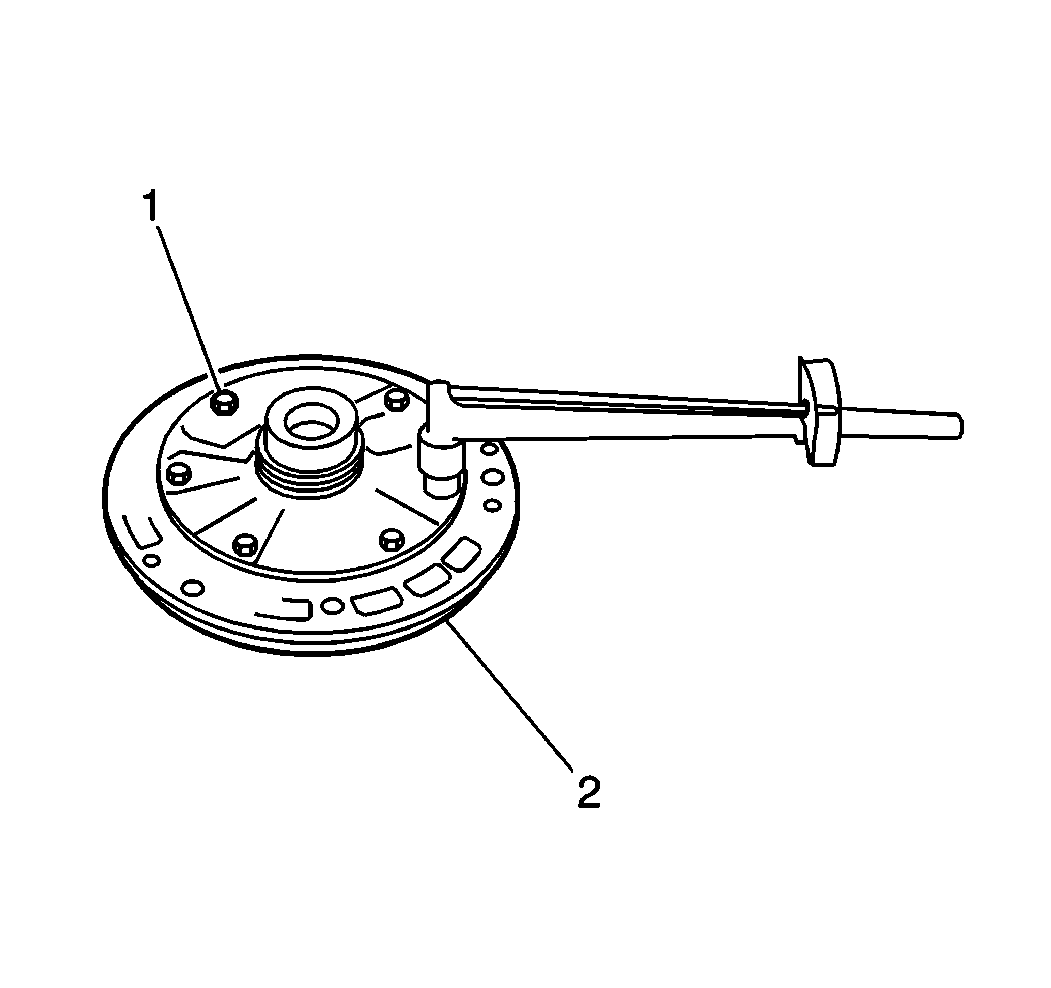
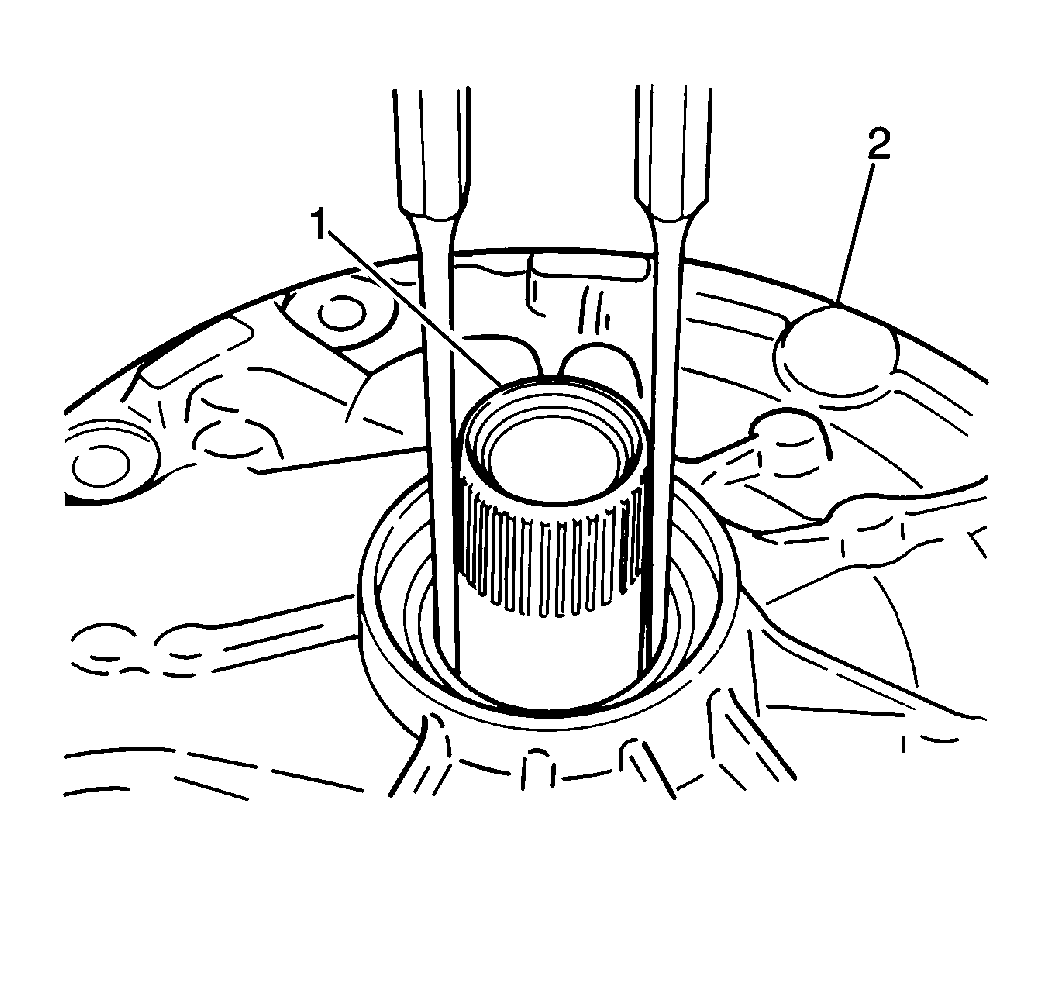
- Install a new input shaft oil seal into the oil pump body (1) using the J 9617 and a hammer.
- Apply J 36850 to the seal lip.
- Install the oil pump cover (2) on the oil pump body.
- Install the cover bolts.
- Apply J 36850 to the oil pump thrust washer and bearing.
- Install the oil pump thrust washer and bearing onto the rear of the cover.
- Install 2 new seal rings onto the cover.
- Install a new oil pump seal onto the fluid pump body.
- Inspect the drive gear as follows for smooth rotation:
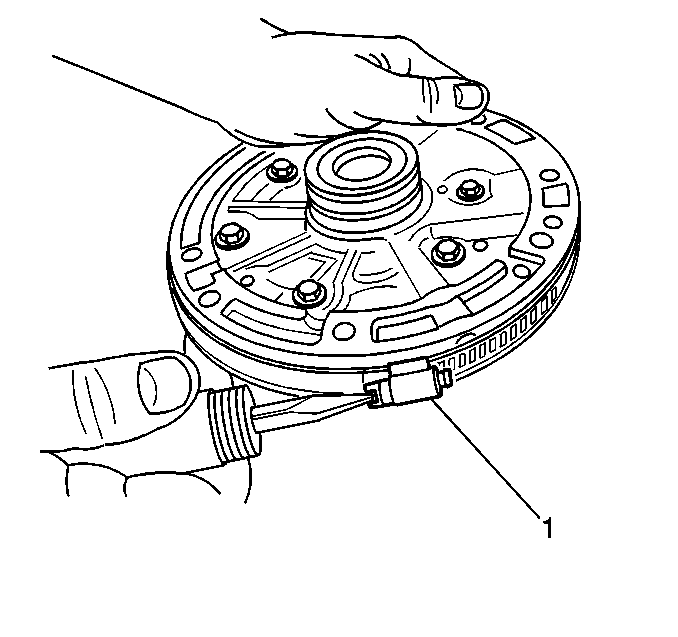
- Install a hose clamp (1) in order to ensure correct alignment.
Notice: Use the correct fastener in the correct location. Replacement fasteners must be the correct part number for that application. Fasteners requiring replacement or fasteners requiring the use of thread locking compound or sealant are identified in the service procedure. Do not use paints, lubricants, or corrosion inhibitors on fasteners or fastener joint surfaces unless specified. These coatings affect fastener torque and joint clamping force and may damage the fastener. Use the correct tightening sequence and specifications when installing fasteners in order to avoid damage to parts and systems.
Tighten
Tighten the bolts to 9 N·m (80 lb in).
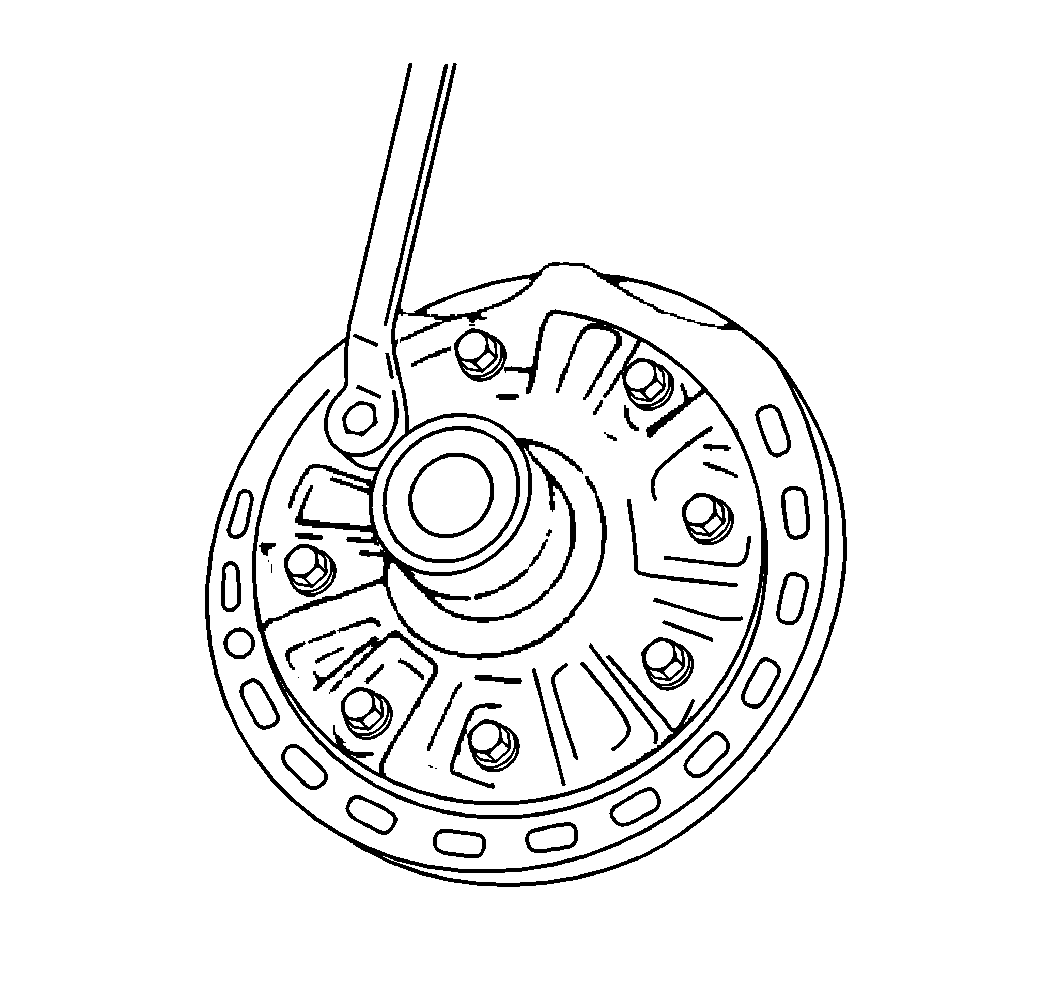
| 9.1. | Insert 2 small drift punches into the oil pump body (2) while turning the drive gear. |
| 9.2. | If the rotation is not smooth, disassemble the pump. |