Tools Required
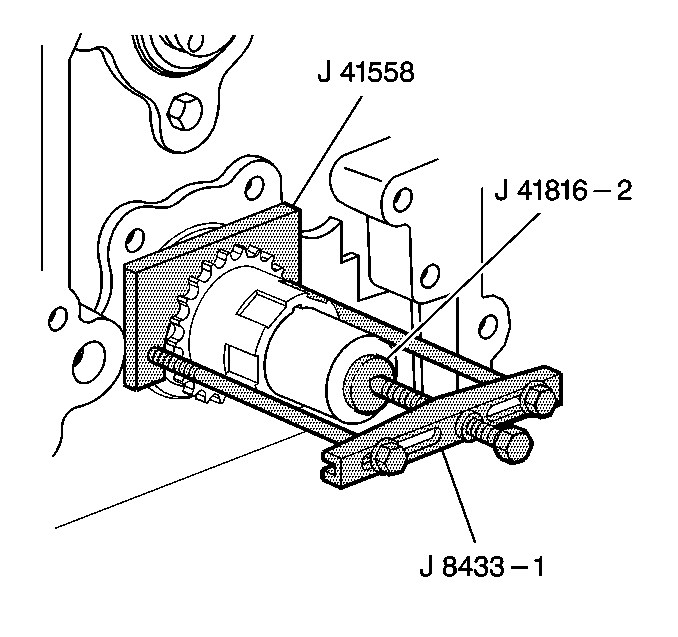
| • | J 8433 Pulley Puller |
| • | J 41816-2 Crankshaft End Protector |
| • | J 41558 Crankshaft Sprocket Remover |
| • | J 41665 Crankshaft Balancer and Sprocket Installer |
Removal Procedure
- Remove the oil pump. Refer to Oil Pump, Screen, and Crankshaft Oil Deflector Replacement .
- Rotate the crankshaft until the timing marks on the crankshaft and the camshaft sprockets are aligned.
- Remove the camshaft sprocket bolts.
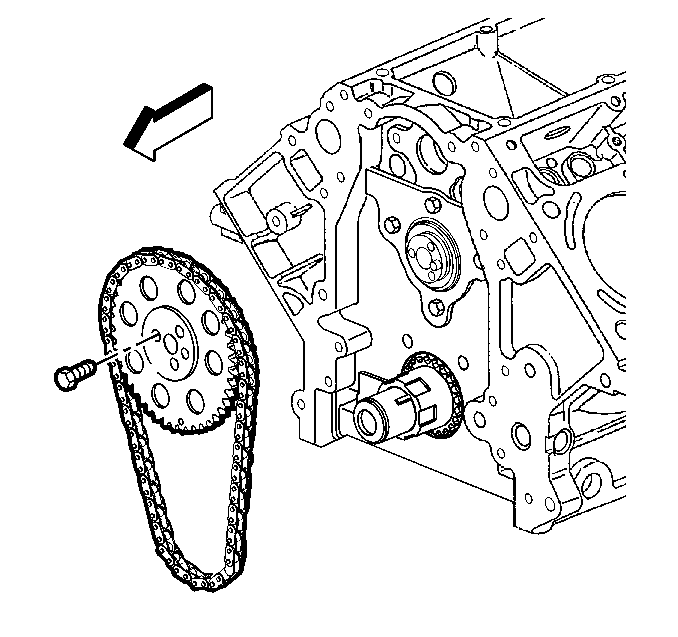
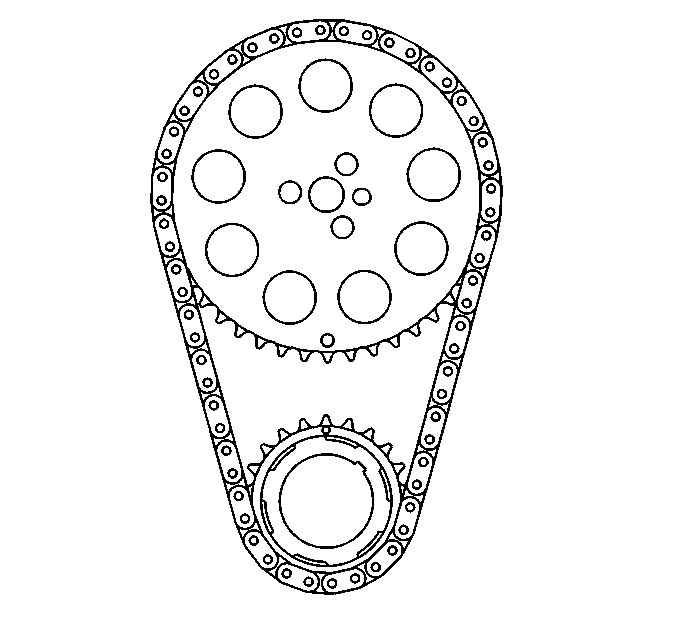
- Remove the camshaft sprocket and timing chain.
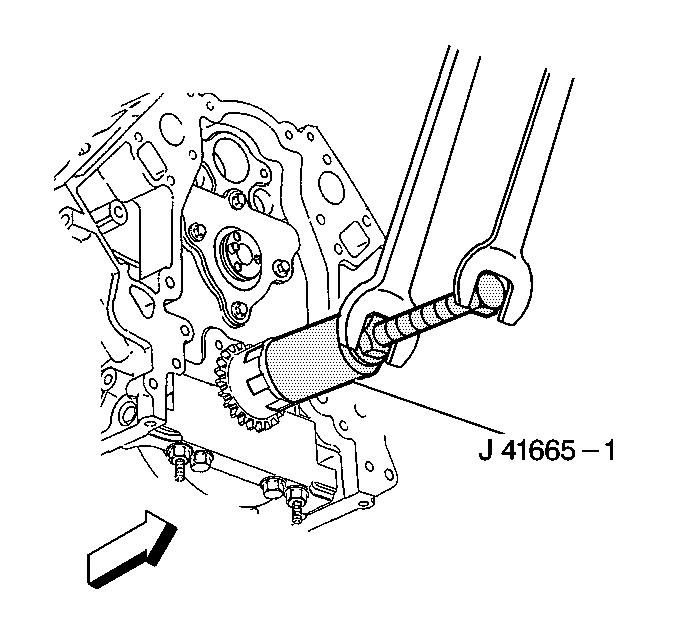
- Use the J 8433 , the J 41816-2 and the J 41558 in order to remove the crankshaft sprocket.
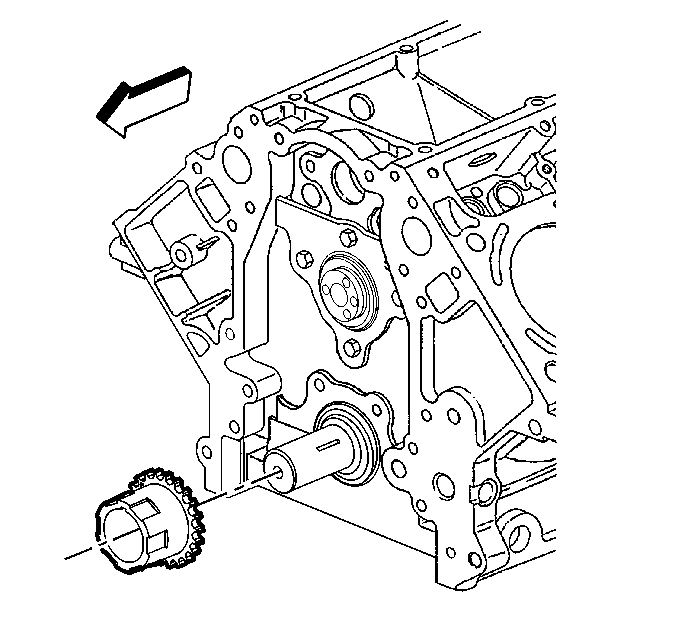
- Remove the crankshaft sprocket.
- Remove the crankshaft sprocket key, if required.
- Clean and inspect the timing chain and sprockets. Refer to Camshaft Timing Chain and Sprocket Cleaning and Inspection .
Notice: Do not turn the crankshaft assembly after the timing chain has been removed in order to prevent damage to the piston assemblies or the valves.
Installation Procedure
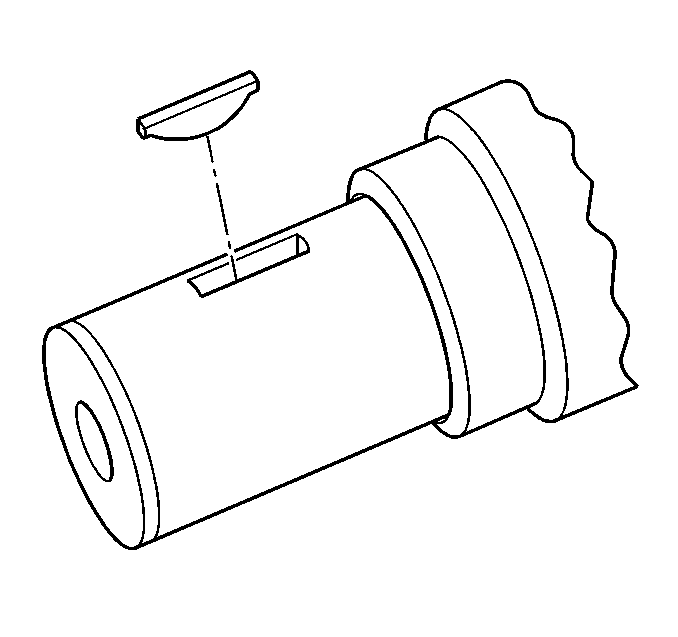
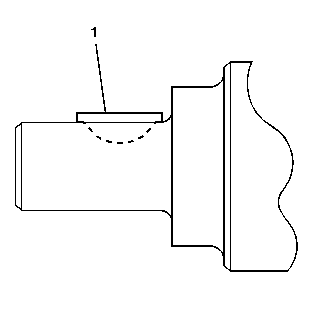
- Install the key into the crankshaft keyway, if previously removed.
- Tap the key (1) into the keyway until both ends of the key bottom onto the crankshaft.
- Install the crankshaft sprocket onto the front of the crankshaft. Align the crankshaft key with the crankshaft sprocket keyway.
- Use the J 41665 in order to install the crankshaft sprocket.
- Rotate the crankshaft sprocket until the alignment mark is in the 12 o'clock position.
- Install the camshaft sprocket and timing chain.
- If necessary, rotate the camshaft or crankshaft sprockets in order to align the timing marks.
- Install the camshaft sprocket bolts.
- Install the oil pump. Refer to Oil Pump, Screen, and Crankshaft Oil Deflector Replacement .
Install the sprocket onto the crankshaft until fully seated against the crankshaft flange.
Important:
• Properly locate the camshaft sprocket locating pin with the camshaft
sprocket alignment hole. • The sprocket teeth and timing chain must mesh. • The camshaft and the crankshaft sprocket alignment marks MUST be aligned
properly. Locate the camshaft sprocket alignment mark in the 6 o'clock position.
Notice: Use the correct fastener in the correct location. Replacement fasteners must be the correct part number for that application. Fasteners requiring replacement or fasteners requiring the use of thread locking compound or sealant are identified in the service procedure. Do not use paints, lubricants, or corrosion inhibitors on fasteners or fastener joint surfaces unless specified. These coatings affect fastener torque and joint clamping force and may damage the fastener. Use the correct tightening sequence and specifications when installing fasteners in order to avoid damage to parts and systems.
Tighten
Tighten the camshaft sprocket bolts to 35 N·m (26 lb ft).
