For 1990-2009 cars only
Water Pump Replacement 4.3L Engine
Tools Required
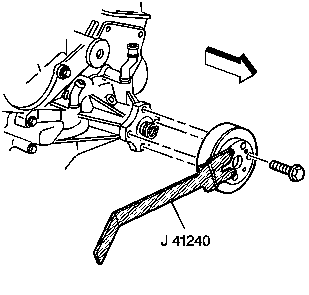
J 41240 Fan Clutch Remover and Installer
Removal Procedure
- Remove the air cleaner assembly. Refer to Air Cleaner Assembly Replacement in Engine Controls - 4.3L.
- Remove the air cleaner outlet resonator duct. Refer to Air Cleaner Outlet Resonator Replacement in Engine Controls - 4.3L.
- Drain the cooling system. Refer to Cooling System Draining and Filling .
- Remove the cooling fan. Refer to Fan Replacement .
- Remove the drive belt. Refer to Drive Belt Replacement in Engine Mechanical - 4.3L.
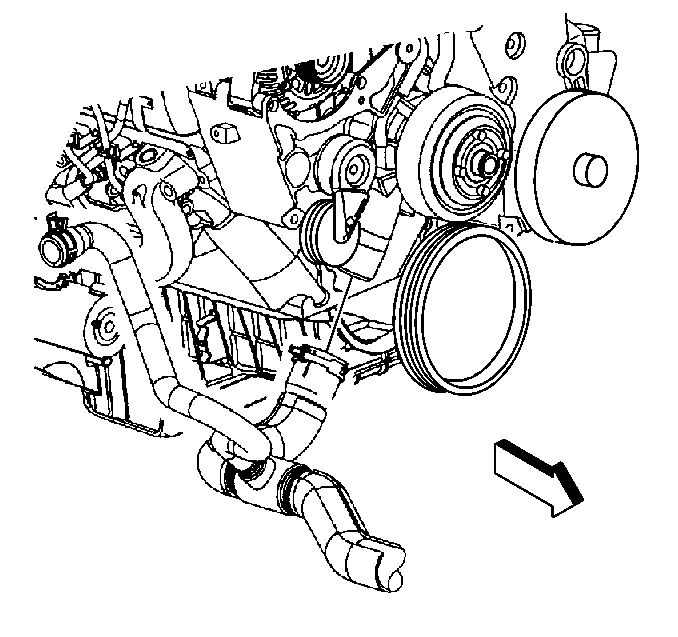
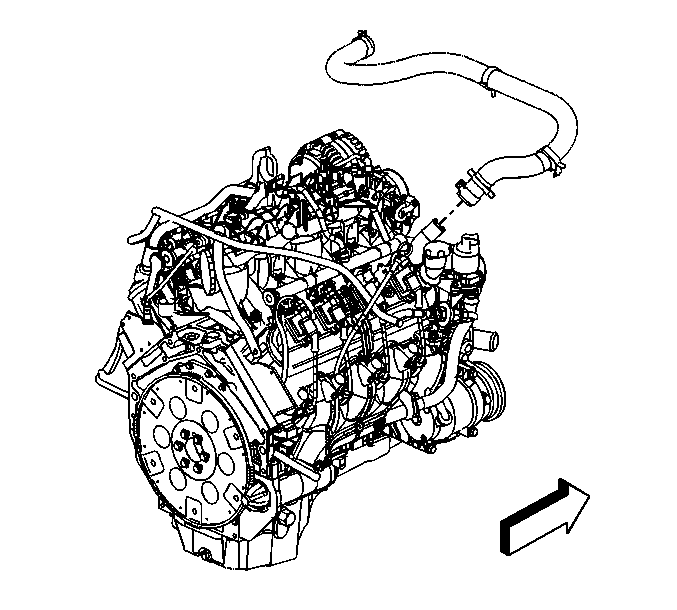
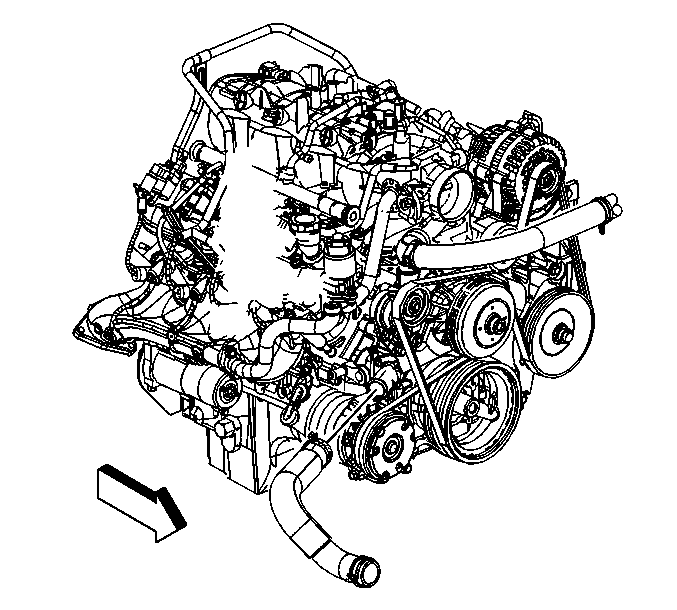
- Reposition the radiator outlet hose clamps at the surge tank and water pump.
- Remove the radiator outlet hose from the surge tank.
- Remove the radiator outlet hose from the water pump.
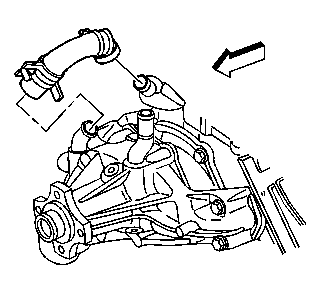
- Reposition the water pump inlet hose clamps.
- Remove the water pump inlet hose.
- Using J 41240 to hold the water pump pulley, remove the water pump pulley bolts.
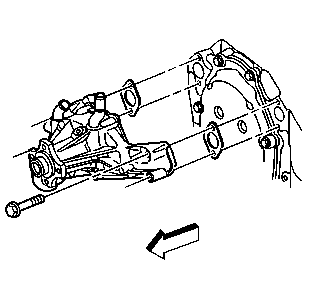
- Remove the water pump bolts.
- Remove the water pump.
- Remove and discard the water pump gaskets.
- Clean and inspect the water pump, if necessary. Refer to Water Pump Cleaning and Inspection in Engine Mechanical - 4.3L. Unit Repair.
Installation Procedure
- If reusing the fasteners, apply sealant GM P/N 12346004 (Canadian P/N 10953480), or equivalent to the threads of the water pump bolts.
- Install NEW water pump gaskets and the water pump.
- Install the water pump bolts.
- Using J 41240 to hold the water pump pulley, install the water pump pulley bolts.
- Install the water pump inlet hose.
- Position the water pump inlet hose clamps.
- Install the radiator outlet hose to the water pump.
- Install the radiator outlet hose to the surge tank.
- Position the radiator outlet hose clamps at the surge tank and water pump.
- Install the drive belt. Refer to Drive Belt Replacement in Engine Mechanical - 4.3L.
- Install the cooling fan. Refer to Fan Clutch Replacement .
- Install the air cleaner outlet resonator duct. Refer to Air Cleaner Outlet Resonator Replacement in Engine Controls - 4.3L.
- Install the air cleaner assembly. Refer to Air Cleaner Assembly Replacement in Engine Controls - 4.3L.
- Fill the cooling system. Refer to Cooling System Draining and Filling .
- Inspect the cooling system for leaks.

Notice: Refer to Fastener Notice in the Preface section.
Tighten
Tighten the water pump bolts to 45 N·m
(33 lb ft).

Tighten
Tighten the water pump pulley bolts to 25 N·m
(18 lb ft).

Important: After assembly, the hose clamp tangs (water pump end) must point forward and the upper tang should be level with the outside diameter of the water pump inlet hose.

Water Pump Replacement 4.8L, 5.3L, and 6.0L Engines
Removal Procedure
- Drain the cooling system. Refer to Cooling System Draining and Filling .
- Remove the air cleaner assembly. Refer to Air Cleaner Assembly Replacement in Engine Controls - 4.8L, 5.3L and 6.0L.
- Remove the fan clutch. Refer to Fan Clutch Replacement .
- Remove the accessory drive belt. Refer to Drive Belt Replacement - Accessory .
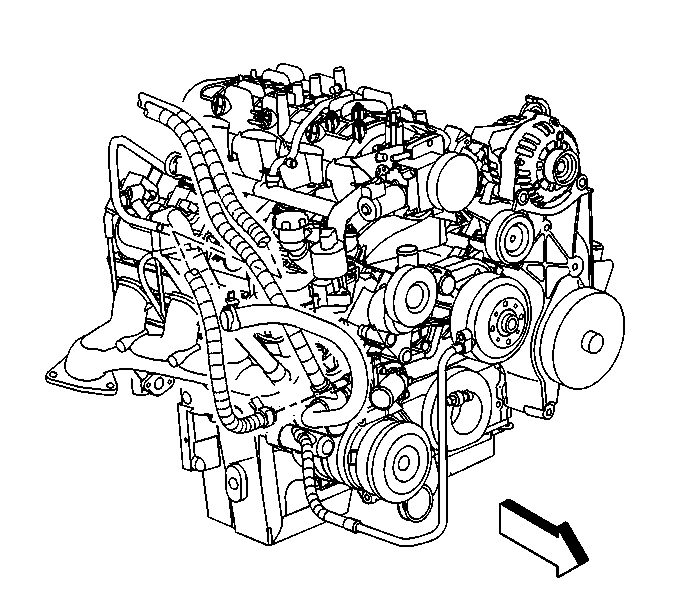
- Reposition the inlet hose clamp at the water pump.
- Remove the inlet hose from the water pump.
- Reposition the outlet hose clamp at the water pump.
- Remove the outlet hose from the water pump.
- Reposition the heater inlet hose clamp at the water pump.
- Remove the heater inlet hose from the water pump.
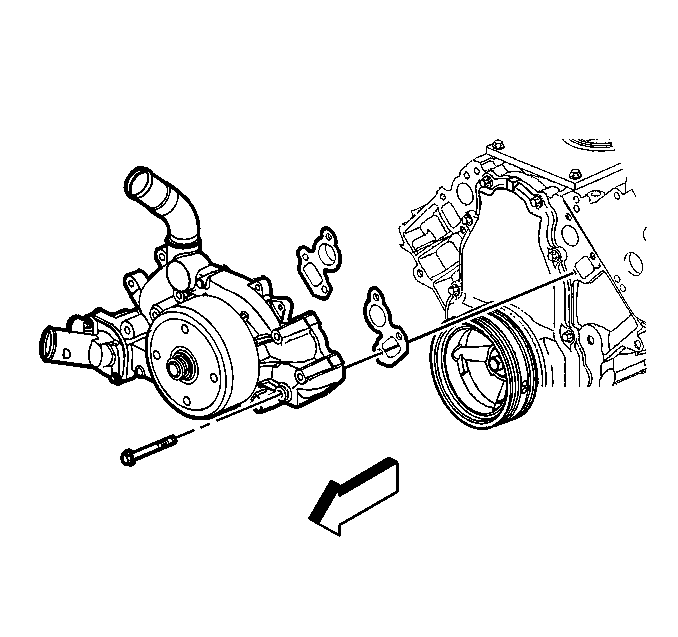
- Remove the water pump bolts.
- Remove the water pump and gaskets.
- Discard the water pump gaskets.
Installation Procedure
Important: All gaskets surfaces are to be free of oil or other foreign material during assembly.
- Install the water pump and NEW gaskets.
- Install the water pump bolts.
- Tighten the water pump bolts a first pass to 15 N·m (11 lb ft).
- Tighten the water pump bolts a final pass to 30 N·m (22 lb ft).
- Install the heater inlet hose to the water pump.
- Position the heater inlet hose clamp at the water pump.
- Install the outlet hose to the water pump.
- Position the outlet hose clamp at the water pump.
- Install the inlet hose to the water pump.
- Position the inlet hose clamp at the water pump.
- Install the accessory drive belt. Refer to Drive Belt Replacement - Accessory in Engine Mechanical - 4.8L, 5.3L, and 6.0L.
- Install the fan blade and clutch assembly. Refer to Fan Clutch Replacement .
- Install the air cleaner assembly. Refer to Air Cleaner Assembly Replacement in Engine Controls - 4.8L, 5.3L and 6.0L.
- Fill the cooling system. Refer to Cooling System Draining and Filling .
Notice: Refer to Fastener Notice in the Preface section.

Tighten


