For 1990-2009 cars only
Removal Procedure
- Remove the drivers knee bolster. Refer to Driver Knee Bolster Replacement in Instrument Panel, Gages, and Console.
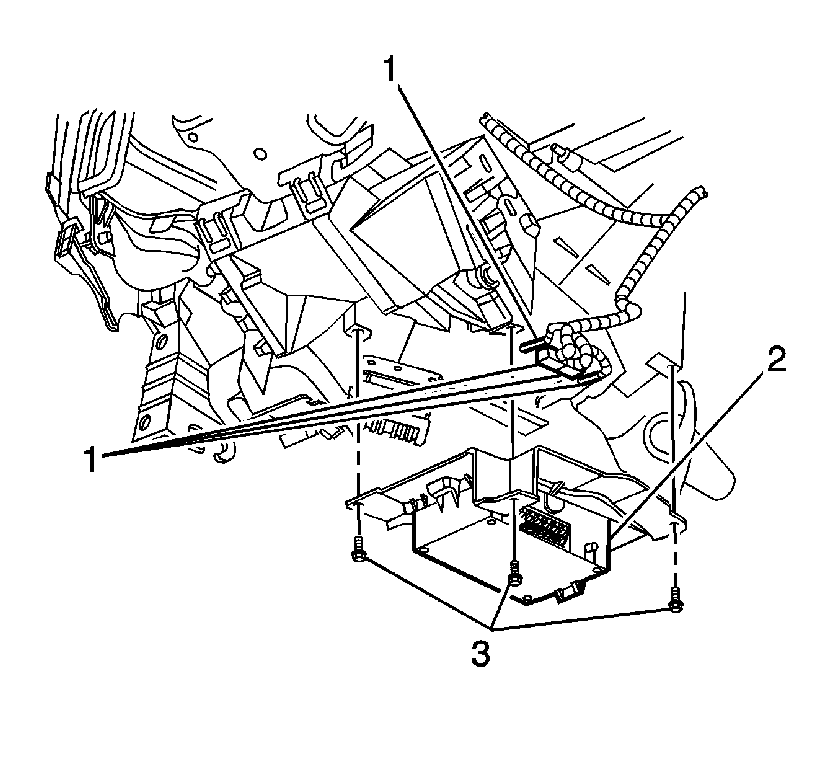
- Disconnect the coaxial cable and the electrical connectors (2) from the module.
- Remove the bolts (3) retaining the module bracket to the instrument panel (I/P).
- Remove the module and bracket (2) from the vehicle.
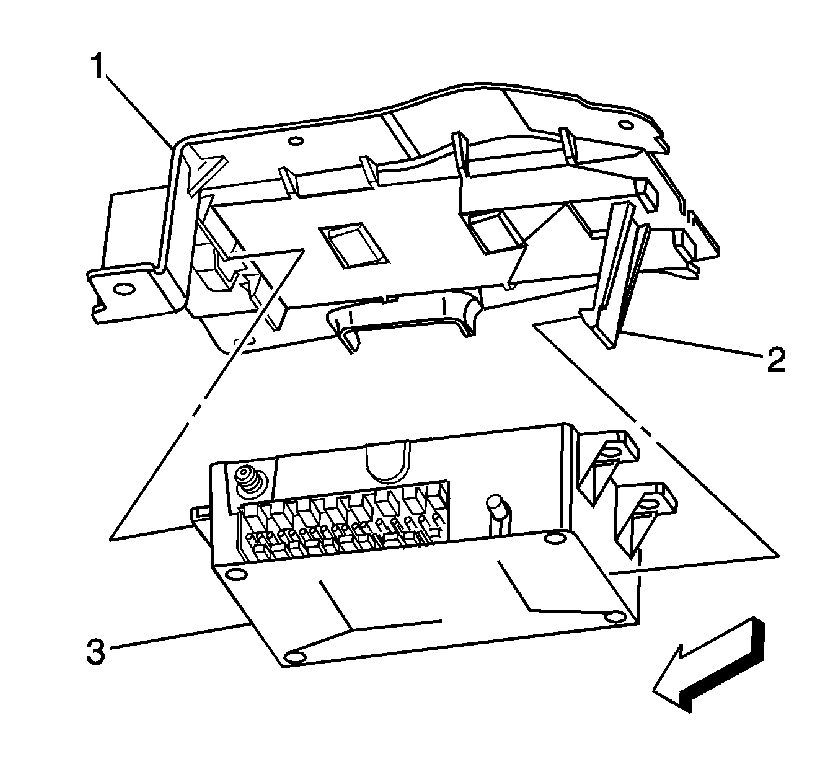
- Release the tab (2) on the mounting bracket and pull that end of the module (3) away from the bracket.
- Slide the module (3) out of the mounting bracket (1).
Important: Do not exchange the vehicle communication interface module with other vehicles. Each vehicle communication interface module has a specific station identification (STID) and electronic serial number (ESN). These identification numbers are stored in the General Motors vehicle history files by VIN and used by OnStar® and the National Cellular Telephone Network.
Installation Procedure
- Slide the module (3) into the mounting bracket (1).
- Push the module (3) towards the mounting bracket (1) at the end near the tab (2).
- Install the module and bracket (2) to the I/P.
- Install the bolts (3).
- Connect the coaxial cable and the electrical connectors (2) to the module.
- Install the drivers knee bolster. Refer to Driver Knee Bolster Replacement in Instrument Panel, Gages, and Console.
Push until the module (3) is seated in the mounting bracket (1).
Notice: Refer to Fastener Notice in the Preface section.
Tighten
Tighten the bolts (3) to 3 N·m (27 lb in).
