Tools Required
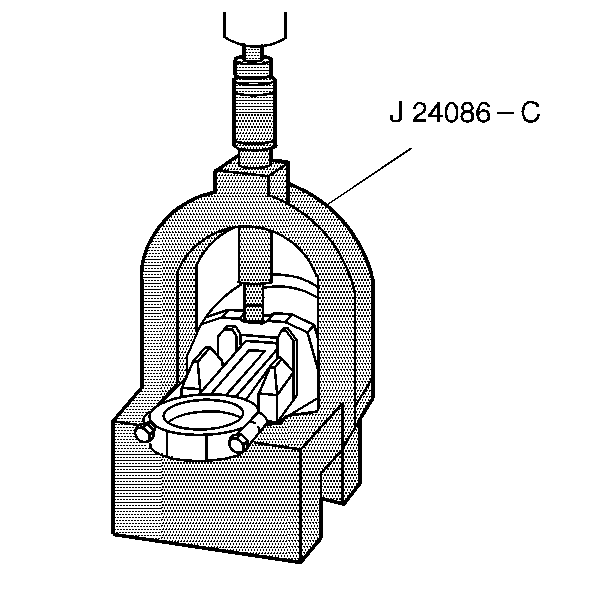
J 24086-C Piston Pin Remover/Installer
- Install the new piston pin and connecting rod assembly.
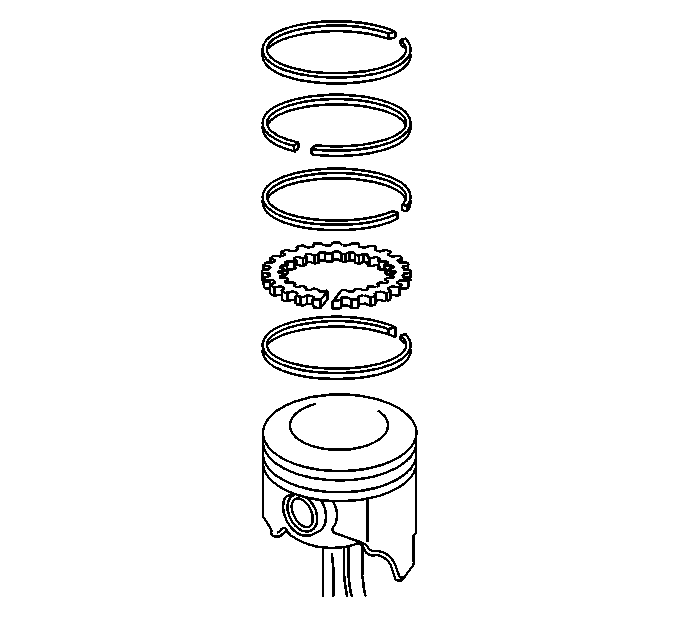
- Install the piston rings onto the piston.
- Space the compression piston ring end gaps 120 degrees apart.
- Space the oil control piston ring end gaps a minimum of 90 degrees apart.
Caution: Avoid contact with HOT components. Wear safety glasses and protective gloves to avoid personal injury.
Notice: Applying excessive heat to the connecting rod may damage or distort the rod. Rod temperature SHOULD NOT exceed 315°C (600°F). At this temperature the end of the connecting rod will turn a straw color upon visual inspection.
Notice: After the J 24086-C installer hub bottoms on the support assembly, DO NOT exceed 35,000 kPa (5,000 psi) or the tool may be damaged.
Important: When assembling the piston and connecting rod, the mark on the top of the piston must point to the front of the engine block. The left bank connecting rods should have the flange face toward the front of the engine block. The right bank connecting rods should have the flange face toward the rear of the engine block.
The new piston pin has an interference fit into the connecting rod and is full floating in the piston.| 1.1. | Lubricate the piston pin bores with clean engine oil. |
| 1.2. | Use a torch and apply MILD heat to the piston pin end of the connecting rod. |
| 1.3. | Use the J 24086-C in order to press the new piston pin into the piston and connecting rod assembly. |
| 1.4. | Inspect for the proper installation of the piston and piston pin. |
The piston must move freely on the new piston pin with no binding or interference.
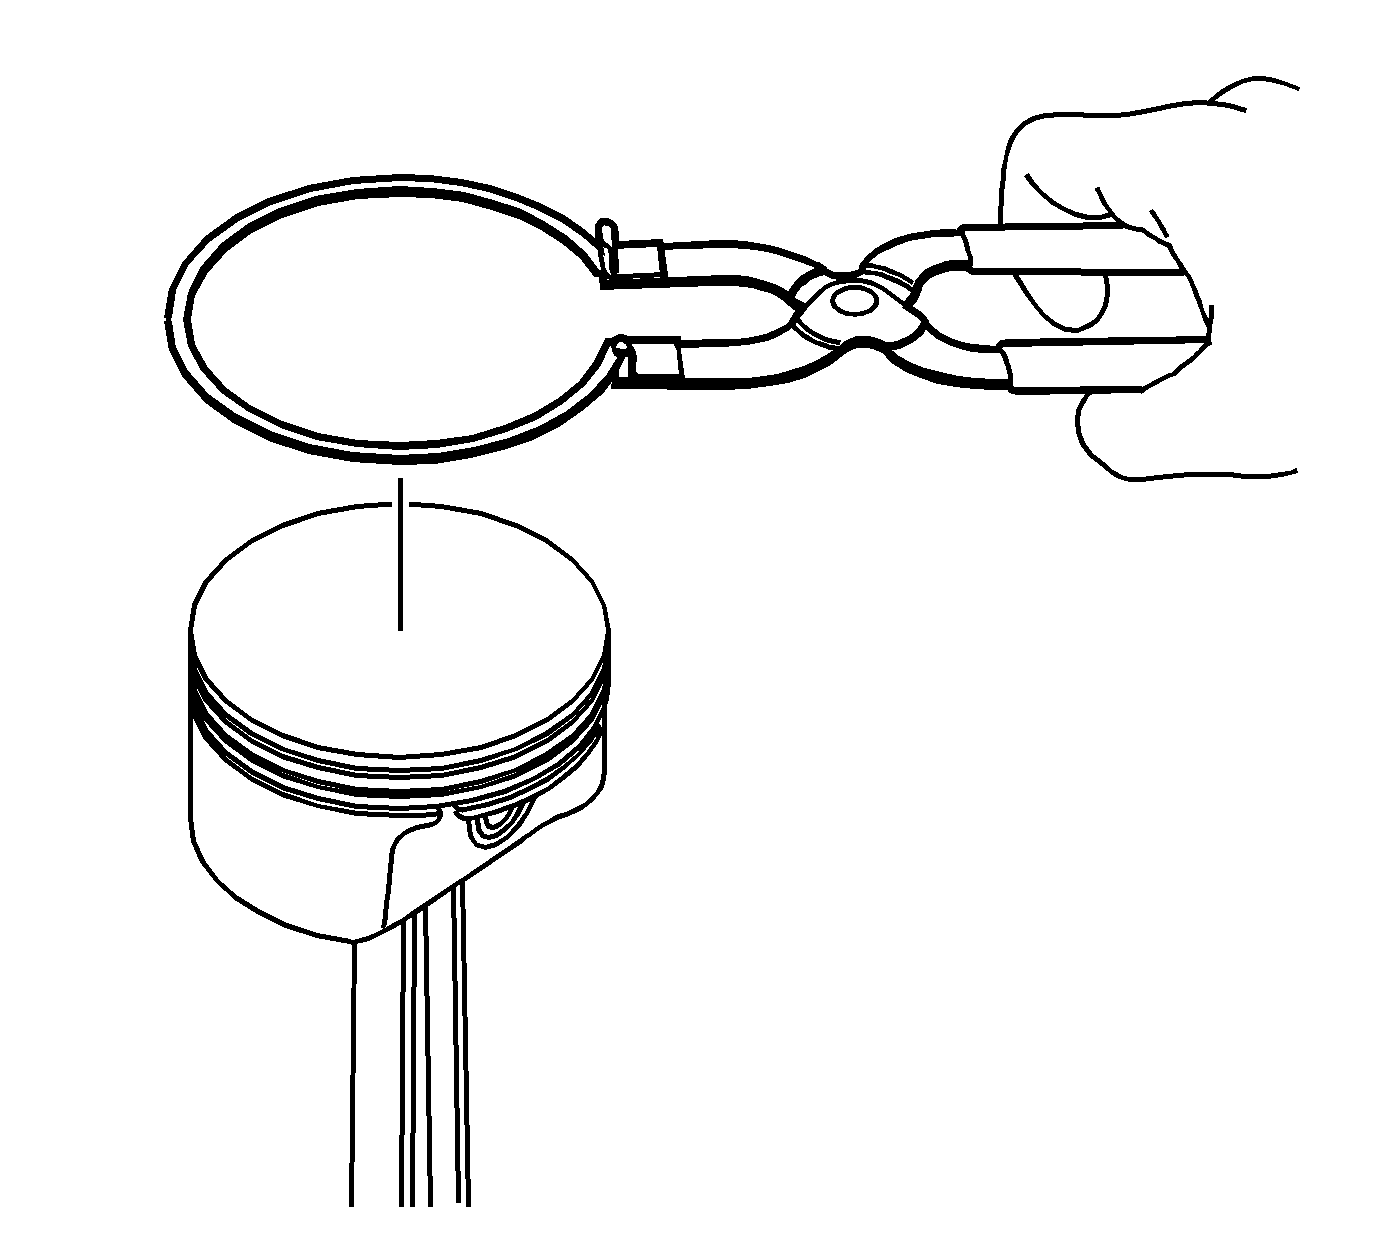
Notice: Use a piston ring expander to install the piston rings. The rings may be damaged if expanded more than necessary.
| 2.1. | Install the oil control piston ring spacer. |
| 2.2. | Install the lower oil control piston ring. |
| 2.3. | Install the upper oil control piston ring. |
| 2.4. | Install the lower compression piston ring. |
The mark on the side of the piston ring should face the top of the piston.
| 2.5. | Install the upper compression piston ring. |
The mark on the side of the piston ring should face the top of the piston.