GM Service Manual Online
For 1990-2009 cars only

Test Description

The numbers below refer to the step numbers on the diagnostic table.

  1. A loose, damaged, misaligned, or defective powertrain insulator and/or bracket may create a transfer path into the passenger compartment.

  2. A loose, damaged, misaligned, or defective exhaust system insulator and/or bracket may create a transfer path into the passenger compartment.

  3. Incorrectly seated and/or aligned powertrain components and/or exhaust system components may create a transfer path into the passenger compartment.

    When loosening powertrain mounts in order to re-bed the powertrain observe the following:

    Do not loosen the mount bracket-to-engine bolts/nuts, do not loosen the mount bracket-to-vehicle frame bolts/nuts if mount brackets are used.

    Loosen the mount-to-mount bracket bolts/nuts if mount brackets are used, or loosen the mount-to-slotted holes in vehicle frame bolts/nuts if a direct-mount design is used.

  4. Non-rotating engine driven accessory component systems can no longer produce a unique disturbance.

  5. Non-rotating engine driven accessory components can no longer produce a unique disturbance. If a disturbance is still present, but the characteristics have been altered, it is possible that these component systems are acting as a transfer path for engine firing frequency or a first order engine disturbance.

    If a disturbance is still present, but the characteristics have NOT been altered, it is NOT likely that these component systems are acting as a transfer path for engine firing frequency or a first order engine disturbance.

  6. If the mark placed on the face of an engine driven accessory seems to stand still while running this test, then that accessory system is either responding to an existing frequency (such as engine firing pulses), or creating a disturbance.

  7. A loose, damaged, misaligned, or defective engine driven accessory system insulator and/or bracket may create a transfer path into the passenger compartment.

  8. Removing the engine driven accessory and bracket(s) from the engine allows a thorough inspection to determine if any conditions are present that may create a transfer path into the passenger compartment.

Step

Action

Yes

No

Caution: One or more of the following guidelines may apply when performing specific required tests in the work stall:

   • When a test requires spinning the drive wheels with the vehicle jacked up, adhere to the following precautions:
      - Do not exceed 56 km/h (35 mph) when spinning one drive wheel with the other drive wheel stopped. This limit is necessary because the speedometer indicates only one-half the actual vehicle speed under these conditions. Personal injury may result from excessive wheel spinning.
      - If all of the drive wheels are spinning at the same speed, do not exceed 112 km/h (70 mph). Personal injury may result from excessive wheel spinning.
      - All persons should stay clear of the rotating components and the balance weight areas in order to avoid possible personal injury.
      - When running an engine in the repair stall for an extended period of time, use care not to overheat the engine and the transmission.
   • When a test requires jacking up the vehicle and running with the wheels and brake rotors removed, adhere to the following precautions:
      - Support the suspension at normal ride height.
      - Do not apply the brake with the brake rotors removed.
      - Do not place the transmission in PARK with the drive axles spinning.
      - Turn Off the ignition in order to stop the powertrain components from spinning.
   • When running an engine in the work stall, use the exhaust removal system to prevent breathing dangerous gases.


1

Were you sent here from the Vibration Analysis - Engine table?

Go to Step 2

Go to Vibration Analysis - Engine

2

  1. Using the engine RPM and frequency data recorded for the customer's vehicle, determine the order of engine rotation to which the disturbance is related.
  2. Determine the possible cause(s) of the disturbance as it relates to a specific order of engine rotation.

Refer to Engine Order Classification .

Does the Engine Order Classification table indicate that the disturbance is of the same order as the engine firing frequency?

Go to Step 4

Go to Step 3

3

Does the Engine Order Classification table indicate that the disturbance is likely related to engine driven accessories?

Go to Step 9

Go to Step 4

4

Inspect the powertrain mounts for the following:

  1. Loose and/or missing fasteners
  2. Improper alignment
  3. Cracked, dry-rotted, and/or oil-soaked insulators
  4. Twisted, broken, torn, and/or collapsed insulators
  5. Bent, twisted, and/or deformed brackets

Did any of the powertrain mounts exhibit any of the conditions listed?

Go to Step 5

Go to Step 6

5

Replace powertrain mounts as necessary. Refer to the following procedures:

    •  Engine Mount Replacement - Left Side in Engine Mechanical - 4.3L
    •  Engine Mount Replacement - Right Side in Engine Mechanical - 4.3L
    •  Engine Mount Replacement - Left Side in Engine Mechanical - 5.0L and 5.7L
    •  Engine Mount Replacement - Right Side in Engine Mechanical - 5.0L and 5.7L
    •  Engine Mount Replacement - Left Side in Engine Mechanical - 6.5L
    •  Engine Mount Replacement - Right Side in Engine Mechanical - 6.5L
    •  Engine Mount Replacement - Left Side in Engine Mechanical - 8.1L
    •  Engine Mount Replacement - Right Side in Engine Mechanical - 8.1L
    •  Transmission Mount Replacement in Automatic Transmission - 4L60-E
    •  Transmission Mount Replacement in Automatic Transmission - 4L80-E

Did you complete the replacement?

Go to Step 15

--

6

Inspect the exhaust system components for the following:

    • Loose and/or missing fasteners
       - Heat Shields
       - Joints and/or couplings
       - (Nuts, bolts, studs, clamps, straps)
       - Bracket and/or insulator mounting
    • Inadequate clearance to body and/or chassis components (with the exhaust system both COLD and HOT; in NEUTRAL, FORWARD and REVERSE gears)
    • Improper alignment
    • Disconnected and/or missing insulators
    • Cracked, dry-rotted, and/or oil-soaked insulators
    • Stretched, twisted, broken, torn, and/or collapsed insulators
    • Bent, twisted, cracked, and/or deformed brackets

Did any of the exhaust systems components exhibit any of the conditions listed?

Go to Step 7

Go to Step 8

7

Repair, replace, and/or realign exhaust system components as necessary.

Did you complete the repair, replacement, and/or realignment?

Go to Step 15

--

8

Re-bed the powertrain:

  1. Loosen, but do not remove, all powertrain mounts and exhaust system hangers.
  2. Ensure that the exhaust flexible coupling (if equipped) moves freely.
  3. Start the engine.
  4. Settle the powertrain by shifting the transmission from DRIVE to REVERSE.
  5. Place the transmission into NEUTRAL.
  6. Turn OFF the ignition.
  7. Tighten all of the loosened fasteners with the powertrain in a relaxed position. Refer to the following procedures:
  8. •  Engine Mount Replacement - Left Side in Engine Mechanical - 4.3L
    •  Engine Mount Replacement - Right Side in Engine Mechanical - 4.3L
    •  Engine Mount Replacement - Left Side in Engine Mechanical - 5.0L and 5.7L
    •  Engine Mount Replacement - Right Side in Engine Mechanical - 5.0L and 5.7L
    •  Engine Mount Replacement - Left Side in Engine Mechanical - 6.5L
    •  Engine Mount Replacement - Right Side in Engine Mechanical - 6.5L
    •  Engine Mount Replacement - Left Side in Engine Mechanical - 8.1L
    •  Engine Mount Replacement - Right Side in Engine Mechanical - 8.1L
    •  Transmission Mount Replacement in Automatic Transmission - 4L60-E
    •  Transmission Mount Replacement in Automatic Transmission - 4L80-E

Did you complete the operation?

Go to Step 15

--

9

Notice: Do not run the engine for longer than 60 seconds with the accessory drive belt, or belts removed, or overheating and/or damage may result.

  1. Remove the engine accessory drive belt(s).
  2. Block the front wheels.
  3. Apply BOTH the service brakes and the park brake.
  4. With the scan tool still installed, start the engine.
  5. Place the transmission in NEUTRAL or PARK.
  6. Increase the engine speed (RPM) to the level recorded during duplication of the disturbance.
  7. Allow the engine to idle, then place the transmission in DRIVE.
  8. Increase the engine speed (RPM) to the level recorded during duplication of the disturbance.
  9. Turn OFF the ignition.
  10. Install the engine accessory drive belt(s).

Was the disturbance significantly reduced or eliminated?

Go to Step 11

Go to Step 10

10

Were the characteristics of the disturbance altered but still present?

Go to Step 12

Go to Step 17

11

  1. Mark the face of the suspected accessory pulleys (including idler pulleys, if necessary) near the outer edge with a paint mark.
  2. Install the J 38792-25 , EVA timing (strobe) light to the J 38792-A .
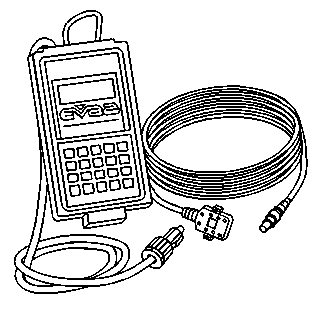
  3. For information on the use of the EVA features, refer to Electronic Vibration Analyzer (EVA) Description and Operation .

  4. Block the front wheels.
  5. Apply BOTH the service brakes and the park brake.
  6. With the scan tool and the J 38792-A , still installed, start the engine.
  7. Select the Smart Strobe feature on the J 38792-A .
  8. Enter the recorded frequency of the disturbance as the initial frequency for strobe operation.
  9. Have an assistant place the transmission in NEUTRAL or PARK.
  10. Slowly increase the engine speed (RPM) to the level recorded during duplication of the disturbance, then maintain that speed.
  11. Using the J 38792-25 , check each of the suspected accessory pulleys to determine if any of them is related to the frequency of the disturbance.
  12. Check each of the accessory systems, both engaged and under maximum load and disengaged or under minimum load.

  13. Allow the engine to idle, then place the transmission in DRIVE.
  14. Slowly increase the engine speed (RPM) to the level recorded during duplication of the disturbance, then maintain that speed closely.
  15. Using the J 38792-25 , check each of the suspected accessory pulleys to determine if any of them is related to the frequency of the disturbance.
  16. Check each of the accessory systems, both engaged and under maximum load and disengaged or under minimum load.

  17. Turn OFF the ignition.

Did you identify an engine driven accessory system as being related to the frequency of the disturbance?

Go to Step 12

Go to Vibration Diagnostic Aids

12

Inspect the components of the engine driven accessory system for the following:

    • Loose and/or missing fasteners
       - Heat Shields, if equipped
       - Joints and/or couplings
       - (Nuts, bolts, studs, clamps, straps)
       - Bracket and/or insulator mounting
    • Inadequate clearance to body and/or chassis components (with the accessory system both under a LOAD and NOT loaded)
    • Improper alignment
    • Bent or damaged pulley(s)
    • Disconnected and/or missing insulators
    • Cracked, dry-rotted, and/or oil-soaked component insulators
    • Stretched, twisted, broken, torn, and/or collapsed component insulators
    • Bent, twisted, cracked and/or deformed component brackets

Did any of the components of the engine driven accessory system exhibit any of the conditions listed?

Go to Step 14

Go to Step 13

13

  1. Remove the engine driven accessory and bracket(s) from the engine.
  2. Thoroughly inspect the accessory bracket(s), bolts/nuts/studs, and the accessory itself for signs of the following:
  3. Bent, twisted, cracked and/or deformed conditions

  4. Replace any of the components found to exhibit any of these conditions.
  5. Reinstall the components to the engine.

Did you find and correct a condition?

Go to Step 15

Go to Step 18

14

Repair, replace, and/or realign the engine driven accessory system components as necessary.

Did you complete the repair, replacement, and/or realignment?

Go to Step 15

--

15

Recheck the vehicle to determine if the disturbance is now significantly reduced or eliminated. Perform the following steps:

  1. Install a scan tool into the customer's vehicle.
  2. Install the J 38792-A into the customer's vehicle; place the sensor in exactly the same location as it was originally placed in the vehicle.
  3. Block the front wheels.
  4. Apply BOTH the service brakes and the park brake.
  5. Start the engine.
  6. Place the transmission in NEUTRAL or PARK.
  7. Slowly increase the engine speed (RPM) to the level at which the disturbance was most noticeable.
  8. Record the engine RPM obtained on the scan tool and the most dominant frequency reading if obtained on the J 38792-A .
  9. Place the transmission in DRIVE.
  10. Slowly increase the engine speed (RPM) to the level at which the disturbance was most noticeable.
  11. Record the engine RPM obtained on the scan tool and the most dominant frequency reading if obtained on the J 38792-A .
  12. If the disturbance has been significantly reduced or eliminated, confirm the results by placing the transmission into REVERSE, then repeat steps 10 and 11.

Has the disturbance been significantly reduced or eliminated?

Go to Step 19

Go to Step 16

16

Have you investigated powertrain isolation as a possible cause of the disturbance?

Go to Step 17

Go to Step 4

17

Have you investigated engine driven accessories as a possible cause of the disturbance?

Go to Vibration Analysis - Engine Balance

Go to Step 9

18

Replace the engine driven accessory component causing the disturbance.

Did you complete the replacement?

Go to Step 19

--

19

  1. Install or connect any components that were removed or disconnected during diagnosis.
  2. Perform the Vibration Analysis - Road Testing table. Refer to Vibration Analysis - Road Testing .

Is the disturbance still present?

Go to Step 2

System OK