If the diagnostic procedures call for the powertrain control module (PCM) to be replaced, then programming the EEPROM in the PCM will be necessary. Use the procedure in this section.
Removal Procedure
- Disconnect the negative battery cables.
- Remove the engine cover. Refer to Engine Cover Replacement in Interior Trim.
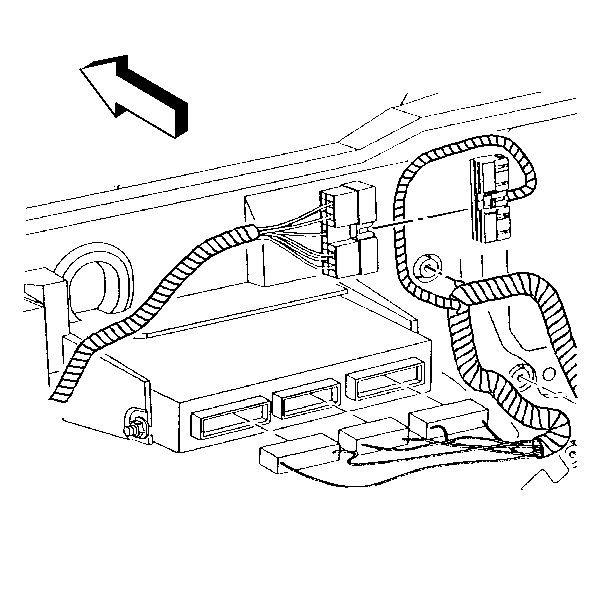
- Disconnect the harness connectors from the powertrain control module (PCM).
- Remove the PCM mounting nuts.
- Remove the PCM from the mounting bracket.
- Remove the PCM mounting hardware.
Caution: Unless directed otherwise, the ignition and start switch must be in the OFF or LOCK position, and all electrical loads must be OFF before servicing any electrical component. Disconnect the negative battery cable to prevent an electrical spark should a tool or equipment come in contact with an exposed electrical terminal. Failure to follow these precautions may result in personal injury and/or damage to the vehicle or its components.
Important: To prevent possible electrostatic discharge to the PCM, do not touch the component leads, and do not remove the integrated circuit from the carrier.
Installation Procedure
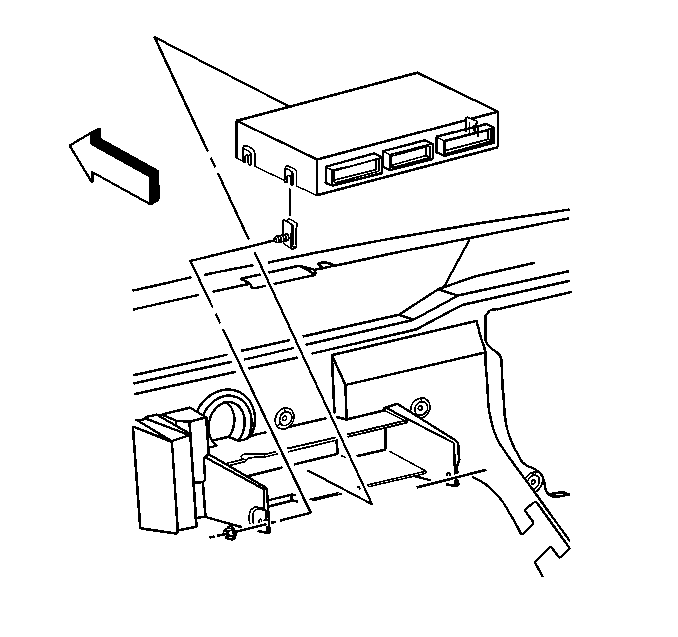
- Install the PCM mounting hardware.
- Slide the PCM into the mounting bracket.
- Install the PCM mounting nuts.
- Reconnect the PCM harness connectors.
- Install the engine cover. Refer to Engine Cover Replacement in Interior Trim.
- Connect the negative battery cables.
Important: Ensure that the PCM electrical harness is properly routed to avoid contact with the engine cover during installation.
The MIL, the antilock and the brake lamps will continue to be enabled until the PCM is programmed. Once the programming is complete, the lamps will be turned OFF and normal operation will occur. Refer to Powertrain Control Module Programming .
