Power Steering Pump Replacement 4.3, 5.0 and 5.7L Engines
Tools Required
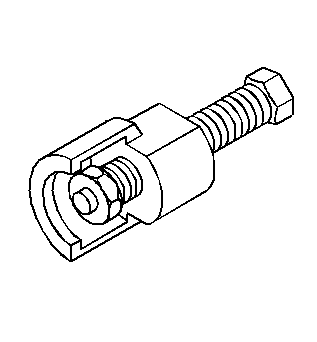
| • | J 25034-C Power Steering Pulley Remover |
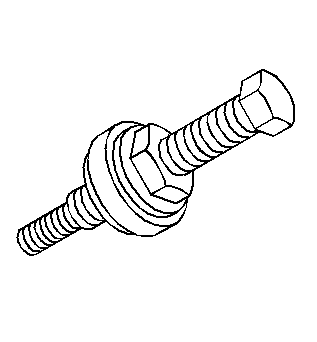
| • | J 25033-C Power Steering Pump Pulley Installer |
Removal Procedure
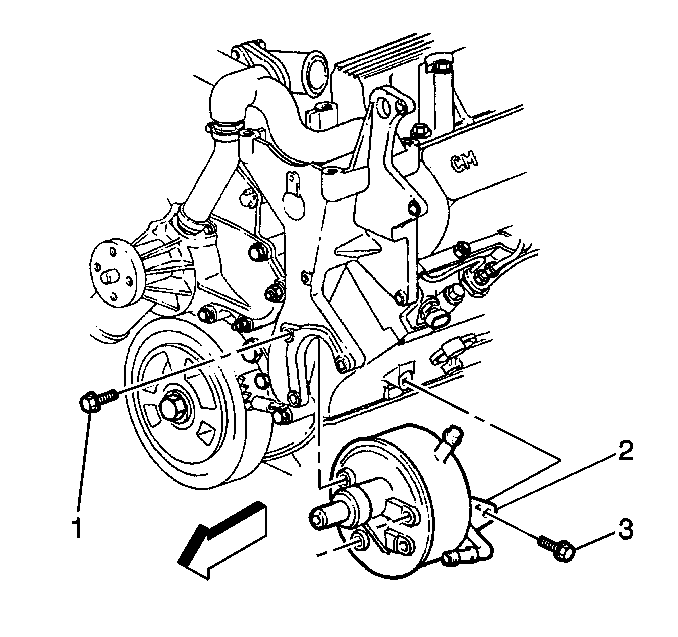
- Using the J 25034-C remove the power steering pump pulley from the vehicle. Refer to Power Steering Pump Pulley Replacement .
- Place a drain pan below under the vehicle.
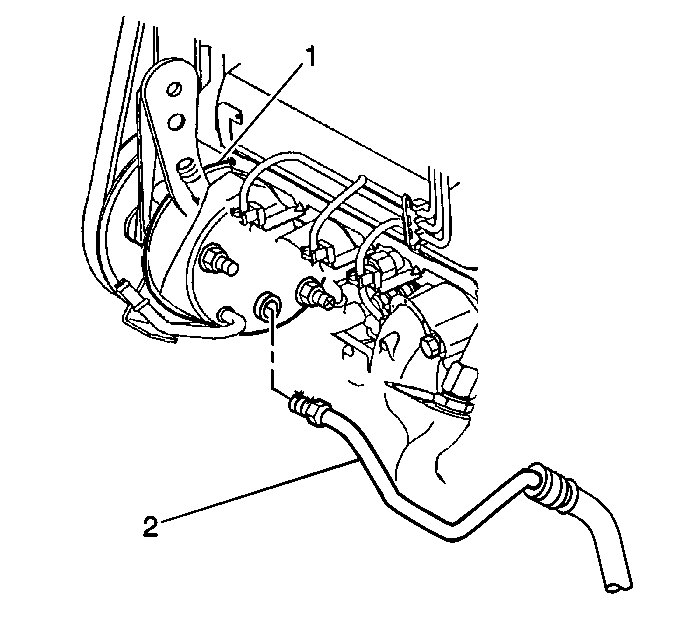
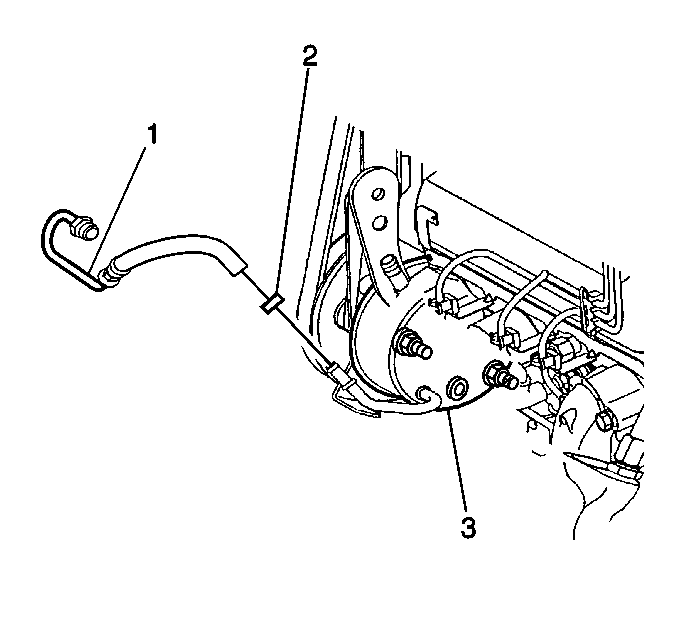
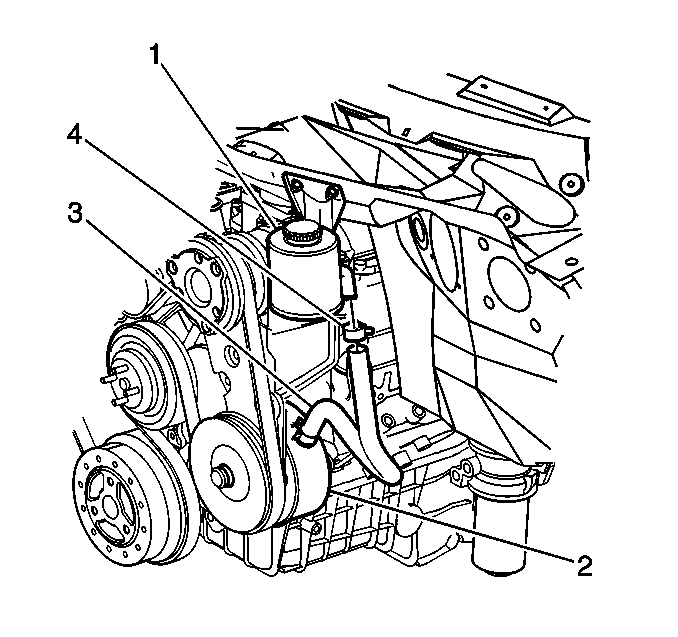
- Disconnect the power steering pressure hose (2) from the pump.
- Disconnect the power steering return hose (1) from the pump.
- Disconnect the reservoir outlet hose (3) from the power steering pump.
- Cap the ends of the hose and the pump in order to prevent the entrance of dirt.
- Remove the power steering pump mounting bolts and the nut from the vehicle.
- Remove the accessory mounting bracket (1) mounting bolts and nuts.
- Pull the accessory bracket forward.
- Remove the power steering pump from the vehicle.

Installation Procedure
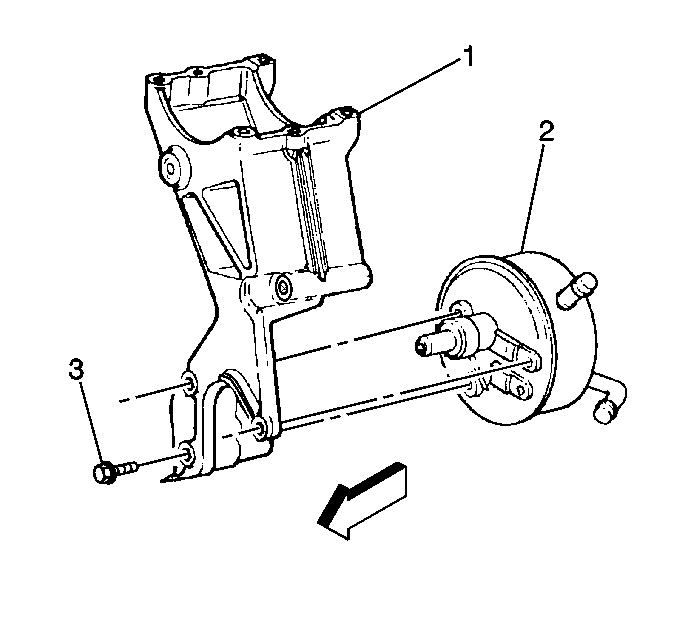
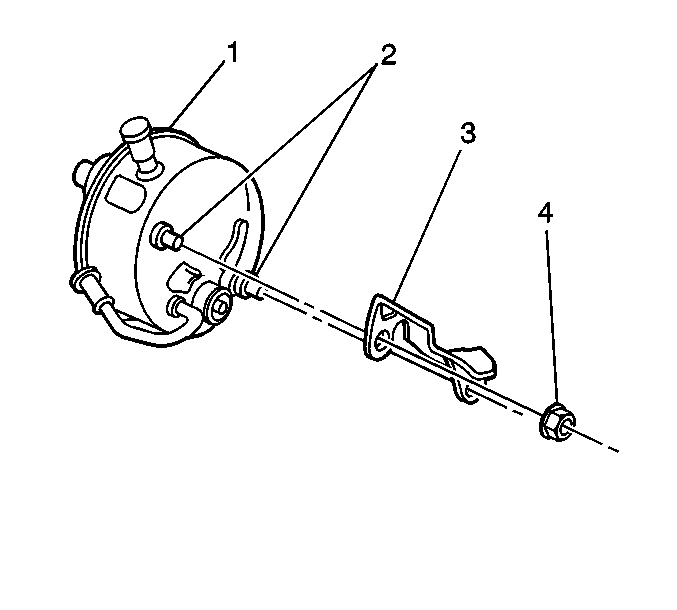
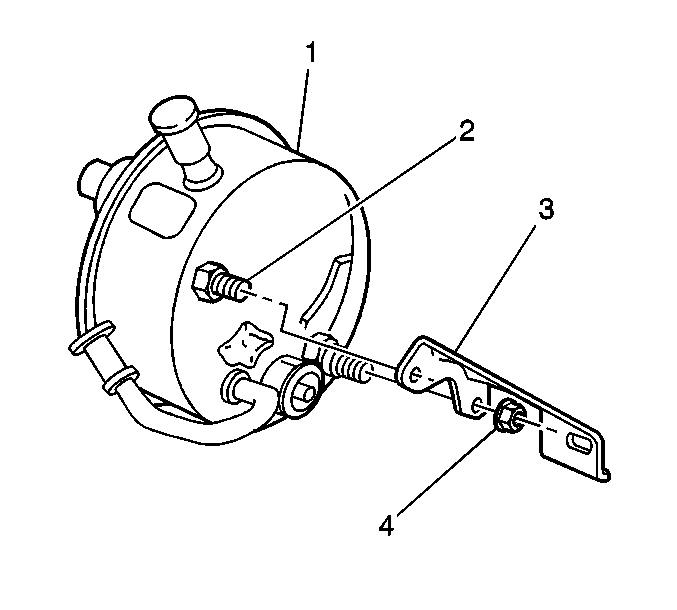
- Install the rear bracket (1) to the pump (2).
- Install the pump assembly to the engine using the bolts.
- Reposition the accessory mounting bracket and install the bolts (3) and nut.
- Tighten the accessory mounting bracket nut.
- Uncap the power steering hoses.
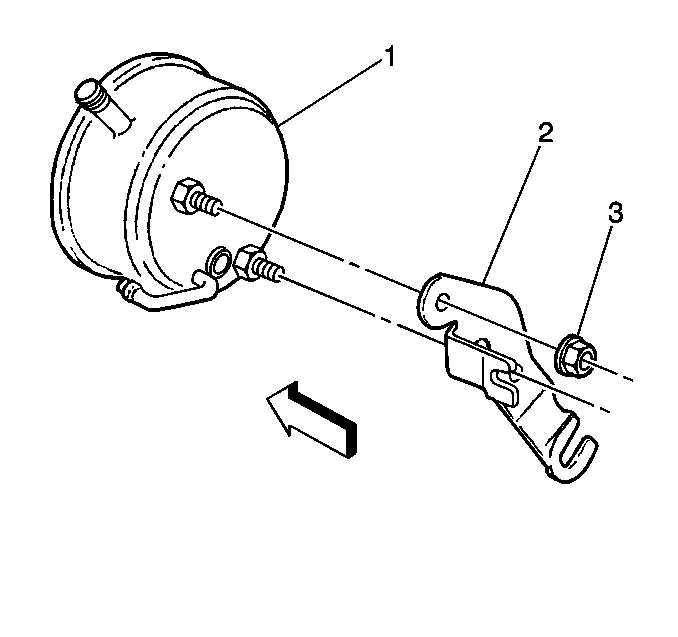
- Install the power steering pressure hose (2) to the pump.
- Install the power steering return hose (1) and the secure the hose with the retaining clamp to the pump.
- Install the reservoir outlet hose (3) and the secure the hose with the retaining clamp to the pump.
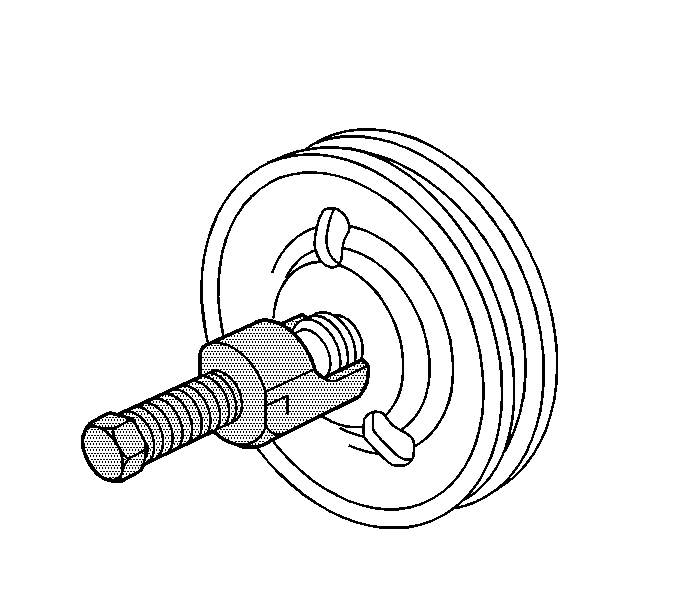
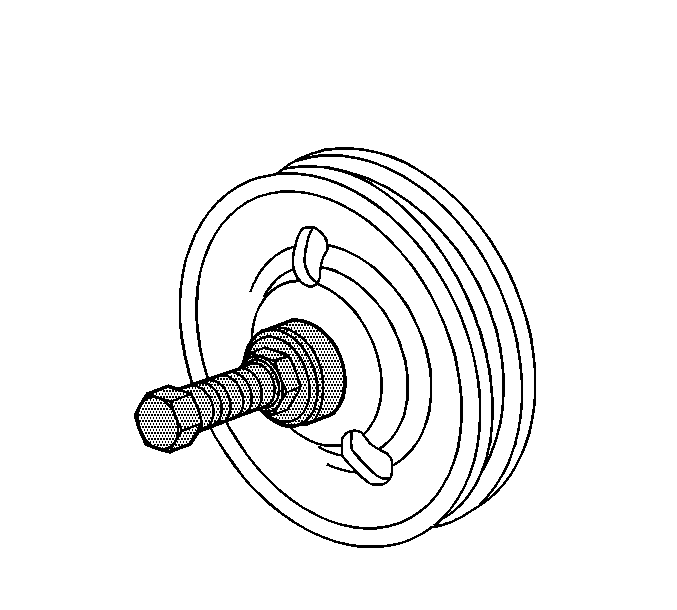
- Place the pulley on the end of the pump shaft.
- Using the J 25033-C install the power steering pump pulley. Refer to Power Steering Pump Pulley Replacement .
- Fill the system with power steering fluid. Refer to Checking and Adding Power Steering Fluid .
- Bleed the system. Refer to Power Steering System Bleeding .
- Remove the drain pan from under the vehicle.
Notice: Use the correct fastener in the correct location. Replacement fasteners must be the correct part number for that application. Fasteners requiring replacement or fasteners requiring the use of thread locking compound or sealant are identified in the service procedure. Do not use paints, lubricants, or corrosion inhibitors on fasteners or fastener joint surfaces unless specified. These coatings affect fastener torque and joint clamping force and may damage the fastener. Use the correct tightening sequence and specifications when installing fasteners in order to avoid damage to parts and systems.
Tighten
Tighten the rear bracket to 50 N·m (37 lb ft).
Tighten
Tighten the retaining bolts to 50 N·m (37 lb ft).
Tighten
Tighten the bolts to 50 N·m (37 lb ft).
Tighten
Tighten the nut to 41 N·m (30 lb ft).
Important: Route the power steering hoses in the same location in which they were removed.
Tighten
Tighten the hose fitting to 27 N·m (20 lb ft).
Power Steering Pump Replacement 8.1L Engine
Tools Required
| • | J 25034-C Power Steering Pulley Remover |
| • | J 25033-C Power Steering Pump Pulley Installer |
Removal Procedure
- Place a drain pan under the vehicle.
- Remove the air cleaner. Refer to Air Cleaner Assembly Replacement in Engine Mechanical.
- Remove the fan shroud. Refer to Fan Shroud Replacement in Engine Cooling.
- Disconnect the power steering pressure hoses (2) from the pump.
- Disconnect the power steering return hose (1) from the pump.
- Disconnect the reservoir outlet hose (3) from the power steering pump.
- Cap the ends of the hose and the pump in order to prevent the entrance of dirt.
- Remove the pump drive belt. Install a 3/8 inch drive ratchet on the tensioner arm and rotate the arm counterclockwise.
- Using the J 25034-C remove the power steering pump pulley from the vehicle.
- Remove the power steering pump mounting bolts (1,3) from the vehicle.
- Remove the power steering pump from the vehicle.
Installation Procedure
- Install the rear bracket (1) to the pump (2).
- Install the bolts (3) retaining the pump to the engine.
- Place the pulley on the end of the pump shaft.
- Using the J 25033-C install the power steering pump pulley.
- Install the power steering pressure hose (2) to the pump.
- Install the power steering return hose (1) and the secure the hose with the retaining clamp to the pump.
- Install the reservoir outlet hose (3) and the secure the hose with the retaining clamp (4) to the pump.
- Install the pump drive belt. Install a 3/8 inch drive ratchet on the tensioner arm and rotate the arm counterclockwise.
- Install the fan shroud. Refer to Fan Shroud Replacement in Engine Cooling.
- Install the air cleaner. Refer to Air Cleaner Assembly Replacement in Engine Mechanical.
- Fill the system with power steering fluid. Refer to Checking and Adding Power Steering Fluid .
- Bleed the system. Refer to Power Steering System Bleeding .
Notice: Use the correct fastener in the correct location. Replacement fasteners must be the correct part number for that application. Fasteners requiring replacement or fasteners requiring the use of thread locking compound or sealant are identified in the service procedure. Do not use paints, lubricants, or corrosion inhibitors on fasteners or fastener joint surfaces unless specified. These coatings affect fastener torque and joint clamping force and may damage the fastener. Use the correct tightening sequence and specifications when installing fasteners in order to avoid damage to parts and systems.
Tighten
Tighten the rear bracket to 50 N·m (37 lb ft).
Tighten
Tighten the retaining bolts to 50 N·m (37 lb ft).
Important: Route the power steering hoses in the same location in which they were removed.
Tighten
Tighten the hose fitting to 27 N·m (20 lb ft).
Power Steering Pump Replacement 6.5L Diesel
Tools Required
| • | J 25034-C Power Steering Pulley Remover |
| • | J 25033-C Power Steering Pump Pulley Installer |
Removal Procedure
- Place a drain pan under the vehicle.
- Remove the air cleaner. Refer to Air Cleaner Assembly Replacement in Engine Mechanical.
- Remove the fan shroud. Refer to Fan Shroud Replacement in Engine Cooling.
- Disconnect the power steering pressure hose (2) from the pump.
- Disconnect the power steering return hose (1) from the pump.
- Disconnect the reservoir outlet hose (3) from the power steering pump.
- Cap the ends of the hose and the pump in order to prevent the entrance of dirt.
- Remove the pump drive belt. Install a 3/8 inch drive ratchet on the tensioner arm and rotate the arm counterclockwise.
- Using the J 25034-C remove the power steering pump pulley from the vehicle.
- Remove the power steering pump mounting bolts (1,3) from the vehicle.
- Remove the power steering pump from the vehicle.
Installation Procedure
- Install the rear bracket (1) to the pump (2).
- Install the pump assembly to the engine using the bolts (3).
- Place the pulley on the end of the pump shaft.
- Using the J 25033-C install the power steering pump pulley.
- Install the power steering pressure hose (2) to the pump.
- Install the power steering return hose (1) and the secure the hose with the retaining clamp to the pump.
- Install the reservoir outlet hose (3) and the secure the hose with the retaining clamp to the pump.
- Install the pump drive belt. Install a 3/8 inch drive ratchet on the tensioner arm and rotate the arm counterclockwise.
- Install the fan shroud. Refer to Fan Shroud Replacement in Engine Cooling.
- Install the air cleaner. Refer to Air Cleaner Assembly Replacement in Engine Mechanical.
- Fill the system with power steering fluid. Refer to Checking and Adding Power Steering Fluid .
- Bleed the system. Refer to Power Steering System Bleeding .
Notice: Use the correct fastener in the correct location. Replacement fasteners must be the correct part number for that application. Fasteners requiring replacement or fasteners requiring the use of thread locking compound or sealant are identified in the service procedure. Do not use paints, lubricants, or corrosion inhibitors on fasteners or fastener joint surfaces unless specified. These coatings affect fastener torque and joint clamping force and may damage the fastener. Use the correct tightening sequence and specifications when installing fasteners in order to avoid damage to parts and systems.
Tighten
Tighten the rear bracket to 50 N·m (37 lb ft).
Tighten
Tighten the retaining bolts to 50 N·m (37 lb ft).
Important: Route the power steering hoses in the same location in which they were removed.
Tighten
Tighten the hose fitting to 27 N·m (20 lb ft).
