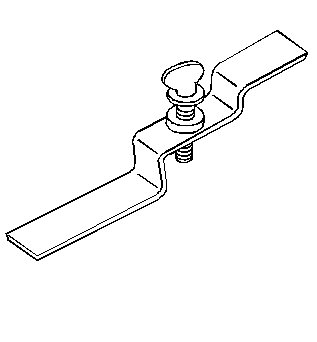
Special Tools
J 21366 Converter Holding Bracket
- Raise the vehicle. Refer to Lifting and Jacking the Vehicle
- Remove the transmission fluid. Refer to Automatic Transmission Fluid and Filter Replacement .
- Remove the shift cable from the transmission. Refer toShift Cable Replacement
- Remove the filler tube. Refer to Transmission Fluid Filler Tube and Seal Replacement .
- Plug the filler tube opening in the transmission.
- Remove the oil cooler lines. Refer to Oil Cooler Line Replacement
- Plug the oil cooler line connectors in the transmission case.
- Remove the rear propeller shaft. Refer to One-Piece Propeller Shaft Replacement or Two-Piece Propeller Shaft Replacement in propeller shaft.
- Remove the torque converter bolts. Refer to Flywheel to Torque Converter Bolt Replacement .
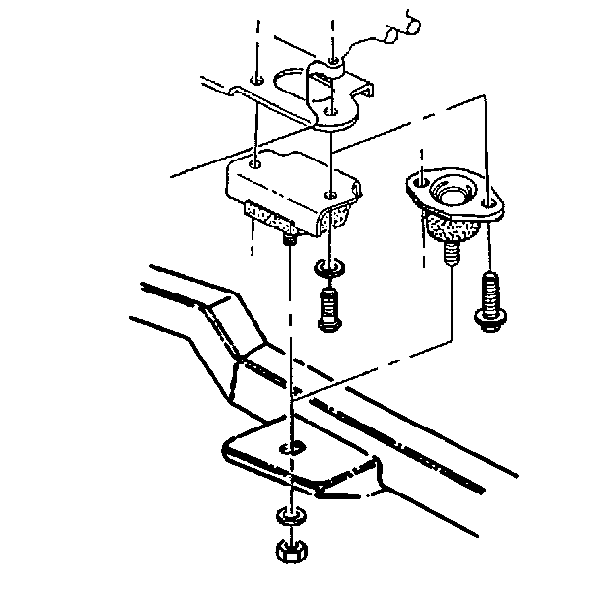
- Nut and washer securing the transmission mount to the cross member.
- Remove the two bolts and washers securing the mount to the transmission.
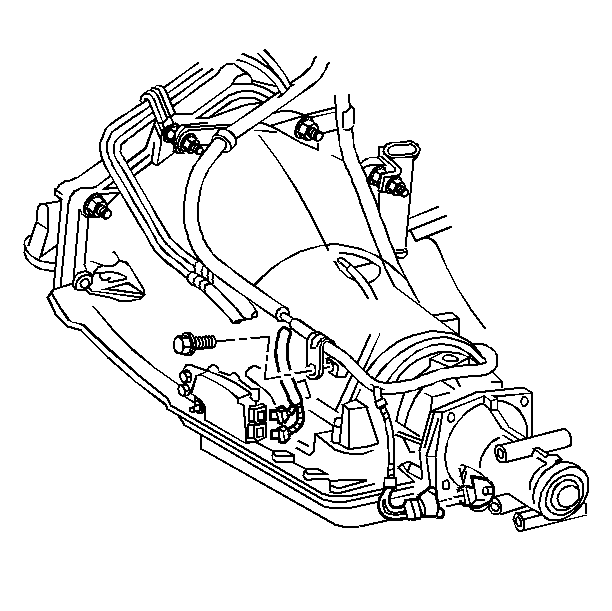
- Remove the bolt, clip, and strap securing the fuel lines and transmission vent hose to the transmission.
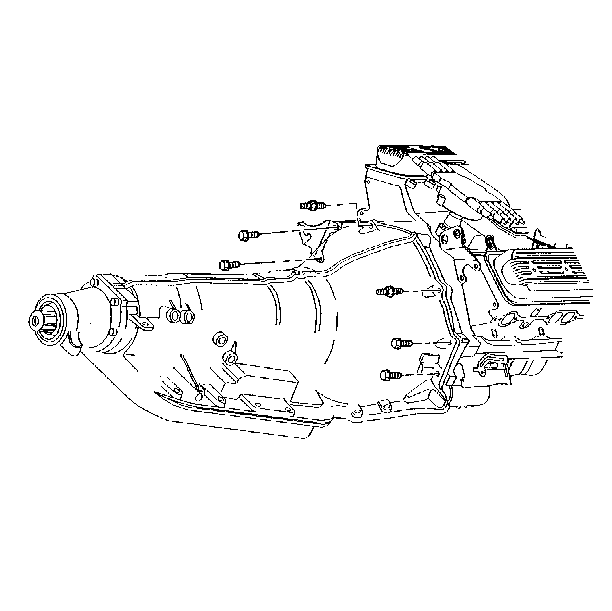
- Remove the bolts and studs securing the transmission to the engine.
- Disconnect the wiring harness connectors from the transmission speed sensor and park neutral position switch.
- Support the transmission with a transmission jack.
- Install J 21336 to the converter housing to secure the torque converter.
- Pull the transmission straight back from the engine.
- Lower the transmission using the transmission jack.
- Flush the cooling system. Refer to Automatic Transmission Oil Cooler Flushing .
- Perform the transmission oil cooler flushing and flow test. Refer to Transmission Fluid Cooler Flushing and Flow Test .
Important: J 21336 prevents the torque converter from pulling forward and dropping out of the transmission during engine and transmission separation.
Installation Procedure
- Ensure the torque converter is seated properly and that J 21366 is installed.
- Raise the transmission into place and remove J 21366.
- Slide the transmission straight onto the locating pins while lining up the marks on the flywheel and the torque converter.
- Install the bolts securing the transmission to the engine.
- Install the wiring harness connectors to the transmission speed sensor and park/neutral position switch.
- Install the bolt, clip, and strap securing the fuel lines and transmission vent hose to the transmission.
- Install the nut and washer securing the transmission mount to the cross member.
- Remove the transmission jack from the transmission.
- Install the torque converter bolts. Refer to Flywheel to Torque Converter Bolt Replacement
- Unplug the oil cooler line connectors in the transmission case.
- Install the oil cooler lines. Refer to Oil Cooler Line Replacement
- Install the rear propeller shaft. Refer to One-Piece Propeller Shaft Replacement or Two-Piece Propeller Shaft Replacement in propeller shaft.
- Unplug the filler tube opening in the transmission.
- Install the filler tube. Refer to Filler Tube Replacement
- Install the shift cable to the transmission. Refer toShift Cable Replacement
- Lower the vehicle.
- Fill the transmission to the proper level with transmission oil.
- Test the transmission for proper operation.
Notice: Use the correct fastener in the correct location. Replacement fasteners must be the correct part number for that application. Fasteners requiring replacement or fasteners requiring the use of thread locking compound or sealant are identified in the service procedure. Do not use paints, lubricants, or corrosion inhibitors on fasteners or fastener joint surfaces unless specified. These coatings affect fastener torque and joint clamping force and may damage the fastener. Use the correct tightening sequence and specifications when installing fasteners in order to avoid damage to parts and systems.
Tighten
Tighten transmission to engine bolts to 47 N·m (35 lb ft).
Tighten
Tighten the bolts to 52 N·m (38 lb ft).
