For 1990-2009 cars only
Drive Belt Replacement 6.5L Drive Belt
Removal Procedure
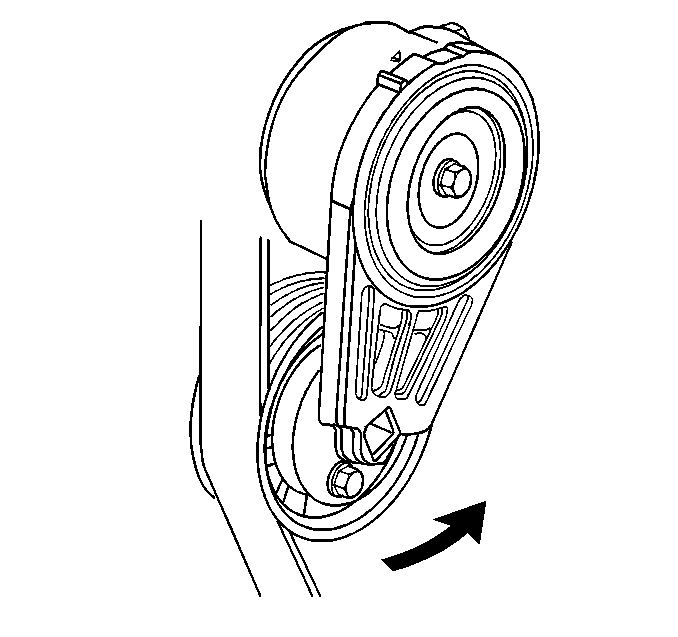
- Install a 3/8 inch drive wrench on the tensioner arm and rotate the arm counterclockwise.
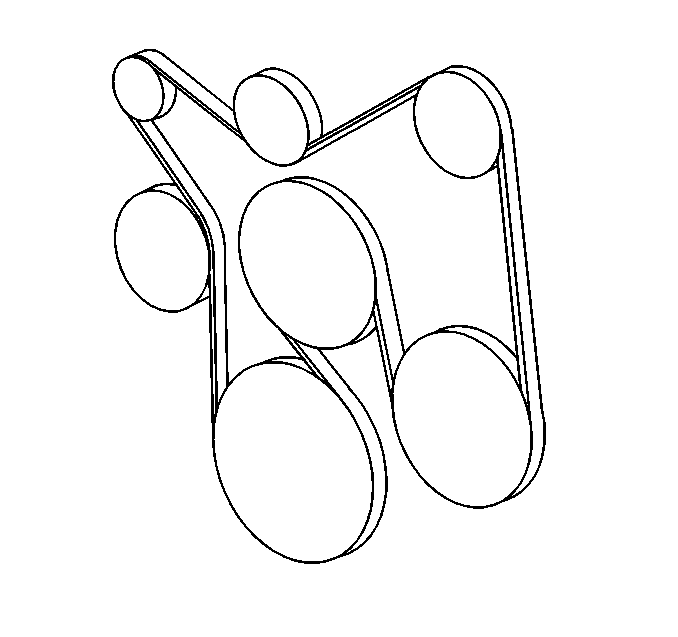
- Remove the drive belt from the drive pulleys (if equipped with a single generator).
- Remove the drive belt from the drive pulleys (if equipped with dual generators).
- Slowly release the tension on the tensioner arm.

Installation Procedure
- Install the belt over all the pulleys except the tensioner arm (if equipped a with single generator).
- Install the drive belt over all the pulleys except the tensioner arm (if equipped a with dual generators).
- Install a 3/8 inch drive wrench on the tensioner arm and rotate the arm counterclockwise.
- Slowly release the tension on the tensioner arm.
- Confirm that the drive is properly seated in all the pulleys and is properly routed before starting the vehicle.
Important: Refer to the Underhood Label for the proper drive belt routing graphic.
