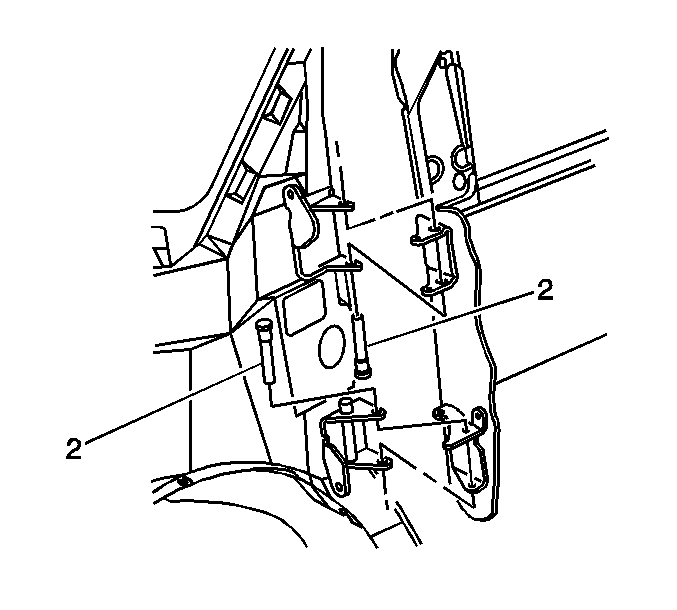
Removal Procedure

- Remove the hinge pillar
trim. Refer to
Outer Belt Sealing Strip Replacement
Hinge Pillar Trim in Interior Trim.
- Remove the electrical connectors in the hinge pillar for the door
wire harness.
- Push the rubber conduit out from the hinge pillar in order to
remove the rubber conduit from the hinge pillar.
- Remove the wire harness from the hinge pillar.
- Remove the check link from the hinge pillar. Refer to
Front Side Door Check Link Replacement
.
- Remove the lower hinge pin (2) using the following method:
| 6.1. | Grasp the lower hinge pin with a pair of locking pliers. |
| 6.2. | Use a soft-faced hammer in order to drive the lower hinge pin
out. |
- Install a bolt through the lower hinges in order to temporarily
hold the door in place while removing the upper hinge pin (2).
- Remove the upper hinge pin (2) using the following method:
| 8.1. | Grasp the upper hinge pin (2) with a pair of locking pliers. |
| 8.2. | Use a soft-faced hammer in order to drive the upper hinge pin
(2) out. |
- Remove the bolt in the lower hinge pin hole.
- Remove the door from the vehicle.
Installation Procedure

- Install the door to the
vehicle.
- Install a bolt through the lower hinges in order to temporarily
hold the door in place while installing the upper hinge pin (2).
- Drive the upper hinge pin (2) into the upper hinge using a soft-faced
hammer with the pointed end up.
- Remove the temporary bolt from the lower hinge.
Drive the lower hinge pin (2) into the lower hinge using a soft-faced
hammer with the pointed end down.
- Install the check link to the hinge pillar. Refer to
Front Side Door Check Link Replacement
.
- Install the wire harness to the hinge pillar.
- Push the rubber conduit into the hole in the hinge pillar.
- Install the electrical connectors for the front door wire harness.
- Install the hinge pillar trim.


