Removal Procedure
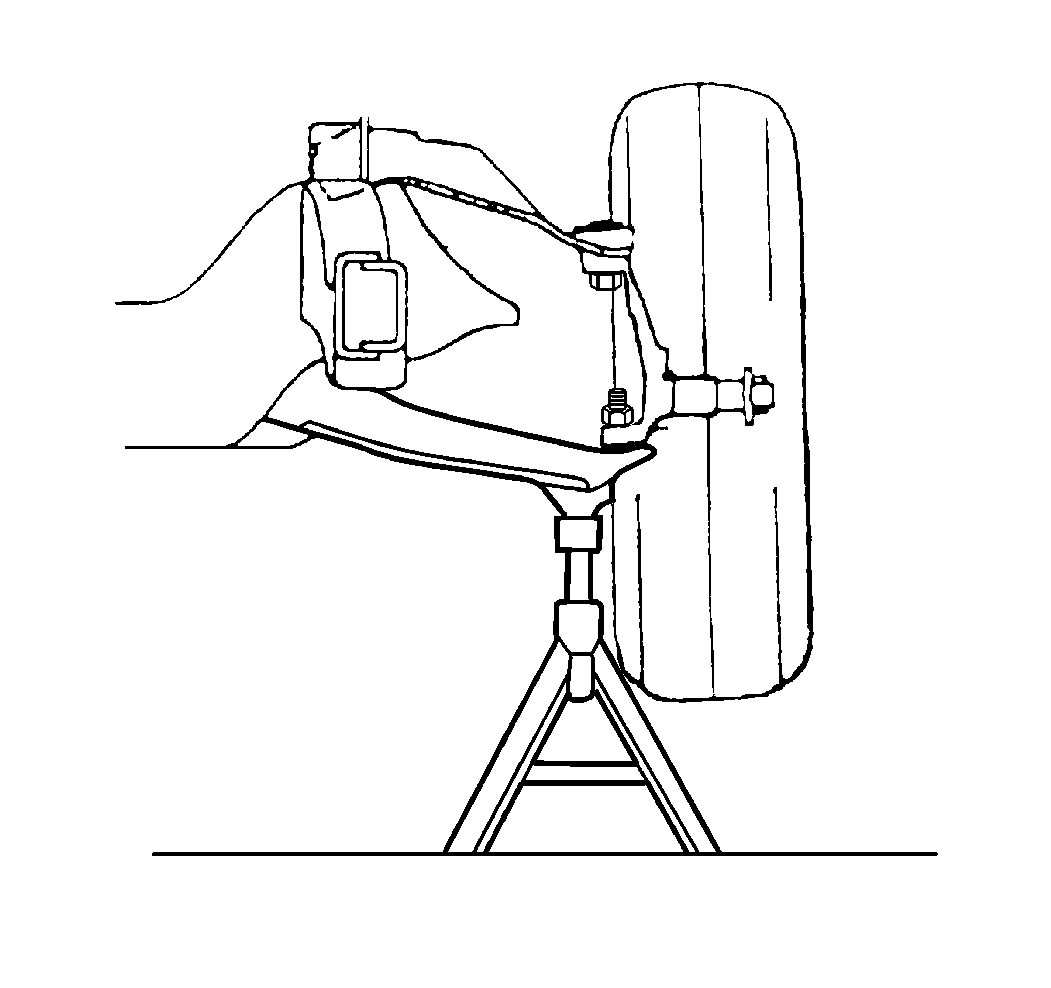
- Raise the vehicle. Support the vehicle with safety stands.
- Remove the wheel and tire assembly. Refer to Tire and Wheel Removal and Installation in Tires and Wheels.
- Remove the front brake caliper. Refer to Brake Caliper Replacement in Disc Brakes.
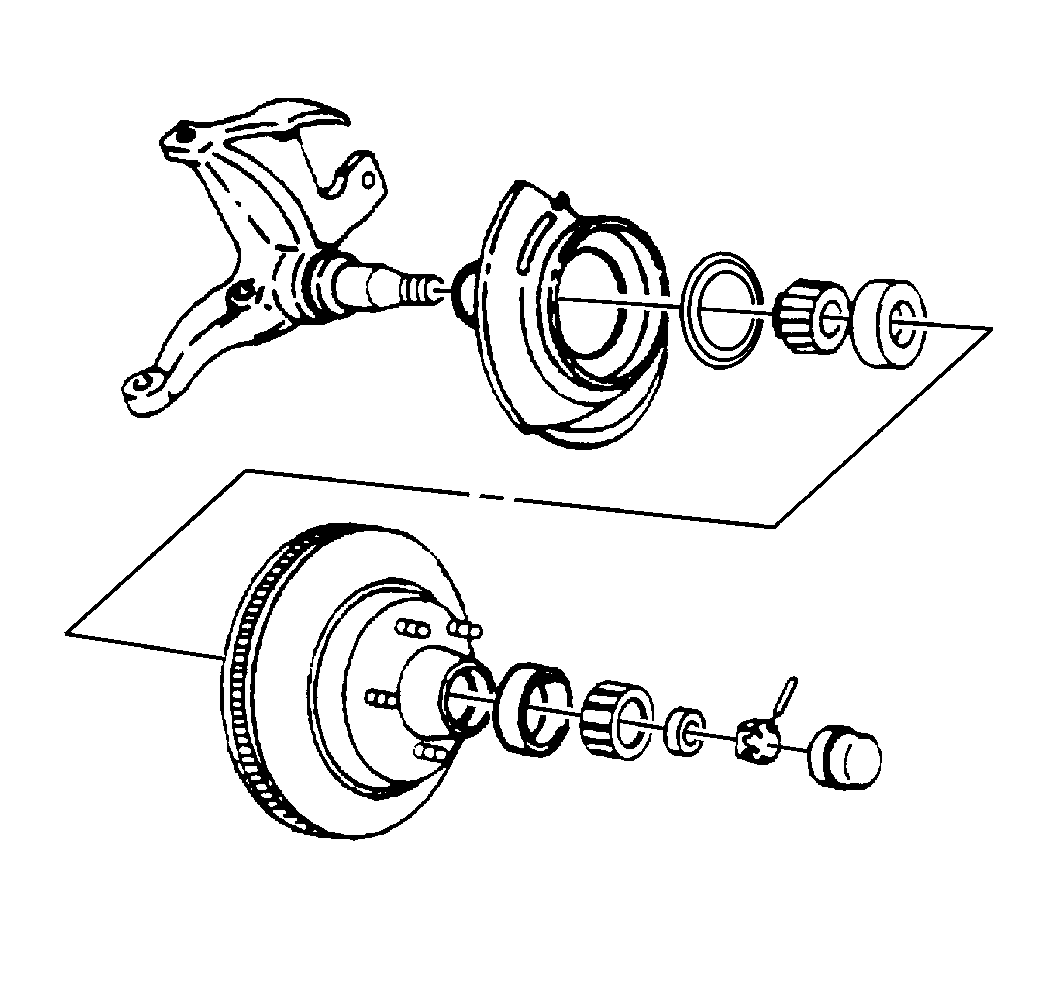
- Remove the dust cap from the hub/rotor.
- Remove the cotter pin.
- Remove the nut and washer.
- Remove the rotor from the spindle.
- Remove the outer bearing.
- Remove the dust seal. Pry the seal out and discard the seal.
- Remove the inner bearing.
- Clean all of the parts in a solvent, then air dry.
- Make sure all of the parts are clean and free of grease.
- Inspect the rotor. Refer to Brake Rotor Thickness Variation Check or Brake Rotor Lateral Runout Check or Brake Rotor Tolerance in Disc Brakes.
- Inspect the bearings and the races for wear or damage. Replace the parts as necessary. Refer to Wheel Bearings Diagnosis in Suspension General Diagnosis.
Notice: Support the caliper with a piece of wire to prevent damage to the brake line.
Important: Do not damage the outer bearing and the spindle threads.
Notice: Do not spin the wheel bearings with compressed air to dry them-the wheel bearings may be damaged.
Installation Procedure
Important:
• Make sure that all of the parts are clean and free of grease. • Apply an approved high-temperature front wheel bearing grease
to the spindle at the inner and outer bearing seat, the shoulder, and the
seal seat. • Also, finger apply a small amount of grease inboard of each bearing
cup in the hub/rotor. • Pressure pack the bearings with a grease machine, or hand pack
the bearings. Make sure the grease is worked thoroughly into the rollers,
the cone, and the cage.
- Install the inner bearing to the rotor.
- Apply an additional quantity of grease outboard of the inner bearing.
- Lubricate the seal lip.
- Install the hub/rotor to the spindle.
- Install the outer bearing to the hub/rotor.
- Install the washer and nut.
- Install the cotter pin.
- Apply grease to the outboard side of the outer bearing.
- Install the cap to the hub/rotor
- Install the front brake caliper. Refer to Brake Caliper Replacement in Disc Brakes.
- Install the tire and wheel assembly. Refer to Tire and Wheel Removal and Installation in Tires and Wheels.
- Remove the safety stands.
- Lower the vehicle.
| 3.1. | Install the seal. |
| 3.2. | Use a flat plate in order to press the seal down flush with the hub. |
Important: Do not scuff the spindle threads.
Notice: Use the correct fastener in the correct location. Replacement fasteners must be the correct part number for that application. Fasteners requiring replacement or fasteners requiring the use of thread locking compound or sealant are identified in the service procedure. Do not use paints, lubricants, or corrosion inhibitors on fasteners or fastener joint surfaces unless specified. These coatings affect fastener torque and joint clamping force and may damage the fastener. Use the correct tightening sequence and specifications when installing fasteners in order to avoid damage to parts and systems.
Important: Adjust the wheel bearings. Refer to Wheel Bearing Adjustment
Tighten
Tighten the nut to 16 N·m (12 lb ft), while
turning the wheel forward by hand.
