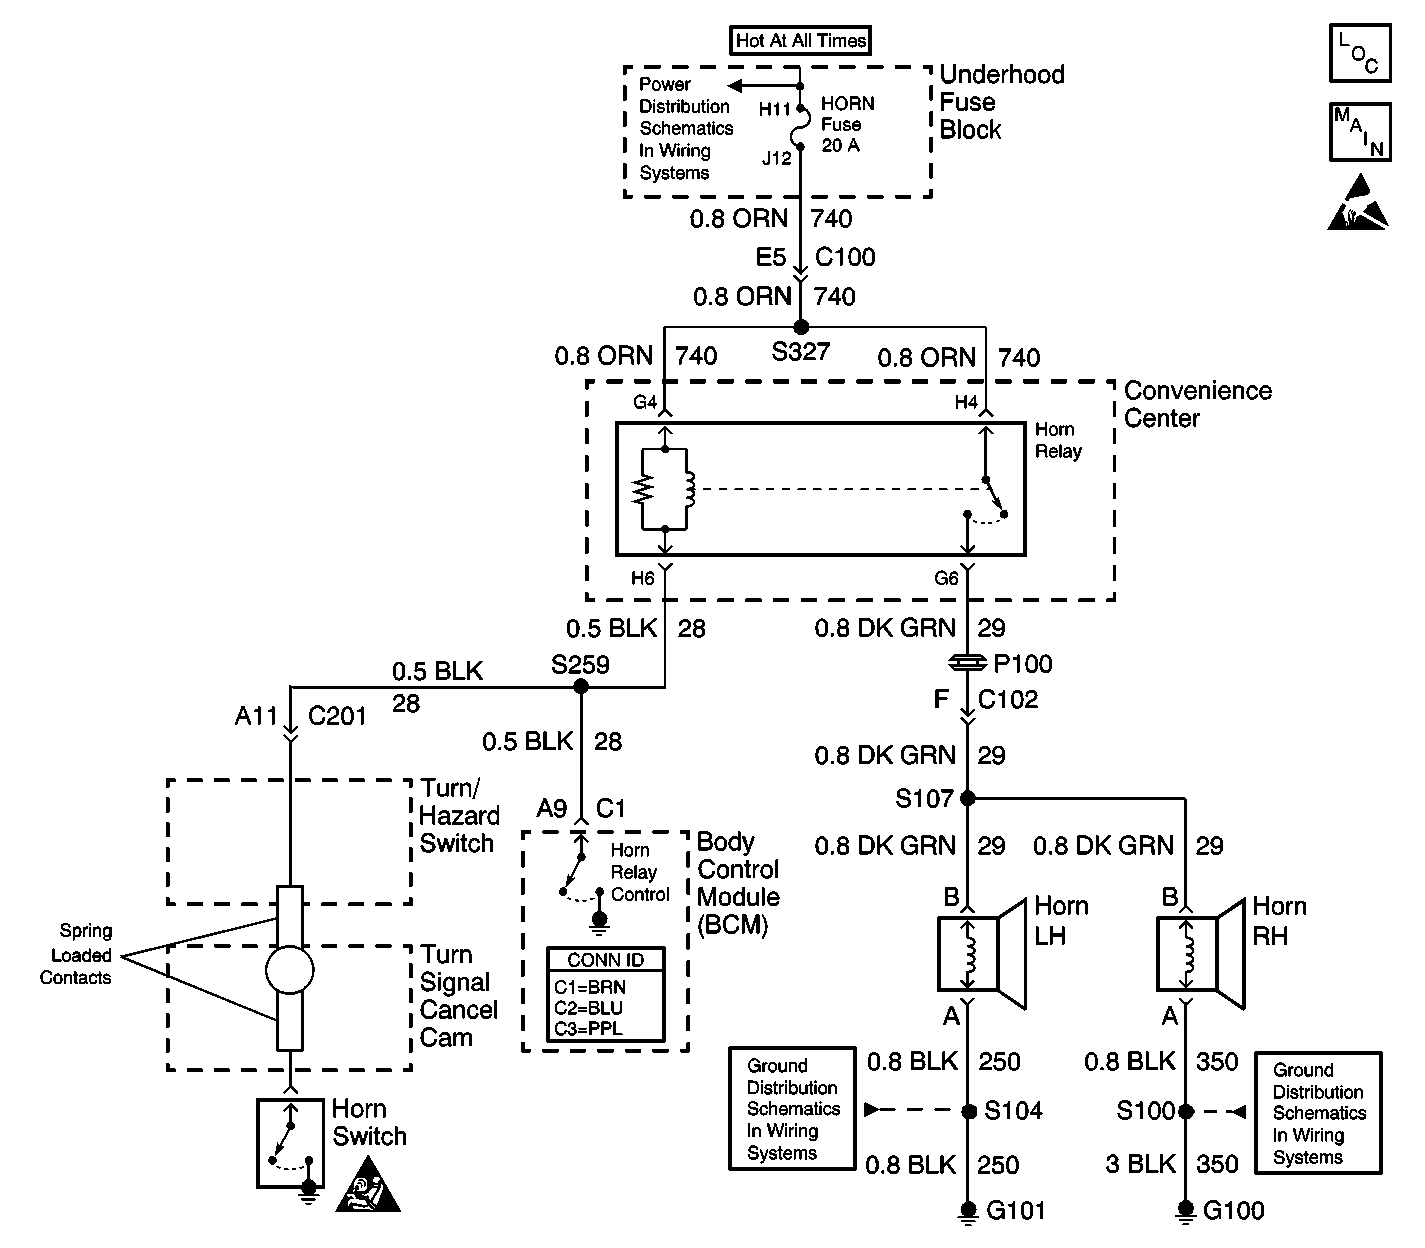
Circuit Description
CKT 28 is an input to the body control module (BCM). The BCM monitors CKT 28 in order to determine if the horn circuit is open or shorted to ground.
Conditions for Running the DTC
| • | They system voltage must be between 9.0 and 16.0 volts. |
| • | The horn must be activated to verify operation of the system. |
Conditions for Setting the DTC
| • | When CKT 28 is open or shorted to ground for approximately 3 minutes the BCM will set B2752. |
| • | The system voltage must be between 9.0-16.0 volts. |
Action Taken When the DTC Sets
| • | If CKT 28 is shorted to ground the horns will remain ON at all times. |
| • | If CKT 28 is open between splice 259 (S259) and the BCM the horn will only work with the horn button on the steering wheel. |
Conditions for Clearing the MIL/DTC
| • | A current DTC will clear immediately after the condition for setting the fault is corrected. |
| • | A history DTC will clear after 100 consecutive ignition cycles without a fault present. |
| • | Use a scan tool in order to clear history DTC's immediately after the fault is corrected. |
Diagnostic Aids
| • | If the customers complaint is that the horns are always on, remove the HORN fuse located in the Engine Wiring Harness Junction Block, so the system can be diagnosed without the horns on. |
| • | Always begin diagnosis with the first DTC listed on the scan tool. |
| • | The scan tool must display DTC B2752 as a current code before performing these diagnostics. |
| • | Inspect for a sticking horn pad and or switch. |
| • | Perform a visual inspection for loose or poor connections at all related components. |
Test Description
The number(s) below refer to the step number(s) on the diagnostic table.
-
Listen for an audible click when the Horn Relay operates. Command both the ON and OFF states. Repeat the commands as necessary.
-
Tests for voltage at the coil side of the Horn Relay. The HORN fuse supplies power to the coil side of the Horn Relay.
-
Verifies that the Body Control Module (BCM) is providing ground to the Horn Relay.
-
Tests if ground is constantly being applied to the Horn Relay.
-
After replacement of the BCM you must calibrate the new module for proper operation.
Step | Action | Value(s) | Yes | No |
|---|---|---|---|---|
1 | Did you perform the Horns Diagnostic System Check? | -- | Go to Step 2 | Go to Diagnostic System Check - Horns . |
Does the horn relay turn ON and OFF with each command? | -- | Go to Diagnostic Aids. | Go to Step 3 | |
Does the test lamp illuminate? | -- | Go to Step 4 | Go to Step 10 | |
Does the test lamp turn ON and OFF with each command? | -- | Go to Step 8 | Go to Step 5 | |
Does the test lamp remain illuminated with each command? | -- | Go to Step 7 | Go to Step 6 | |
6 | Test the control circuit of the horn relay for an open or short to battery voltage. Refer to Circuit Testing and Wiring Repairs in Wiring Systems. Did you find and correct the condition? | -- | Go to Step 13 | Go to Step 9 |
7 | Test the control circuit of the horn relay for a short to ground. Refer to Circuit Testing and Wiring Repairs in Wiring Systems. Did you find and correct the condition? | -- | Go to Step 13 | Go to Step 9 |
8 | Inspect for poor connections at the horn relay. Refer to Testing for Intermittent Conditions and Poor Connections and Connector Repairs in Wiring Systems. Did you find and correct the condition? | -- | Go to Step 13 | Go to Step 11 |
9 | Inspect for poor connections at the harness connector of the Body Control Module (BCM). Refer to Testing for Intermittent Conditions and Poor Connections and Connector Repairs in Wiring Systems. Did you find and correct the condition? | -- | Go to Step 13 | Go to Step 12 |
10 | Repair the coil side feed circuit of the horn relay. Refer to Wiring Repairs in Wiring Systems. Did you complete the repair? | -- | Go to Step 13 | -- |
11 | Replace the horn relay. Did you complete the replacement? | -- | Go to Step 13 | -- |
Did you complete the replacement? | -- | Go to Step 13 | -- | |
13 |
Does the DTC reset? | -- | Go to Step 2 | System OK |
