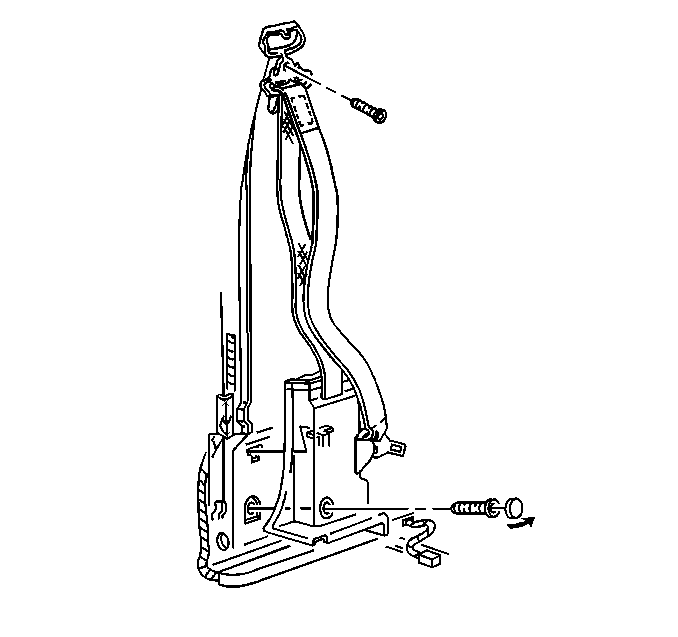
For 1990-2009 cars only
Removal Procedure
- Slide the front seat all the way forward.
- Remove the seat belt from the seat belt guide located on the side of the bucket seat.
- Remove the cover from the shoulder belt guide to expose the bolt.
- Remove the retaining bolt from the shoulder belt guide adjuster bracket.
- Remove the left inside garnish molding. Refer to Center Pillar Garnish Molding Replacement - Left Side in Interior Trim.
- Remove the body side front lower molding. Refer to Body Side Front Lower Trim Panel Replacement in Interior Trim.
- Remove the electrical connectors.
- Remove the bolt retaining the retractor from the pillar, lift upward to release.
- Remove the retractor from the vehicle.

Installation Procedure
- Install the retractor to the vehicle.
- Install the retractor bolt to the pillar.
- Install the electrical connectors.
- Install the body side front lower molding. Refer to Body Side Front Lower Trim Panel Replacement .
- Install the left inside garnish molding. Refer to Center Pillar Garnish Molding Replacement - Left Side .
- Install the bolt retaining the shoulder belt guide to the adjuster bracket.
- Install the cover to the shoulder belt guide.
- Install the seat belt to the seat belt guide located on the side of the bucket seat.
- Slide the front seat back in position.
Notice: Refer to Fastener Notice in the Preface section.
Tighten
Tighten the retractor bolt to the pillar to 53 N·m (39 lb ft).

Tighten
Tighten the shoulder belt retaining bolt to 30 N·m (22 lb ft).
