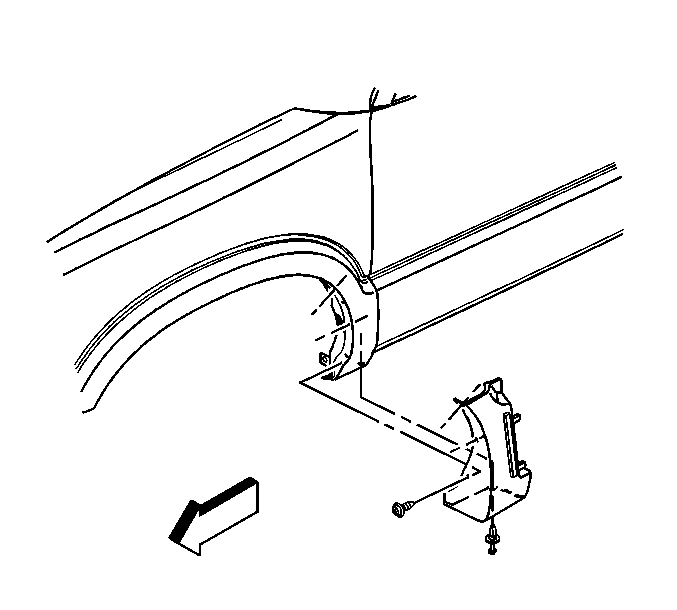
Front Fender Rear Molding Replacement GMC Utility
Tools Required
J 25070 Heat Gun
Removal Procedure

- Remove the rocker panel
molding. Refer to
Rocker Panel Molding Replacement
.
- Remove the push pin retainer on the bottom of the molding securing
the molding to the rocker panel retainer.
- Remove 3 screws securing the front fender rear molding to the
fender.
- Remove the molding.
| 4.1. | Heat the molding using aJ 25070
. Hold the heat gun approximately 152 mm (6 inches)
from surface. |
Apply heat using a circular motion for approximately 30 seconds.
| | Important: Be careful not to scratch or chip the paint.
|
| 4.2. | Peel the front fender rear molding from the panel surface using
a flat-bladed tool. |
| 4.3. | Remove all adhesive from the fender and the back of the molding
using a 3M™ scotch brite molding adhesive remover disk 3M™ P/N 07501
or equivalent. |
| 4.4. | Clean the body panel using Varnish Makers and Painters (VMP) naphtha. |
Installation Procedure

- Ensure that the painted
body surfaces in the tape contact area is clean and dry.
- Warm the body panel with a heat lamp to a minimum of 21°C
(70°F).
Notice: Use the correct fastener in the correct location. Replacement fasteners
must be the correct part number for that application. Fasteners requiring
replacement or fasteners requiring the use of thread locking compound or sealant
are identified in the service procedure. Do not use paints, lubricants, or
corrosion inhibitors on fasteners or fastener joint surfaces unless specified.
These coatings affect fastener torque and joint clamping force and may damage
the fastener. Use the correct tightening sequence and specifications when
installing fasteners in order to avoid damage to parts and systems.
- Install the front
fender rear molding to the fender with 3 screws:
| 3.1. | Install the middle screw first. |
| 3.2. | Install the top screw second while pushing the molding inboard. |
Tighten
Tighten the front fender rear molding screws to 1.9 N·m
(17 lb in).
- Peel the backing from the adhesive on the molding.
Important: Do not touch the adhesive backing.
- Press the molding to the body.
- Hand roll the front fender rear molding to the body in order to
ensure proper adhesion.
- Install the push pin retainer through the hole in the bottom of
the molding into the rocker panel retainer.
- Install the rocker panel molding. Refer to
Rocker Panel Molding Replacement
.


