
- Remove the oil pan baffle bolts and the oil pan baffle.
Caution: Wear safety glasses in order to avoid eye damage.
- Clean the oil pan and oil pan baffle in cleaning solvent.
- Dry the oil pan and oil pan baffle with compressed air.
- Inspect the oil pan for the following:
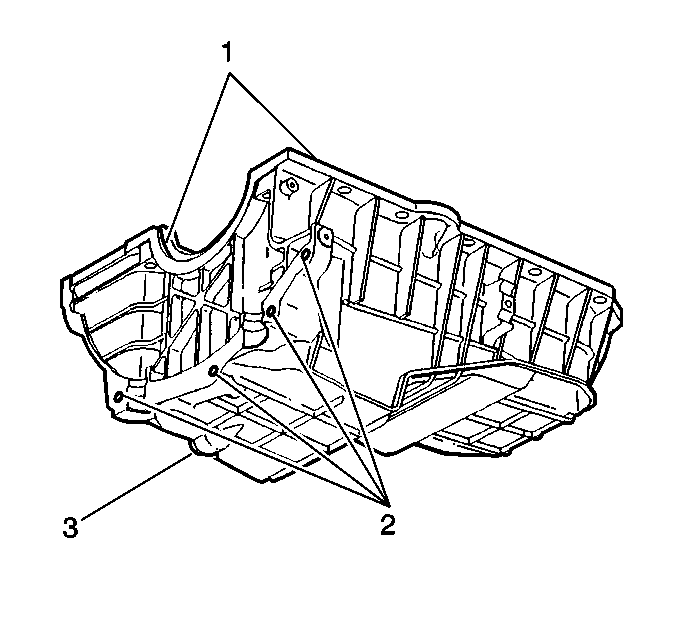
| • | Gouges or damage to the oil pan sealing surfaces (1) |
| • | Damage to the threaded holes (2) |
| • | Damaged oil pan drain hole threads (3) |
| • | Damage to the oil pan baffle |
| • | Damage to the exterior of the oil pan |
| • | A damaged oil pan may interfere with the proper position of the oil pump screen, or may not distribute oil properly in the oil pan sump area. |
Notice: Use the correct fastener in the correct location. Replacement fasteners
must be the correct part number for that application. Fasteners requiring
replacement or fasteners requiring the use of thread locking compound or sealant
are identified in the service procedure. Do not use paints, lubricants, or
corrosion inhibitors on fasteners or fastener joint surfaces unless specified.
These coatings affect fastener torque and joint clamping force and may damage
the fastener. Use the correct tightening sequence and specifications when
installing fasteners in order to avoid damage to parts and systems.
- Install the oil pan baffle and the bolts.
Tighten
Tighten the oil pan baffle bolts to 12 N·m (106 lb in).
